.png)
.png) Français
Français .png) Deutsch
Deutsch .png) Italiano
Italiano .png) 日本語
日本語 .png) Português
Português  Español
An Overview of the Canon Rebel T7
The Canon Rebel T7 is a digital single-lens reflex camera for beginners. It’s equipped with a wide array of exciting features such as a 24.1 MP resolution APS-C CMOS sensor, DIGIC 4+ image processor, 9-point autofocus system, LCD screen, wide ISO range, creative filters, etc. With all these in its arsenal, this camera is optimized to provide first-time users with decent image quality. It’s capable of a continuous shooting speed of 3 frames per second and entry-level videography functionalities.
When you purchase this camera, certain benefits come with it. We’re talking about a user-friendly interface, guidance features, a budget-friendly price tag, access to a wide range of Canon lenses and accessories, and a dynamic lens system. This makes it a worthy buy for anyone who wants to venture into DSLR photography.
Let’s delve into a brief beginner’s guide for the Canon Rebel T7.
Getting Started
Unpacking
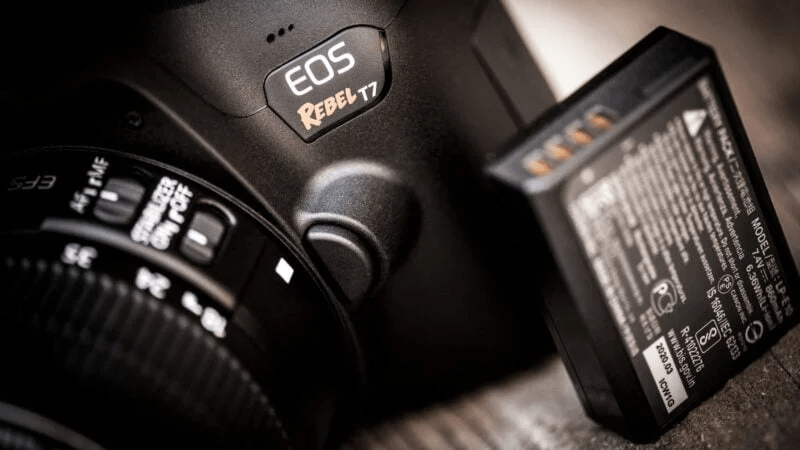
When you buy the Canon Rebel T7, we recommend checking the package to see that all the elements are included. A single purchase typically comes with the following:
- The camera itself (with a body cap and eye cup)
- A strap
- A battery pack (LP-E10) with protective covering
- A user manual
- A battery charger (LC-E10/LC-E10E). The latter comes with a charging cord
Charging the Battery
The next step after unpacking the camera components (without necessarily including the strap) is to assemble them. Then, fully charge the battery before use. Here’s how to go about it:
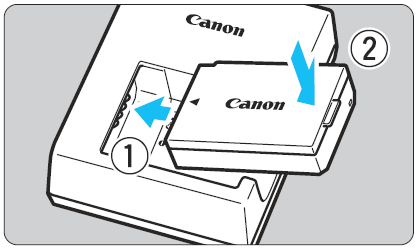
- Remove the protective cover on the battery.
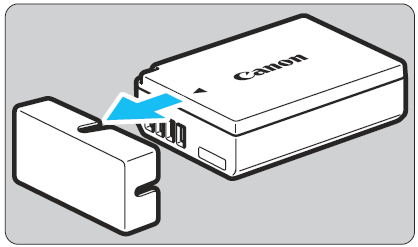
- Attach the battery to the charger, as shown in the image below. To remove the battery, reverse this step.
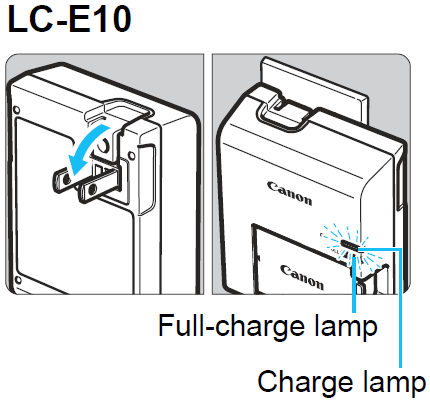
- For the LC-E10, bring out the prongs of the battery charger, plug them into a wall socket, and switch it on.
- If your charger is the LC-E10E, connect its cord to the charger. Plug the head into a power outlet and switch it on.
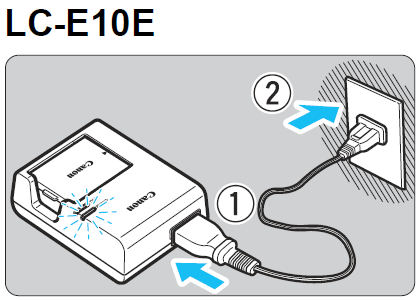
The charging indicator displays an orange light when the battery is charging. The color will change to green when the battery is full. It takes about 2 hours for the battery to complete a charging cycle.
Inserting the Memory Card
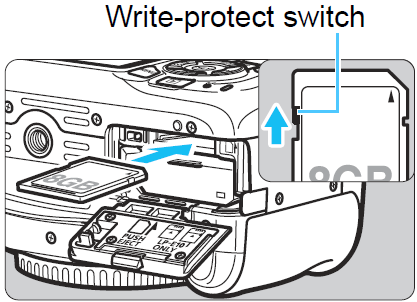
The storage card doesn’t come with the camera, so you’ll have to purchase that separately. You can order an SD, SDHC, or SDXC card. Before you insert the card, ensure that its write-protect switch is upward. This will enable it to store and delete images.
Follow the steps below to insert the memory card:
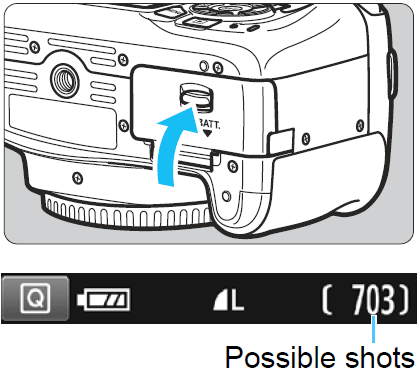
- Slide the lever to open the battery cover.

- Insert the battery (with the electrical contacts going in first) in the space provided until it’s snugly fitted.
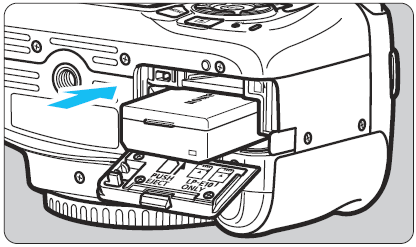
- Insert the memory card (with the label side facing the rear of the camera) into the space above where you installed the battery.
- Press the cover until it clicks shut. Then, switch the camera on. You should see the total number of shots you can snap until the card is full.
Basic Camera Functions of the Canon Rebel T7
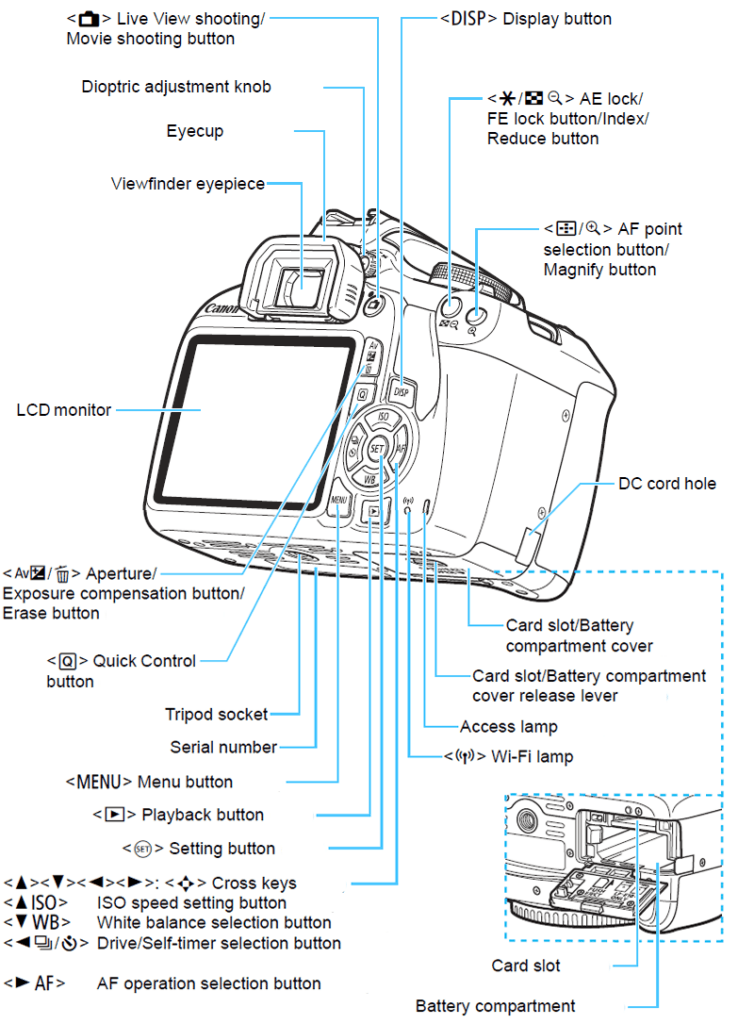
To know the basic functions of your brand-new camera, you should be able to identify the different parts of the camera and learn the functions of each button. So, what are the key parts of the camera?
Lens
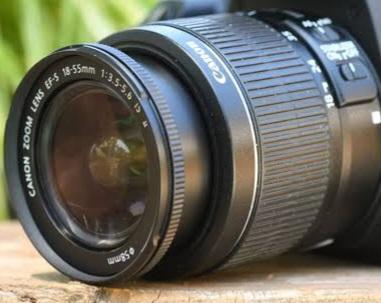
The lens is the protruding part of the camera that’s responsible for channeling light to a fixed point of focus. The light goes to a digital sensor.
Viewfinder
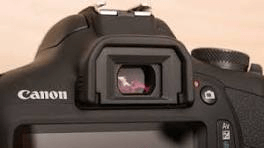
The viewfinder helps the photographer compose and frame their shots. There are optical, electronic, and hybrid viewfinders. For this camera, the viewfinder is optical.
LCD Screen
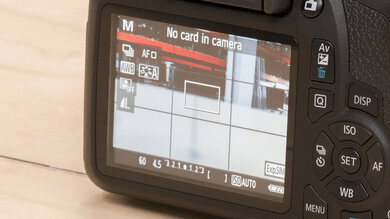
The LCD (liquid crystal display) screen is used to compose and view captured shots. It’s also used to navigate the focus and exposure settings, grid and level display, touch focus and shutter, selfie mode, and many more.
Buttons

Each button serves a specific function depending on what they’re designated to do. More on this will come later.
Dials
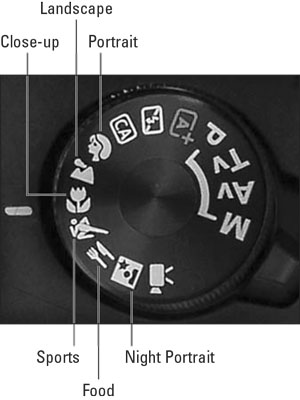
The close-up dial lets the camera zoom in on objects or subjects and capture a detailed image. The landscape dial optimizes the aperture and focus settings to shoot wide scenes, emphasizing image sharpness. The portrait dial creates a shallow field depth that enables the camera to capture the focus of the image and blur the background.
The sports dial activates fast shutter speeds and continuous autofocus. This helps the photographer to capture fast-paced scenes with clarity and sharpness. The food dial optimizes color saturation to capture stunning and vibrant images of food. The night portrait dial facilitates the capture of well-lit and balanced portraits in low-light conditions. It combines artificial and ambient lighting for the best results.
Learning Canon Rebel T7 Button Functions
These are the major button functions:
- Power: To switch on your camera for use and switch off when not in use.
- Shutter: This button serves two functions. When half-pressed, it initiates autofocus, but when fully pressed, it captures a photograph.
- Mode Dial: With this button, the photographer can select shooting modes depending on the scenario or preference. The modes include aperture priority, shutter priority, scene, manual, etc.
- Navigation Buttons: They give the user an interface to scroll through images and menus and make selections.
Exposure Modes
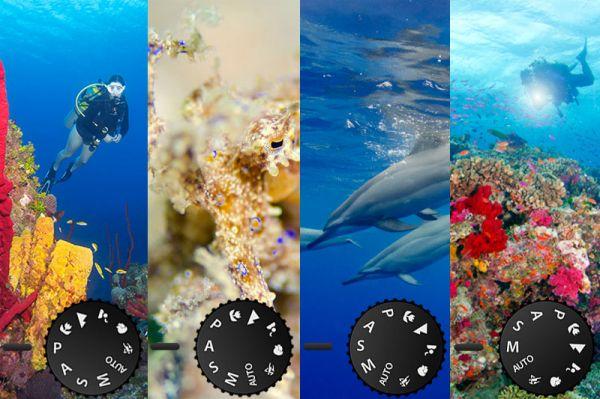
These preset settings on your camera determine how the camera configures and adjusts parameters such as aperture, shutter speed, and ISO. These modes provide photographers with various options tailored to specific shooting scenarios. Exposure modes range from full manual control to automatic settings. Here are the various exposure modes:
Auto Mode: Point-And-Shoot Simplicity
In this mode, the camera automatically controls the exposure settings, focus, and other parameters to make photography easy for users who may not be familiar with manual controls.
Scene Modes: Pre-programmed Settings for Specific Situations
These modes are default settings for specific shooting scenarios, such as portraits, landscapes, sports, etc. They optimize various exposure parameters to enhance the camera’s performance in specific situations. Scene modes allow photographers to achieve optimal results without relying on manual settings.
Creative Modes: Control Over Aperture, Shutter Speed, ISO
Creative modes provide photographers with manual control over the key exposure parameters. These modes (aperture priority, shutter priority, and manual mode) allow for a high degree of creative freedom.
Understanding the Exposure Triangle
The exposure triangle is a fundamental aspect of photography. It comprises an aperture, shutter speed, and ISO, interlinked elements that determine a photo’s exposure. The aperture controls light through the lens opening, shutter speed dictates exposure time, and ISO adjusts sensitivity. To get well-exposed shots, these components must be in sync with each other. You need to have creative control to balance them.
With these features, you can blur motion, freeze action, or configure the depth of field. You must master the exposure triangle because it’s crucial for achieving optimal results in diverse lighting conditions and creative scenarios.
Focusing
Focusing involves adjusting the lens to achieve sharpness and clarity on the subject of the image. Types of focusing include:
Autofocus Modes: One-Shot AF and Servo AF
The one-shot AF mode captures a single, precise focus point. This is ideal for stationary subjects. Servo AF mode, on the other hand, dynamically adjusts focus for moving subjects, maintaining sharpness during continuous shooting.
Manual Focus
Manual focus involves turning the lens ring to fine-tune the camera’s focus for precision, creative expression, or challenging scenarios.
Using the Canon Rebel T7 for Shooting Stills
When using the Canon Rebel T7 to capture still images, there are some factors to consider:
Framing Your Shot: Composition and Rule of Thirds
Composition techniques guide photographers in arranging elements in order within the frame. The Rule of Thirds, on the other hand, strategically divides the image into thirds. This helps to create balanced photos.
Metering Modes: Evaluative, Partial, and Centre-Weighted
Metering modes determine how a camera measures and uses light for exposure. Evaluative takes in the entire scene, partial measures a small portion, and center-weighted focuses on the central area.
White Balance: Setting for Different Lighting Conditions
White balance is crucial for accurate color reproduction in photography. It involves adjusting the camera’s settings for different lighting conditions, like daylight, tungsten, or fluorescent. When you use white balance properly, it makes your image colors appear natural and true to life.
Image Quality: JPEG vs RAW
When you opt for JPEG, you can compress files. However, this will reduce their sizes, and you may lose some data in the process. It’s suitable for general use. RAW is the uncompressed and unprocessed image. This retains maximum detail and flexibility for editing. Photographers often choose RAW for professional work.
Using the Canon Rebel T7 for Shooting Movies
The Canon Rebel T7 has a video recording feature, so you can use it to shoot motion pictures. Its user-friendly interface and Full HD capabilities make the process easy, but there are things to consider:
Understanding Movie Modes
Cameras like the Canon Rebel T7 offer various recording settings such as frame rates, resolutions, and exposure controls. Mastering these modes allows you to achieve the desired visual effects and ensure optimal performance when capturing dynamic and engaging cinematic sequences.
Recording Audio
This is essential for quality video production. Using an external microphone with features like directional pickup or a windscreen enhances sound capture on your shoot. To get clear, high-quality sound, we recommend monitoring levels, reducing background noise, and syncing audio with video. This will provide a well-rounded multimedia experience.
Basic Editing Techniques
These involve certain processes to refine or add finishing touches to your footage:
- Trimming and Cutting: Adjust timing by removing unnecessary footage.
- Color Correction: Enhances visual appeal by adjusting color balance and contrast.
- Transitions: Facilitates smooth movement between scenes to enhance the viewing experience.
- Text Overlays: Add information through on-screen text.
- Audio Adjustments: Ensure clear sound by balancing levels and reducing background noise.
- Cropping: Reframe shots for better composition.
- Effects: Apply simple effects for creative touches.
Canon Rebel T7’s Advanced Features
If you want to go a step further in your photography career, you have to understand the advanced features of this camera, including:
Customizing Settings
- My Menu: This customizable feature makes frequently used functions easily accessible. Users can personalize this menu by placing essential settings for quick adjustments. This feature enhances efficiency and eliminates the need to navigate various menus for commonly used functions.
- Picture Style: This feature helps photographers to customize color and contrast settings in their images. By adjusting parameters such as saturation, contrast, and sharpness, users can tailor their photos to achieve a specific visual style. This feature allows photographers to capture images with distinctive color palettes and tonal characteristics.
- Auto Lighting Optimiser: Auto lighting optimizer intelligently adjusts exposure to enhance the camera’s dynamic range. It enhances details in both highlighted and shadowy areas.
Using Different Lenses
The Canon Rebel T7 accommodates various lenses, offering versatility for photographers. Whether you’re using a wide-angle for landscapes, a telephoto for zooming, or prime lenses for low light, the camera supports creative exploration with different optics.
- Understanding Lens Types: This entails focal lengths and apertures. Focal lengths determine the field of view. When you use shorter lengths, you capture more. On the other hand, when you use a longer lens, you can zoom in more. Apertures control light intake, and lower f-numbers mean larger openings for more light.
- Mounting and Removing Lenses: To mount the lens, you need to align the lens and body mount marks. Then, rotate the lens until it clicks securely in place. To remove the lens, press its release button and turn it counterclockwise.
- Basic Lens Care: You can use a lens brush or blower to keep the lens clean. For gentle wiping, use a microfiber cloth. Also, store the lens in a case to prevent dust from settling on it and to keep the glass intact.
Connecting to a Smartphone
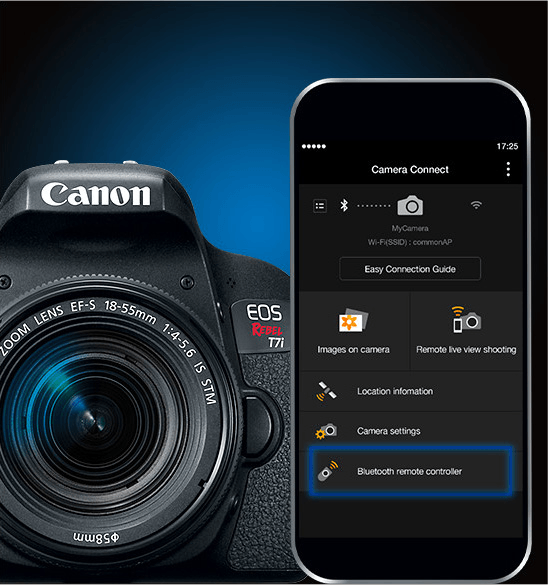
This will involve your Wi-Fi/Bluetooth Connectivity and the Canon Camera Connect app. Follow the steps below to connect your camera to your smartphone:
- Switch on the camera and go to the menu.
- Navigate to the wireless communication settings and enable Wi-Fi/Bluetooth.
- Install the Canon Camera Connect app on your smartphone from the App Store (iOS) or Google Play (Android).
- Open the Camera Connect app on your smartphone and select your camera model (Canon Rebel T7) from the list of available devices.
- Follow the on-screen instructions to establish a Wi-Fi/Bluetooth connection.
- Confirm the pairing request on the camera.
You can now use the app to shoot or adjust settings remotely and transfer images between the camera and your smartphone.
Live View
This feature enables users to do the following:
- Use the LCD Screen for Composing Shots: With the LCD screen, photographers can frame and preview images in real time. This will ensure precise composition and help to capture the desired visual elements.
- Touch AF: This feature helps users select and focus on a specific point by simply touching the LCD screen.
Creative Shooting Techniques
If you want to experiment with your lighting, composition, and settings, there are various techniques you can use:
- Long Exposures: This method involves extended camera shutter times. This permits more light to capture dynamic scenes, create light trails, or convey a sense of motion.
- Time-lapse Photography: This technique captures a series of frames at set intervals, condensing time and showcasing changes like sunsets, blooming flowers, or bustling cityscapes.
- HDR photography: This entails merging several exposures of the same scene to create a high dynamic range image. It captures a wider range of tones and details.
Post-Processing
After the picture or video has been shot, the following processes will come into play:
- Downloading Images to Computer: You’ll connect the camera via USB or use a memory card reader, then transfer files to the desired folder.
- Organising and Managing Photos: You’ll have to create folders for the photos, use keywords, and sort them by date. This makes it easy to manage and locate specific images.
- Using Editing Software: This involves basic adjustments like exposure and color. It also entails cropping for composition and enhancing details to refine and perfect images.
- Sharing Your Photos Online or in Print: You may decide to print the finished work or publish it online.
To elevate your photography and videography with the Canon Rebel T7, investing in a reliable camera monitor can greatly enhance your shooting experience. A dedicated external monitor provides clearer composition previews and precise focus adjustments, helping you maximize the potential of your Rebel T7.
Frequently Asked Questions – FAQs
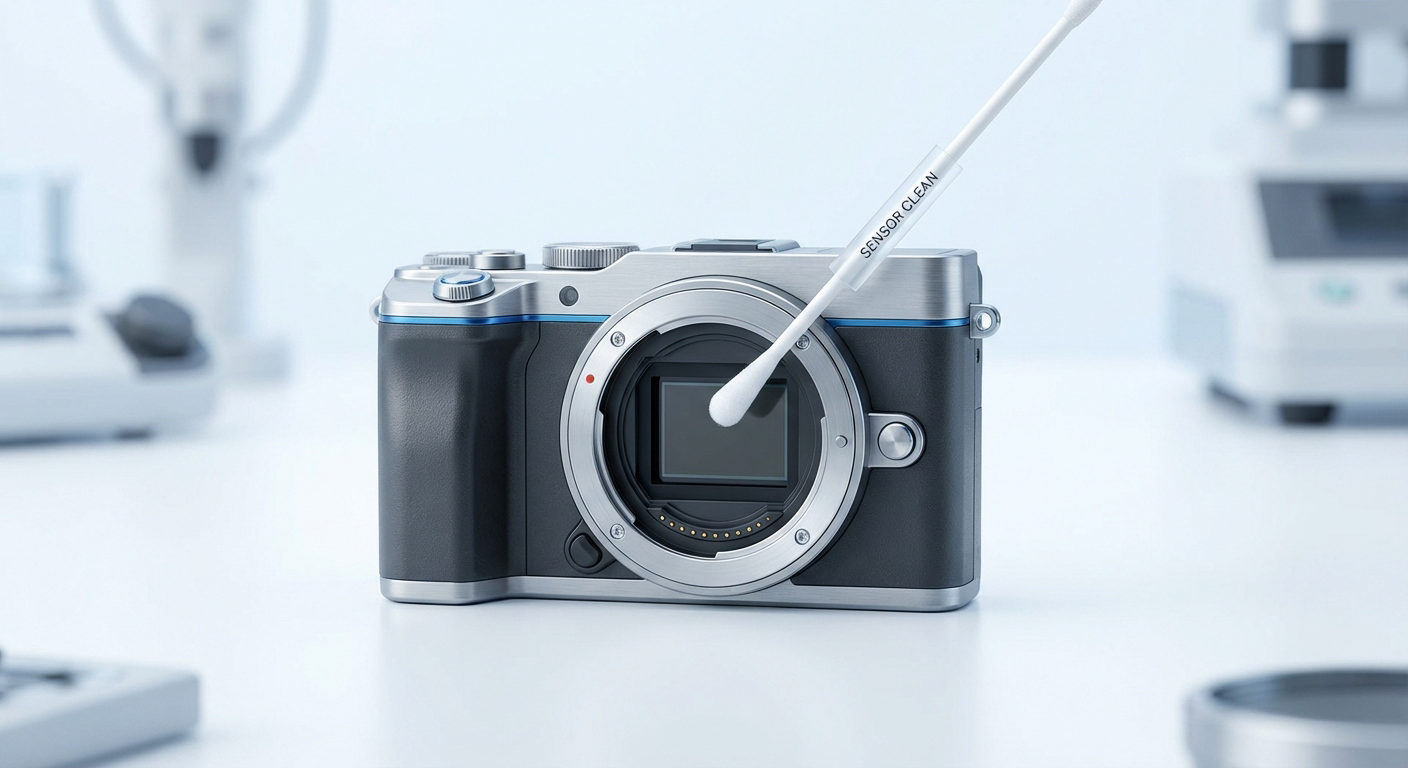
How do I clean my camera sensor?
For loose dust, we recommend using a bulb blower. However, if it’s stubborn dirt, you should get a sensor-cleaning kit or hire a professional to get rid of it.
What is the difference between the AF point and the metering area?
AF (autofocus) points determine where the camera focuses, while the metering area measures light for exposure.
What settings should I use for low-light photography?
For low-light photography, we recommend you use a wide aperture (low f-number), higher ISO for sensitivity, and a slower shutter speed.
Troubleshooting Issues on Canon Rebel T7
Your camera is prone to having issues at some point, but they are fixable. These are some of the common issues you can troubleshoot:
Camera Not Turning On
This can be because of the battery, power source, memory card, or other factors. Do any of the following to resolve it:
- Charge the battery and make sure it’s inserted properly. Alternatively, you can use a different but fully charged battery.
- Check if the battery charger is connected to the wall socket and the latter is switched on.
- Remove the storage card and try to turn on the camera without it.
- Press the reset button.
- Seek professional assistance if none of the above solutions works.
Blurry Images
To fix this with one or more of the following:
- Ensure that the focus is on the subject of the image.
- If it’s a moving object, use a faster shutter speed.
- Activate image stabilization on the camera or lens.
- Adjust the aperture for a deeper length of field.
- Clean the lens.
- Increase ISO in low-light conditions.
Error Messages
Do any of the following to get rid of error messages:
- Restart your camera.
- Consult your user manual.
- Check that the battery is charged and inserted properly.
- Ensure that the memory card is not full and inserted properly.
- Look for and install (if any) firmware updates for your camera.
- Reset to default settings.
- Contact the manufacturer.
- Seek professional help.
Additional Questions
What are some specific tips for taking good portraits with the Canon Rebel T7?
Firstly, use a wide aperture (low f-number) to achieve a pleasing background blur (bokeh). Secondly, utilize the camera’s portrait mode for optimized skin tones and softer focus. Lastly, experiment with different lighting conditions and focal lengths for diverse portrait styles.
How can I use the built-in flash to my advantage?
You can use it selectively in low-light conditions or to fill in shadows. You should also experiment with flash exposure compensation for subtle adjustments. Alternatively, consider using a diffuser to create a softer and more flattering light.
What are some recommended accessories for the Canon Rebel T7?
You may need additional lenses, like a prime lens for low light and a sturdy tripod for stability. You may also need a camera bag for convenient transportation and protection.