



































.png)
 简体中文

If your microphone sounds too quiet on calls or recordings, the fix is usually a slider adjustment inside Windows 11, but finding the right slider is the tricky part. Windows 11 splits microphone gain across two separate locations: a basic volume control in modern Settings and a more powerful Boost control buried in the Sound properties window. This guide covers both paths. Also, a dedicated walkthrough for wireless mic users and a fix for the common “Boost is missing” frustration.

What “Microphone Gain” Means in Windows 11
Windows 11 does not offer one universal microphone gain slider. Instead, it provides two separate controls for adjusting microphone input levels. Your microphone type and audio drivers determine their availability.
- The first option is the Input volume slider under Settings > System > Sound. This is your main microphone control, with levels ranging from 0 to 100. It sets the microphone’s default recording volume.
- The second option is Microphone Boost, found inside the classic Sound Control Panel. You can find it under your microphone’s Properties in the Levels tab. This setting adds extra amplification, usually up to +20 dB or +30 dB. The available amount depends on your audio driver. It works alongside your regular Input volume setting.
Most USB microphones and audio interfaces lack this option. They usually control gain through physical knobs or companion software.
Method 1: Adjust Microphone Gain via Windows 11 Settings
The Settings path gives you the fastest way to raise or lower your microphone’s base input level. Follow these steps:
- Press Windows + I to open Settings.
- Select System from the left sidebar.
- Click Sound.
- Scroll down to the Input section and click on your active microphone to open its properties.
- Locate the Input volume slider under “Input settings.”

- Drag the slider right to increase gain or left to reduce it. A starting point of 80–90% works well for most microphones.
- Below the slider, select Start test beside Microphone test. Speak normally for a few seconds, then click Stop test. Windows displays your recorded volume as a percentage. Contrarily, return to the previous Sound screen and watch the blue audio bar respond while speaking.
Note: This slider controls base input volume only. It does not expose the Microphone Boost control. If your voice still sounds too quiet at 100%, proceed to Method 2.
How to Verify You’re Adjusting the Right Microphone
If you have more than one audio input device connected (such as a headset, a USB microphone, and a webcam mic), it is easy to adjust the wrong one.
- In Settings → System → Sound → Input, check which device is currently listed.
- Click on it to expand its settings and find the live audio level bar.
- Speak or clap near your intended microphone and confirm the bar moves in response.
- If the bar does not move, go back and select a different input device from the list before adjusting the slider.
Method 2: Enable Microphone Boost via the Classic Sound Menu (Levels Tab)
Windows 11 doesn’t provide Microphone Boost through regular Settings. You’ll need the classic Sound properties window to access this control. Here is how:
- Press Windows + R to open the Run dialog. Enter mmsys.cpl and press Enter to open the Sound window directly.
Conversely, open Settings > System > Sound and select More sound settings under the Advanced section.


- Once the Sound window opens, switch to the Recording tab.

- Find your microphone in the device list. A green checkmark identifies your default recording device.
- Right-click your active microphone and choose Properties. Or left-click your mic name to select it, then click the Properties button.

- Inside the Properties window, select the Levels tab.
- You will find two separate sliders in this section. The upper Microphone slider controls your regular input volume. Its range goes from 0 to 100, matching the Input volume setting in Windows Settings.
- Below it, the Microphone Boost slider provides extra amplification. Your audio driver determines its available increments. Common options include +0.0 dB, +10.0 dB, +20.0 dB, and +30.0 dB. If your microphone sounds too quiet, start with +10.0 dB or +20.0 dB.

- Choose your preferred Boost level using the slider. Click Apply and then select OK to save changes.
- .
Important: Microphone Boost mainly supports analog 3.5mm microphones. These microphones connect through onboard audio chips, such as Realtek. If Boost is missing from the Levels tab, your microphone probably uses USB audio with internal gain controls. Your audio driver might also hide this option. Check the troubleshooting section below for explanations and possible fixes.
Method 3: Adjusting Gain for a Wireless Mic on Windows 11 (Hollyland LARK M2 Walkthrough)
Content creators using the Hollyland LARK M2 wireless microphone can connect its compact USB-C receiver directly to a Windows 11 laptop. Once recognized, the standard Windows gain methods apply, but the LARK M2 also has transmitter-side hardware controls that affect perceived loudness. Work through this sequence before adjusting Windows settings.
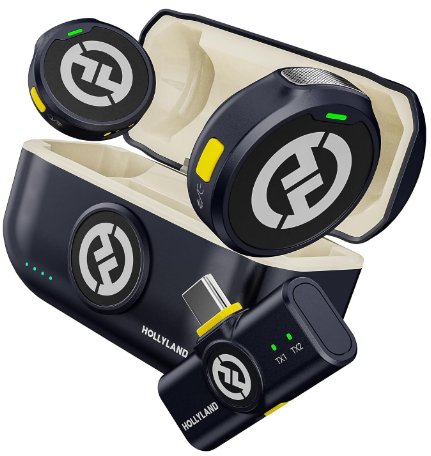
Hollyland LARK M2 - Mini Lavalier Microphone
An incredibly lightweight and compact wireless button microphone that captures high-fidelity audio.
Key Features: 9g Button Size | 48 kHz/24-bit | 40 Hours Battery
- Insert the USB-C receiver. Plug the LARK M2 receiver into your laptop’s USB-C port. Windows 11 detects it automatically and displays a notification confirming a new audio device is connected. The device will appear as “USB Audio Device” or “LARK M2” in the Sound Settings input list.

- Confirm the transmitter (TX) is active. Once you pull out the LARK M2 TX from the charging case, it should turn on and connect automatically to the RX. If not, you will need to manually pair the units. Here are the steps:
- Make sure the TX and RX units are turned off before re-pairing them. If they are still blinking or flashing but no audio is being recorded, press and hold the power button/multifunction button for 3 seconds on both units until they are switched off.


- Then press and hold the power button on both units for 6 seconds to enter the pairing mode.
- Once done, the LED indicator light on the TX and RX will turn solid blue.


- Check noise-reduction mode. Pressing the multi-function button on the transmitter once activates the LARK M2’s built-in noise-reduction mode. This reduces ambient noise but also lowers overall loudness. If noise reduction is currently active, you may need to raise the Windows Input volume slightly to compensate. The transmitter LED state will change to solid green when the function is active.

- Select the LARK M2 in Windows Settings. Go to Settings → System → Sound → Input and select the LARK M2 receiver from the input device list. Confirm the live level bar responds when you speak into the transmitter.
- Adjust the Input volume slider. With the LARK M2 receiver selected, drag the Input volume slider to around 80%. Speak at your normal recording level and watch the audio meter, then adjust up or down from there.
- Optional: Set volume levels via the companion app. LARK M2 is supported by the HollyAudio app (formerly called LarkSound). You can connect the mic to the app and select Low, Medium, or High volume options.

Why Is Microphone Gain Greyed Out or Missing in Windows 11?
If you open the Levels tab in Control Panel and the Microphone Boost slider is absent or unclickable, one of three causes is responsible.
- USB audio class-compliant microphone: USB microphones and wireless receivers that handle gain internally do not expose a Boost slider to Windows. This includes most USB condenser microphones and wireless receivers like the LARK M2. The fix is to maximize the Input volume slider and rely on any hardware or the companion app gain controls on the device itself.
- Missing or outdated audio driver: The Boost control requires a functioning driver layer to appear. Open Device Manager, expand Audio inputs and outputs, right-click your microphone, and select Update driver. Restart Windows and check the Levels tab again afterward.
FAQs
What is the difference between microphone volume and microphone boost in Windows 11?
Microphone volume (the Input volume slider in Settings, on a 0–100 scale) sets the base capture level for your microphone. Microphone Boost is a separate amplification layer inside Control Panel that adds up to +30 dB on top of that base level. If your mic is already at 100% input volume but still sounds too quiet, Microphone Boost is the control you need.
Why doesn’t my microphone have a Microphone Boost option in Windows 11?
USB microphones and wireless receivers that are USB Audio Class-compliant manage their own gain internally, so Windows does not display a Boost slider for them. This is expected behavior, not a fault. Use the Input volume slider in Settings and any hardware-level gain controls on the device itself to manage loudness.
How do I test whether my microphone gain change actually worked?
After adjusting, watch the live audio level bar in Settings → System → Sound → Input to see real-time level changes. You can also open the built-in Voice Recorder app or use a communication app like Teams or Discord to record a short clip and compare loudness before and after the adjustment.
Does raising microphone boost degrade recording quality?
At high Boost levels (+20 dB or +30 dB), the signal can clip or introduce audible hiss, especially in quiet environments. Set Input volume to 80–90% first, then apply Boost only as needed. Always record a short test clip to check for distortion before committing to a setting for a live call or recording session.
Conclusion
Adjusting microphone gain in Windows 11 involves two main options. Use the Input volume slider in Settings for quick adjustments. For extra amplification, open the Levels tab and adjust Microphone Boost.
If you have a wireless microphone, such as the Hollyland LARK M2, check the transmitter first. Make sure it is powered on before changing Windows settings. Also, confirm your noise-reduction mode is set correctly. Open Voice Recorder and capture a short test clip. Check the recording to make sure your gain level works properly. Do this before starting your next call or recording session.
