



.png)
 简体中文
简体中文 
How to Livestream Indoors: A Step-by-Step Beginner’s Guide
For singing streamers, just chatting creators, storytellers, and performance creators who want to sound and look professional from home.
Introduction
You can have a great personality, a compelling story, or an incredible singing voice — but if your audio sounds echoey and your lighting makes you look like a shadow, viewers will leave within seconds.
The difference between a stream people stay for and one they click away from usually isn’t talent. It’s setup. A poorly treated room, an unmonitored audio chain, and no way to adjust your sound mid-performance will undercut even the most engaging creator—the good news: none of these problems are expensive to fix. Most of them just require knowing the right order to do things in.
This guide walks you through exactly how to livestream step by step indoors — from picking the right room to managing your sound live on stream. It’s built specifically for indoor entertainment streamers: singing streamers, just chatting creators, storytellers, and performance creators who want to sound and look professional from home.
What You’ll Need
A solid live streaming equipment setup for indoor entertainment streaming typically includes:
| Category | What You Need |
| Camera | Smartphone, webcam, or mirrorless camera |
| Lighting | Ring light or LED panel |
| Microphone | USB or wireless microphone |
| Audio Mixer | Smart mixer or audio interface |
| Monitoring | In-ear monitors or headphones |
| Streaming Software | OBS Studio or Streamlabs |
| Internet | Stable Wi-Fi or wired Ethernet |
You don’t need everything at once. This guide will show you what matters most at each stage.
Step-by-Step: How to Set Up and Run Your Indoor Livestream
Step 1: Choose the Right Room and Background
Your room is your studio — and it directly affects your audio quality, not just your visuals.
What to look for:
- Small to medium size — large rooms create echo and make your voice sound distant
- Soft furnishings — carpets, curtains, and upholstered furniture absorb sound naturally
- Low background noise — away from appliances, traffic, or HVAC vents
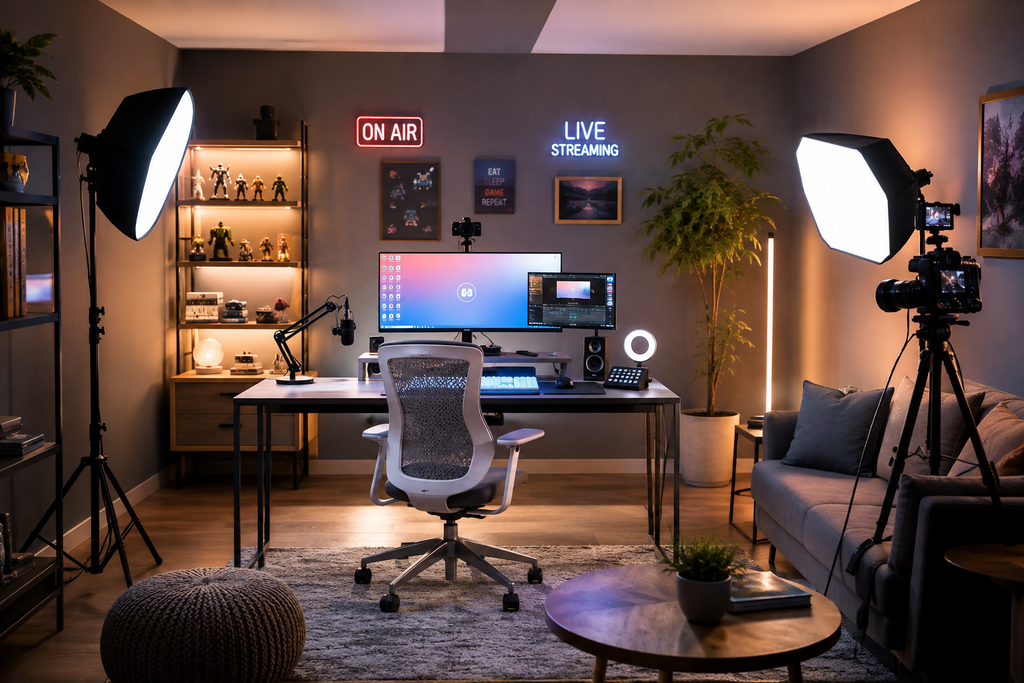
Match your background to your content:
- Bookshelves and soft décor → just chatting, storytelling
- Acoustic panels or foam → singing streamers
- RGB or LED accents → performance streams
- Clean, minimal space → works for any format
One rule: Never sit with a window directly behind you. Position windows in front of or to the side of you.
Step 2: Set Up Your Camera and Lighting
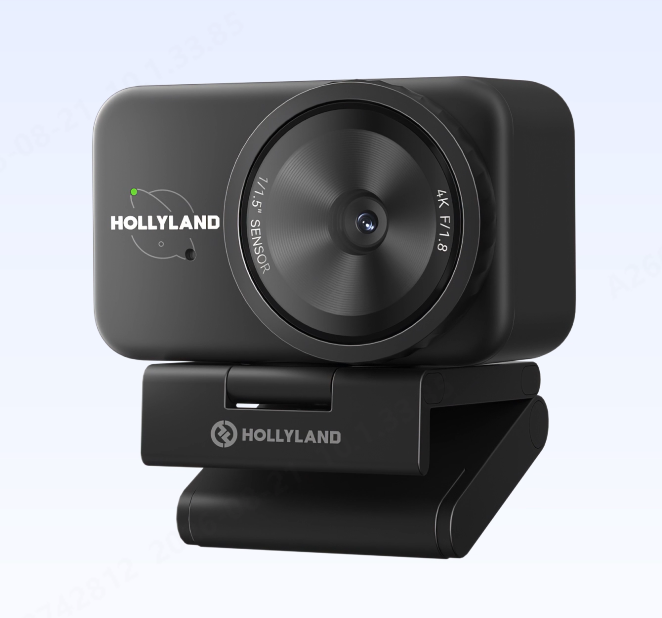
The Hollyland Lyra takes the guesswork out of looking great on stream. Everything from sharp 4K visuals to AI-powered framing works automatically in the background, so your attention stays where it belongs — on your performance. For indoor entertainment streamers who want a reliable, professional-looking camera without a complicated setup, it’s a natural choice.
Camera positioning:
● Mount your camera at eye level or just above — this is the most natural, flattering angle
● Keep a distance of 1.5–2 meters for chatting or interview formats; slightly wider for singing performances
● Always use a tripod — even minor camera wobble looks unprofessional
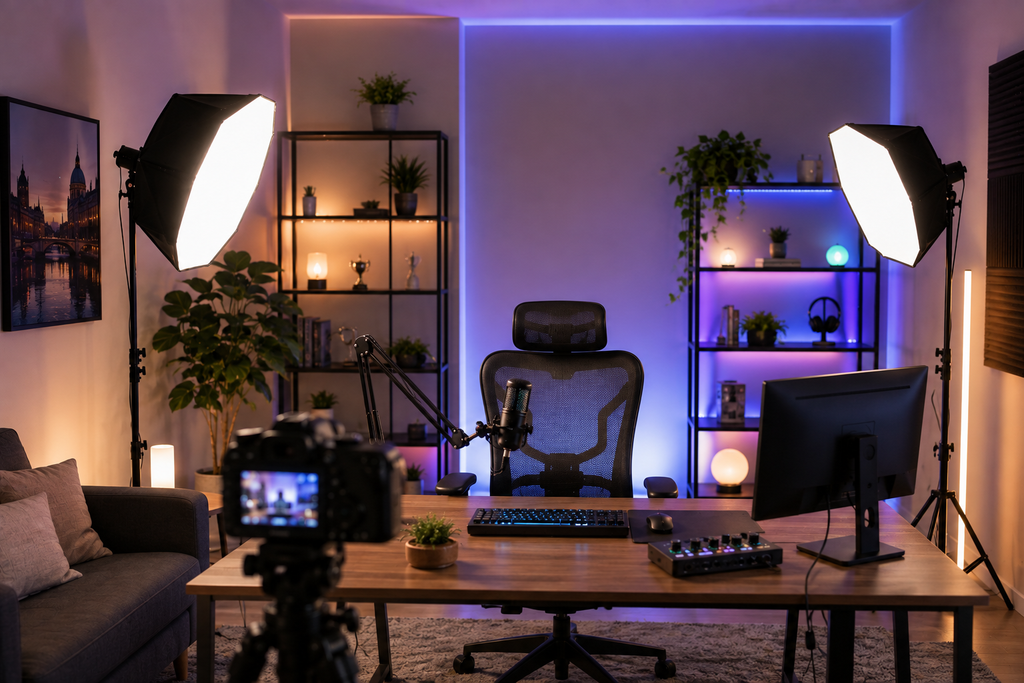
Lighting basics:
● Key light (your main light): Position it at 45 degrees to one side, slightly above eye level. A ring light works for beginners; an LED panel gives a more polished look.
● Fill light (optional): A softer second light on the opposite side reduces harsh shadows
● Background lighting (optional): Colored LED strips behind you add atmosphere — especially effective for performance and singing streams
Match your light color temperatures so everything looks consistent on camera.
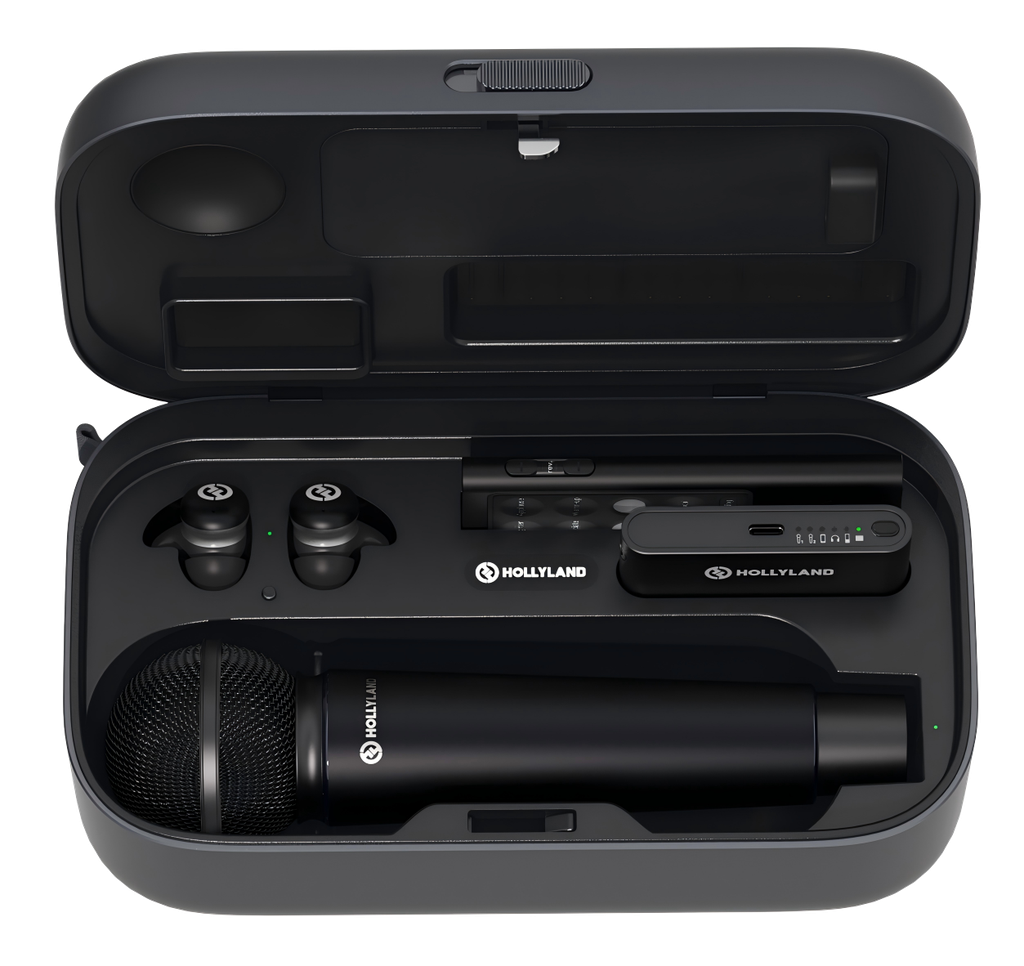
Step 3: Unbox and Power Up the MELO P1
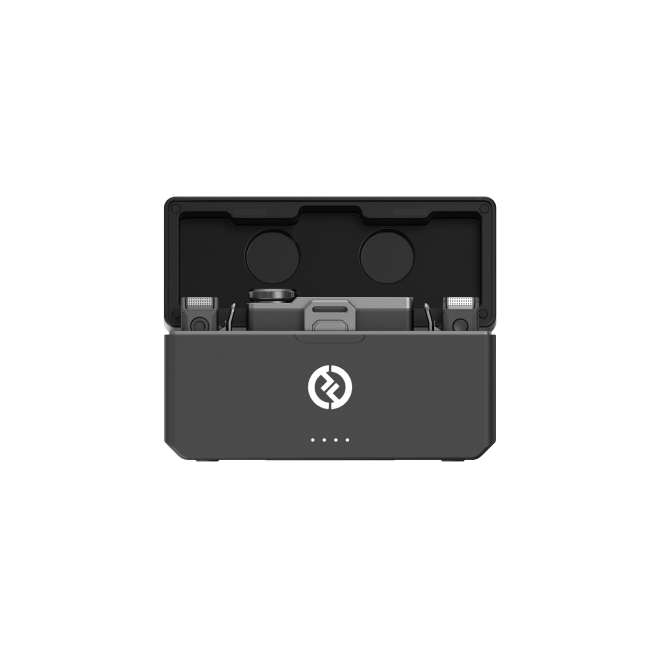
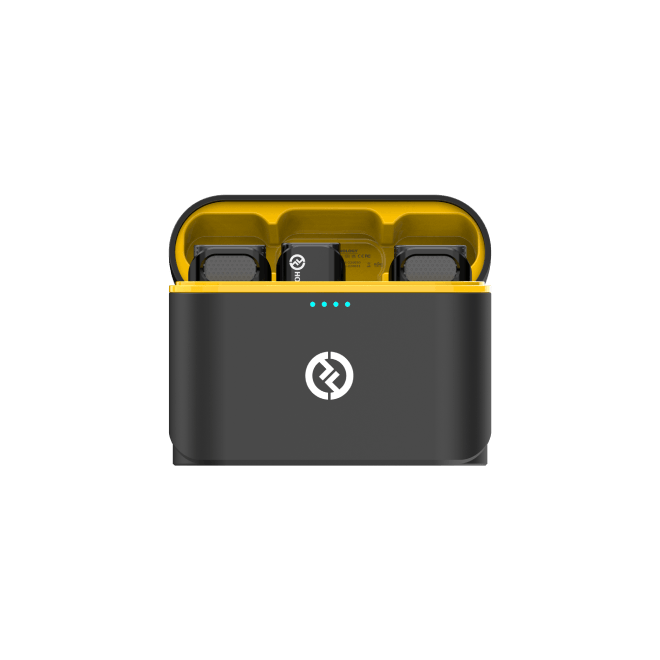
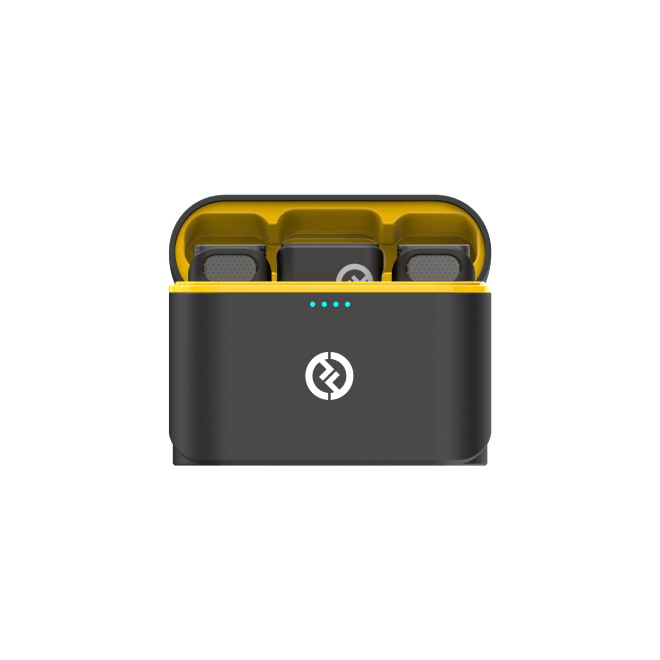
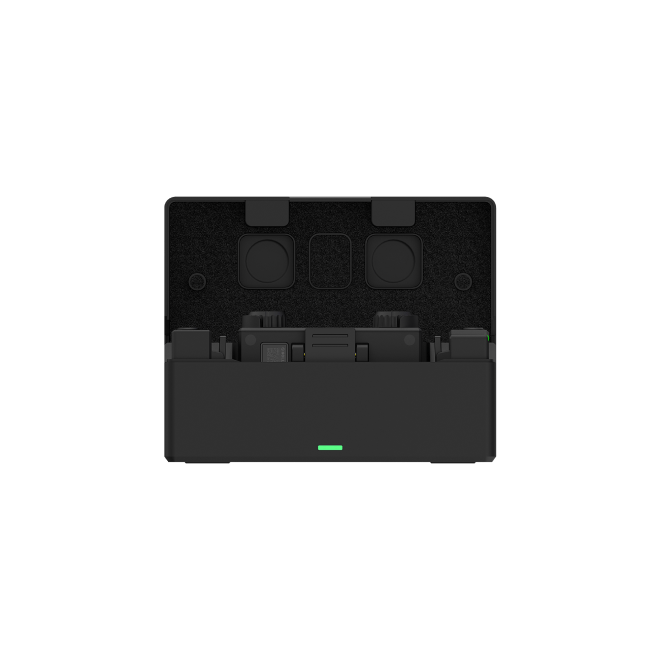
The MELO P1 Combo includes a wireless handheld microphone, Smart Audio Mixer, TWS monitoring earphones, Bluetooth remote, and a 5000mAh charging case that charges everything except the remote.
First-time setup:
- Remove protective film from charging contacts on all devices (not the remote)
- Place devices back in the case, close the lid, and wait 5 seconds
- Open the case — all devices auto-pair with the Smart Audio Mixer out of the box
Choosing your capsule for indoor streaming:
The microphone ships with both condenser and dynamic capsules — swap them by rotating the outer then inner metal tube clockwise to remove, counterclockwise to tighten after attaching the new one.
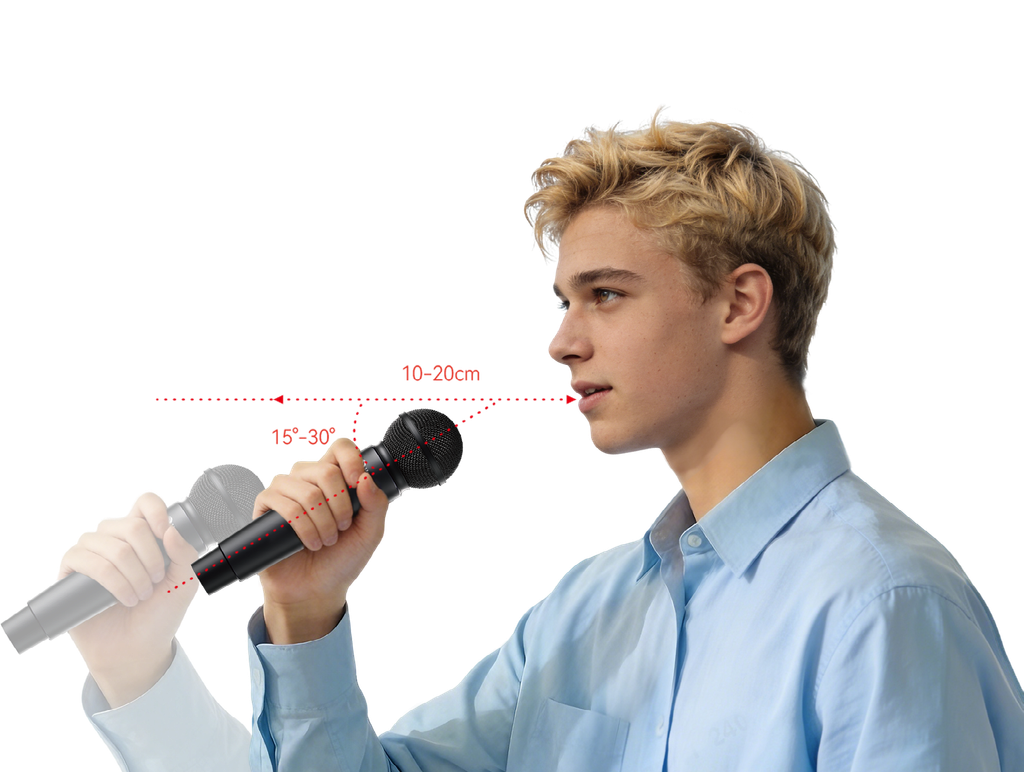
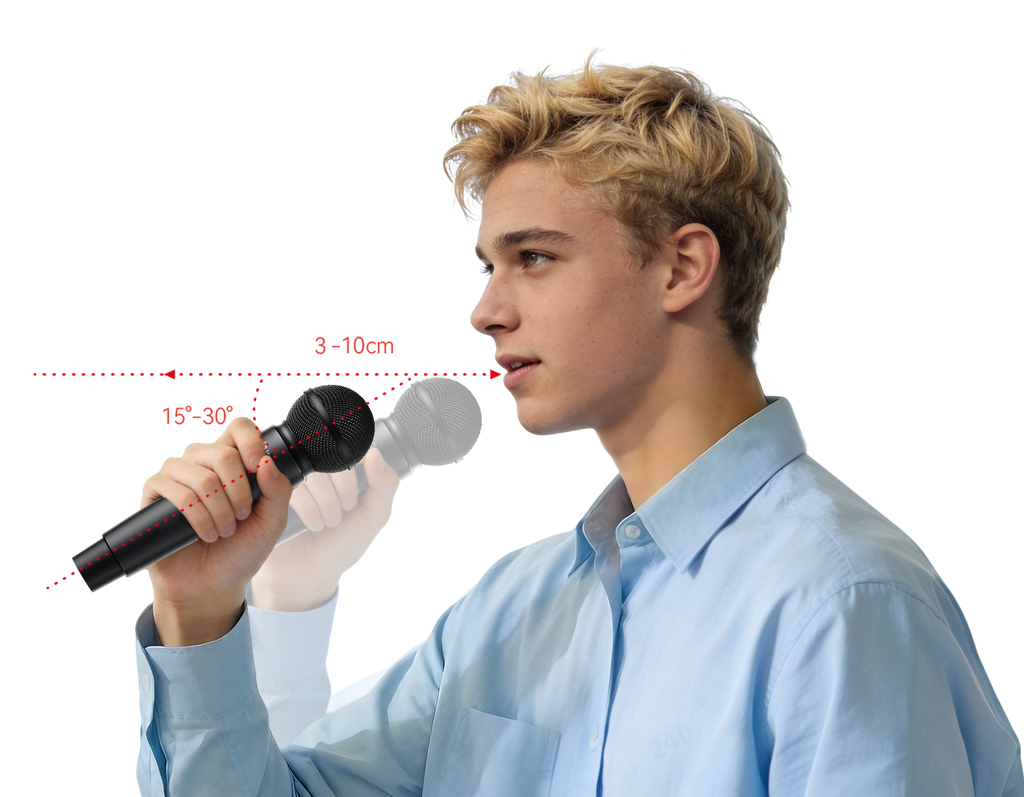
- Condenser — Best for quiet indoor environments. High sensitivity captures vocal detail even at soft volumes. Hold it about 1 fist from your mouth, tilted 15°–30° downward.
- Dynamic — Better if you can’t eliminate ambient room noise. Hold it 2 fingers to 1 fist away, also tilted 15°–30° downward.
Setting up your monitoring earphones:
Put your earphones in now and keep them in throughout your entire session — from setup through the end of your stream. Without monitoring, you won’t catch a dropped level, unexpected noise, or a problem preset until it’s too late. The earphones default to wireless monitoring mode (white indicator light) out of the box, connecting to the mixer over 2.4G with up to 60m range and delivering your fully processed audio with minimal latency.
Step 4: Connect the MELO P1 to Your Streaming Device
Computer streaming (OBS / TikTok LIVE Studio):
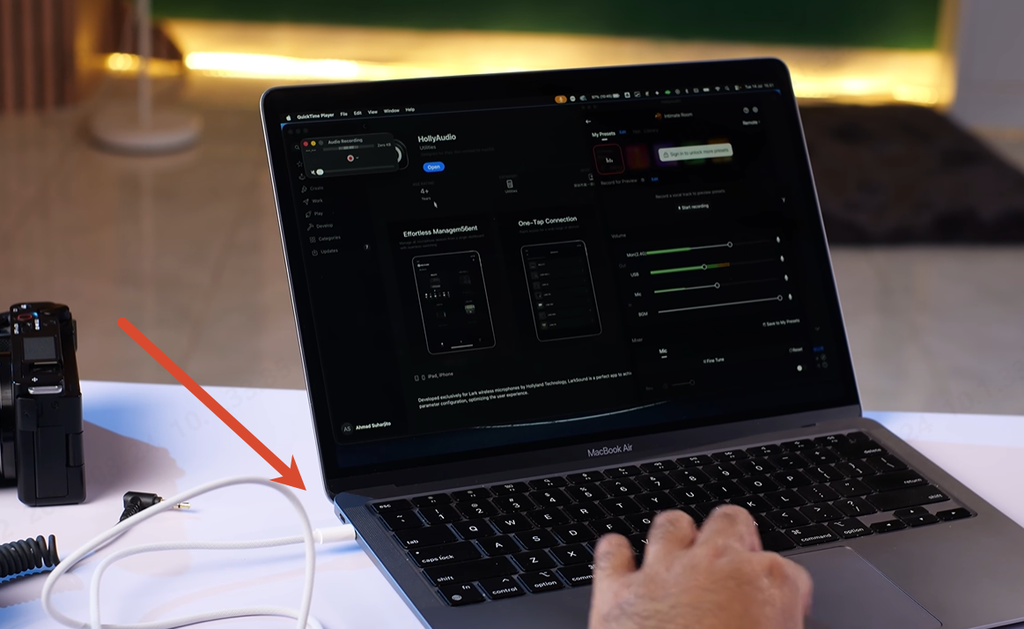
- Connect the top USB-C port of the Smart Audio Mixer to your computer
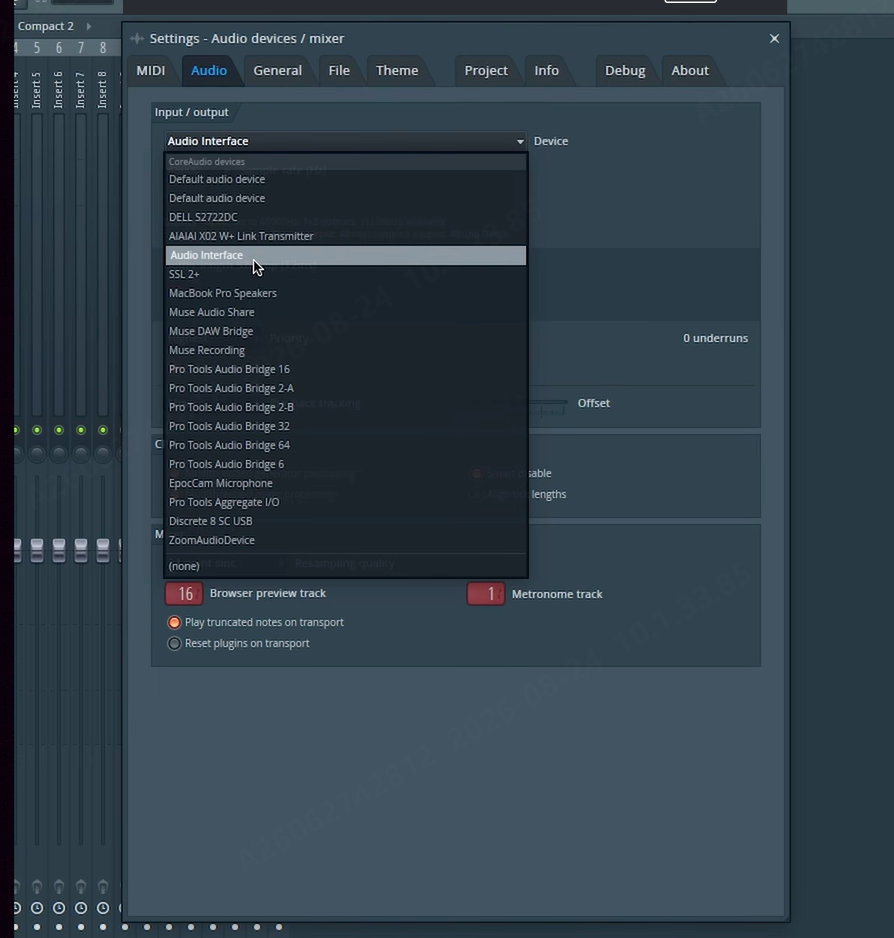
- In your streaming software, select “Audio Interface” as both audio input and output
- Set volume to 100% in the software — all gain management happens inside the MELO P1
TikTok LIVE Studio: Turn off the Background music switch in the Audio Mixer panel to prevent your backing track from creating an echo loop in your live room.
Smartphone streaming: Plug in via USB-C — streaming apps automatically recognize the mixer as the default audio device.
Adding a backing track (singing streamers):
- On your backing track phone, go to Bluetooth settings and connect to “MELO P1”
- Android users can tap the phone’s NFC area against the mixer for instant connection
- Confirm it’s working: play a track and check that the BGM meter bounces in the HollyAudio App
macOS note: Don’t use a Mac for both recording and backing track playback simultaneously — audio routing conflicts are difficult to avoid. Use a separate phone for backing tracks.
Step 5: Set Up the HollyAudio App
Download the HollyAudio App (iOS 12.0+ / Android 8.0+) from the App Store or Google Play.
Two ways to connect:
- Wired (recommended for full setup): Connect your phone to the side USB-C port of the mixer. Open the app — it detects the mixer automatically. Gives you access to all features, including Fine-Tune mode.
- Wireless Bluetooth (for live adjustments): Open the app, tap “+”, select MELO P1, tap “Bluetooth Connection”, and connect to “MELO APP” when it appears. Note: Fine-Tune is not available over Bluetooth.
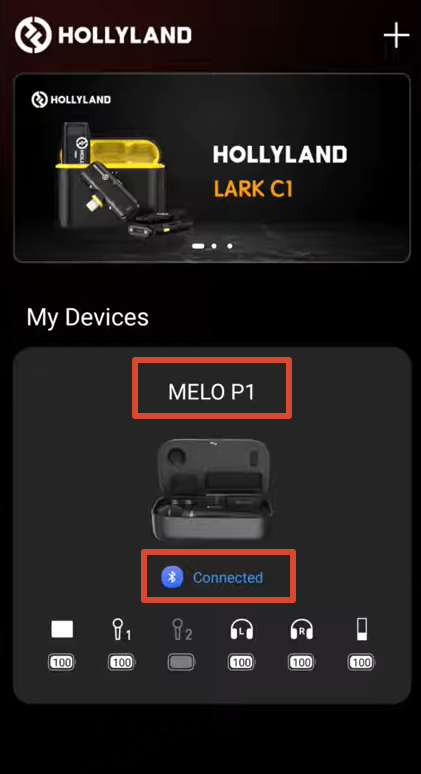
Workflow tip: Use the wired connection to dial in all settings before going live. Switch the top USB-C port to your streaming device when ready. During the stream, use Bluetooth or the physical remote for adjustments.
Step 6: Use Record for Preview to Lock In Your Sound
Before going live, use this feature to evaluate your sound against an actual recording of your own voice — not a guess.
- In the app, tap “Record for Preview” → Start Recording
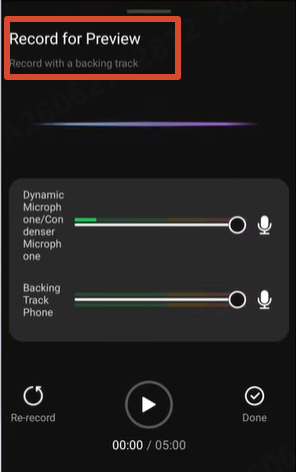
- Sing or speak normally for 30–60 seconds, with or without your backing track
- Tap Done, then tap Play to loop the recording
- Browse the Preset Library while it loops — tap presets to hear exactly how each sounds on your voice through your monitoring earphones
Note: This feature only works when your phone is connected to the top USB-C port. Finish all preset and volume decisions here before switching that port to your streaming device.
This eliminates the bone-conduction bias you get from evaluating your own voice while singing live, giving you an accurate picture of what your audience actually hears.
Step 7: Choose and Fine-Tune Your Voice Preset
Browse presets:
- Hot — Trending presets with the most distinct differences; good for quick comparison
- Library — Hundreds of professionally crafted presets filtered by style keyword
- My Presets — Save favourites here for instant recall during streams
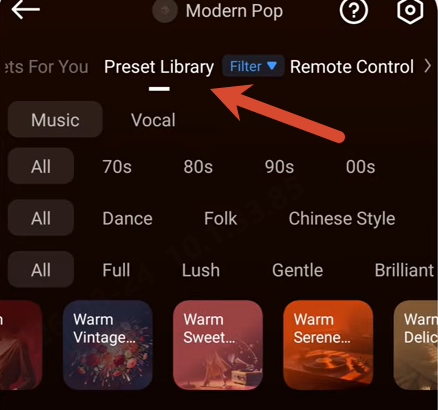
Preset direction by creator type:
| Creator Type | What to Look For |
| Singing streamer | Medium-to-high reverb; stage presence; try ballad or gospel styles |
| Just chatting | Low reverb, boosted mid-presence; warm broadcast-style presets |
| Storytelling | Atmospheric presets with adjustable reverb for mood shifts |
| Talk show | Clean, dry vocals with enhanced high-frequency clarity |
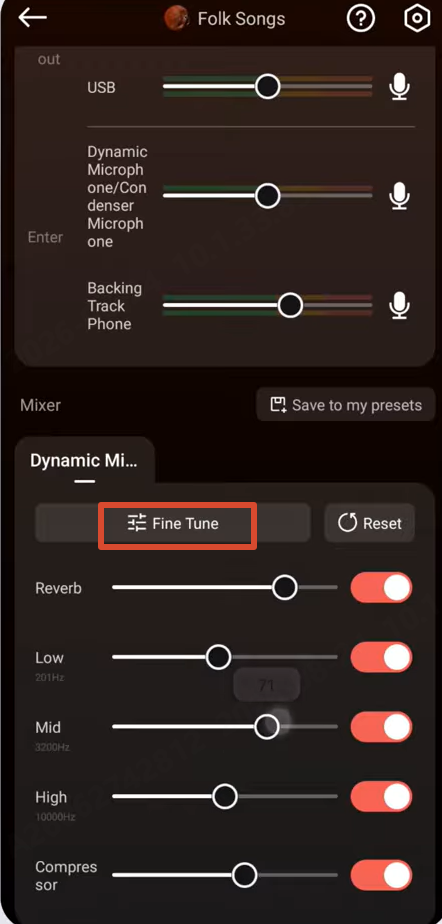
Need deeper control?
Tap “Fine-Tune” for a full professional processing chain: parametric EQ with real-time waveform display, full-band and multi-band compression, reverb, sidechain compression, harmonic saturation, and a de-esser.
Step 8: Configure OBS Audio Settings
The MELO P1 handles most processing at the hardware level, so your OBS setup is minimal.
- Go to Settings → Audio, set sample rate to 48kHz
- Set audio input device to “Audio Interface”
- Add a Limiter filter (ceiling at -1 dB) as a final safety net
- Target -12 dB to -6 dB on your level meters during normal performance
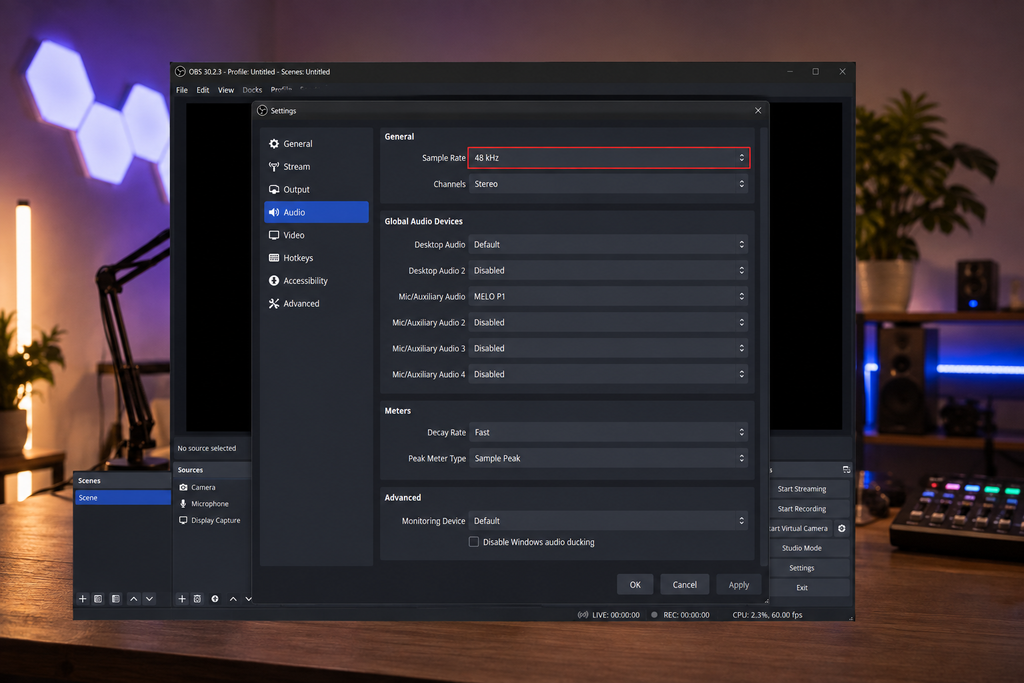
Do not add OBS noise suppression or a compressor — the MELO P1 already handles these at hardware level. Double-processing degrades your audio quality.
Step 9: Go Live and Manage Your Stream
Starting:
- Click Start Streaming in OBS and wait 10–15 seconds before speaking
- Confirm solid indicator lights on the mixer for your microphone, earphones, and remote
- Watch for dropped frame warnings — if persistent, reduce your bitrate in OBS settings
During the stream:
- Keep earphones in throughout — they’re your real-time quality check
- Use the remote’s reverb wheel and preset buttons to shift your sound as mood and energy change
- Use the Ducking button during talking segments over music so your voice always cuts through cleanly
- Glance at OBS level meters periodically — if something looks wrong, your ears should already be telling you
Audience engagement without breaking flow:
- Keep chat visible on a second screen in your eyeline
- For singers, designate song request moments rather than stopping mid-performance
- Use overlays and alerts to acknowledge follows and donations visually
Troubleshooting Common Indoor Livestream Problems
My voice sounds echoey or hollow
Cause: Too many hard, reflective surfaces in your room.
Fix:
- Add rugs, curtains, and soft furnishings to absorb sound reflections
- Move closer to your microphone — proximity reduces how much room sound gets captured
- In a pinch, stream from inside a closet surrounded by hanging clothes — it works surprisingly well
- If using the MELO P1, reduce the reverb level in your active preset via the HollyAudio App or remote
Too much background noise in my signal
Cause: HVAC, appliances, traffic, or computer fan noise picked up by the microphone.
Fix:
- Turn off unnecessary appliances before going live and close windows and doors
- The MELO P1’s AI Noise Cancellation (25dB depth) handles most steady background noise — confirm it’s active in the HollyAudio App
- In OBS, add a Noise Suppression filter for additional software-level reduction
My microphone sounds too quiet
Cause: Input gain is too low, or the microphone is too far away.
Fix:
- Increase input gain in your mixer or HollyAudio App
- Hold or position the microphone closer to your mouth
- Confirm in OBS that your mixer is selected as the audio source — not your computer’s built-in microphone
Frequently Asked Questions
Q: Wi-Fi or wired internet — which is better for streaming?
Wired Ethernet is more stable, especially for long streams. Wi-Fi works, but it’s more vulnerable to interference from other devices, causing dropped frames. If your router is far from your streaming position, consider a direct Ethernet cable or a Wi-Fi extender.
Q: Do I need to wear monitoring earphones the whole time I’m live?
Strongly recommended, especially when you’re starting. Your ears are the most real-time quality check you have — if your level drops, background noise creeps in, or an effect sounds wrong, you’ll hear it immediately rather than waiting for viewers to complain in chat.
Q: Should I stream from my phone or a computer?
Phones are easier to start with — plug in a microphone, open a streaming app, and you’re live with almost no configuration. A computer running OBS gives you more flexibility: scene switching, overlays, and multi-source audio management. Both are completely viable. Start with whatever you already own.
Q: Can I read chat and perform at the same time?
Yes, but it needs to be set up intentionally. Position chat on a second screen or phone within your natural eyeline rather than looking down at it. For singing streamers, designate specific moments to take song requests rather than interrupting your performance mid-song — your audience’s experience will be significantly better for it.
Q: Do I need a big following before I start streaming?
Zero followers is the right time to start. Streaming is a skill that only improves by doing it — you’ll get comfortable with your gear, find your rhythm, and learn how to handle unexpected problems. Waiting until you feel “ready” usually means never starting.
You’re More Ready Than You Think
A great indoor livestream isn’t about having the most expensive gear — it’s about understanding the fundamentals and putting them in the right order. The right room, the right audio chain, and the right tools make the difference between a stream people click away from and one they stay for.
For indoor entertainment streamers especially, audio is your performance. Dial it in, monitor it in real time, and use tools like the MELO P1 remote to shape your atmosphere dynamically — without ever breaking the moment your audience came to experience.
Set up, test, go live, and make it yours.
Explore the Hollyland MELO P1 — the all-in-one wireless studio built for indoor entertainment streamers.


Subscribe us
to get the latest news!