.png)
 简体中文

Rain tapping against a window, distant traffic, and the soft sound of turning a book page can create a relaxing listening experience. ASMR ambience videos use environmental sounds to build peaceful settings for studying, reading, working, or winding down.
Unlike traditional ASMR videos that focus on whispering and close-up triggers, ambience videos recreate environments through carefully recorded and layered sounds.

You do not need an expensive studio to get started. A smartphone, stable recording position, headphones, and audio-editing software are enough for your first project. The key is capturing natural sounds, balancing audio layers, and creating smooth transitions.
This guide explains how to record, layer, edit, and publish ASMR ambience videos, using a practical rain-soundscape project to demonstrate each step.
Create a Rain Soundscape: A Practical ASMR Example
A rain soundscape combines continuous rainfall with smaller environmental details. Here is how to create one from individual recordings.
1. Record the Main Rain Sound
Capture 2–5 minutes of steady rainfall from a sheltered location, such as near a window or under a covered area. Keep your microphone protected from moisture and wind.
2. Capture Additional Sounds
Record separate clips of water droplets hitting windows, rain tapping on surfaces, and distant thunder. These recordings add variety and depth to the background ambience.
3. Layer the Recordings
Import the clips into an audio editor. Use continuous rainfall as the background and introduce secondary sounds at natural intervals. Keep additional effects subtle so they do not overpower the main ambience.
4. Edit and Extend the Audio
Remove distracting noises, balance volume levels, and use gentle crossfades between clips. Repeat suitable sections with overlapping transitions if you want to create a longer ambience video.
5. Add Visuals and Publish
Pair the finished audio with a simple visual, such as rain falling against a window or a rainy landscape. Check for audio gaps and abrupt transitions before exporting and publishing your video.
What Makes a Good ASMR Ambience Video?
A good ASMR ambience video creates a consistent environment without making individual sounds distracting. Three elements help achieve this:
- Continuous ambience: A main sound, such as rainfall, a crackling fireplace, or quiet room tone, establishes the environment.
- Supporting sounds: Distant traffic, keyboard typing, ticking clocks, or page turns add depth.
- Natural audio: Consistent volume, smooth transitions, and subtle variations prevent the recording from sounding repetitive.
For example, a rainy study-room video could combine rain against glass, distant traffic, and occasional paperback page turns.

Start with one clear concept rather than combining unrelated relaxing sounds. A focused soundscape is easier to record and edit.
Which Sounds Work Best for ASMR Ambience Videos?
The best ambience sounds depend on the environment you want to create. Before recording, choose a setting and list the sounds that would naturally belong in it.
Build a Rain-on-Window Soundscape
Rain provides a continuous background with natural variations. You can record it yourself or use properly licensed audio.
Consider combining:
- Rain tapping against a glass window.
- Distant traffic on a wet road.
- Occasional paperback page turns.
- Quiet indoor room tone.
- A soft desk clock ticking.
Keep rain as the main audio layer. Supporting sounds should remain subtle and fit the same environment.

Record Cozy Indoor Sounds
Indoor ambience is often easier for beginners because you can control the room, microphone position, and recording conditions.
Useful examples include:
- Gentle keyboard typing in a study room.
- Fireplace crackling.
- Distant conversation and ceramic mug sounds in a café-inspired setting.
- Rain against a window while someone reads.
- Occasional mouse clicks and page turns.
A little natural room tone can make an environment believable. However, avoid distracting sounds such as loud refrigerator motors, repeated chair squeaks, and nearby conversations.

Choose Sounds That Belong Together
Combining individually relaxing sounds does not automatically create a convincing atmosphere. A fireplace, heavy rain, tropical birds, and busy café chatter may work separately but feel unnatural together.
Ask whether each sound belongs in the same physical space. Build the main ambience first, then add only supporting sounds that improve the scene.
What Equipment Do You Need to Record ASMR Ambience?
You can start with a smartphone and a suitable recording app. As your projects develop, consider an external microphone, headphones, and audio-editing software.
Start With a Smartphone and a Stable Recording Position
A smartphone can capture useful indoor ambience when placed in a quiet location. Use a stable stand or desk instead of holding it throughout the recording.
For a rain-on-window project, position the phone securely near the window, away from condensation and water exposure. For study-room ambience, place it where the keyboard and surrounding room sounds are balanced.
Make a short test recording and listen through headphones. Check for handling noise, electrical hum, ventilation noise, and distortion.
Long recording sessions can consume storage and generate heat. Check available space and keep your device properly ventilated.

Monitor Your Recording With Headphones
Headphones help identify problems that may go unnoticed during recording. Listen for clipping, unwanted hum, handling noise, and sudden background changes.
For close-up ASMR sounds, 5–15 cm is a practical starting microphone-to-source distance. This can work for page turns, gentle tapping, and small desk movements.
Wider ambience recordings generally require more distance to capture the environment naturally.

Understand When an External Microphone Helps
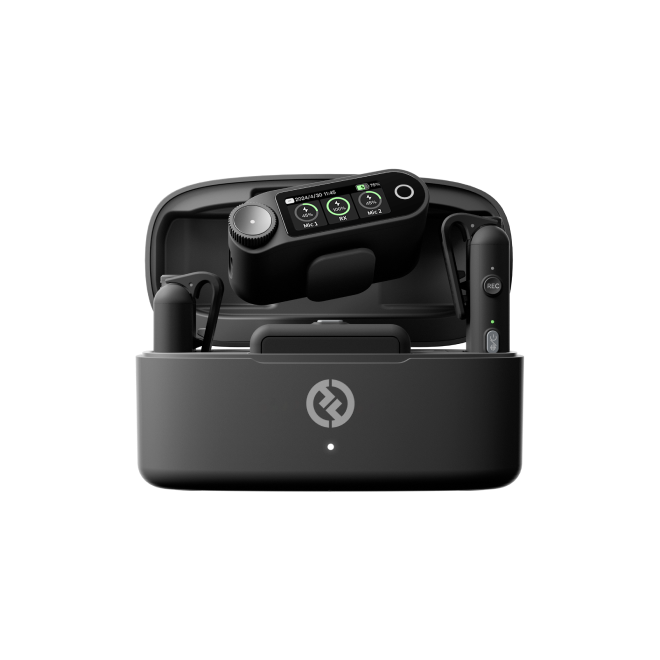
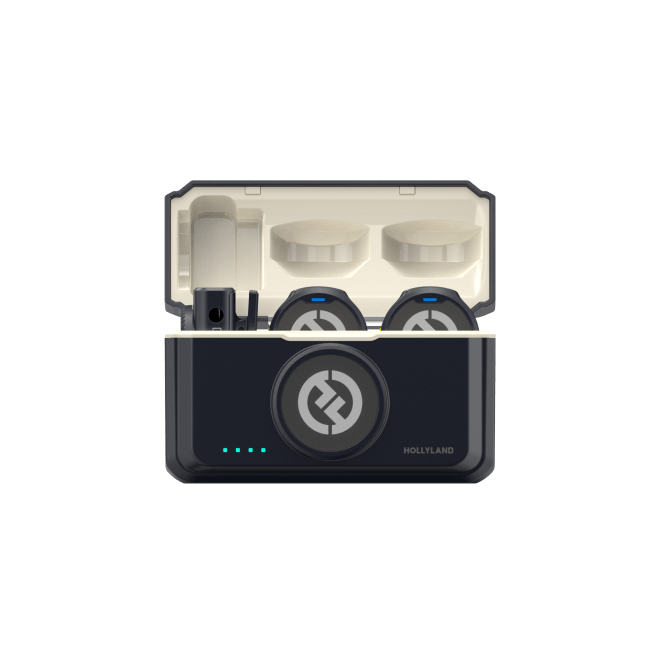
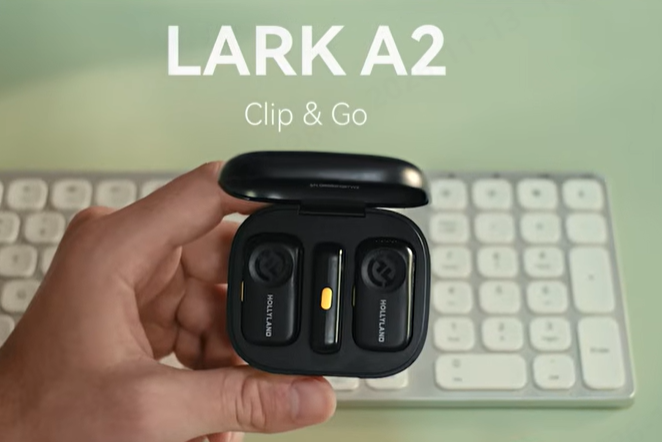
An external microphone gives you more flexibility when recording voice-led ASMR and nearby sounds. A wireless lavalier such as the Hollyland LARK A2 can be useful for spoken introductions, soft-spoken narration, and indoor recordings.
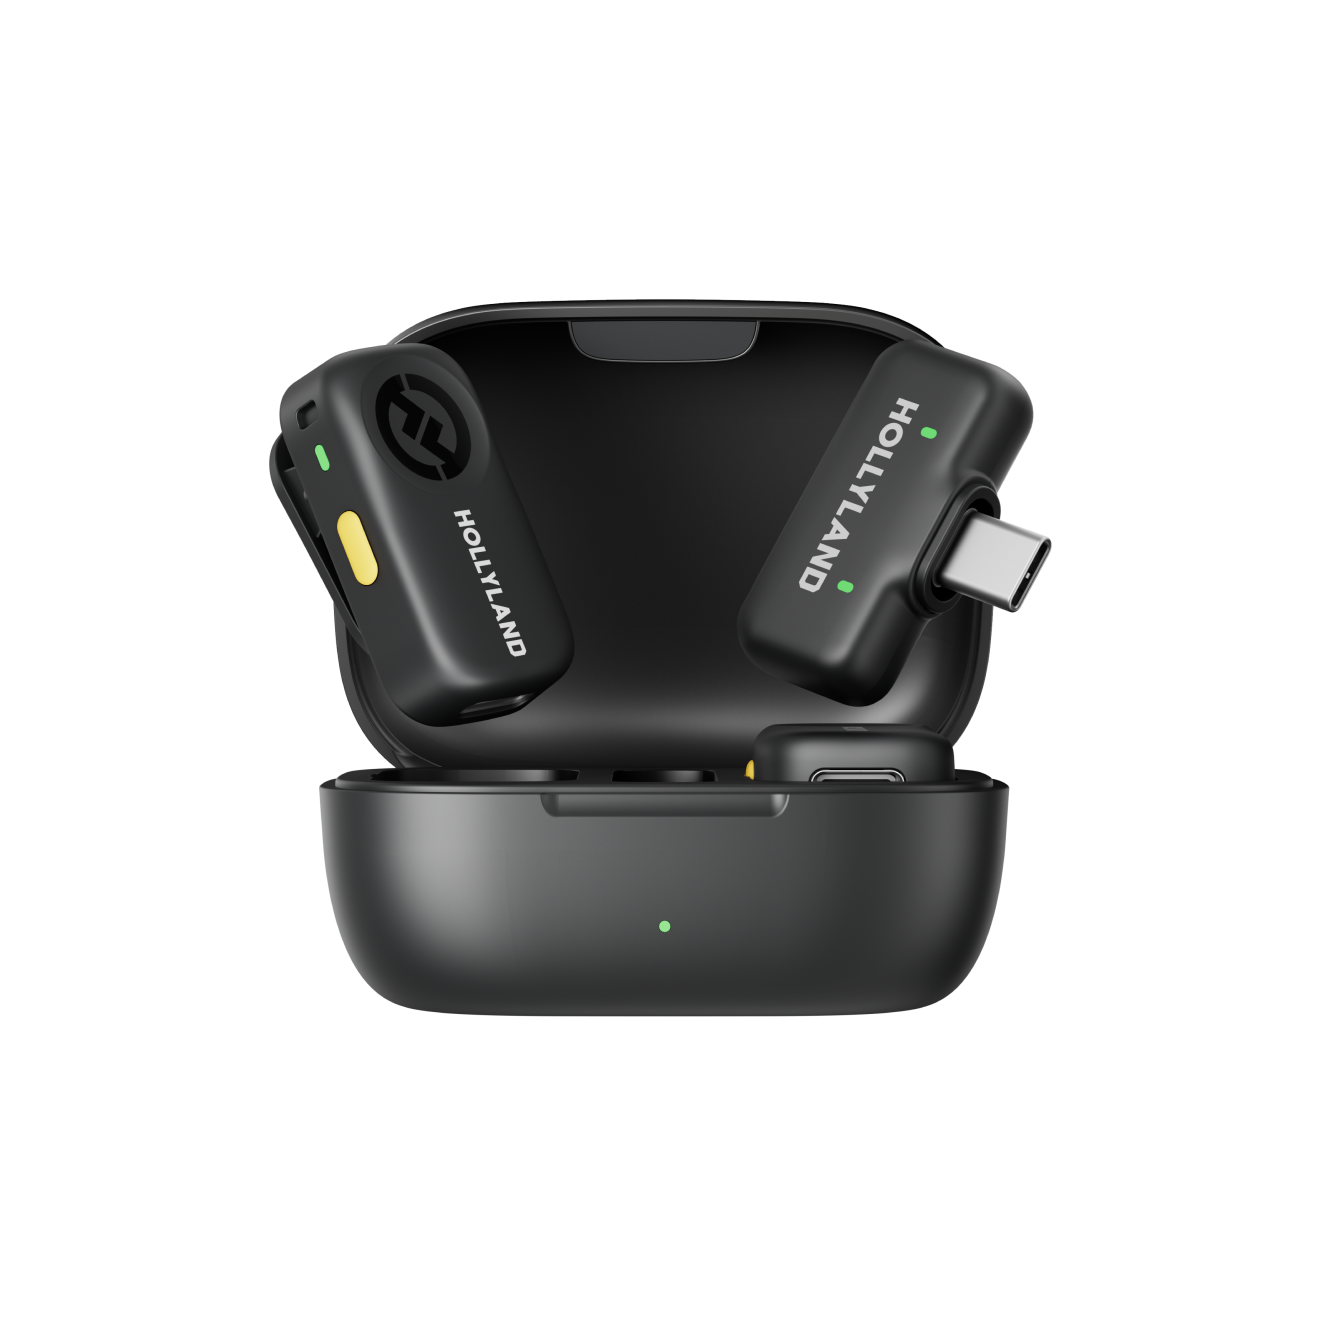
Hollyland LARK A2 - Clip-on Microphone
An ultra-light 8.5g wireless microphone engineered for effortless mobile recording, featuring smart AI noise cancellation and studio-grade sound.
Key Features: 8.5g Clip & Go | AI Noise Cancellation | 42 Hours Battery
How to Layer Sounds for a Natural ASMR Soundscape
Layering combines separate recordings into one continuous environment. Instead of making every sound equally loud, establish a main ambience, supporting background, and occasional details.
Set the Main Ambience as Your Audio Bed
Begin with the sound that defines your scene. For a rainy study room, use steady rain against a window as the main audio bed.
Place it on your editing timeline and check for abrupt changes, obvious repetition, and sudden volume peaks.
Keep this layer consistent unless you intentionally want the environment to change.
Add Distant Sounds at Lower Levels
Supporting sounds should normally remain quieter than the main ambience. Distant traffic, a quiet fan, or faint room tone can create depth without taking over the recording.
Adjust volume by listening to the combined result. For example, a page turn should be noticeable without sounding as though someone is turning a book directly beside the listener’s ear.
Use Occasional Sounds Sparingly
Small details make ambience videos feel more realistic. A gentle ceramic mug tap, page turn, or wooden-table scratch can add variation.
Place these sounds naturally instead of repeating them at fixed intervals. Record several variations when possible to make repeated sections less noticeable.
How to Create Seamless ASMR Ambience Loops
A seamless loop allows a video to play for an extended period without an obvious beginning or ending. It is especially useful for rain, fireplace, and study ambience.
Find Compatible Start and End Points
Choose sections with similar intensity and texture. Steady rainfall is generally easier to loop than audio containing thunderclaps or large splashes.
Avoid cutting through prominent sounds such as page turns, passing vehicles, or sharp crackles.
Apply a Short Crossfade
A crossfade overlaps the end of one audio segment with the beginning of another, gradually reducing one while increasing the other.
Try a crossfade of a few seconds for steady ambience. Adjust it according to the recording because overlapping different rain rhythms can temporarily increase the volume.
Check the Loop Before Extending It
Listen to the transition repeatedly before duplicating the audio across an entire hour.
Check whether repeated traffic sounds or page turns become predictable. Extend the main ambience while placing occasional details at irregular intervals.
How to Reduce Noise Without Losing Ambient Detail
Noise reduction can remove unwanted hum or hiss, but aggressive processing can damage the subtle textures that make ambience recordings enjoyable.
Identify Unwanted Noise Before Applying Reduction
Listen for specific problems, such as electrical hum, air-conditioning rumble, or sudden chair scrapes.
Whenever possible, improve the recording environment before editing. Move away from noisy appliances, secure the microphone, and record during quieter periods.
Preserve the Natural Texture of the Recording
Heavy noise reduction can make rain sound artificial, remove delicate page rustling, or suppress the details of fireplace crackling.
Apply processing conservatively and compare the result with the original recording. If the processed version sounds less natural, reduce the effect.
Know When AI Noise Cancellation Should Be Off
Use noise cancellation according to the type of recording:
- Whispering and narration: Enable AI noise cancellation when distracting room noise interferes with the voice.
- Ambient textures: Turn it off or use the lowest available level for rain, tapping, scratching, paper, brushing, and fireplace sounds.
Noise cancellation may interpret subtle environmental details as unwanted noise. For ambience-first recording, preserving natural sound is usually more important than removing every background detail.
Is the Hollyland LARK A2 Suitable for ASMR Ambience?
The Hollyland LARK A2 is a compact wireless lavalier microphone designed for smartphone-first creators. It works well for indoor ambience with spoken introductions, soft-spoken narration, and nearby sounds like keyboard activity.
However, it is not a dedicated field recorder, and a wearable microphone is not automatically the right choice for wide environmental recordings.
Connect the LARK A2 Directly to Your Smartphone
The LARK A2 offers USB-C and Lightning receiver options. Choose the version that matches your smartphone and connect the receiver directly.

It supports plug-and-play recording, so you do not need the Hollyland app simply to start recording.
Its stated specifications include:
- 48 kHz/24-bit audio.
- Omnidirectional pickup.
- 20 Hz–20 kHz frequency response.
- Signal-to-noise ratio of at least 68 dB.
- Maximum SPL of 120 dB.
The LARK A2 is smartphone-only. It does not have a dedicated camera version or a 3.5 mm camera output.
Use the LARK A2 for Cozy Indoor Ambience, Not Every Soundscape
The LARK A2 may suit:
- Study-room ambience.
- Quiet café-style scenes.
- Indoor keyboard room tone.
- Spoken introductions for fireplace videos.
For example, it can capture a spoken introduction or nearby voice-led content in a study video. However, microphone placement and room conditions may matter more when recording the main rain ambience.
For outdoor ambience, I would not recommend relying on the LARK A2 as your primary field-recording solution. Wind can create unwanted noise, and its accessories should not be assumed to provide dedicated outdoor wind protection.
A field recorder and microphone with suitable wind protection are generally better choices.
Turn AI Noise Cancellation Off for Ambient Textures
The LARK A2’s AI noise cancellation is adjustable through the Hollyland app.
For spoken introductions, it can help reduce distracting room noise. For rain, page turns, fireplace crackling, and other ambient textures, turn it off or select the lowest available level.
Listen to a short sample before recording a longer session to ensure natural details are preserved.
Understand When an External Microphone Helps
An external microphone can improve recording flexibility when your phone’s built-in microphone does not capture the desired sound clearly. It is especially useful when recording whispering, soft-spoken content, talking ASMR, or indoor voice-led videos.
The Hollyland LARK A2 is a practical option for smartphone-first beginners who want a compact wireless microphone for everyday ASMR recording. However, creators pursuing binaural or highly detailed environmental recordings may benefit more from specialized stereo microphones or dedicated field recording equipment.
Frequently Asked Questions
1. Should ASMR Ambience Videos Include Moving Visuals or Static Images?
Both formats can work. Moving visuals, such as falling rain or a flickering fireplace, can reinforce the environment, while a static image keeps the presentation simple. Choose visuals that complement the soundscape without distracting viewers from listening.
2. How Can You Make an ASMR Ambience Video Suitable for Different Listening Environments?
Consider that viewers may listen through headphones, phone speakers, or larger speakers. Review your finished audio on more than one playback device and make sure important sounds remain comfortable and balanced across different listening conditions.
3. Can You Create an ASMR Ambience Series Around Different Seasons?
Yes. You can develop a series around seasonal environments, such as summer rain, autumn wind, winter fireplaces, and spring birdsong. Give each video a distinct setting while maintaining a consistent presentation style.
4. How Can You Choose a Visual Theme That Matches Your ASMR Soundscape?
Start with the environment represented by your audio. A rainy study-room recording could use a desk, window, books, and warm lighting, while a fireplace soundscape could feature a cozy indoor setting. Keep the visual presentation consistent with the sounds viewers hear.
5. Should You Create Separate ASMR Ambience Versions for Different Audiences?
You can adapt the same original soundscape for different viewing preferences. For example, create a shorter version for casual listening and an extended version for viewers who prefer longer background sessions. Make sure each version is edited and exported appropriately for its intended platform.
Conclusion
Making ASMR ambience videos involves creating believable environments through carefully recorded and balanced sounds. Start with one concept, such as rain against a window, then add subtle background layers and occasional details.
Use headphones to monitor recordings, create smooth loops, and preserve natural audio textures. A one-hour video is a practical starting point for YouTube, while shorter clips can introduce the same soundscape on TikTok.
You can begin with a smartphone and expand your setup as needed. A wireless microphone such as the Hollyland LARK A2 can suit indoor voice-led content, but dedicated field-recording equipment is more appropriate for detailed outdoor ambience.
The best ambience video is not the one with the most audio layers. It is the one that creates a consistent, natural listening experience.