.png)
There’s something sacred about the sound of an acoustic guitar. Its wood, strings and air coming together in a way that feels almost alive. But capturing that magic in a recording? That takes more than just a mic and a button press.
No matter if you’re recording your first demo at home or fine-tuning sound for a professional session, this guide covers everything. You’ll find tips on gear, setup, mic techniques, and mixing tricks to capture the sound just as you hear it in the room.
Let’s disclose the incredible knowledge of recording acoustic guitars with studio-quality precision.
Before You Hit Record: Get Things Right at the Source
Equipment Checklist
There’s a saying: “What good is a machine gun when it’s out of ammo?” Without the right gear, no guide can help you get the studio-level acoustic guitar sound you are after. Let’s get your equipment out and ready.
1. Microphone
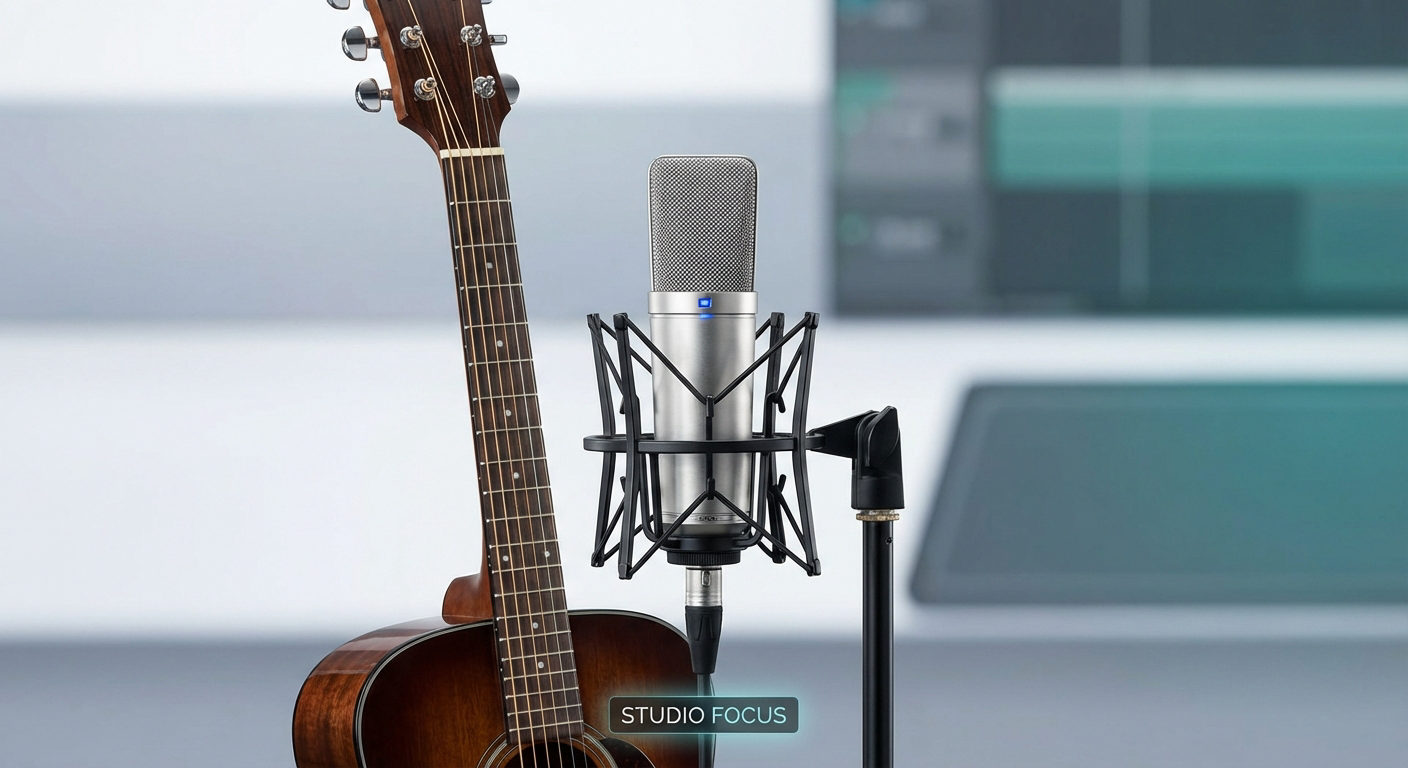
Your mic is the heart of the signal chain. And when it comes to acoustic guitar, condenser mics are the go-to for a reason. They’re sensitive, detailed, and responsive to subtle dynamics.
- Small-diaphragm condensers (SDCs) such as the Neumann KM184 and Shure KSM137 excel at capturing quick sounds and clear tones. They work great for fingerpicking and light strumming.

- Large-diaphragm condensers (LDCs), such as the Audio-Technica AT4040, and versatile mics like the Shure SM7B provide a warm, full low end. The SM7B is dynamic but stands out in performance.

There is no need to break the bank; just choose a mic that complements your guitar’s natural voice. Many vocal mics work surprisingly well on acoustic instruments.
2. Audio Interface
Clean, quiet preamps and reliable conversion make all the difference. You’ll want an interface that:
- Supports 48V phantom power (required for condenser mics)
- Has at least two XLR inputs for stereo techniques
- Offers 24-bit resolution at 44.1 or 48 kHz, which is standard for high-quality audio

A few trusted picks: Focusrite Scarlett 2i2 and MOTU M2. Some even offer “color modes” like Focusrite’s Air, which adds high-frequency shimmer — a subtle bonus for acoustic tone.
Tip: Make sure drivers are updated and compatible with your DAW and OS before your session.
3. Stands, Shock Mounts & Cables
Good mic placement needs stable support — literally.
- Use a boom stand to position the mic precisely without blocking your strumming arm
- A shock mount minimizes vibration from footsteps, desk taps, or mic stand bumps
- High-quality XLR cables reduce hum and crackle. Cheap cables can sabotage a take before it begins
Tip: Don’t forget closed-back headphones (for tracking without bleed) and a guitar tuner. They’re basic, but essential.
4. In-Guitar Effects: The ToneWoodAmp 2 (Optional)
Want something a little extra? Devices like the ToneWoodAmp 2 let you add effects like reverb, chorus, and slapback directly inside your guitar. No pedals or post-processing is needed.

It sticks to the back of your acoustic and uses vibration to turn the whole guitar into a mini speaker. The result? You hear the effect in real time while playing, and your mic captures that enhanced tone naturally.
We highly recommend reading this guide from kickstarter.com on ToneWoodAmp2 to learn more. It’s perfect for solo sessions, creating a rich ambiance, or adding experimental textures without extra gear.
Preparing Your Guitar & Recording Space
Little things make a big difference. Before recording, get your guitar and space prepped. Doing so will save you headaches (and bad takes) later.
1. Change Your Strings
Dull strings sound like regret. If yours feel stiff or die under your fingers, swap them — not right before recording, but the night before. That way, they settle, stretch, and stop slipping out of tune mid-take.
New strings give you shimmer and snap. Played-in ones soften the edges. Pick your vibe, but don’t record with rust. Ever.
2. Find the Sweet Spot in the Room
The room is your sound. Stand in the center, strum a chord, and then try a wall, a corner, or a couch. You’ll hear it shift — boom here, thin there, bright somewhere between.
Find the spot that sounds honest. That’s where you set up.
3. Acoustic Metamaterials (Optional)
Metamaterials are worth a look if you’re chasing clarity in a cramped room. They soak up more than flutter echoes; they tame the room itself.
Optional, yeah. But they’re the future if you want your space to work with you, not against you.
4. Pick the Right Chair
If you’re not standing, use a stool, armless chair, or something that lets your guitar breathe, and your arms move freely. Avoid anything that creaks, wobbles, or gets in your way. It sounds obvious, but the wrong chair can ruin a take before it starts.
5. Clean Setup
Tidy up your cables, lock your mic stands in place, and make sure nothing will trip you or touch the guitar mid-take. A clean space is a focused space, and honestly, it just feels better to play in.
Mic Types: Choose Your Weapon
Every mic tells a different story. Your guitar’s the voice, and the mic decides how it speaks. Here’s how to pick the one that gets out of the way and lets your sound shine.
Condenser Microphones
These mics are the go-to for a reason. Condensers are detailed, sensitive, and natural.
SDCs capture fast, clean transients. Perfect for fingerpicking, strumming nuance, and percussive playing. The result? A bright, realistic sound that doesn’t lie.
LDCs lean warmer. They round off the highs and bring out body and resonance — better when you want fullness over sharpness.
Tip: Use SDCs when you want accuracy—and LDCs when you want weight.
Ribbon Microphones
Ribbons smooth things out. Literally. They tame harsh highs, soften pick noise, and add a subtle vintage tone that flatters solo guitar or layered acoustic tracks.

[Image text: AEA R44C – a legendary ribbon microphone]
They’re not as detailed as condensers, but they add soul. Some engineers blend ribbons with condensers to get warmth and clarity in one take.
Tip: Best if your tone is too bright or you want a softer top end.
Dynamic Microphones
Technically, it’s not ideal for an acoustic guitar. But if you’re working with a budget or trying to capture a gritty, mid-heavy tone, they can do the job (just not alone).

Dynamics miss fine detail and high-end sparkle. Use one only if you pair it with EQ later or record a condenser alongside it.
Tip: It’s best if it’s all you’ve got or you’re after a lo-fi texture.
The Best Mic Placement Techniques for Acoustic Guitar
Ask ten engineers how to mic an acoustic guitar, and you’ll get ten answers — all different, all right. That’s the beauty of it. Your chosen mic technique depends on your room, your guitar, and the acoustic’s role in the mix. But a few tried-and-true placements work again and again.
Here’s what matters. What works. And what sounds like you want it to sound.
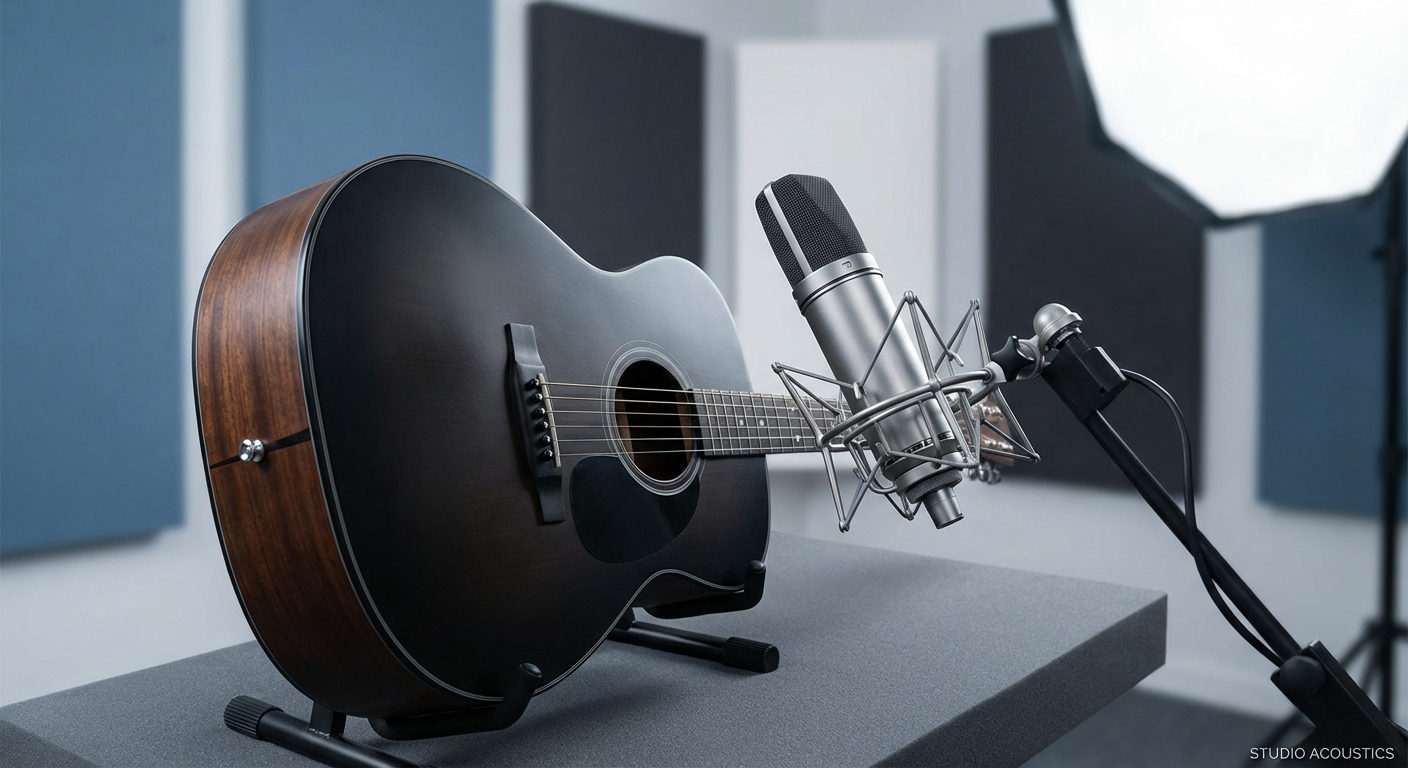
1. Mono Mic
Simple, Focused, Clean
This technique involves a single mic. One mic pointed at the neck–body joint (around the 12th fret), 6–12 inches away.

It records cleanly, directly, and phase-safely. It is great for singer-songwriter tracks or tight mixes where the guitar supports rather than leads. Use it when you need clarity, simplicity, and no mix headaches.
Tip: If you want a bit more room vibe, back it off a foot or two if your space sounds good.
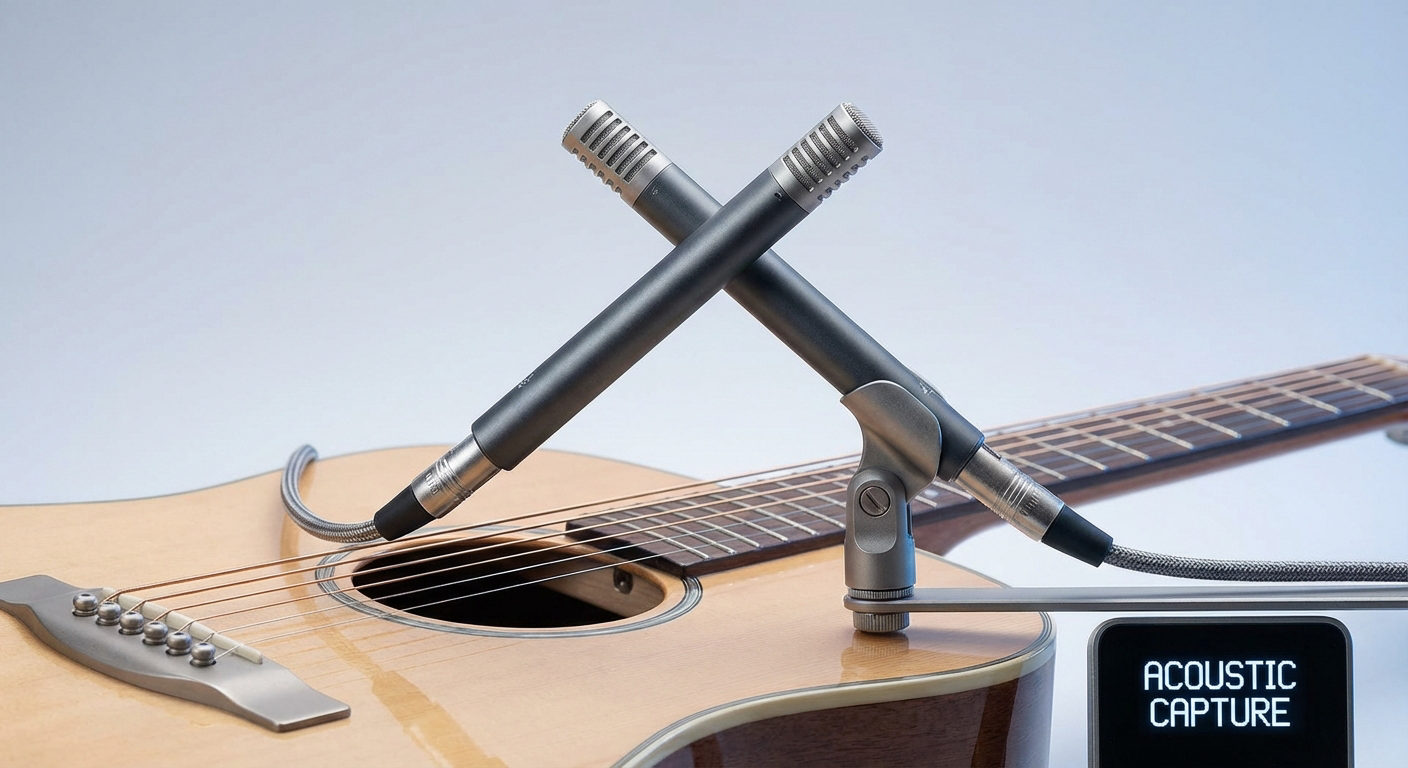
2. XY Stereo
Tight Stereo Image, Easy to Mix
What it is: Two matched cardioid mics angled at 90°–110°, capsules nearly touching in an X shape, aimed at the 12th fret.

It works great because you get stereo width without phase issues. It sounds natural and folds to mono without comb filtering. The sound is less wide than spaced pairs but tighter and more controlled. Use it when you want stereo but need it to behave.
3. Over-the-Shoulder
Natural, Lively, Player’s POV
It involves placing one mic near the player’s right ear (if right-hand player), angled down at the guitar. It can be (and sounds best when) blended with a front mic.

[Image Text: credits – Venus Theory on YouTube]
It works because it captures what the guitarist hears — airy, organic, and surprisingly full sound. Engineers often use this to add realism to a close-miked tone. Use it when you want a human, intimate feel in the track.
4. Mid/Side (M/S)
Flexible Stereo, Mono-Safe
The M/S mic placement technique involves placing one cardioid mic (Mid) pointed at the guitar and one figure-8 mic (Side) facing sideways.

That’s not it; you must also configure a few settings to get the sound right. First, duplicate the figure-8 recording.

Then, pan these copies out hard left and hard right.

Then, on the duplicate copy, invert the phase.

The transformation is complete: your acoustic guitar now delivers a rich, spatial tone that sounds as good as it should.
This technique works because you can control stereo width after recording. And if the mix folds to mono, the Side info cancels out cleanly, leaving a perfect mono signal. Use it when you want stereo control with zero phase stress.
5. Overhead Stereo Pair
Wide, Balanced, Unobtrusive
Originally, it was a drums recording technique, but it works well for acoustic guitar as well. Two mics are placed above the guitar, pointing down at the strings and body.

It captures the full instrument without the exaggerated highs of close-miking. There is less finger noise and more natural balance. Use it when you want a roomie, honest acoustic tone.
6. Add a Room Mic
Depth, Air, Ambience
A mic (omni or figure-8) placed 5–10 feet away captures the room’s character. It adds space and realism—when blended subtly with the close mic, it can make the whole track breathe.
Use it when your room sounds good, and you want your mix to feel alive.
Final Tip: Try these techniques. Blend them. The best sound is the one that works for your room, your fingers, and your mix. Use your ears, not just the diagram.
Post-Processing: After Recording
You’ve got your take—the tone’s right. But a little polish can take it from good to finished. Here’s how to bring out the best in your recording without overthinking it.
Condenser mics can sound a little too clean, especially on cheaper interfaces. Try a tape saturation plugin like the Chow Tape Model. It adds subtle grit and glue, like hitting a reel of tape instead of hard drive zeros.

Link: Chow Tape Model Plugin
If your playing is a bit uneven (maybe some harsh peaks or punchy strums), throw on a VCA-style compressor to control spikes. Analog Obsession’s dBComp is a great start. Set a gentle ratio, and let it smooth things out. The result will be tighter dynamics without killing the feel.

Link: Analog Obsession’s dBComp Plugin
Strings hiss. Nails scrape. It’s part of the sound — but sometimes it’s too much. A simple de-esser, or a dynamic EQ like TDR Nova, can tame those squeaks around 3–7kHz. The result is a cleaner tone without muting the life out of it.

Link: TDR Nova Plugin
Tip: Want more width without fake stereo tricks? Record the same part twice and pan them left/right. Do not copy/paste — perform it again. The tiny differences in timing and tone make it feel alive.
DAW Settings: For Acoustic Guitar
A precise DAW setup means fewer mistakes and better takes. Let’s build a session that sounds as good as your guitar.
Step 1: Initial Settings
Open your DAW and create a new project. Set the sample rate to 48kHz and the bit depth to 24-bit. This will give you clean, high-resolution audio that’s video-friendly and won’t crush your CPU.
Choose WAV or AIFF as your recording format — never MP3.
Tip: Only go higher than 48 kHz if you’re planning extreme processing or need it for film work. Otherwise, it’s overkill.
Step 2: Add Tracks
Using one mic? Create a mono track. Using two? Either make a stereo track or two mono tracks for more control. Two monos let you pan, process, or EQ each mic individually.
Tip: Name your tracks clearly — e.g., “Guitar Neck Mic,” “Guitar Bridge Mic,” or “Mid” and “Side” for M/S setups. You’ll thank yourself later during editing.
Step 3: Set Inputs & Enable Phantom Power
Assign each track to the correct interface input (Mic 1 = Input 1, etc.). Turn on +48V phantom power for condenser or active ribbon mics and give them a few seconds to power up.
Tip: Label your cables and channels before recording. Keeps things tight when you’re in a creative flow.
Step 4: Dial In Your Levels
Have the player run through the loudest section of the song. Watch the meters. Aim for peaks around -6 dBFS (loud enough to be clean but with room for dynamics).
Don’t let the signal hit 0. Distortion from digital clipping isn’t musical — it’s just broken.
Done right, this DAW setup disappears behind the music, letting you focus on performance, not problem-solving. This setup is tested and verified on Reaper, Logic Pro, and FLStudio and works the same across most major DAWs.
Conclusion
It’s not about chasing perfection; it’s about getting the best version of what’s already there. With the right prep, smart mic choices, and a few dialed-in tweaks, you can make your acoustic guitar sound honest, full, and studio-worthy — even in a quiet bedroom.
Listen closely. Adjust slowly. You’ll hear when it’s right.
FAQs
Q: What’s the best mic placement for fingerstyle?
Point a small diaphragm condenser at the 12th–14th fret, 6–10 inches out. It captures detail without boom. Add a second mic near the bridge or over the shoulder for more depth.
Q: Can I record a good acoustic guitar with a USB mic?
Yes. A quality USB condenser (like a Blue Yeti) can sound great with careful placement and a quiet room.
Q: What is the 3:1 rule in recording?
When using two mics, keep the second at least three times farther from the source than the first. It helps avoid phase issues that mess with tone and clarity.