.png)
.png) Français
Français .png) Deutsch
Deutsch .png) Italiano
Italiano .png) 日本語
日本語 .png) Português
Português  Español
 Social media influencers use Instagram stories regularly to engage with their audience. They may like to add their audio to these social media clips to give a personal touch to their stories. By doing so, these influencers will be able to deliver their message through simple clips. Moreover, this technique helps Instagrammers avoid putting static pictures or boring videos into their account.
Throughout this article, we will familiarize you with three detailed methods to record and integrate your audio with video for a personalized Instagram story. Therefore, go through these steps to learn how to add your voice to social media stories.
3 Ways to Add Your Own Audio to an Instagram Story
You can conveniently add your own audio to an Instagram story via the app’s built-in recording feature or by uploading a pre-recorded audio from your device. This section will discuss three ways to do that, including the following:
Way 1. Use Instagram Reels or Stories to Add Original Audio
Through this method, users can add their original audio by starting a reel or story on Instagram, then using the microphone to record their sound. It’s a pretty straightforward technique for adding personal audio:
Step 1. Tap the plus (+) icon on Instagram to launch your camera.
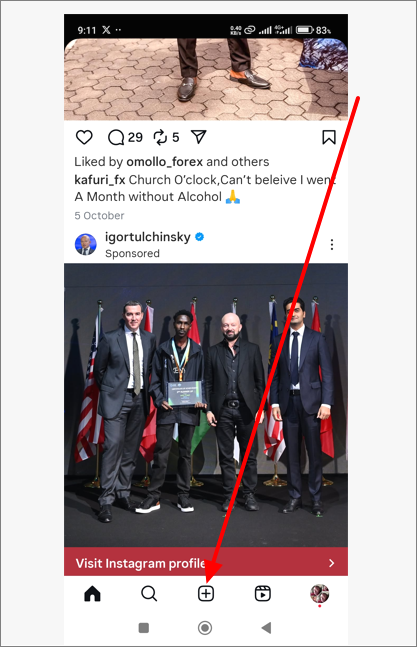
Step 2. Next, choose your “Story” or “Reel” depending on what you want to create.
Step 3. Tap and hold the Record button and speak while recording. Instagram automatically captures your voice as part of the video.
While recording the audio, you also need to use a good microphone to avoid background noise and record high-quality audio. For this purpose, we recommend you use Hollyland Lark MAX because of its long-range and innovative MaxTimbre Mic Technology.

Hollyland LARK MAX - Professional Wireless Microphone
A professional wireless microphone system featuring studio-quality audio with advanced noise cancellation.
Key Features: Studio-Quality Audio | Magnetic Attachment | 8GB Internal Recording
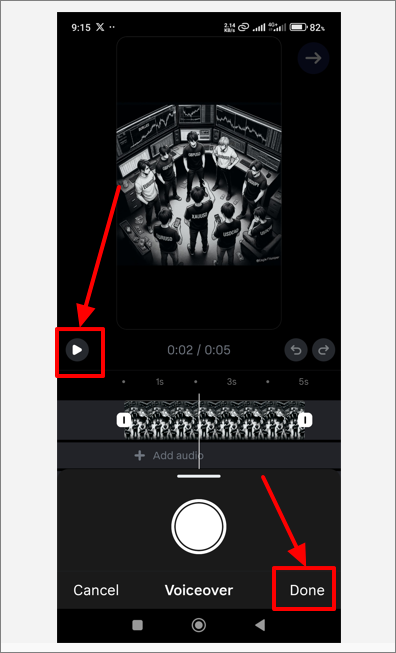
Step 4. Use the volume slider to adjust and balance your audio levels.
Step 5. Once you’ve done this, you can preview your reel/story and audio recording by tapping the Play button. If everything is fine, tap “Done” to post your Instagram content.
Way 2. Use the In-App Voiceover Function on Instagram
This method lets you upload a video from your device to your Instagram story and add your own audio using the built-in voiceover function.
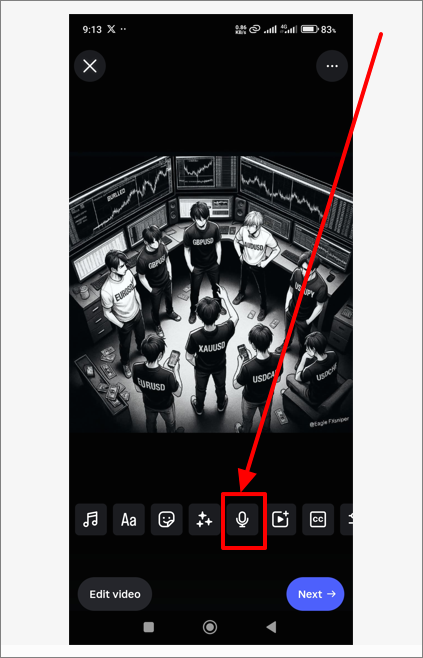
Step 1. Open Instagram and upload a video from your camera roll.

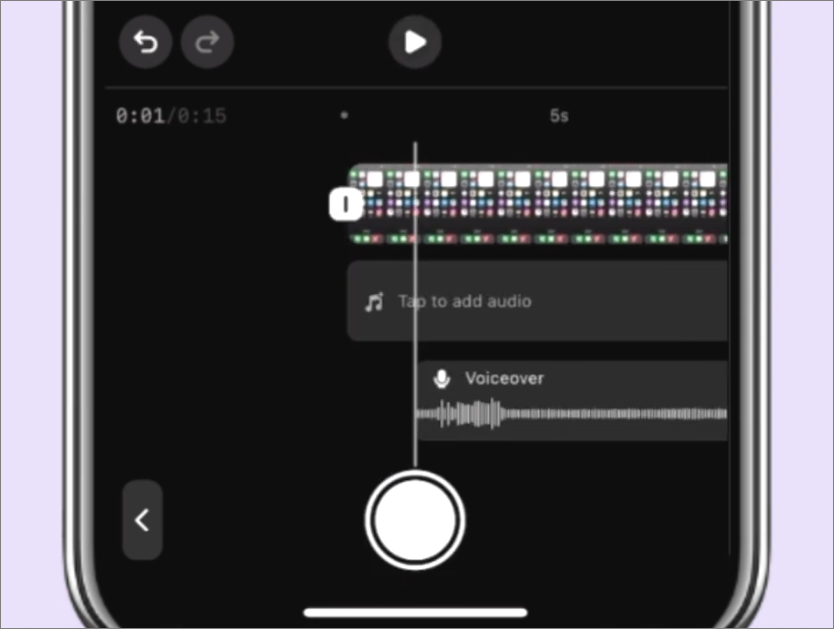
Step 2. Navigate to the music note icon at the top and choose “Voiceover” from the audio options provided.
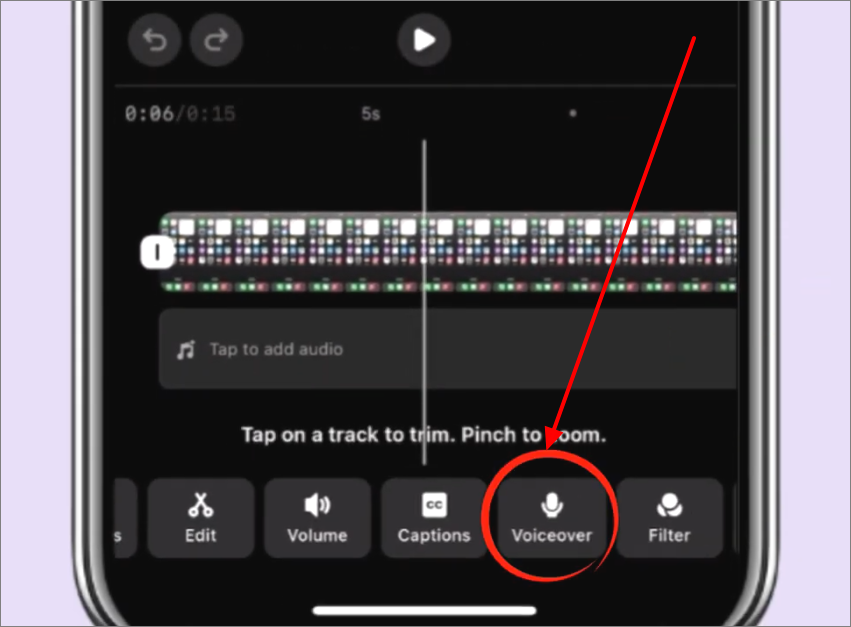
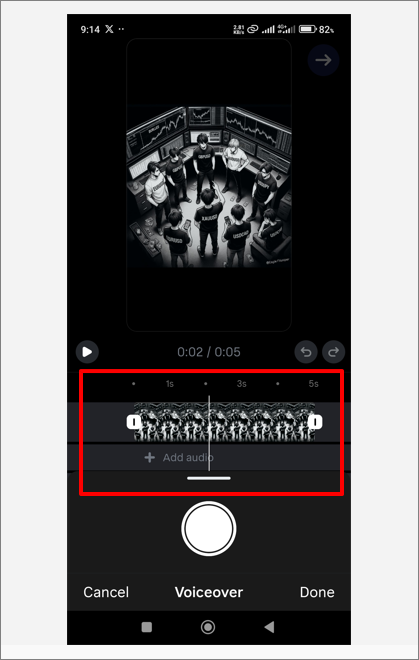
Step 3. Next, move the playhead to where you want your narration to begin in your video.
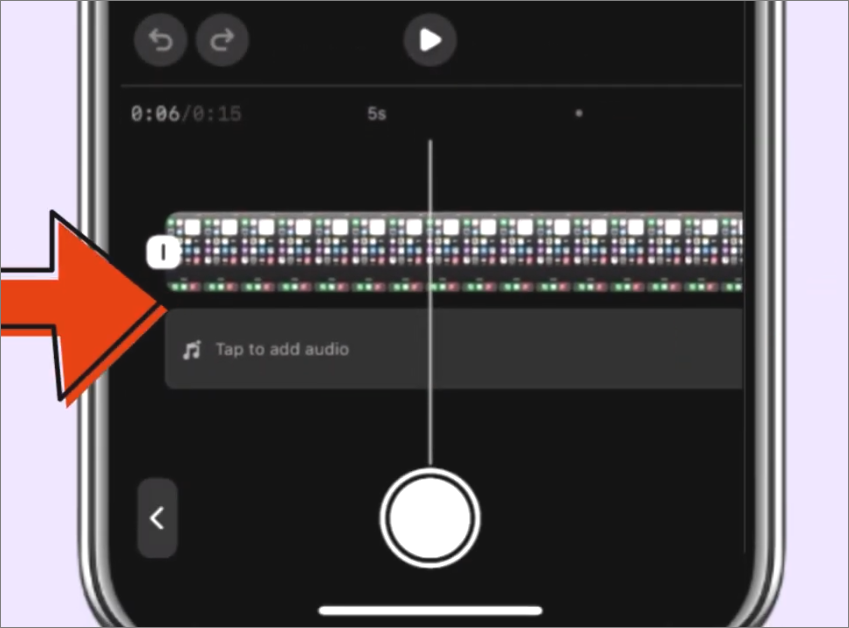
Step 4. To start recording your voice, hold down the “Record” button and release it when done.
Step 5. Once you’ve finished adding your audio recording to the video, trim any unwanted sections per your preference. You can also use the slider to adjust the voiceover volume before posting your content.
Way 3. Upload Custom Audio from Your Device Via Third-Party Tools
This method lets you upload a custom audio from your device, import a video, and use a third-party tool to edit the volume levels/sync audio to visuals. One tool that gets the job done conveniently is InShot. Check these steps:
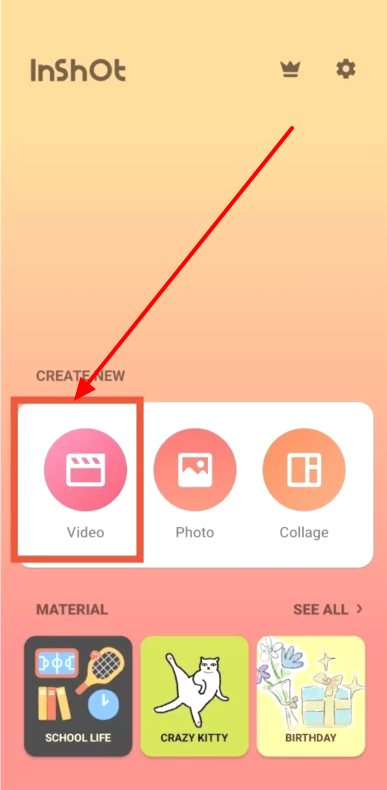
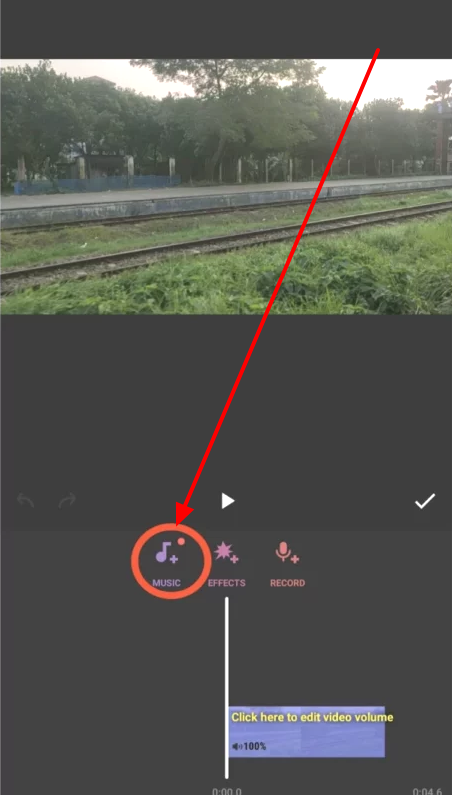
Step 1. Launch InShot and open a new project.
Step 2. Navigate to the “Create New” section and select “Video” to import a video from your camera roll.
Step 3. Next, tap the “Audio” button and choose “Music” or “Sound Effects” to upload your custom audio.
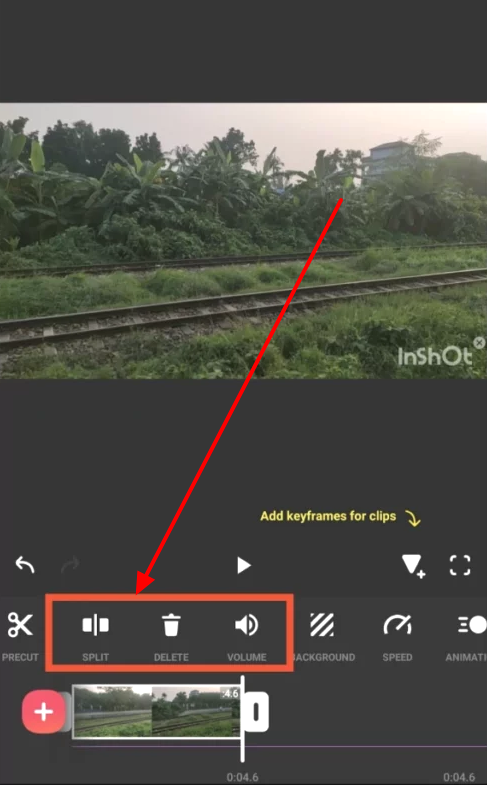
Step 4. Once the system uploads your audio, use the “Edit” functionality to adjust the timing and volume so that they match your video.
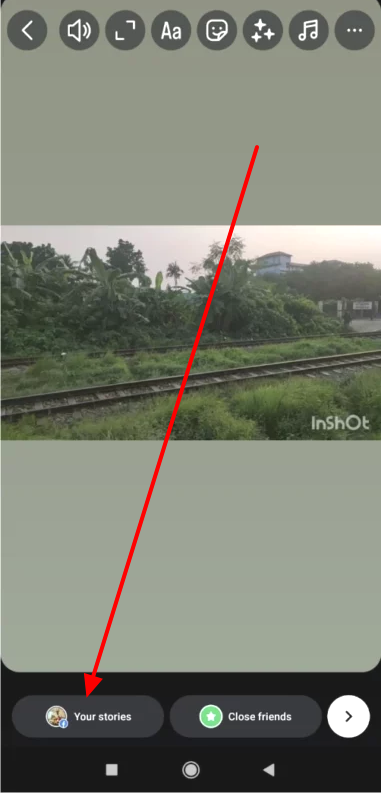
Step 5. Export the edited video and audio from InShot to your device storage.
Step 6. Lastly, go to Instagram and upload the edited content from your local storage. You can then post the video and custom audio in your IG stories.
Why Add Your Own Audio to Instagram Stories?
After learning the different ways to add your own audio to Instagram stories, you may wonder whether it has any benefits. Well, adding personalized audio to your Insta stories helps to:
- Showcase your personality and brand identity: By adding your voice narration, signature sound effect, or background music, you’re able to stand out from the crowd through your brand voice.
- Improve storytelling and emotional impact: Adding personalized audio to your Instagram stories helps set the mood, bring out emotions, or create dramatic moments that can not come out through text or visuals.
- Add original voiceovers and commentary: Adding audio to your Instagram tutorials, vlogs, or reviews makes the message being passed across clearer and more authentic.
- Avoid copyright restrictions: Using your own audio on IG makes you beat the platform’s built-in music licensing restrictions. Hence, you have more control over your content.
- Align content across platforms: If you’re already using your voice on other platforms like TikTok or YouTube, adding it to your Instagram stories promotes consistency and multi-platform brand recognition.
Indeed, adding audio to your IG content doesn’t make it only stand out but also boosts your brand’s identity and uniqueness.
Conclusion
After going through this article, you have learned the different ways to add your own audio to Instagram stories. You can add audio using Instagram’s built-in recording functionality or by uploading custom audio. Third-party tools like InShot let you easily edit your audio and video files for the best IG content.
If you truly want your Instagram Stories to stand out and feel more authentic, crystal-clear personal audio is the key. Using a compact wireless lavalier microphone lets you easily record professional-quality voiceovers, instantly elevating your storytelling and viewer engagement.
FAQs
Q1. Can I add audio to a photo on Instagram Story?
Yes, you can add audio to an image while uploading it to the Instagram story. For this purpose, you can utilize third-party applications like InShot. Other than that, users get to add music or other viral clips while uploading stories on Instagram.
Q2. Why isn’t my audio file playing after uploading to Story?
Temporary glitches might be responsible for the lack of audio content while watching the Insta story. You can choose to restart the device or application to fix this particular issue. Moreover, copyrighted music may also be the reason why your audio file isn’t playing.
Q3. How long can my audio be for an Instagram Story?
Your audio clip or song needs to be only 15 seconds long to fit the Insta story duration. Any audio longer than this duration will get trimmed when you attach it to your video or image.
Q4. Can I add multiple audio clips to a single Story?
Yes, you can add multiple songs or recorded audio voices to your video by using applications such as Filmigo. After adding your desired audio files to the video, you can easily upload the clip as an Instagram story.
Q5. Is it possible to adjust the audio volume in Instagram Stories?
While watching the stories on this social media platform, you can easily adjust the volume by using the volume-adjusting buttons on your device. To control the audio volume before uploading a video, you need to use third-party video editors.