.png)
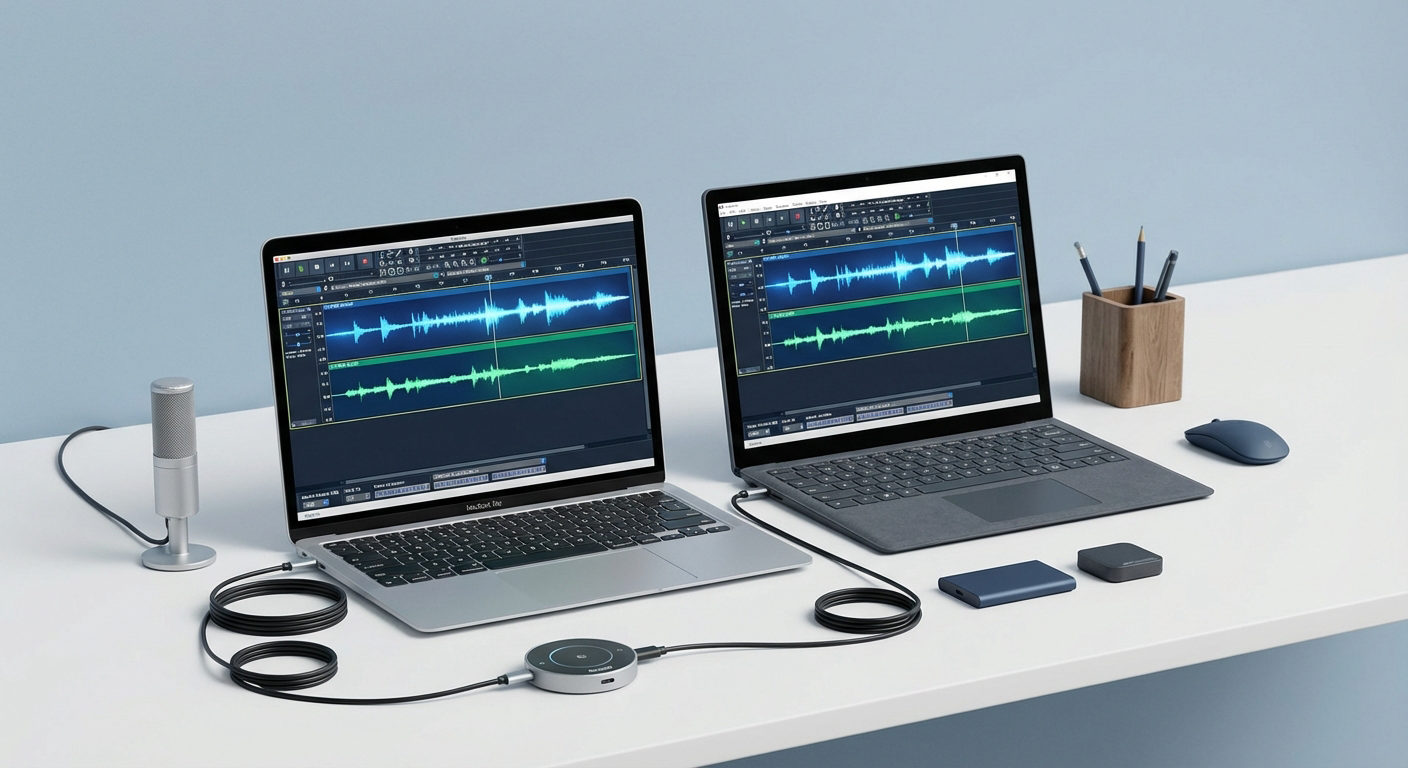
While attending an online meeting, you may want to record the audio on your desktop to keep the record of this meeting for future use. Many recorders are available in the market to help professionals in different industries record audio content from their devices. Whether you want to record YouTube songs or game background music, these audio recorders will make the task easier for you.
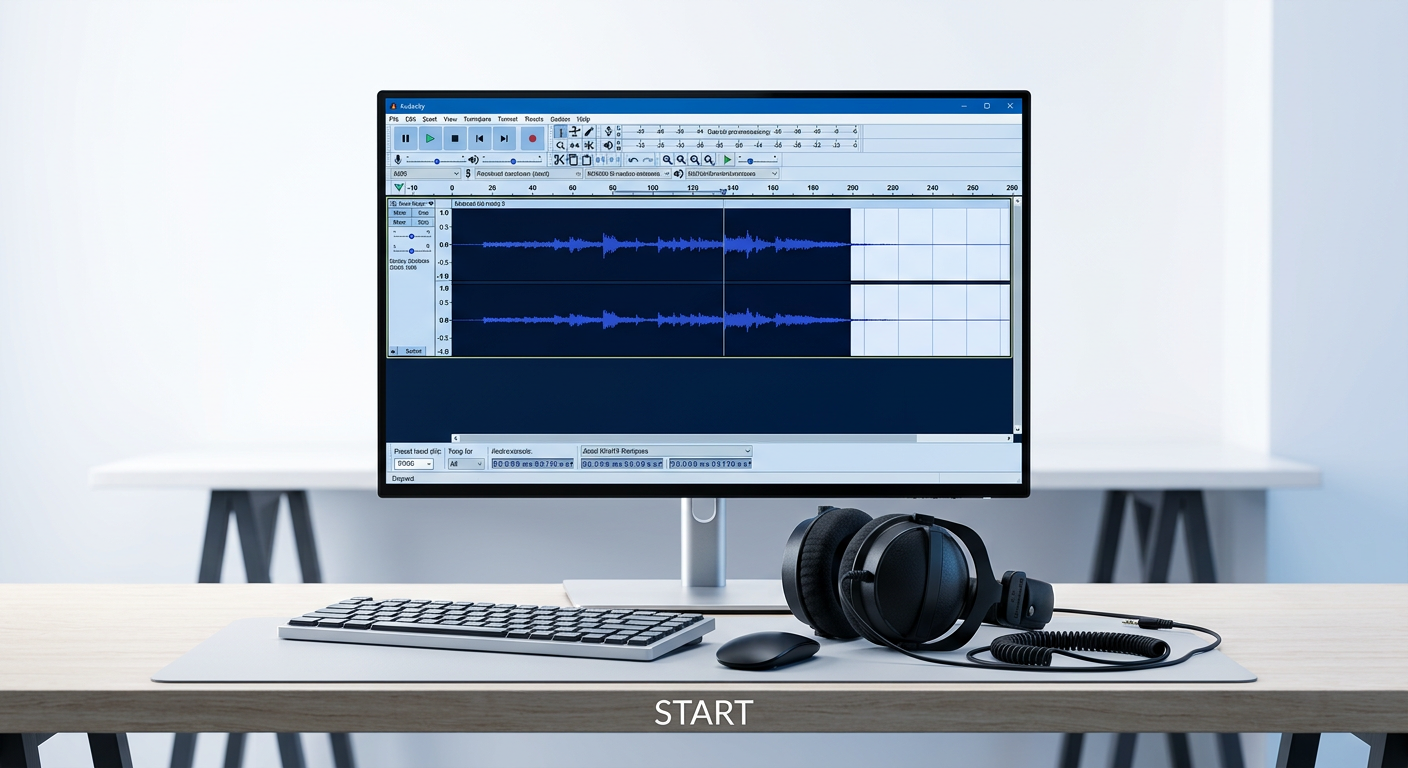
Audacity is one such tool that allows you to save the audio from different applications in the best output quality possible. Using this audio content recorder, you can export files in various formats, including MP3 and WAV. Let’s learn how to use the Audacity audio recorder for crystal-clear sound recording sessions.
Step 1: Download and Install Audacity on Your System
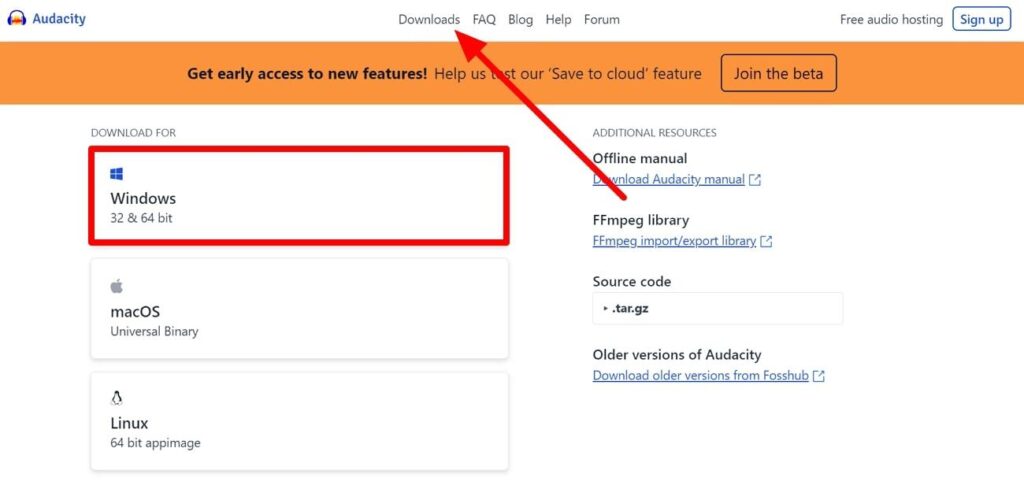
Before you start the audio recording task, you need to install this recorder in your system. After visiting the official website, access the “Downloads” tab, and you will see different download options for Windows, macOS, and Linux.
From here, users can download the setup suitable for their device to proceed with the desktop sound recording. The following steps will help you to successfully install Audacity on your computer:
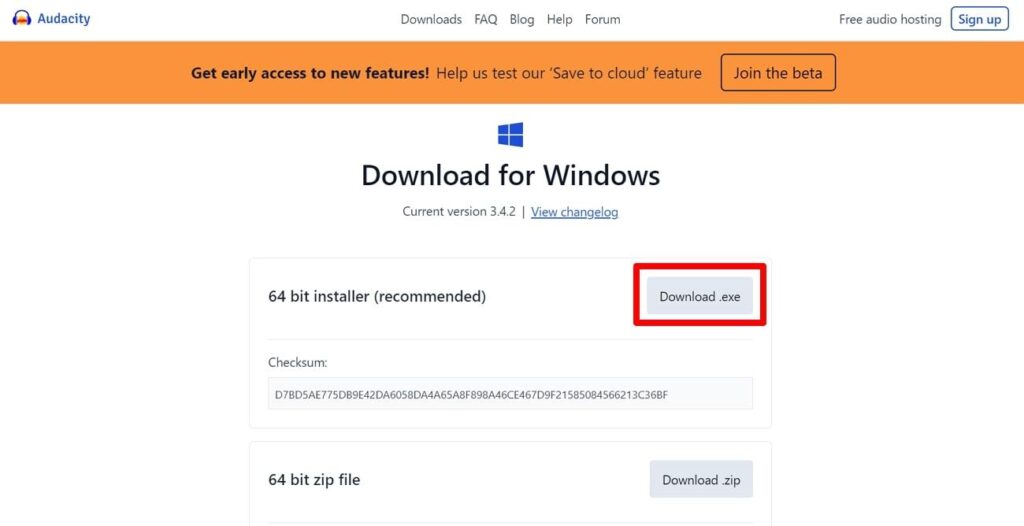
- First and foremost, access the official website of Audacity on your preferred browser. Now, hit the “Downloads” tab to reach different options for multiple operating systems. Afterward, press the “Windows 32 & 64 bit” button to get a new screen.
- Moving forward, you will see different versions of Windows installation setups for this software. Here, you can download the “64-bit Installer” setup by hitting the “Download .exe” button.
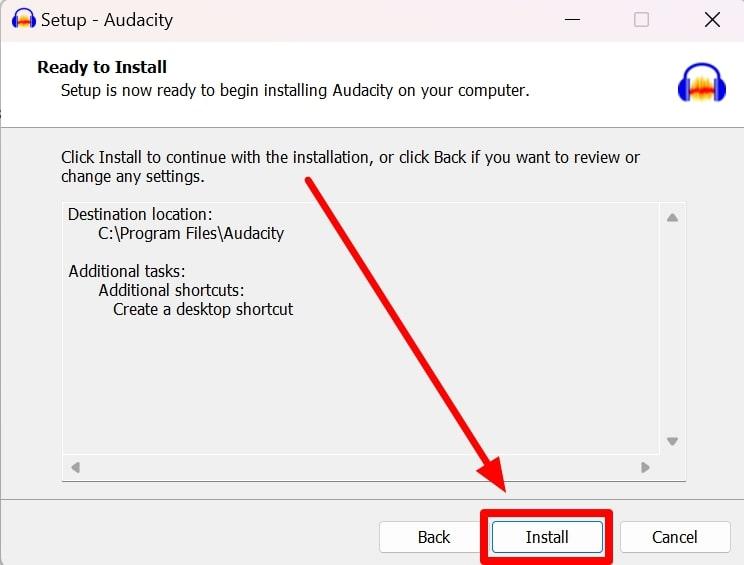
- Once the setup is installed on your PC, run it as the administrator and follow the on-screen instructions to install this audio recorder on your device.
Step 2: Configure Audio Host and Source
Upon installing this audio recorder on your Windows device, you can enter the “Preferences” settings dialog box to change the host and source settings. In addition, there are many other settings available to optimize the quality of your output recording.
Within these settings, users can also adjust the latency values to optimize the recorded audio. Anyone can apply these settings before starting the recording using the following steps:
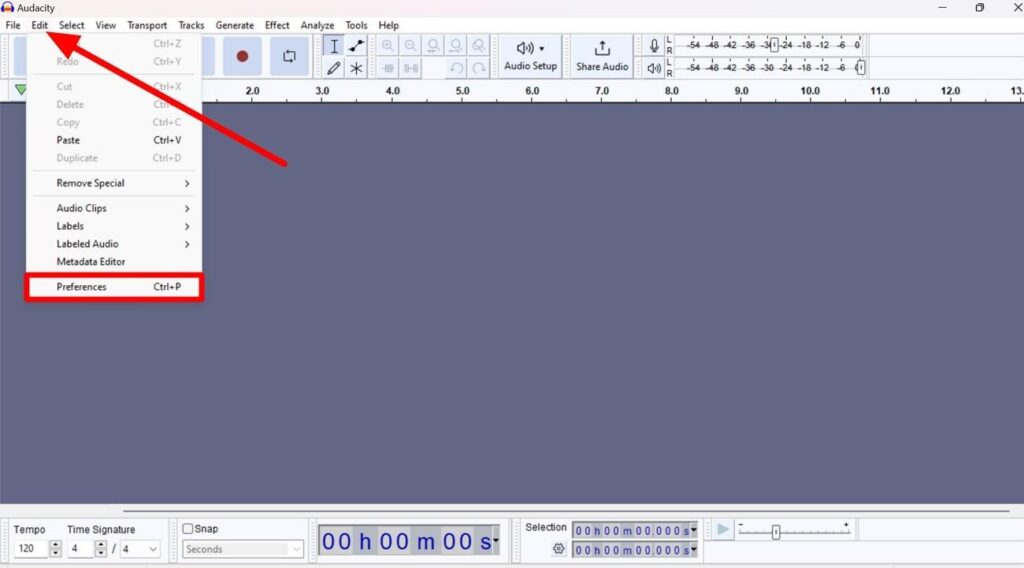
- Start the process of configuring the audio host and source by launching the Audacity software on your PC. Now, click on the “Edit” tab and choose the “Preferences” option to access a new window for optimizing these settings.
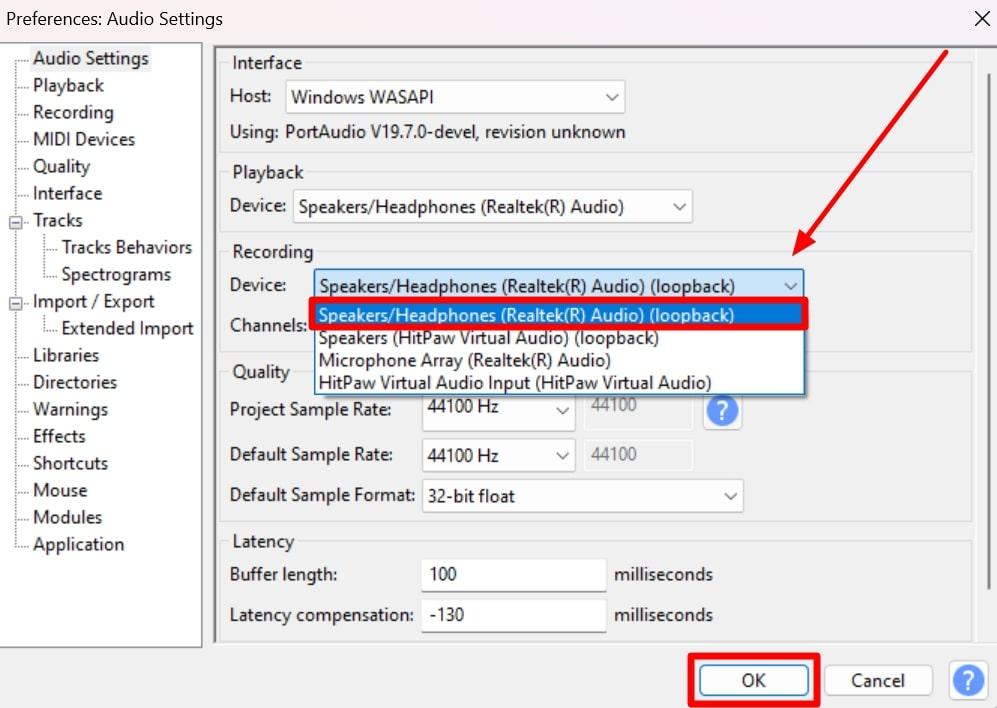
- Afterward, press the “Audio Settings” tab and access the “Host” drop-down menu from the “Interface” section. Within this menu, hit the “Windows WASAPI” option to select it as a host to record the desktop audio.
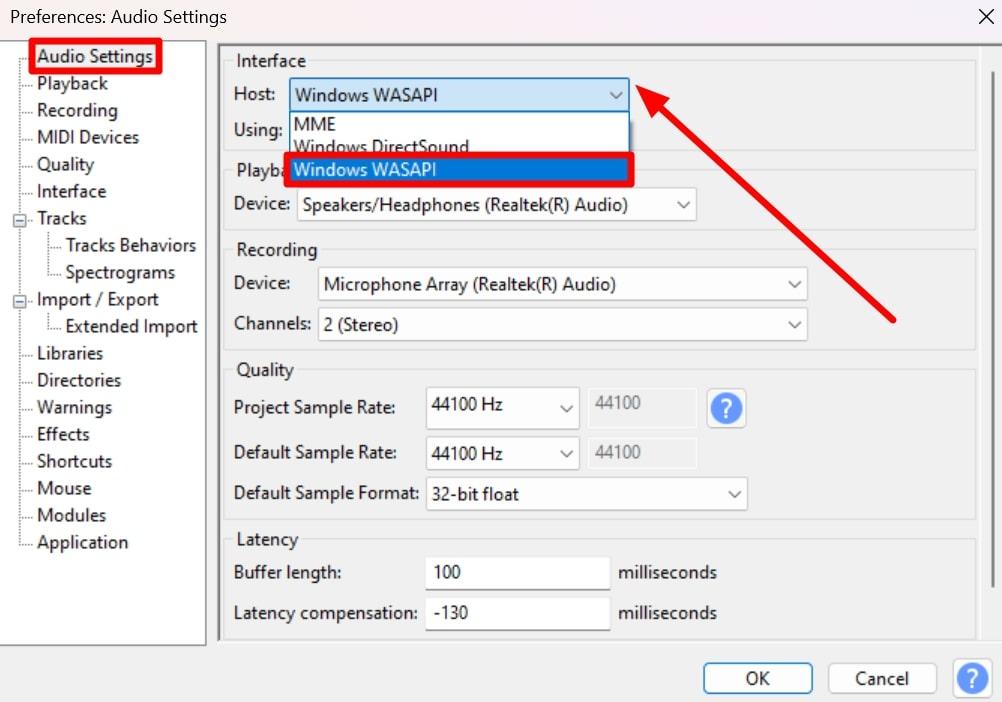
- Once you set the host for audio recording, click on the “Device” drop-down icon under the “Recording” section. From here, choose the desktop audio output by pressing the “Speakers/Headphones (Realtek® Audio) (loopback)” option. After completing all these settings, hit the “OK” button to finalize the selections.
Step 3: Adjust the Recording Settings
After configuring the host and source, you can move forward to optimize the recording setting for an optimized output. You can access these audio recording settings through the “Preferences” windows of this software.
In this dialog box, you can enable the sound-activated recording and software playthrough options. Let’s dig deep into the steps you need to follow to optimize the recording settings on Audacity.
- Access the same “Preferences” dialog box through the “Edit” tab using the steps explained before. Then, hit the “Recording” tab to reveal several settings for the desired recorded audio.
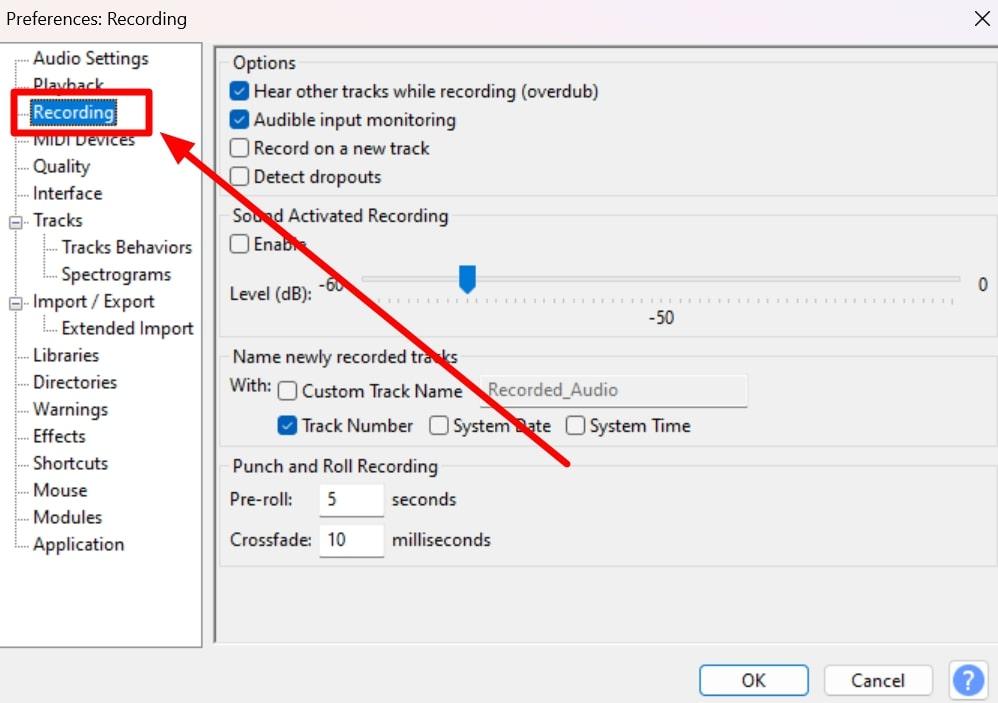
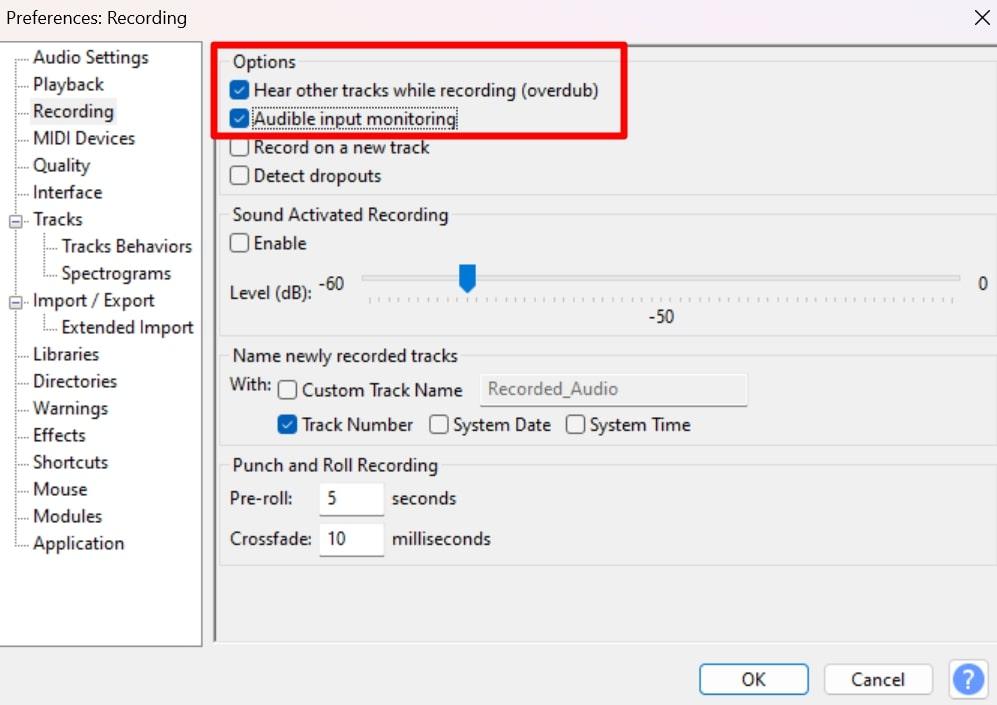
- Next, you need to check the “Hear Other Tracks while Recording” and “Audible Input Monitoring” options under the “Options” section to monitor sound quality while recording.
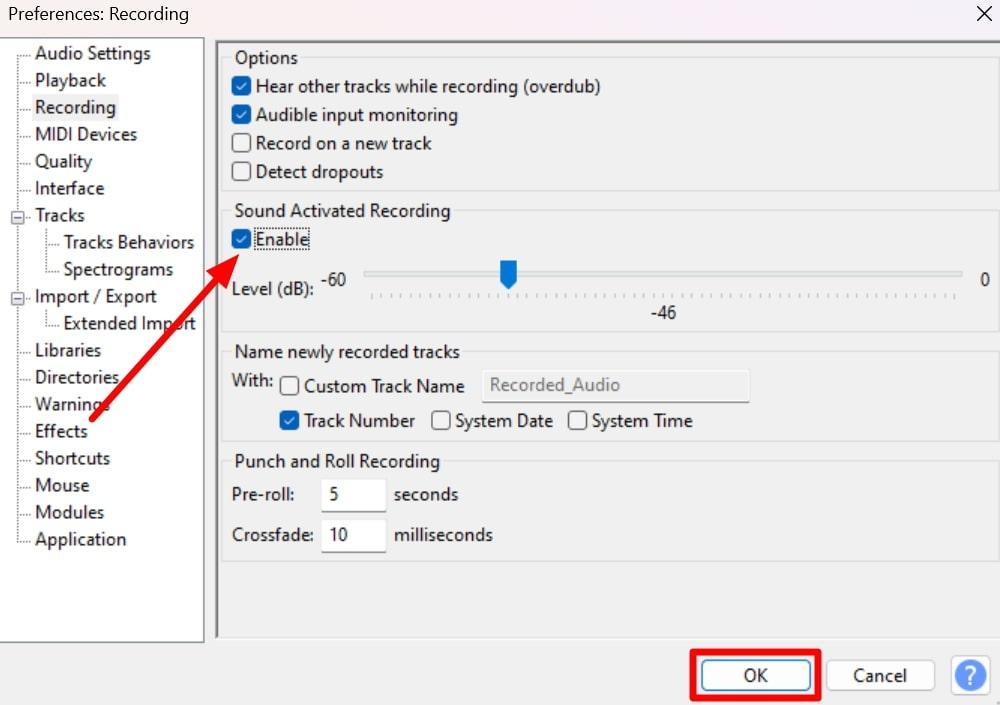
- Finally, enable the “Sound Activated Recording” option and adjust the “Level” values to optimize the recording process. Upon finishing these settings, press the “OK” button to proceed.
Step 4: Prepare for Recording Audio
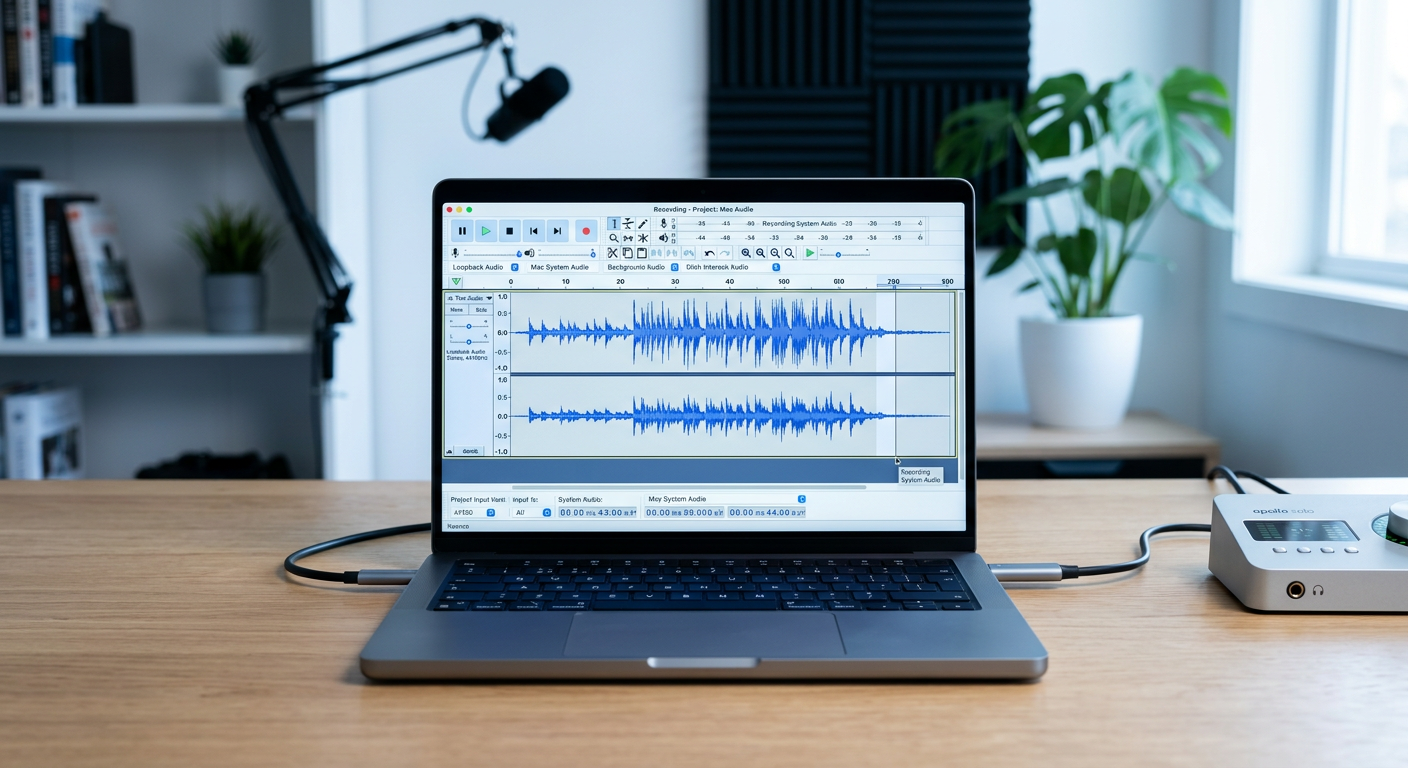
Once you optimize all the recording settings, start preparing your desktop to ensure the best output. For this purpose, we recommend you close unnecessary applications from which you don’t want to extract the audio.
Afterward, proceed to open the application, such as YouTube, and play the music or podcast you want to record. In addition, you should connect an efficient microphone like Hollyland Lark M2 to your device if you’re going to capture your voice.

Hollyland LARK M2 - Mini Lavalier Microphone
An incredibly lightweight and compact wireless button microphone that captures high-fidelity audio.
Key Features: 9g Button Size | 48 kHz/24-bit | 40 Hours Battery
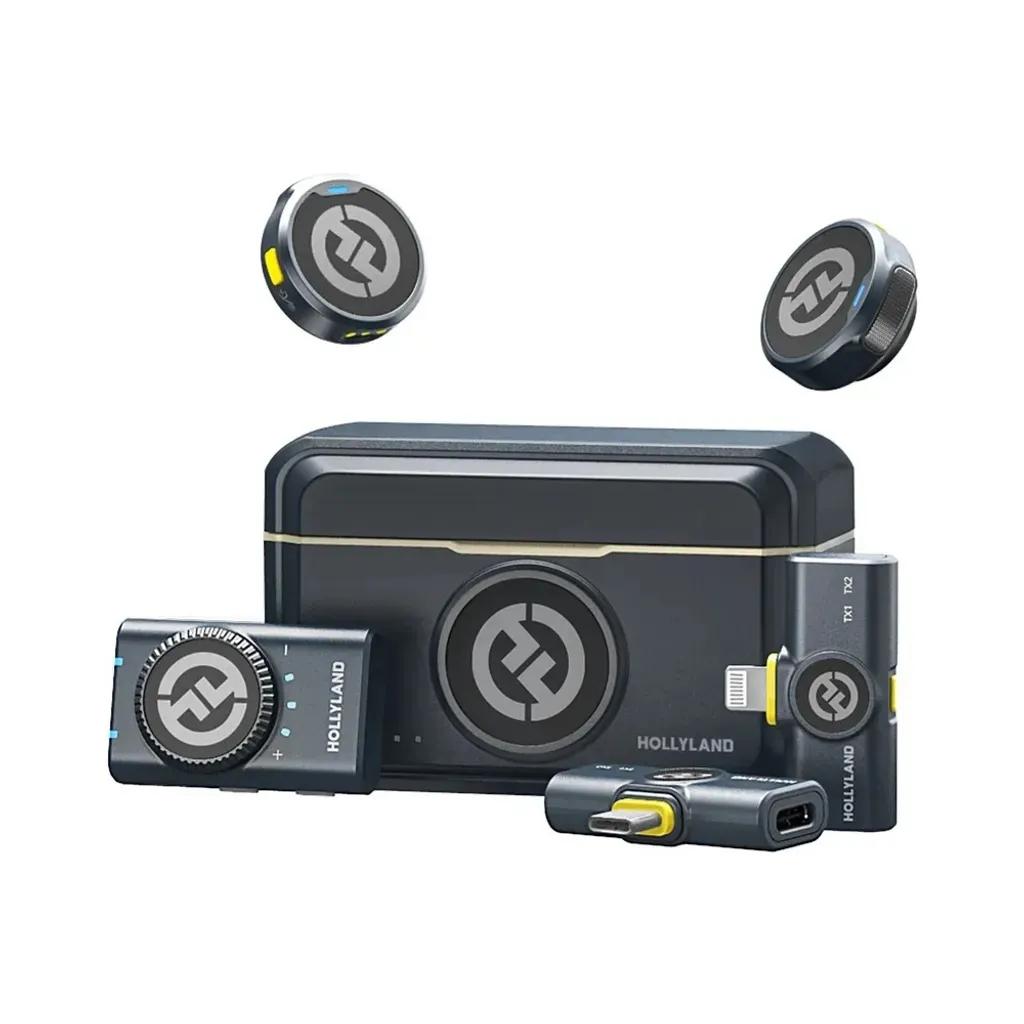
With this wireless mic, you will be able to record crisp quality sound without background noise interference. Moreover, it has an extended battery time of over 30 hours to help you enjoy long recording sessions without interruption. Other than that, its two transmitters make it optimal for recording reviews for video playing on your desktop.
Step 5: Start Recording Your Desktop Audio
Now, you are ready to finally start recording your desktop audio with the help of Audacity. Follow the steps explained below to capture the audio content with this highly efficient application:
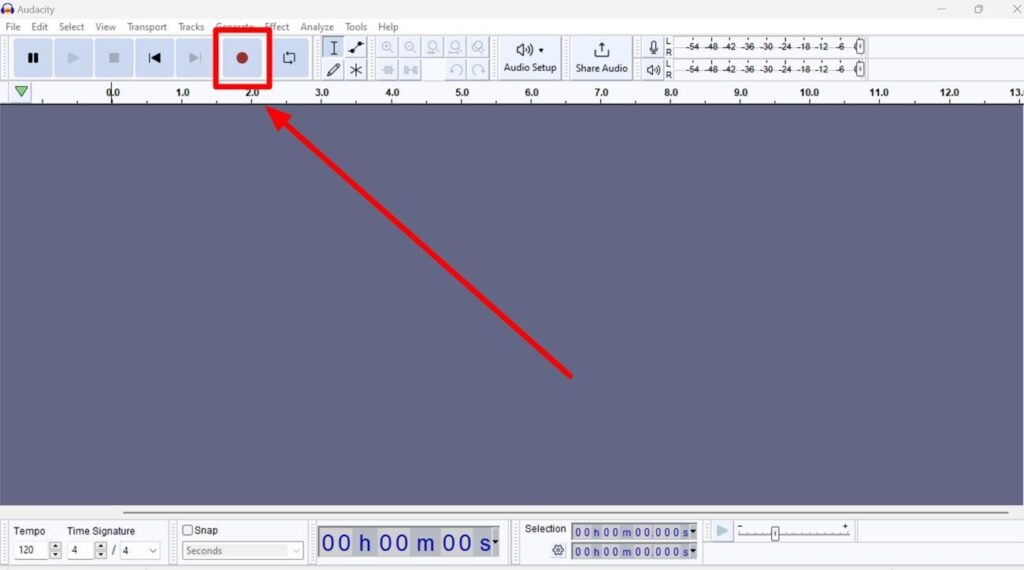
- Begin this recording process by relaunching this audio recording application on your system. Now, hit the “Red” circle button to start capturing the desktop audio.
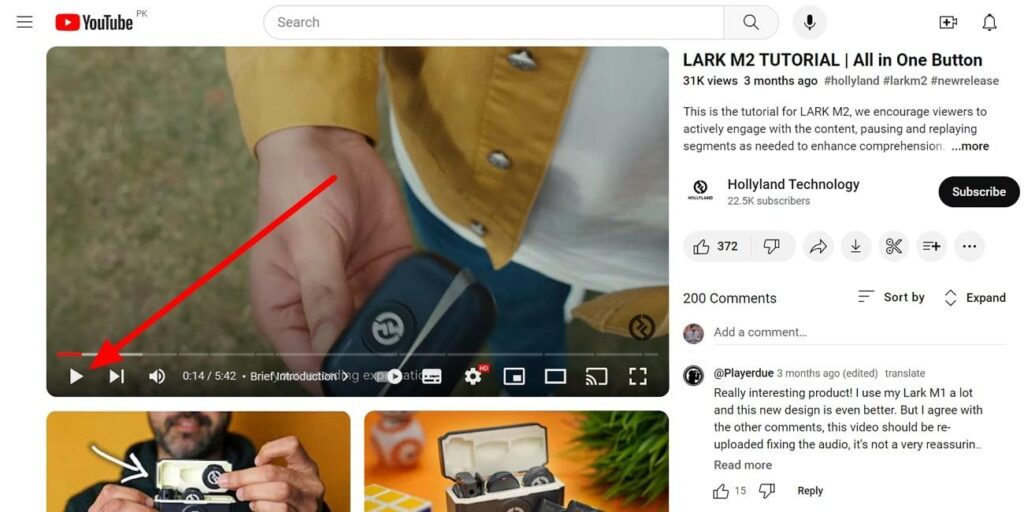
- Next, go to YouTube again and start the previously prepared video by hitting the “Play” icon.
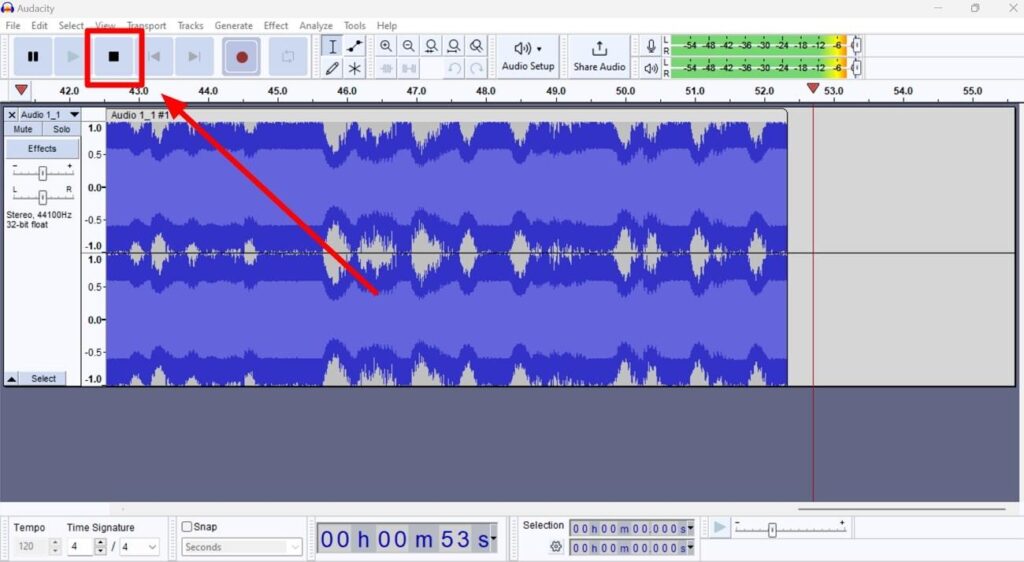
- When you are done recording the desired audio, press the “Rectangle” button to stop the audio content recording session.
Step 6: Edit and Export Your Audio Recording
Audacity also allows you to edit the recorded audio to apply the desired effects for personalization. In addition, you can also trim or split the recording with the help of this audio content creation tool.
After applying the desired changes, you can export the whole project or separate the audio file in your favored format. You can get guidance from the following steps to customize your recorded sound before exporting.
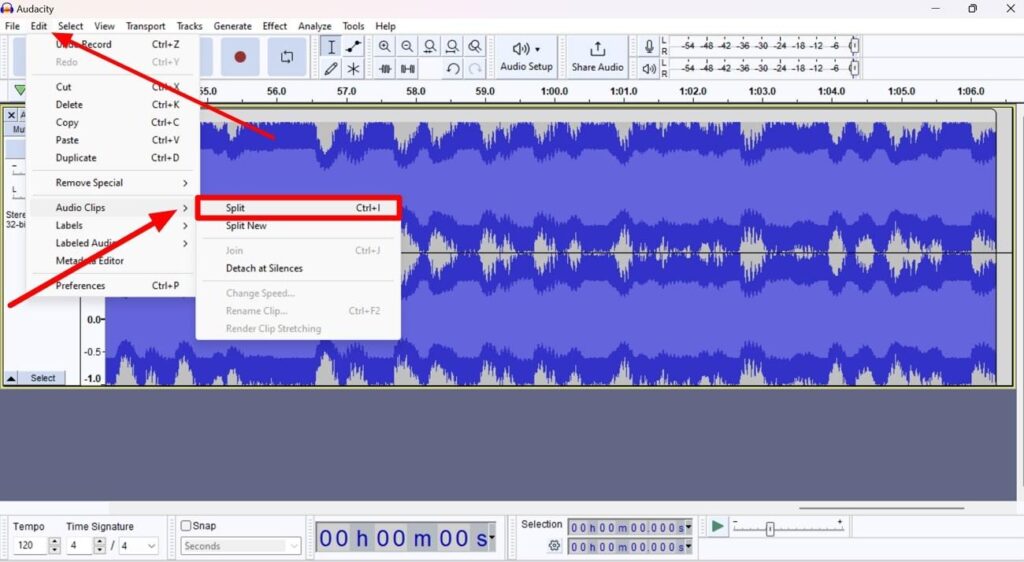
- First, access the “Edit” drop-down menu and hover over the “Audio Clips” option to reveal further settings. Now, press the “Split” button to optimize the length of your audio clip.
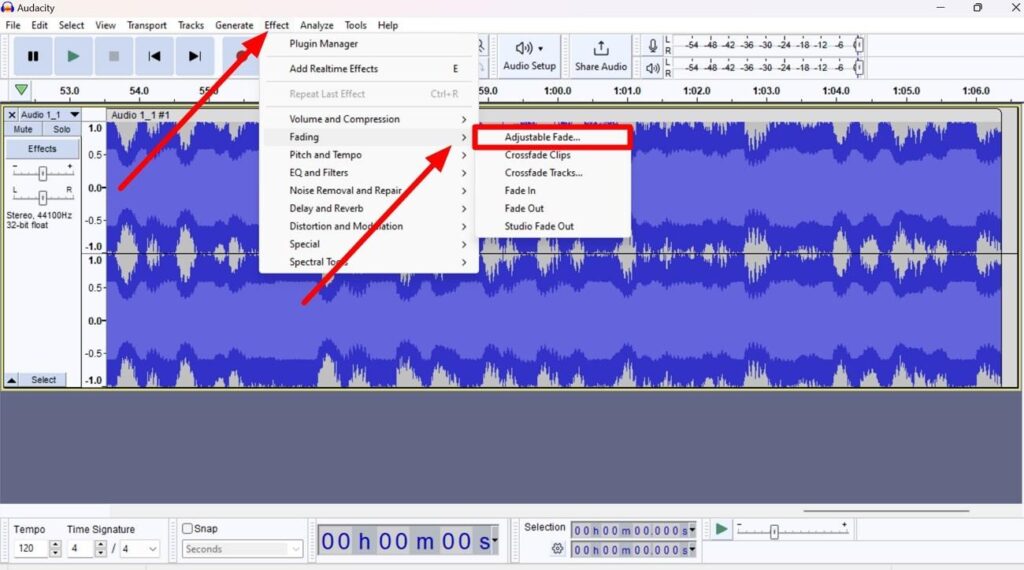
- Afterward, hit the “Effect” tab and click on the “Fading” effect to access further options. From here, choose the “Adjustable Fade” or any other option to apply the desired effect.
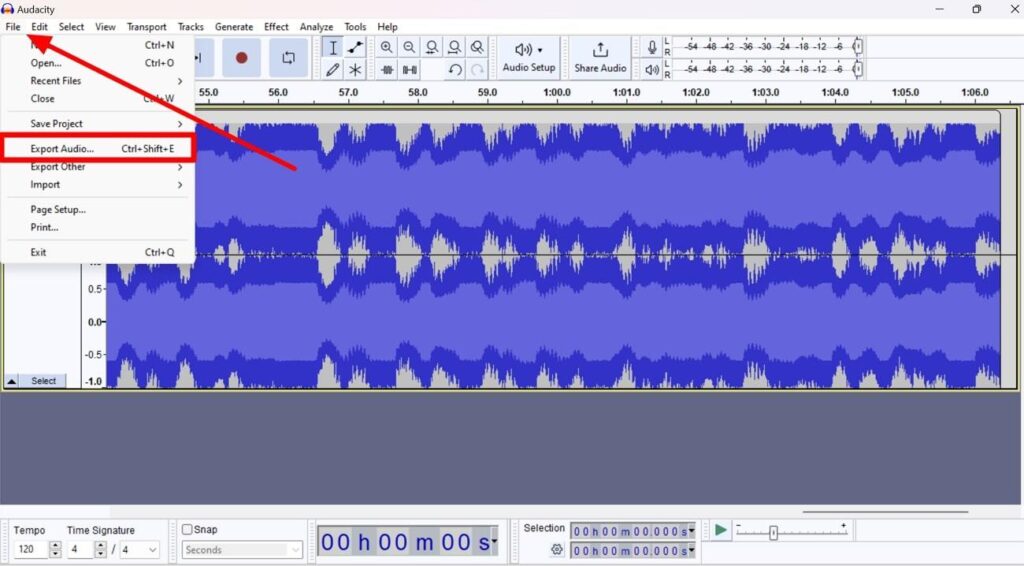
- Next, click the “File” tab on the top left of your screen and choose the “Export Audio..” option to access a dialog box.
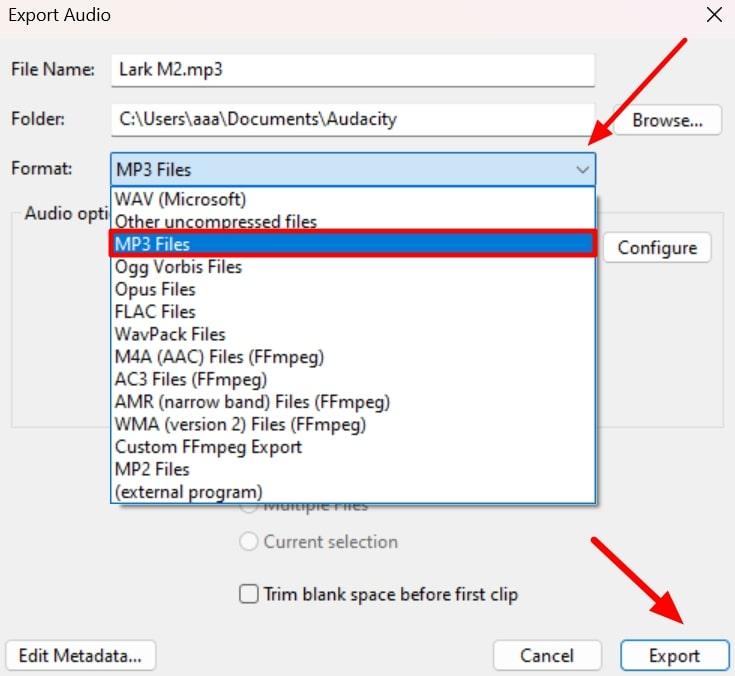
- On this new window, select the file name and desired location to store the recorded audio. From the “Format” drop-down menu, choose the “MP3 Files” option before hitting the “Export” button to complete this process.
Step 7: Troubleshooting Tips
Users facing any difficulty while recording audio using the steps explained above can get help from these troubleshooting tips. Each of these tips will solve any issue related to output quality or audio configuration settings. Let’s go through these tips to see if applying them solves your problem.
- When you are continuously failing to record the audio, we recommend you visit the “Preferences” dialog box to make sure the right device is selected for recording.
- Users who are facing issues with the output sound quality should check the volume values of both the computer and the application from which they are recording audio.
- If none of the fixes work, you should ensure that your installed sound card supports the loopback recording feature. In such cases, you may need to apply the additional configuration settings.
Conclusion
After going through each step of this guide, you have now become an expert in recording desktop audio with Audacity. With its multiple configuration settings and editing features, Audacity stands out as one of the best tools to capture computer sound. Moreover, if you want to record your own voice while recording desktop audio, we recommend you connect Hollyland Lark M2 to your device.
FAQs Related to Recording Desktop Audio with Audacity
Q1. Can Audacity record streaming audio from websites?
Yes, you can surely use Audacity to record audio from streaming platforms without any hassle. This audio content recorded supports websites, including Netflix, YouTube, and Spotify, to record audio for future listening sessions.
Q2. Why is my recording silent or at a very low volume?
You can face this issue when the volume levels of your computer or application from where you are recording audio are too low. We recommend you keep volume values as high as possible to ensure the output is crystal clear. When recording your own voice using an application like Audacity, you should use Hollyland Lark M2 for the top sound quality.
Q3. How do I record audio from a video playing on my desktop?
If you are looking to record any song or podcast while playing it on your desktop, you can use Audacity for high-quality output. To perform this task, simply launch this audio recorder and press the “Red” circle button. Afterward, you can play the song you want to record from your desktop to start capturing the audio.
Q4. Is it possible to record system sounds and microphone audio simultaneously?
Yes, you can record both system and microphone sound at once using third-party tools, such as EaseUS RecExperts and WavePad. You also get this option while recording the audio content with the help of Audacity.
Q5. Can I record desktop audio on a Mac with Audacity?
Audio content creators can utilize Audacity on the Mac device to record the desktop sound. For this purpose, they need to launch the application and optimize the “Host” configuration settings. Then, they can simply press the “Record” button to start capturing the sound.
Q6. Why does my recording have an echo or bad sound quality?
When recording the sound with a microphone, you can face this issue if the mic is too close to the speaker or source device. We recommend you utilize a high-quality microphone and keep it at a suitable distance while recording the audio content.
Q7. What are the best export settings for high-quality audio?
Professionals usually recommend exporting the recorded audio in the AAC format for the best quality output. Furthermore, you need to set the sample rate and bitrate values to about 48000 Hz and 320, respectively. Finally, choose the “Stereo” option for the “Channel” settings for the desired quality.
Q8. How can I remove background noise from my desktop audio recording?
Audacity gives you the option to remove background noise from the recorded audio through its “Effect” tab. After accessing this drop-down menu, hover over the “Noise Removal and Repair” option to click the “Noise Reduction” button for effective background noise removal.
Q9. Is recording audio with Audacity legal?
Yes, you will not face any legal consequences after recording audio with an Audacity sound recorder. However, when you upload the recorded music to different streaming platforms, such as YouTube and Spotify, you will face copyright infringement charges.
Q10. Can I schedule recordings with Audacity?
Yes, you can schedule recordings with Audacity using the Timer Record feature. This particular functionality lets you schedule when the recording begins and ends. Moreover, you can also specify if you want Audacity to automatically save the project or export it to the desired audio format.