Are you tired of grimy and discolored Airpods pro that are ruining your listening experience? It can happen to anyone. Whether you have been rocking out with your favorite music or taking phone calls, the unsightly buildup of dirt and grime can make the top-notch quality airpods looks like relics from past. But no need to worry because here is a proper solution which is simple as well: regular cleaning.
Life happens and your Airpods pro have to bear the brunt of it. From earwax to dust, the Airpods have seen it all. But don’t feel discourage with the current terrible state of your airpods. If you want to bring back their former glory and condition, then you just need a little care to keep their performance top-notch and looking good.
To keep your airpods pro functionality at their best, cleaning is mandatory. In this advanced era, smart equipments like airpods are the necessity of all those who want to stay connected to everyone that’s why keep them clean is essential. The cleaning of the airpods pro microphone can be challenging because all the cleaning methods are not safe
If you are not familiar about how to clean your airpods, then here we have given instructions and methods to follow.
Get ready to rediscover the former pleasure of listening your favorite music, all while flaunting AirPods pro that look as good as new.
How to Clean AirPods Pro Microphone?
For effective cleaning and sfae maintenance of AirPods, you will need few tools and materials. The electronic devices/accessories that are delicate like AirPdos Pro need more care to keep them safe from potential damage. High quality tools are also the requirement of keeping these AirPods clean.
Choosing the appropriate tools is mandatory to keep the AirPods cleaner and enhance their longevity. Also, cleaning guarantees the optimal performance.
Tools
Here are the tools you need for the cleaning of AirPods Pro;

- Cotton swabs
- 40% or 90% isopropyl alcohol
- Soft toothbrush for cleaning purpose
- Paper towel or any dry lint-free microfiber cloth
- Liquid dish soap and warm water
When you will clean these AirPods Pro, you need to focus on 3 main areas. The eartip, the AirPods body, and the case.
Rules
There are 5 cleaning rules that are also mentioned by Apple to clean AirPods Pro as follows;
- Use clorox wipes/70% isopropyl alcohol for only exterior cleaning of AirPod Pro
- Don’t use wipes on the speaker mesh
- Don’t use bleach for cleaning
- Don’t use any moisture in any AirPod opening
- Don’t submerge the AirPod Pro in any cleaning agent
Cleaning
If you are tired of the earwax buildup on AirPod Pro, let’s get rid of dirty earwax.
First, put down a dry cloth/paper towel on some counter space and gently tap AirPods onto the cloth/paper towel. Keep the eartips down to remove any excess moisture or earwax.
Now remove the eartips by gently pull them off. Also, check if the eartips are clear from the earwax or not. If there is no earwax present then you can use dry cotton swab to clean inside of the eartip. If there is earwax present then clean it with the brush having small wire like loop as shown in the figure below to ensure proper cleanliness. This is the special tool for the cleanliness of hearing aids.

You just need to carefully use this loop brush to clean earwax from eartip without damaging the plastic eartip. When you use this brush to clean eartip then it prevent the plastic screen inside the eartip from getting clogged with earwax as screen is difficult to clean when clogged with earwax. Now you can rinse the eartips with water after cleaning earwax. Do not use any soap etc. just rinse with water after completely disconnected them from the AirPods Pro. After rinsing, wipe the eartips off with dry cloth and let them sit for a moment to dry out.
Now move to the rest of the AirPods Pro cleaning.
Keep the AirPods body clean and use dry cloth to clean them after every use especially if they are exposed to any kind of moisture, sweat, or lotion. As they are water-resistant but not water proof so, take care not to directly submerge them into water at any time.
Start cleaning with the wire mesh of the AirPods Pro. Clean them off with the dry cotton swabs.

If there is still clogging or dirt present then gently use brush to clean it.

Now you can use wipes/alcohol to clean AirPods Pro body. You can use alcohol wipe to wet the cotton swab and use that for cleaning for more improved cleaning.
Do not use any cleaning wipe on the speaker mesh. Avoid any type of liquid to get exposed to wire mesh or speaker mesh area. Only clean the white area of AirPods Pro.
Now comes AirPods Pro case cleaning. First clean it with dry microfiber cloth and then use dry cotton swab to clean. Then use alcohol wipe or cotton swab dipped in alcohol wipe liquid to clean the AirPods Pro case. Your main focus must be the part of case which comes in direct contact with AirPods Pro earbuds.
Take care not to get any moisture down the case near the charging port area. Only use the cotton swabs for the upper section cleaning where eartips rest. In case you see any dirt or buildup at lightning port area, gently clean that with brush.
Now move to the next step – reassembling.
Reassembling of AirPods after Cleaning
Take a look at ear tips to ensure they are completely dry. Use dry cotton swab inside the ear tips and see if they are completely dry. Now push them back to the AirPods Pro. Ensure that the ear tips perfectly align and correctly placed. You will hear ear tips click back when these are correctly pushed.
Finally, put the clean AirPods Pro into the clean case.
Bottomline
In a world where our AirPods Pro have become essential companions for staying connected, regular cleaning is the key to maintaining their optimal performance and aesthetic appeal. The microphone, a critical component responsible for clear communication, requires attention to ensure its functionality is unimpaired.
While the information to clean the AirPods Pro microphone can be found across various sources like YouTube tutorials and online communities, a systematic approach is necessary. By aggregating these insights, we’ve provided a comprehensive guide to help you restore your AirPods Pro to their former glory.
Remember, the tools and materials you use for cleaning play a pivotal role in the outcome. Delicate electronics demand gentle care. High-quality tools like soft brushes, cotton swabs, and isopropyl alcohol enable effective cleaning without causing damage. Adhering to Apple’s guidelines, such as avoiding moisture in openings, using safe cleaning agents, and steering clear of bleach, is crucial for the longevity of your AirPods Pro.
Taking the time to clean your AirPods Pro is a rewarding investment. It not only enhances their appearance but also ensures that you continue to enjoy crystal-clear audio and seamless communication. So, follow these steps diligently and relish the satisfaction of owning AirPods Pro that look and perform as if they just came out of the box.
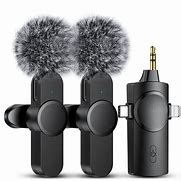
If you’re frequently struggling with muffled or unclear audio on your AirPods Pro microphone, you might consider using a dedicated wireless lavalier microphone for clearer and more reliable audio recording. Especially useful for recording interviews, videos, or presentations, wireless lavalier microphones deliver consistently crisp sound without the hassle of frequent cleaning.
FAQs
Q1. Can I use water and soap to clean the AirPods Pro?
A1. Try to avoid it but if you want, you can use a mild soap solution and water to clean removable ear tips, it’s best to avoid introducing any moisture into the openings or delicate components of the AirPods Pro.
Q2. How often should I clean my AirPods Pro?
A2. Regular cleaning is recommended, especially if your AirPods Pro are frequently exposed to sweat, dirt, or moisture. Aim to clean them at least once every couple of weeks or as needed.
Q3. Can I use cleaning wipes on the speaker mesh?
A3. No, it’s advisable to avoid using cleaning wipes on the speaker mesh. Instead, use dry cotton swabs and gentle brushing to clean the mesh area.
Q4. Can I submerge my AirPods Pro in cleaning agents?
A4. No, you should never submerge your AirPods Pro in any cleaning solution. Moisture can damage the internal components and compromise their functionality.
Q5. Can I use any alcohol concentration for cleaning?
A5. It’s recommended to use isopropyl alcohol with a concentration of 70% or higher for effective cleaning. Lower concentrations might not be as effective in removing grime and oils.
Q6. Can I clean my AirPods Pro with a damp cloth?
A6. While it’s generally better to avoid introducing moisture, you can use a slightly damp, lint-free cloth for the exterior surfaces. Just ensure that no moisture enters the openings or sensitive components.


.png)


