.png)
.png) Français
Français .png) Deutsch
Deutsch .png) Italiano
Italiano .png) 日本語
日本語 .png) Português
Português  Español
 Clean sound makes content truly engaging and impactful. Great audio starts by learning how to balance a microphone on a mixer. Proper mixer setup protects equipment and preserves headroom. Basic gain and EQ tweaks shape mic tone. Subtle fader moves and pan positioning enrich the mix. So, in this article, you will find step-by-step mic balancing. Follow these approaches to achieve professional-quality results.
7 Steps to Balance a Microphone on a Mixer
Step 1: Initialize Master and Channel Faders
Before powering on a mixer, lower the master volume all the way down. This simple action prevents sudden loud feedback when power is applied. Next, find each channel’s fader at the bottom of the board. Turn them fully down until they stop. After that, press the mixer’s power switch. Wait for the lights to come on. Then double-check that every fader still sits at zero. Make sure to avoid quick movements when adjusting faders to prevent noise.

This careful setup protects speakers from damage. It also keeps the first audio signal clean. Finally, this practice lays the groundwork for the rest of your mixer workflow. It creates a safe starting point. By following these steps, the equipment stays protected and distortion is avoided. This first step covers how to balance the microphone on the mixer safely.
Step 2: Set Master Volume to 0 dB
Once the mixer is on, adjust the main volume control to the 0 dB mark. This level is often a detent or safe maximum. Slowly raise the fader until its indicator aligns with that mark. Watch the master meter as you move it. Ensure the signal remains in the green zone. It should never reach the red clipping area. After setting this reference, any added channel signals will be easier to balance.

Always re-check when you plug in new devices. Their combined levels could push the master above 0 dB. By keeping the master at this point, you secure headroom. You also avoid distortion from overload. This step establishes a predictable overall level for your session.
Step 3: Clip Light and Meter-Based Gain Staging

Begin gain staging with all channel controls at their neutral positions. Keep EQ knobs detented, pan centered, and faders down. Then speak loudly into the mic, for example, check one two check one two. Slowly turn up the gain trim until the clip light flickers on peaks. Next, raise the channel fader to zero. Then bring up the main mix fader to the same point. Watch the master meters as you speak. Aim for your loudest peaks to sit around 0 dB.

This process uses both clip lights and meters for precision. It results in a clean signal. It also minimizes hiss and noise floor. This method gives confidence in your mixer’s preamps before adding any extras.
Step 4: Talk-Level Metering for Gain Staging
Instead of watching clip lights, use your normal speaking voice to set the gain. Keep both channel and master faders at zero. Then speak at the loudest level you expect to use. Gradually raise the gain trim knob. Stop when the meters peak at or just below 0 dB on your loudest words.

This method tailors amplifier gain to your voice. It maximizes signal-to-noise ratio. It also preserves the headroom for sudden peaks. By calibrating with real talk-levels, you avoid distortion. You also prevent weak signals that require later boosting. This approach ensures your vocals remain clear and consistent in the mix.
Step 5: Adjust EQ for Microphone Presence
With gain staged, shape the mic’s tone using the EQ knobs. First, reduce the bass slightly to remove any low rumble. Then boost the treble to add clarity and presence. After that, use the mid control for boxiness or harshness. Cut mids for a cleaner sound or add warmth with a boost. Make small adjustments while monitoring through headphones or speakers. Always toggle EQ on and off to compare changes.

This careful tonal sculpting ensures the mic stands out in the mix. It also prevents shrill or boomy results. By fine-tuning these bands, vocals cut through instruments. They remain natural and clear without sounding processed.
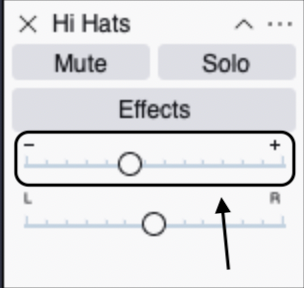
Step 6: Balance Channel Faders for Clarity
Once the tone is set, bring up each channel fader in turn. Start with the microphone fader. Raise it until it balances against any background tracks. Keep faders below three-quarters of their travel. This prevents channel noise and preserves headroom. Listen for any clashing or overcrowding.

If the mic gets buried, lower other channels slightly. Alternatively, raise the mic fader just enough to stand out. Continue this process until each source sits clearly. Check both headphones and monitors for accuracy. This iterative balancing makes every input distinct. It also keeps the overall mix cohesive and dynamic.
Step 7: Integrate Fader Balancing and Stereo Placement
For the final touch, combine level and spatial adjustments. First, set the mic fader to a clear but not overpowering level. Keep it within three-quarters of travel. Then use the pan knob for stereo placement. Center the vocal for focused clarity. Or offset it slightly, around ten to fifteen percent, to complement panned instruments.
Adjust other faders too for balance. An instrument panned hard right may need a lower level. Always monitor in stereo on headphones or nearfield monitors. This approach ensures each source occupies its own space. It makes the vocals clear and naturally integrated. It also delivers a wide and engaging stereo image.
Pro Tip: Balancing a microphone on a mixer can help you experience high-quality audio. But let’s face the reality! It can be a bit time-consuming. It can be a pain in the neck, especially when you’re juggling gain staging, EQ tweaks, and fader adjustments. That’s where the Hollyland Lark Max comes in.

Hollyland LARK MAX - Professional Wireless Microphone
A professional wireless microphone system featuring studio-quality audio with advanced noise cancellation.
Key Features: Studio-Quality Audio | Magnetic Attachment | 8GB Internal Recording
This sleek wireless microphone system delivers up to 820ft of solid transmission and leverages MaxTimbre technology to produce studio-quality sound with a 48 kHz sampling rate and 24-bit depth. With a 70 dB SNR and 128 dB max SPL, it captures crystal-clear vocals in any environment. Plus, 14 hours of backup recording and 8 GB onboard memory ensure you never miss a take, while a charging case boosts battery life to 22 hours. Integrating the Lark Max streamlines your setup, minimizing cables and mixer tweaking, so you can focus on performance, not gear.
Conclusion
Getting a clean sound takes both careful setup and practice. Every step matters, from setting faders and gain to shaping tone and placing audio in stereo. Keep things steady and listen closely during the process. Small changes in volume or EQ can make a big difference in how your voice blends in the mix. Learn to trust your ears while staying mindful of your levels. With time, the whole process becomes natural. Knowing how to balance a microphone on a mixer gives you a clear and steady sound that fits well in any recording.
Frequently Asked Questions about Balancing a Microphone on a Mixer
Q1. How can I eliminate mic feedback on my mixer setup?
When feedback occurs, first lower the master fader level. Then, reduce the microphone gain knob slowly. Next, raise the master fader back up carefully. If feedback persists, repeat these actions until it stops. Also, adjust the mic position relative to the speakers. Finally, verify that speaker placement avoids direct mic pickup. This series of steps prevents looped audio and keeps your mix clear.
Q2. What is the process for adjusting EQ bands on a mixer?
First, identify whether high or low frequencies need to change. Then rotate the relevant EQ knob clockwise to boost those frequencies. Alternatively turn the knob counterclockwise to reduce unwanted tones. Always make small adjustments and listen critically. Next, verify the overall tonal balance with monitors or headphones. Continue tweaking until you achieve the desired sound. This systematic approach results in a polished frequency response across all sources.
Q3. How do I mix vocals effectively for clarity?
Begin by selecting your best vocal takes for quality. Then, remove any background noise carefully before mixing. Next, use pitch correction tools to stabilize vocal performance. After that, apply gentle compression to even out the dynamic range. Then use EQ to carve out competing frequencies around vocals. Next, apply level automation for consistent loudness throughout. Finally, add subtle effects for depth without overwhelming the mix. This workflow ensures a clear and engaging vocal presentation every time.
Q4. What steps help me apply professional vocal EQ settings?
Start by cutting a narrow band to remove mud between 80 and 150 Hz. Then boost a wide band around 200 to 300 Hz for the body. Next, reduce boxy frequencies between 300 and 600 Hz using a narrow cut. After that, boost the presence between 1.5 and 4.5 kHz for intelligibility. Finally, sweep and listen carefully during each adjustment. This structured approach delivers a balanced and professional vocal tone.
Q5. Does using a mixer improve microphone audio quality?
Yes, mixers offer preamp gain knobs to strengthen microphone signals. Then you can shape tone with EQ bands for clarity. Next, use channel and master faders for level control. Also, balanced outputs reduce noise through proper routing. In addition, compressors and effects improve dynamics. Therefore, the mixer contributes to cleaner and more powerful audio.