.png)
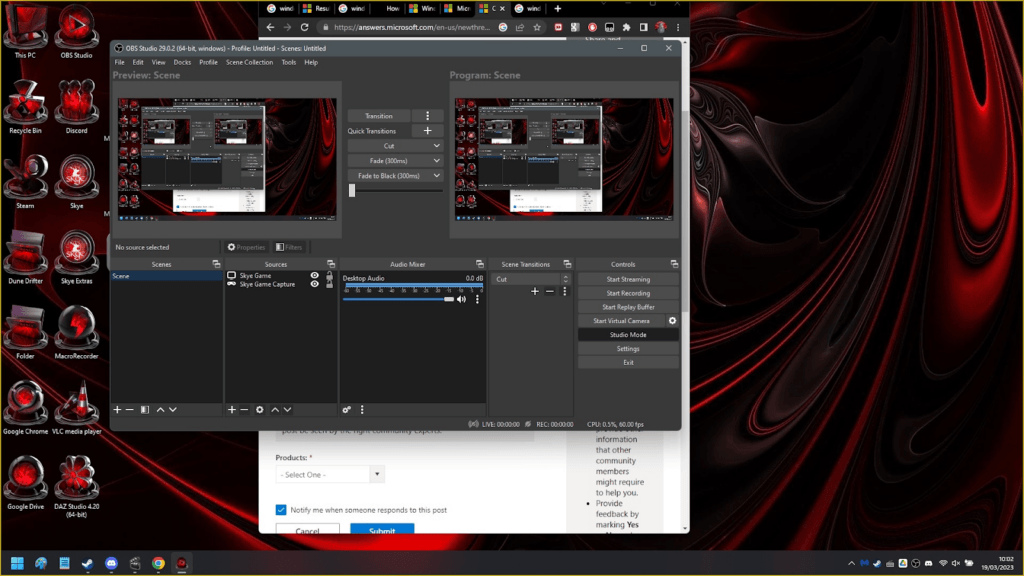
Many people have been scratching their heads due to this pesky YELLOW BORDER IN OBS, wondering how to bid adieu to this uninvited guest in their streaming adventures.
And No, THIS ISN’T A BUG, TOO!
So, what is it, and how to disable it?
Well, here we are again to help you out!
The Yellow Border Dilemma In OBS
Now, before we get into the nitty-gritty of removing this yellow nuisance, let’s briefly understand why it’s even there.
Whether you’re on Windows 11 or using Google Chrome, that yellow border is often implemented for security reasons.
It’s like a virtual “Do Not Cross” line, keeping your system safe from potential threats.
However, we understand that it can be downright annoying, especially when you’re in the middle of an epic gaming stream or a virtual meeting.
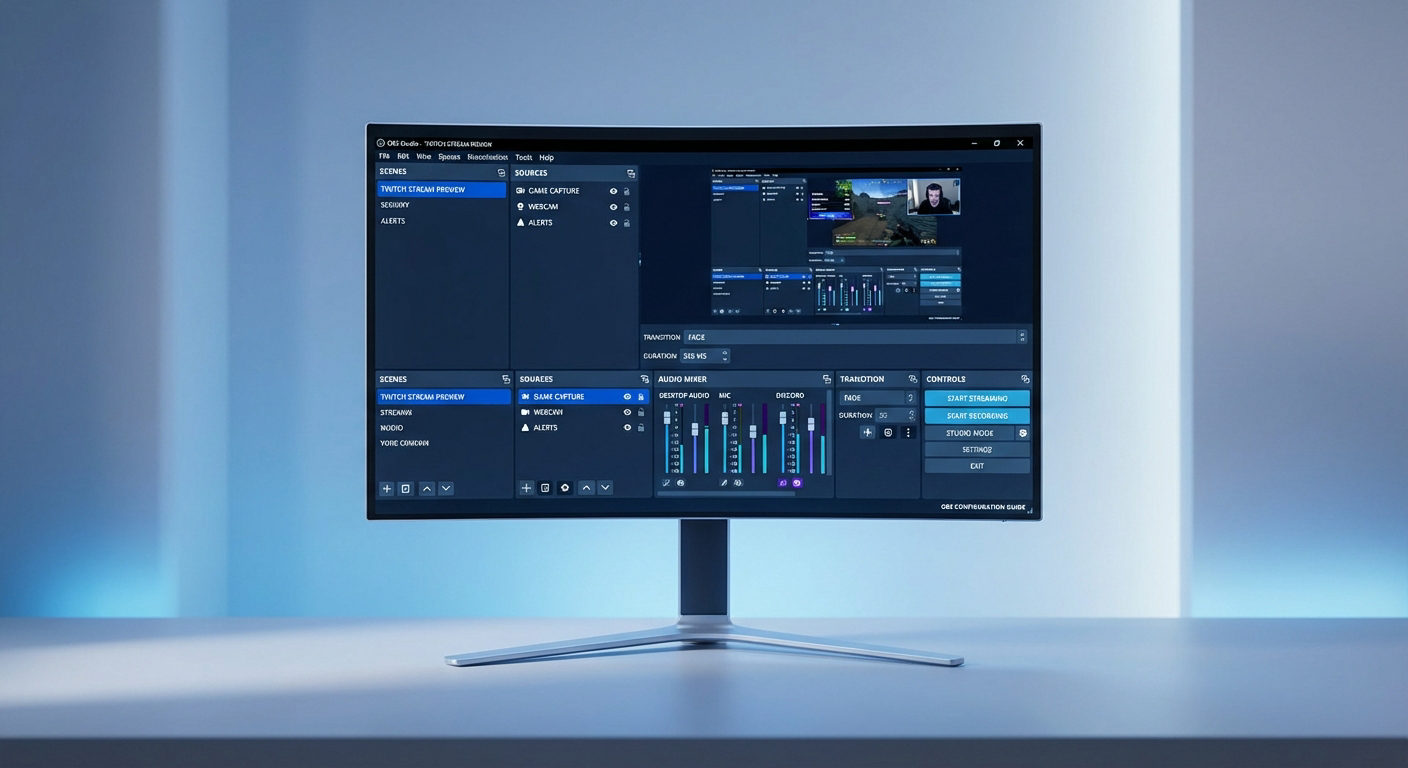
The Very First Method to Try
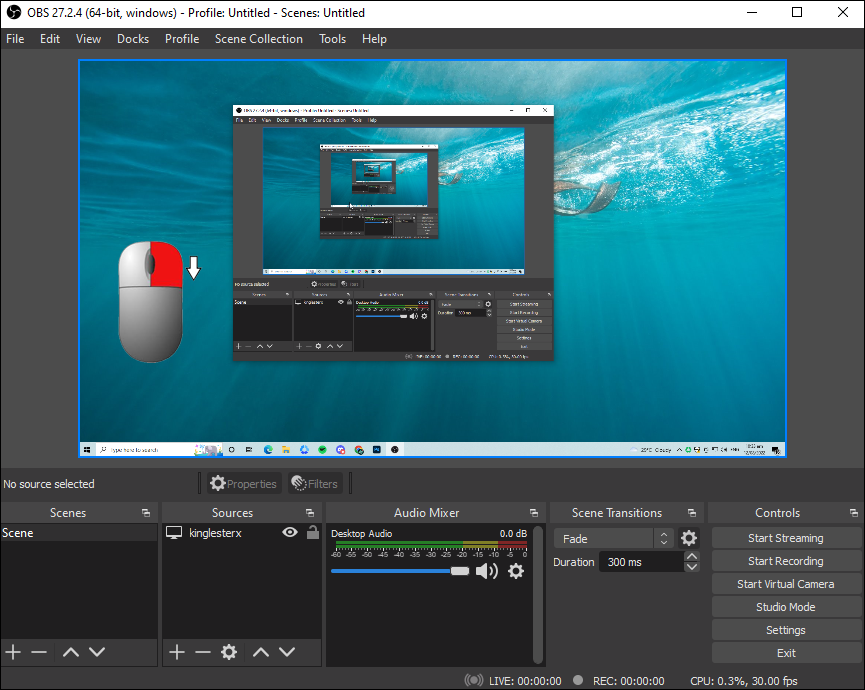
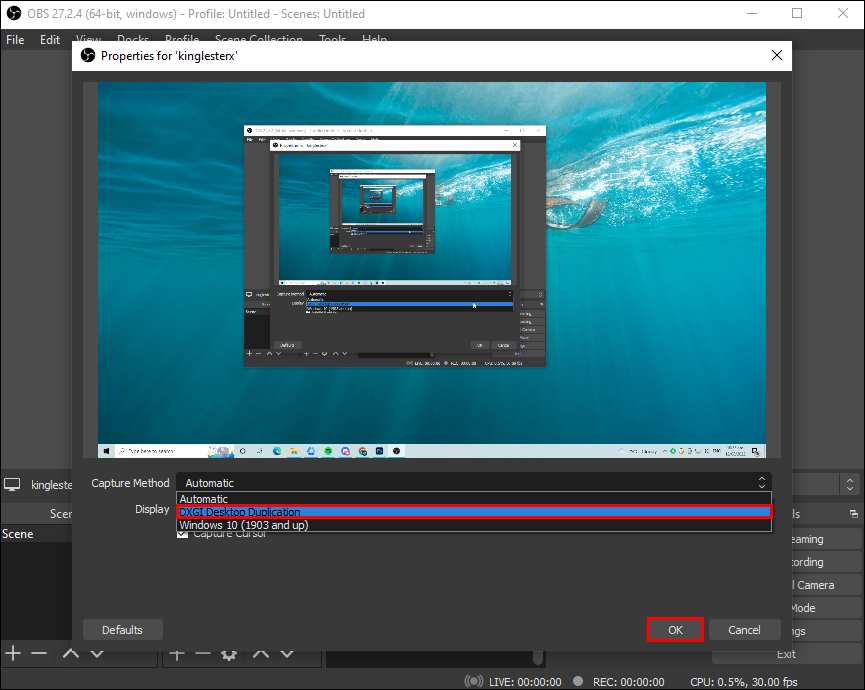
- Open up your OBS and cast your eyes to the bottom area. You’ll find a zone named “Sources.”
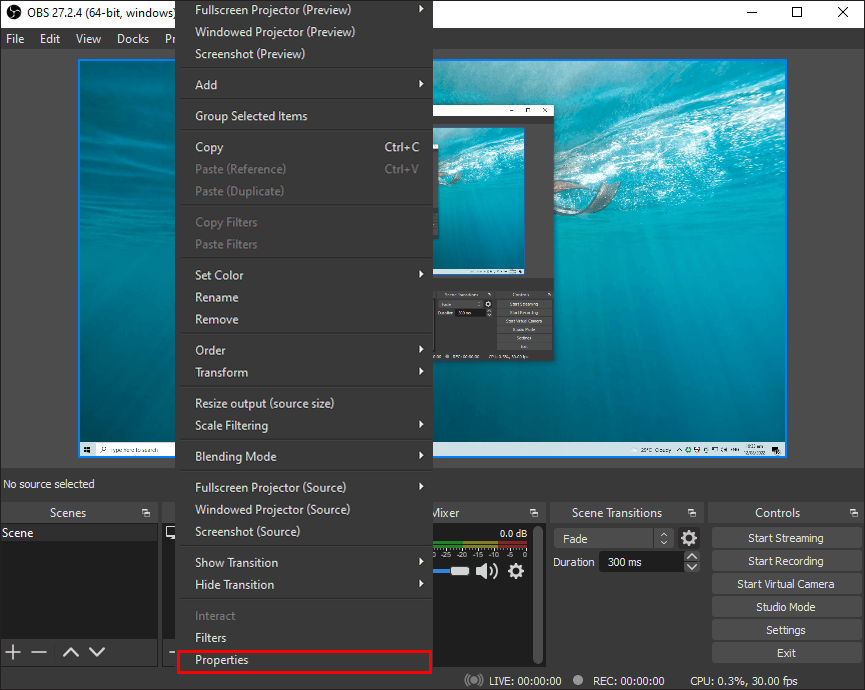
- Spot the “Display Capture (the screen you want to record)”? Give it a right-click.
- From the dropdown that appears, choose “Properties.”
- Now, you’re in the control room! Find the “Capture Method” option.
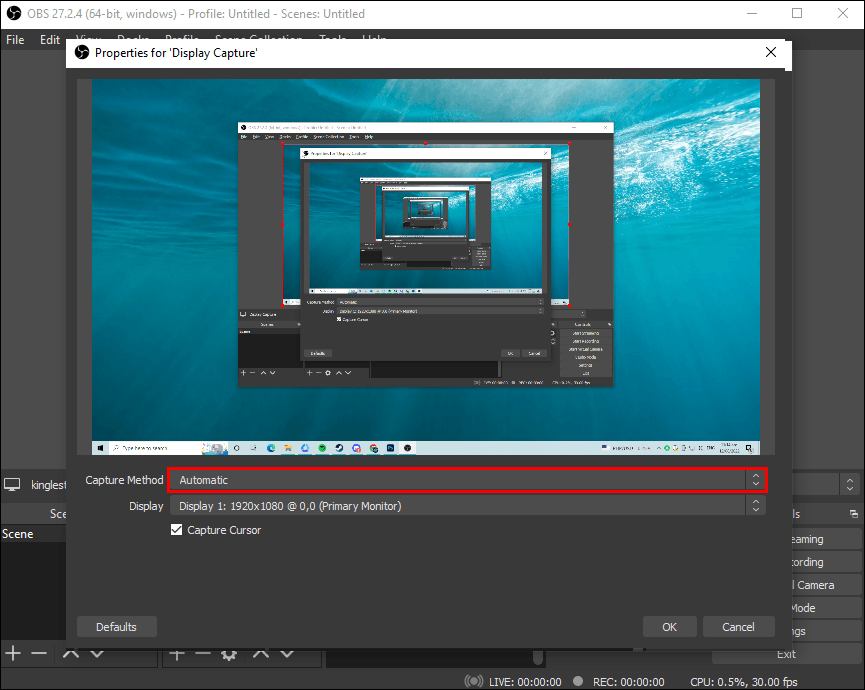
- Change that setting to “DXGI Desktop Duplication” and then smash that “OK” button.
For many, it will do the work but for some, it won’t.
Don’t worry; we have other methods to try on, too!
Give them a try.
Windows 11 Users Unite!
If you’ve upgraded to Windows 11 and found yourself stuck with this yellow border, fret not.
Here’s your ticket to freedom:
- The Settings:
Head to your Windows Settings (you can do this by clicking the Start button and selecting the gear-shaped icon).
Then, click on “Accessibility” and scroll down to “Visual Effects.”
You’ll find an option that says, “Use the yellow border to highlight the active control.”
Toggle this off, and bam!
No more yellow border.
- The Registry Rendezvous:
For the adventurous, there’s another route.
Press the Windows key + R to open the Run dialog, type in “regedit,” and press Enter.
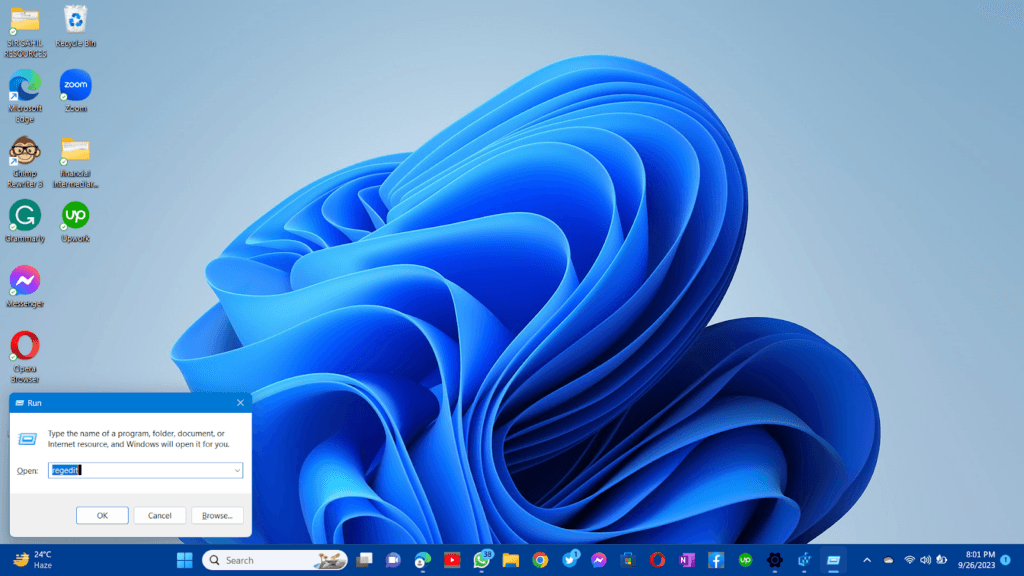
Navigate to HKEY_CURRENT_USER\Control Panel\Accessibility and look for a key called “DynamicColorHighlightEnabled.”
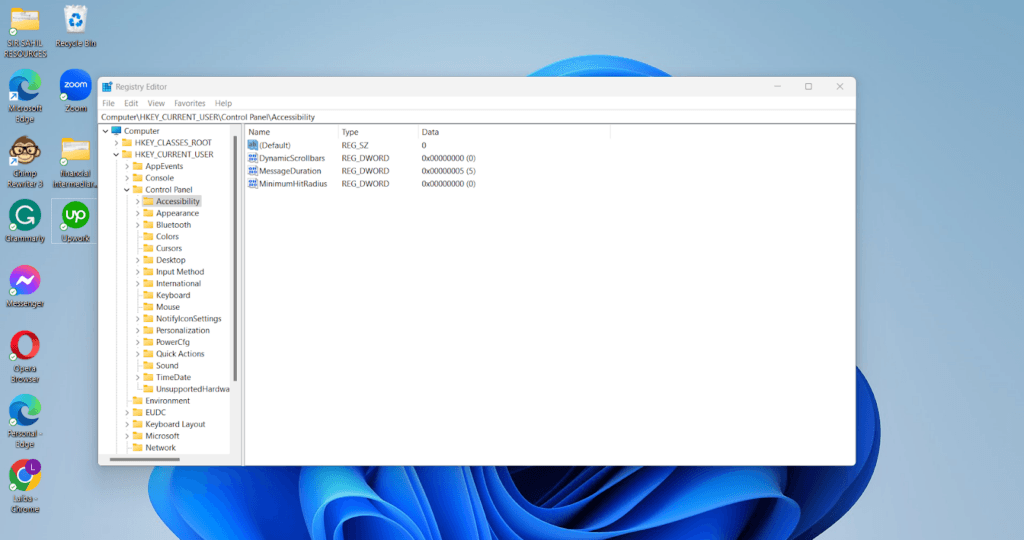
Change its value to 0, and voilà, you’ve outsmarted the yellow border.
Google Chrome’s Sneaky Yellow Border
Google Chrome, the browser that’s always got your back, sometimes throws in a yellow border just to keep you on your toes.
Here’s how to bid it adieu:
- Checking Your Extensions:
This yellow border can be caused by browser extensions misbehaving.
Go to your Chrome settings (click the three dots in the upper-right corner, then select “Settings”) and go to “Extensions.”
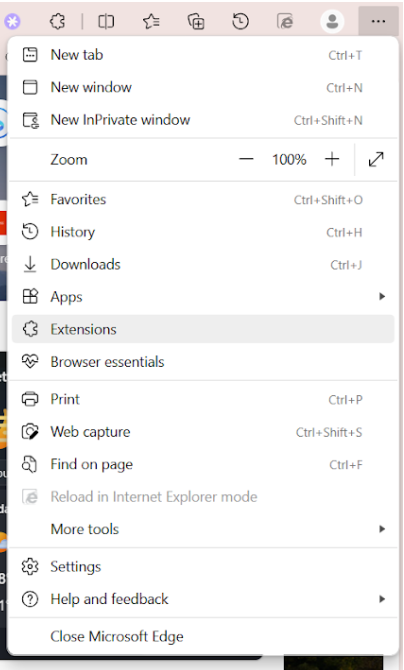
Disable them one by one and see if the border disappears.
A rogue extension might just be the culprit.
- Zooming in for a Fix:
Sometimes, the border pops up due to zoom levels.
Try pressing Ctrl + 0 (Cmd + 0 on Mac) to reset your zoom level to default.
Magically, the border might fade away.
- Update Chrome:
Keeping your browser up to date is like giving it a health check-up.
Ensure Chrome is running the latest version by going to “About Chrome” in the settings.
An update could be the yellow border’s kryptonite.
Update, Update, Update!
Ever heard the phrase, “An outdated OBS is a yellow-bordered OBS”?
Probably not, but it’s true.
So, it’s time for an update!
Just open OBS, click on “Help,” and select “Check for Updates.”
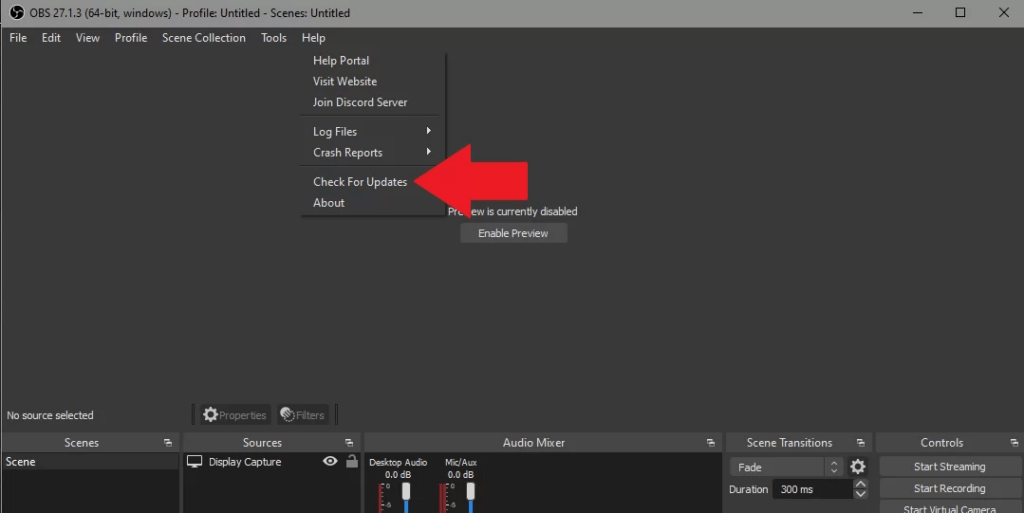
If there’s a new version available, OBS will let you know, and you can hit that “Update” button faster than your buddy snatches the last pair of limited-edition sneakers.
Game Capture Vs. Window Capture
Picture this:
You’re gearing up for an epic gaming stream.
You want your audience to see every pixel of your gaming glory without any interference from that pesky yellow border.
That’s where the capture options come into play.
- Game Capture is like having a secret agent inside your game.
It directly hooks into the game’s graphics, ensuring a smooth and uninterrupted stream.
It’s your go-to choice when you’re diving into a game.

- On the other hand, Window Capture is your versatile buddy.
It doesn’t just focus on games; it captures any window on your screen.
So, if you want to show off your mad video editing skills or switch between apps seamlessly during your stream, Window Capture has your back.
But here’s the twist: OBS sometimes gets a bit indecisive.
It’s like trying to choose between pizza and tacos; they’re both awesome, but one might be better, depending on the situation.
So, OBS might think, “Should I use Game Capture or Window Capture for this game?” And that’s when the yellow border might pop up.
The key here is experimentation.
Play around with both capture options during your streams.
If you notice that the yellow border tends to crash the party more with one of them, then stick with the other.
It’s all about finding the harmony that makes your stream shine.
The Resolution Matters
So, imagine your computer screen is like a painting canvas. It’s got a certain size, right? That’s your display resolution.
Now, OBS, your streaming buddy, is like an artist trying to copy that canvas.
But if OBS’s canvas (base and output resolutions) doesn’t match yours, it’s like trying to paint a big picture on a small canvas.
Result? Chaos!
That’s when the yellow border comes to the rescue, shouting, “Hey, something’s not right here!”
To fix this, go to OBS settings, click on “Video,” and make sure that your canvas size (base and output resolutions) matches your actual canvas (display settings).
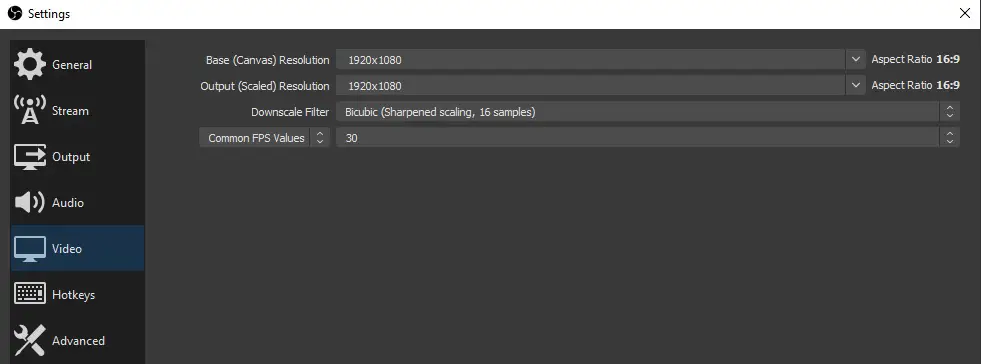
It’s like telling OBS, “Hey, use the same canvas size as mine!”
Once you do that, OBS won’t be confused anymore, and that yellow border won’t be there anymore.
Encoding Settings
Think of encoding settings as the secret recipe for making the best sandwich.
Your computer, just like a chef in the kitchen, needs to balance the ingredients (settings) just right to cook up a delicious stream.
Imagine you’ve got a super fancy oven (your computer).
If you crank up the heat (encoding settings) too high, your sandwich (stream) might get burned, and OBS will be waving that yellow flag like a referee at a sports game.
On the other hand, if the heat is too low, your sandwich won’t cook properly, and your stream will suffer from lag and pixelation.
The trick is to find that “Goldilocks zone” where your encoding settings are just perfect; not too high to overload your computer, and not too low to compromise on stream quality.
Here’s a general recipe to get you started:
- Encoder:
Think of this as choosing the engine for your streaming car.
If you have a powerful computer, pick “x264.”
If you’ve got an NVIDIA graphics card, go for “NVENC.”
AMD users can use “AMD VCE.”
- Bitrate:
This is like picking the quality level of your video.
For standard HD (720p), aim for a bitrate between 2500 to 6000 Kbps. If you want top-notch Full HD (1080p), go for 6000 to 8000 Kbps.
Remember, better quality needs more “juice.”
- Keyframe Interval:
This sets the beat for your video.
Keep it simple by setting it to 2 seconds, like a steady drumbeat.
- CPU Usage (x264):
If your computer is a powerhouse, select “faster” or even “medium” for high-quality streaming.
If it’s not, play it safe with “veryfast.”
- Profile (NVENC):
For NVIDIA users, the “high” profile is usually fantastic.
- Max B-Frames (NVENC):
Set this to 2.
It’s like adding a pinch of spice to your stream for better visual appeal.
- Resolution:
Match your streaming resolution with what your screen can handle for the clearest visuals.
- FPS (Frames Per Second):
Keep it simple by choosing either 30 or 60 FPS, depending on how smooth you want your stream to look and your computer’s capabilities.
Let’s Talk About Studio Mode
Studio Mode is fantastic because it lets you set up scenes, overlays, and transitions behind the curtain while your audience enjoys a seamless stream.
It’s like changing the set of a play while the show goes on!
Now, let’s talk about the confusion.
Sometimes, OBS might be like, “Wait, what’s happening behind the curtain?”
And that’s when the yellow border might make an appearance. But fret not! Your trusty solution is as simple as an on-off switch.
Just toggle Studio Mode off and then back on, like a light switch that instantly brightens the room.
This little reset often clears up any confusion OBS might have, and your stream goes back to being a smooth performance.
The Final Frontier: OBS Plugins
We understand OBS is your favorite gaming console.
And it surely will be because it’s so awesome, but you can make it even more amazing with plugins!
These are like adding cool accessories to your console.
They can do all sorts of magical things, like making your stream look extra fancy or playing funky sounds when someone follows you.
But here’s the catch: sometimes, these plugins can be like mischievous gremlins causing trouble. They might not play nice with each other, and that’s when the yellow border decides to join the party.
So, what’s the solution?
Think of it as decluttering your gaming room. Go through your plugins one by one and check if they’re up-to-date.
Just like you wouldn’t want a dusty old controller, outdated plugins can cause issues.
Update them to the latest versions, and you might already say goodbye to that yellow border.
Now, if the yellow border is a persistent party crasher, you gotta go Sherlock Holmes on your plugins. Disable them one by one and see which one’s causing the trouble. It’s like finding that one noisy neighbor at a party and asking them to keep it down.
For instance, if you have a fancy plugin that adds animated emotes to your stream, and suddenly, the yellow border shows up, try disabling it temporarily. If the border retreats, you’ve found your troublemaker.
Conclusion
Say goodbye to that pesky yellow border, and hello to seamless streaming!
With this guide, you’re now the OBS whisperer. Now go forth, and let nothing come between you and your epic gaming moments!
Now that you’ve resolved the distracting yellow border problem in OBS, it’s time to level up your video quality with a reliable streaming camera. A professional-grade streaming camera ensures crystal-clear visuals, delivering a polished look for every stream\u2014without needing advanced technical skills.
FAQs:
Can I just ignore the yellow border?
You can, but remember, it’s there to help you.
It’s like having a friendly tech guru at your side.
However, if it’s constantly bothering you without any real issues, it’s time to show it the exit.
Does the yellow border affect my viewers?
Nope! Your viewers won’t see the yellow border on your stream. It’s your private warning signal.
I tried everything, and the yellow border won’t budge! What should I do?
Don’t worry, we’ve got a nuclear option for you. Uninstall OBS and reinstall it. This will wipe out any potential issues that might be causing the yellow border to persist.
Can I change the color of the border?
As much as we’d love a rainbow of borders, OBS doesn’t offer that feature. It’s always yellow.