.png)
.png) Français
Français .png) Deutsch
Deutsch .png) Italiano
Italiano .png) 日本語
日本語 .png) Português
Português  Español
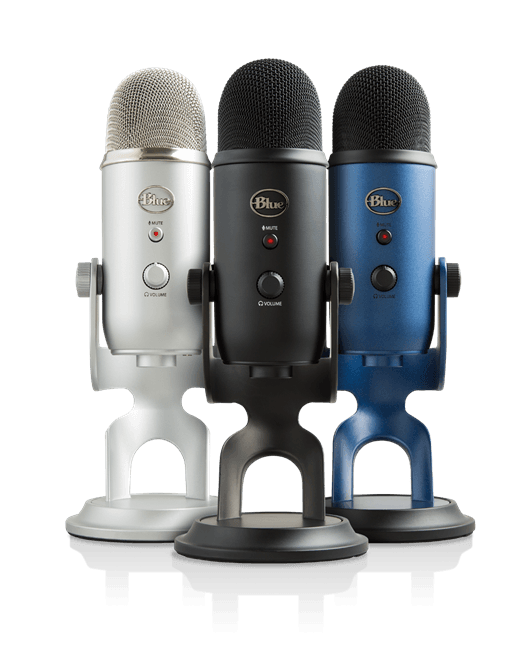
 In an ocean of sound, where content creators are on an unrelenting hunt for the perfect wave of audio, the Blue Yeti emerges as the lighthouse for those with the budget.
This isn’t just another USB microphone; it’s an audio alchemist capable of transforming even the most mundane monologues into sonic gold.
From the sound caves of elite podcasters to the battle stations of epic streamers, this microphone has carved its name into the digital stone of content creation.
Why? Because it doesn’t just record sound; it captures the very essence of your voice.
But wait, there’s more to this microphone than meets the eye (or the ear).
With its multiple microphone polar patterns, the Blue Yeti promises not just versatility but a chameleon-like adaptability that allows it to excel in virtually any setting.
Yet, what do these cryptic patterns mean, and how can you harness them to elevate your audio game to god-like levels?
Well, this is what we are here for!
So plug in, power up, and let’s unravel the audio magic that’s just a pattern switch away.
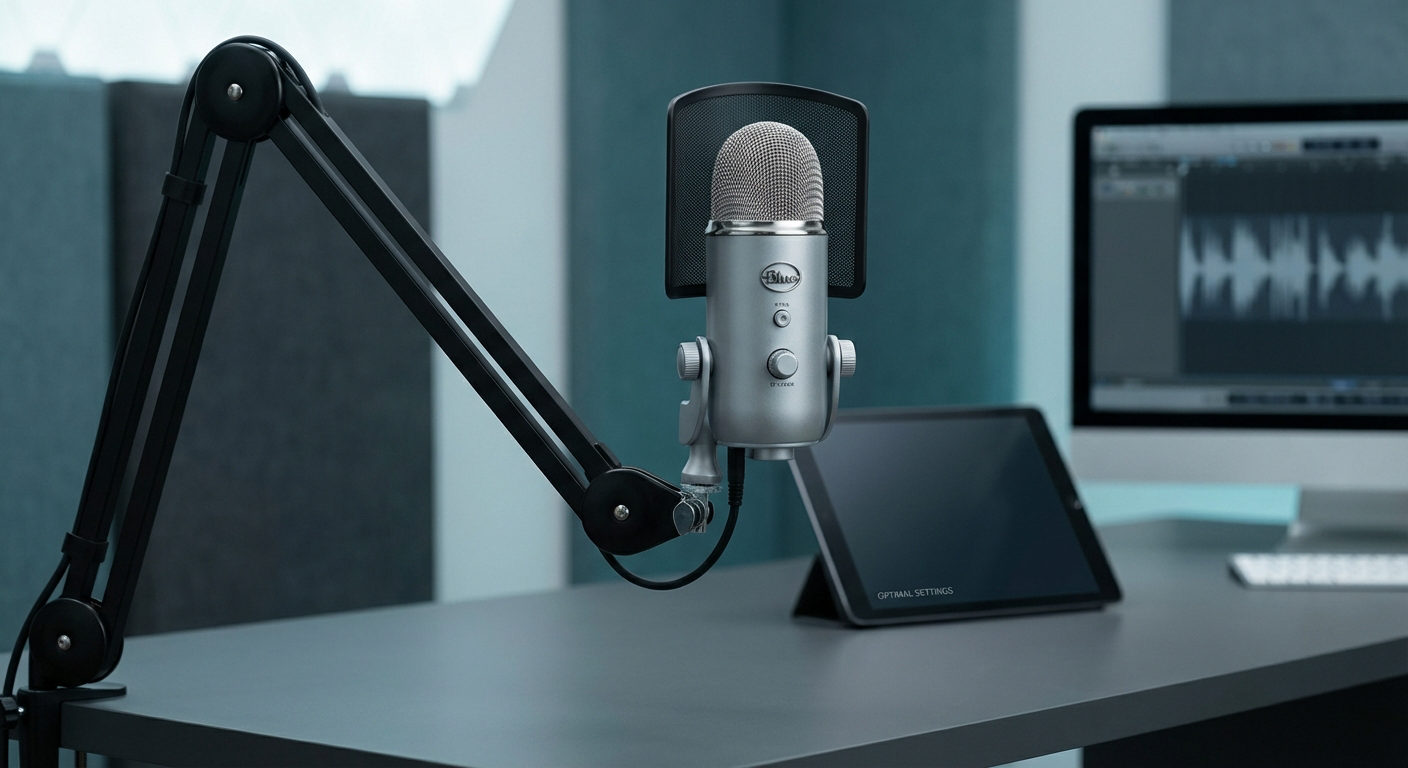
Understanding The Blue Yeti’s Microphone Controls!
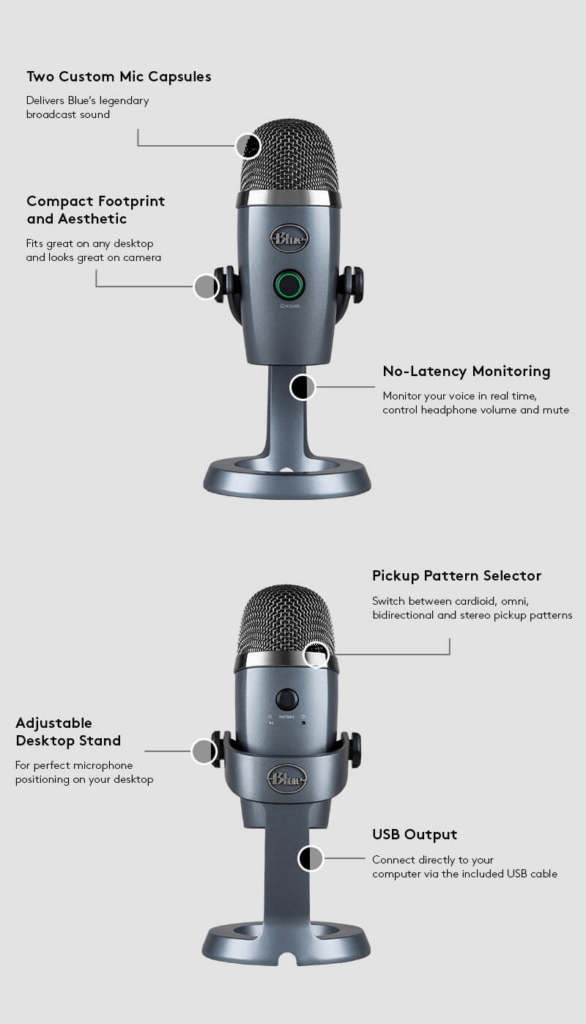
- Gain Control
Let’s start with the Gain knob, situated like a silent maestro on the mic’s backside.
Remember, we’re talking Gain, not Volume. Volume is your output’s loudness—what you hear.
Gain is the level at which the microphone picks up sound.
Imagine it as the microphone’s “ears.” If you’re only recording your solo podcast or an ASMR session, you won’t need to crank this up too much.
A gentle twist to the lower end should suffice for those silky-smooth vocals.
- What are Polar Patterns?
Before we dive into the remaining controls, let’s decode the enigmatic term “Polar Patterns.”
These are essentially the directions from which the mic can pick up sound. Think of it like the microphone having different “listening modes” for different occasions.
Got it? Great! Let’s move on.
- Polar Pattern Selector
Now, this knob isn’t just there for decoration; it’s your DJ for directional sound.
Located right under the Gain Control on the mic’s rear, it lets you toggle between four different polar patterns: Cardioid, Omnidirectional, Bidirectional, and Stereo.
It’s like having four microphones in one, each serving a unique purpose depending on your sound landscape.
Pick your pattern, and you’re good to go!
- Mute Button
Ever need to cough or take a sip of water during a livestream?
You’ll find your silent savior right under the Blue logo on the front of the mic—a quick push, and you’re muted.
Voila, instant silence!
- Headphone Volume Control
Just below the Mute button on the mic’s front face is another knob; this one’s your personal volume control for what you hear through your headphones.
Turn it up or down to achieve the perfect balance between your voice and background audio.
- Headphone Jack Socket
Don your headphones by plugging them into this 3.5mm socket located stealthily at the mic’s bottom.
Ingeniously positioned, it keeps your setup neat and tidy, freeing your desk of any additional clutter.
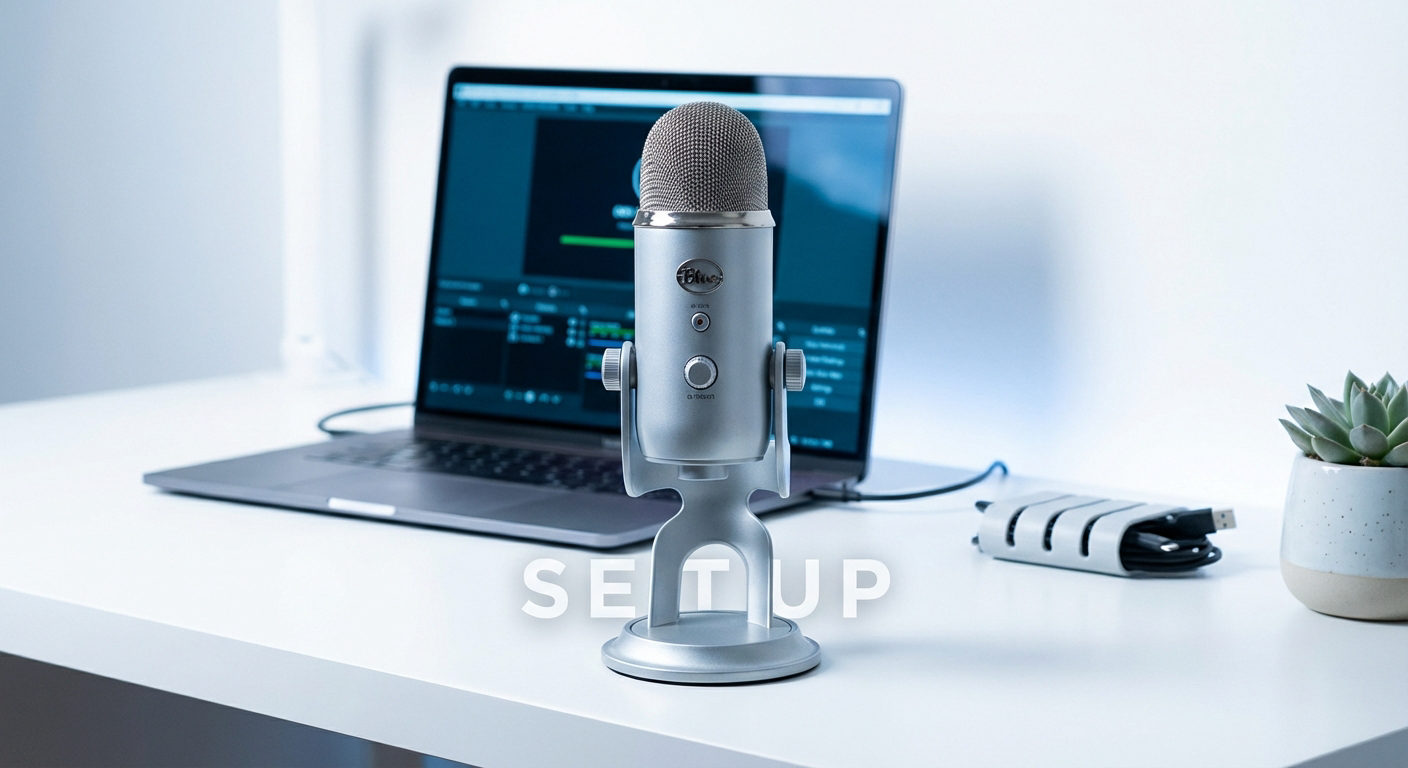
- USB Connection
While we’re underneath the microphone, you’ll notice the USB port nestled beside the headphone socket.
It’s as if the designers thought of everything to keep your workspace minimalist and efficient!
- The Stand
And finally, this is no ordinary mic stand. You can adjust the angle to catch your voice just right using the two knobs. And if you’re a mic stand connoisseur, worry not; your Blue Yeti will easily adapt to a conventional mic stand.
Explaining The Blue Yeti Mix’s Patterns In Detail
Polar patterns are like the microphone’s “ears,” each set to hear the world in a distinct way.
They’re the unique modes that dictate from which directions the microphone will pick up or ignore the sound.
Now, let’s jazz up how the Blue Yeti employs these listening modes to make it a Swiss Army knife for audio capture:
- Cardioid Pattern:
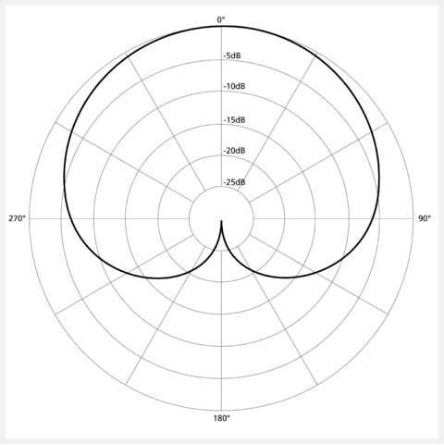
Think of this as the microphone’s “love mode,” as it only has ears for what’s right in front of it—like a rounded heart focusing on its beloved.
LET’S PUT IT ANOTHER WAY.
You can also think of this mode as the “Selfie Stick” of microphones. It only cares about YOU, thus picking up sound mainly from the front!
So, if you’re singing, narrating a podcast, or even giving a solo kazoo performance, this is your go-to setting. This setting acts like those horse blinders; it won’t pay attention to noises on the side or at the back.
So, you can put your fan or keyboard behind the mic to not let their voices slide into the recording! It’s like having a one-on-one conversation with your mic!
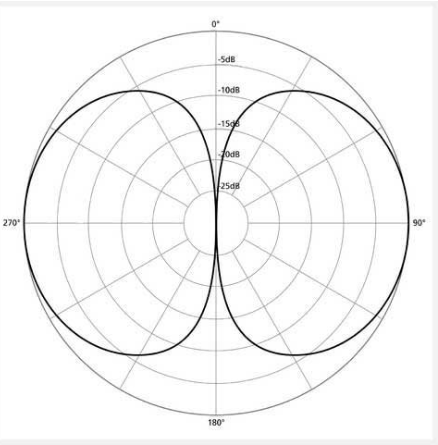
- Bidirectional Pattern:

It’s the microphone’s “figure-of-eight” dance.
Imagine you’re Batman, and the person opposite you is Robin. In Bidirectional mode, the mic acts like it has ears on both sides of its head.
So, whether you’re doing a podcast interview or singing a duet, it’ll capture both your voices clearly while ignoring any pesky background noises from the sides.
Just make sure the Blue Yeti logo is facing one of you, sort of like an audience to your awesome performance.
- Omnidirectional Pattern:
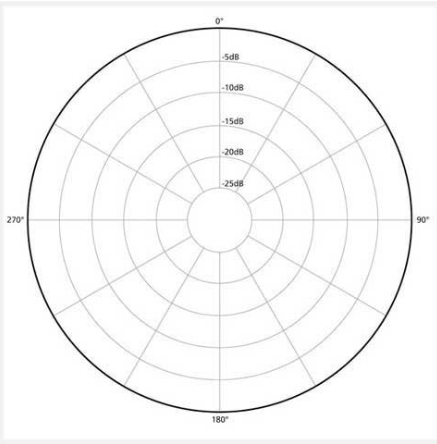
Omnidirectional means the mic wants to hear everything, from the chatter in the background to the rustling of leaves outside the window.
It’s like having ears all around its head.
If you’re trying to capture the ambiance of a room or want your listeners to feel like they’re right there with you in a live setting, then this is your jam.
TO PUT IT SIMPLY;
This is the Blue Yeti in “social butterfly mode,” eager to hear every whisper, giggle, and murmur from all around the room.
- Stereo Pattern:
Ever been to a live concert and felt the music surround you? The Stereo mode tries to mimic that.
With this setting, the mic picks up sounds from the left and right sides, creating a rich, full sound.
It’s great for capturing musical performances like a piano recital or a string quartet, where you want the listener to feel the music coming from different directions.
Changing Patterns Made Easy
Switching between these patterns is a breeze.
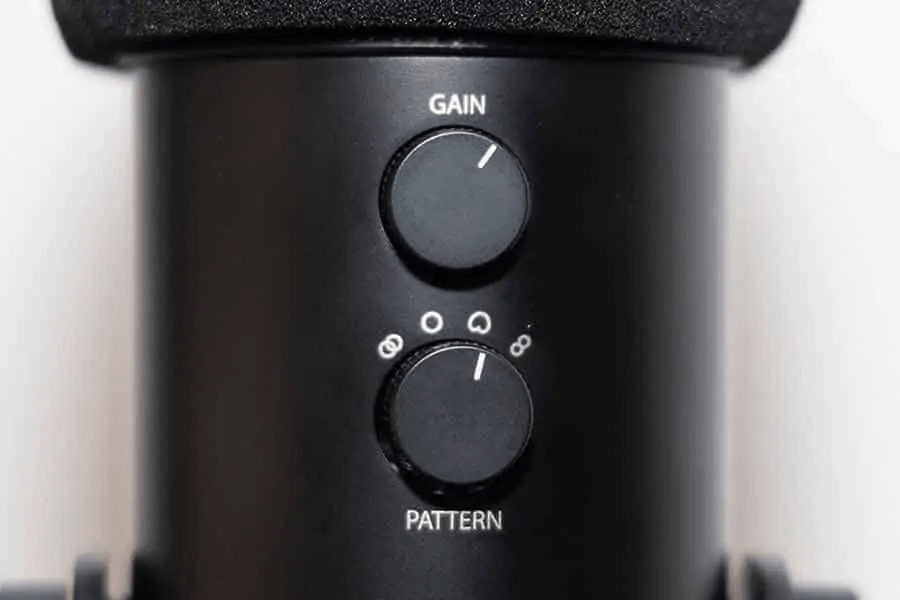
At the Blue Yeti’s rear, you’ll find two knobs: GAIN and PATTERN.
Use the lower knob to select the desired pattern, aligning the line on the knob with the pattern symbol on the Blue Yeti.
Remember that live pattern changes might result in an audible spike, so set it correctly before recording or streaming.
How Much Gain Goes With Which Pattern?
Okay, now let’s pair these two like fine wine and cheese—or, you know, pizza and soda, whatever floats your boat!
Cardioid:
Gain Setting:
Medium to Low
Why:
You’re the star of the show here.
We don’t need to amplify any distracting background noise, do we?
Pattern & Gain Mix:
Keep that mic focused on you with the Cardioid setting and don’t crank the gain too high.
About halfway or a smidgen lower should do it. Now, it’s all about you, darling!
Bidirectional:
Gain Setting:
Medium
Why:
Both you and your partner-in-crime (or in song) need to be heard clearly.
Pattern & Gain Mix:
Put that mic in Bidirectional mode and set the gain to medium.
This will capture both of you without picking up that annoying air conditioner humming in the background.
Omnidirectional:
Gain Setting:
Low to Medium
Why:
This setting is already a chatterbox, picking up sounds from everywhere.
Too much gain, and it might just get overwhelming.
Pattern & Gain Mix:
Flip that mic to Omnidirectional and keep the gain on the lower side of medium.
This way, you’ll capture the essence of the room without making it sound like you’re recording inside a beehive.
Stereo
Gain Setting:
Medium to High
Why:
Music is all about the details, and a higher gain will help you capture the full experience.
Pattern & Gain Mix:
Set your mic to Stereo and inch that gain towards the higher side of medium, but not too high!
This way, the mic will pick up the glorious highs and lows of your instruments, making your listeners feel like they’ve got front-row seats to your concert!
Additional Tips to Supercharge Your Blue Yeti Mic Pattern Settings
- Whisper in Its Ear:
You don’t have to shout. Stay chill and chat 4-10 inches (that’s 10-25 centimeters) away.
Trust us, it’s listening!
- Don’t Crank It Up:
Remember, louder doesn’t mean better. Keep the headphone volume low.
Let your voice shine, not scream.
- Gain Game:
Play with the gain till you hit that sweet spot.
If it sounds like you’re whispering in a cave, turn it up.
Sounds like you’re shouting in a tiny room? Dial it back.
- Pop Goes the Weasel:
Don’t have a pop filter?
No worries, put a finger in front of your mouth when you’re pronouncing words with strong ‘P’s or ‘B’s.
Or, You can put a clean sock over the mic! See which one helps.
- Room Wizardry:
You don’t need a studio to sound like a pro.
A couple of bookshelves, some thick curtains, or even pillows can improve your room’s acoustics dramatically.
Who knew your decor could make you sound like a podcast star?
- EQ Extravaganza:
Don’t be scared of the EQ settings in your DAW.
Cut a bit of those low rumbles and boost the warm mids.
Your voice will thank you.
- Compression Station:
Ever heard a podcast where the host sounds as smooth as melted butter?
That’s compression doing its magic.
Use it sparingly to even out your vocal dynamics.
- The Silent Button:
That mute button isn’t just for show.
Use it strategically to cut out any unwanted noise when you’re not speaking.
Alternative to Blue Yeti to Get High-Quality Audio
Hollyland Lark Max is a high-sensitivity omnidirectional microphone, that provides users with extreme precision in voice, which is possible with the qualitative numbers of 48kHz/24-bit. If you are using the microphone in a quieter environment, the 70dB Signal-to-Noise ratio makes it a great option for recording. This is enhanced with the Digital Signal Processing (DSP) technology that amplifies the audio signal quality and decreases the noise present within the signal.

Hollyland LARK MAX - Professional Wireless Microphone
A professional wireless microphone system featuring studio-quality audio with advanced noise cancellation.
Key Features: Studio-Quality Audio | Magnetic Attachment | 8GB Internal Recording
Lark Max provides a complete package to its users for recording in a better condition while offering portability. This lavalier microphone can serve much better than the Blue Yeti, which, regardless of being a fine option, is quite complicated to comprehend in many situations.
Wrapping It Up
The Blue Yeti is like the DJ of microphones, always knowing the right setting to make you sound like a star.
From podcasts to jam sessions, it’s got your audio covered like a cozy blanket.
Get ready to rock the mic like a pro, no Ph.D. in sound engineering is required!
FAQs
Do I need special software to use the Blue Yeti microphone?
No, the Blue Yeti is a plug-and-play USB microphone compatible with both Windows and macOS.
You may need to select it as the input device in your recording or streaming software, but no additional software is required for basic functionality.
What is the ideal distance from the Blue Yeti microphone for recording?
In cardioid mode, it’s recommended to maintain a distance of about 6 inches from the microphone for optimal sound quality.
However, experiment with distance to find the sweet spot that suits your voice and recording environment.
Can I change the polar pattern during a live recording?
While you can change the pattern on the Blue Yeti during a live recording, be aware that it may result in a noticeable click or transient spike in the audio.
To avoid interruptions, set the desired pattern before you start recording.
Can I convert a stereo recording from the Blue Yeti to mono?
Yes, you can convert a stereo recording from the Blue Yeti to mono in post-production using audio editing software.
Most audio editing programs have a mono conversion or mix-down function that allows you to create a mono audio file from a stereo recording.
Can You Position the Blue Yeti Sideways?
Absolutely, positioning your Blue Yeti microphone on its side is completely fine.
The key here is to make sure that the logo and control knobs are aimed towards you or whatever you’re recording.
As long as you maintain that orientation, you can certainly have it sideways.
Is It Possible to Use the Blue Yeti Upside Down?
Yes, you can definitely mount your Blue Yeti microphone upside down.
Given its considerable weight, make sure you have a robust mount to support it in this position.
Like when setting it sideways, the important thing is that the logo and the adjustment knobs should be facing toward the sound source or you.
This ensures that the mic captures the audio effectively, regardless of its position.