Whether you’re presenting a project, attending an interview, or simply catching up with family on Zoom, you might want to save the conversation for later. The good news is, your Zoom call doesn’t have to end when you hang up—you can record the entire session, including audio from all participants.
If you’re the host or have host permissions, Zoom’s built-in recorder makes this easy. But even without those permissions—or if you prefer to record discreetly—there are other simple methods you can use. In this guide, we’ll walk you through how to screen record on Zoom with audio in different ways.

Record Zoom Meeting With Built-in Recorder – Windows & macOS
Before starting your video, open your Zoom settings and review a few options to decide what you want to record and how you want it to be captured.
1. Click on your Zoom desktop app on either your Windows or Mac.
2. On the Home screen, look to the top-right corner and click the Settings icon.

3. Select Recording in the Settings menu located to the left.

4. Under Local recording storage, click Change to choose where your recordings will be saved. Make sure the location has enough space.

5. In Recording preferences, enable or disable options like:
- Show participants’ names in the video
- Include timestamp for reference
- Record video during screen sharing to capture both your shared content and the meeting video feed

6. Click Advanced for more options if you want to adjust recording layouts or optimize for audio.

1# Recording Zoom with Audio as a Host (Default Permission)
As the host, you don’t need any permission to start recording your Zoom meeting. Here’s how to do it.
1. In the meeting window, click on the Record button on the toolbar to start. You can alternatively also press Alt + R on Windows, or Command + Shift + R on Mac.

2. To stop and save your Zoom meeting recording, click on the Stop icon, and the recording will be saved locally.
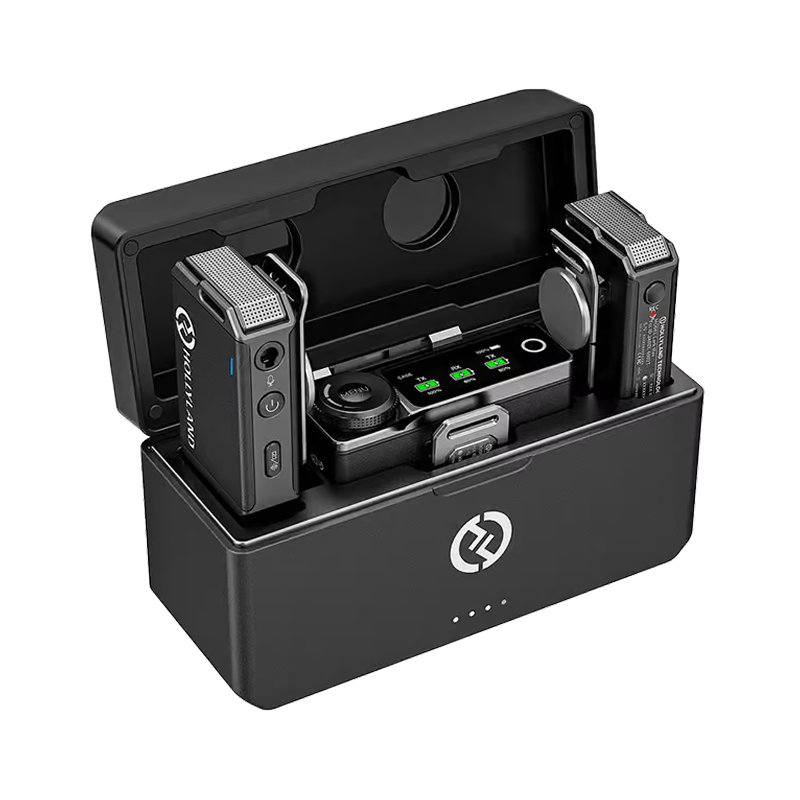
For the best audio quality, use a professional-grade microphone like the Hollyland LARK MAX 2. With its groundbreaking FocalClear Technology and 48 kHz / 32-bit float recording, it captures every subtle tone, natural pause, and passionate moment in stunning detail, ensuring your message delivers the strongest possible impact.


Hollyland LARK MAX - Professional Wireless Microphone
A professional wireless microphone system featuring studio-quality audio with advanced noise cancellation.
Key Features: Studio-Quality Audio | Magnetic Attachment | 8GB Internal Recording

2# Recording Zoom with Audio as a Participant (Need Host Permission)
If you’re a participant in the meetings, you’ll need to ask the host for permission before you can record the meeting. To do this:
1. Click on your Zoom meeting link to join. The Zoom workspace will open, and you’ll see a preview of the meeting where you can test your audio and video before entering.

2. Once in, ask the host for recording permission. You can do this by sending a quick message in the chat (e.g., “Could you please enable recording for me?”) or asking verbally if it’s a live discussion.
Or you could also send an early email to request that permission be granted to you by default if you want to record from the beginning.

3. Once the host grants permission, you’ll see the Record button become active in the Zoom toolbar.
4. Click Record and select Record on this Computer or Record to the Cloud (if available).
6. Speak and participate as usual—Zoom will capture both video and audio.

7. Click Stop Recording when finished. End the meeting or wait for Zoom to process and save the recording file.

3# Record Zoom Meeting With Built-in Recorder on Phone
Recording a Zoom meeting from a mobile device is only available via cloud recording, which is a paid feature. This means you need to have a Pro, Business, Education, or Enterprise account. As a participant, you’ll still need the host’s permissions, like we described in the previous section.
Now, before now start the how part, you first need to enable cloud recording on your Zoom phone app. Here’s how:
1. Sign in to the Zoom web portal and go to your Zoom dashboard.

2. On the left panel, click on the My Account tab, then select Settings from the dropdown.

3. Go to the Recordings tab and use the toggle to enable the Cloud Recording feature.

Now, with cloud recording turned on, here’s how to record your meetings on mobile.
4. If you’re the host, swipe left on the bottom toolbar of your Zoom meeting and tap More (three dots icon). Tap Record to the Cloud to start recording.
If you’re a participant, first seek permission to see the “record” feature.


Record Zoom Meeting Via Third-Party Tools (No Permissions Needed)
Zoom’s built-in recording depends on the host’s permission, which you often has not control over. Sometimes, like on interviews, the host may have a policy against recording. Other times, you might simply prefer not to let them know you’re recording. In that case, we’ve got two more handy options for you.
4#: Record Zoom Using Xbox Game Bar Recorder
Xbox Game Bar is a built-in tool in modern versions of Windows. Although it’s designed for gamers, it can also screen record other applications, including Zoom. This makes it a convenient native solution that doesn’t require any additional installations.
1. Close all windows on your screen, except for your Zoom meeting.
2. Press the Windows logo key + G to open Xbox Game Bar.

3. Open the Capture panel by clicking on the Camera icon.

4. Next, just hit Record, or press Windows logo key + Alt + R, so screen-recording begins.

5. Run your meeting as usual; Game Bar records in the background.
6. When you’re done, click the Stop icon on the Capture Status box.

7. Your screen recording will appear for preview in the Gallery panel. Click “Open file location” to jump straight to the folder where the recording is saved.

Using the Xbox Game Bar is a quick, no-cost option for Windows users. The controls are simple, and your file is available instantly after the meeting.
5# Record Zoom Using Loom
Loom is another third-party tool available for both Windows and Mac. It lets you customize the recording window to show exactly what you want to show and automatically saves the recording to the cloud for easy sharing.
1. Download and install the Loom desktop app on your Windows or Mac.
2. Open Loom and set your recording preferences, such as screen area, camera, and microphone.
3. Click “Start recording”, then switch back to your Zoom meeting.

4. While recording, you’ll see a small Loom control window. Use it to pause or stop when needed.
5. Click the red Stop button to finish. Loom will automatically save the recording to your cloud account.

Sharing the meeting recording with your colleagues with Loom is usually pretty efficient, since you can easily share it via just a link through any platform.
Conclusion
Whichever method you choose, take into account factors like your internet stability, whether you’ll need to share the file, and any legal requirements before you start recording. And always pay attention to your audio quality—clear sound can make a huge difference in the value of your recordings.
FAQs
Q: Can I record Zoom meetings without the permission of the host?
No. If you choose to record through Zoom’s built-in recording tool, you need to get the host’s permission first. You can ask the host through the chat window, or directly by voice if you’re granted mic permission.
Q: Can I record only certain participants’ audio?
No, Zoom’s built-in recording captures audio from everyone speaking. To isolate specific voices, you’ll need to edit the audio track after the meeting or use third-party software that allows multi-track recording.
Q: Where are Zoom recordings saved?
Locally recorded Zoom recordings are stored in a folder called “Zoom” in your Documents. That’s where you’ll find the files. If you’re not sure, open your Zoom settings, go to the Recording tab, and check the exact save location there.


.png)


