.png)
Streaming has exploded in popularity over the years, with creators from all over the world showcasing their gaming talents, chatting with fans, or sharing their passions. And for anyone looking to get started with streaming video games, there is no better place to start than Twitch. However, starting your first stream on Twitch isn’t as easy as hitting a simple GO LIVE button. That is why we have put together a comprehensive guide to getting started streaming your favorite video games on Twitch.
1. Create Your Twitch Account
Before getting into the nitty-gritty of starting your first stream, the first step is to sign up on Twitch and put yourself out there as a creator. To do this, simply:
- Open your browser and head over to the official Twitch.tv website.
- On the homepage, click the “Sign Up” button in the bottom-right corner of your screen.

- Enter the required details and click Sign Up.

- You’ll then be asked to verify your email, and once that’s done, your account will be ready to go.
2. Make Sure You Have the Right Equipment
Check Your PC
Start by making sure you have a computer that can handle both gaming and streaming at the same time..
Stable Internet Connection
You’ll also need a fast and stable internet connection to stream smoothly. While speeds of around 3–5 Mbps can work, having at least 10 Mbps is generally recommended for the best results.
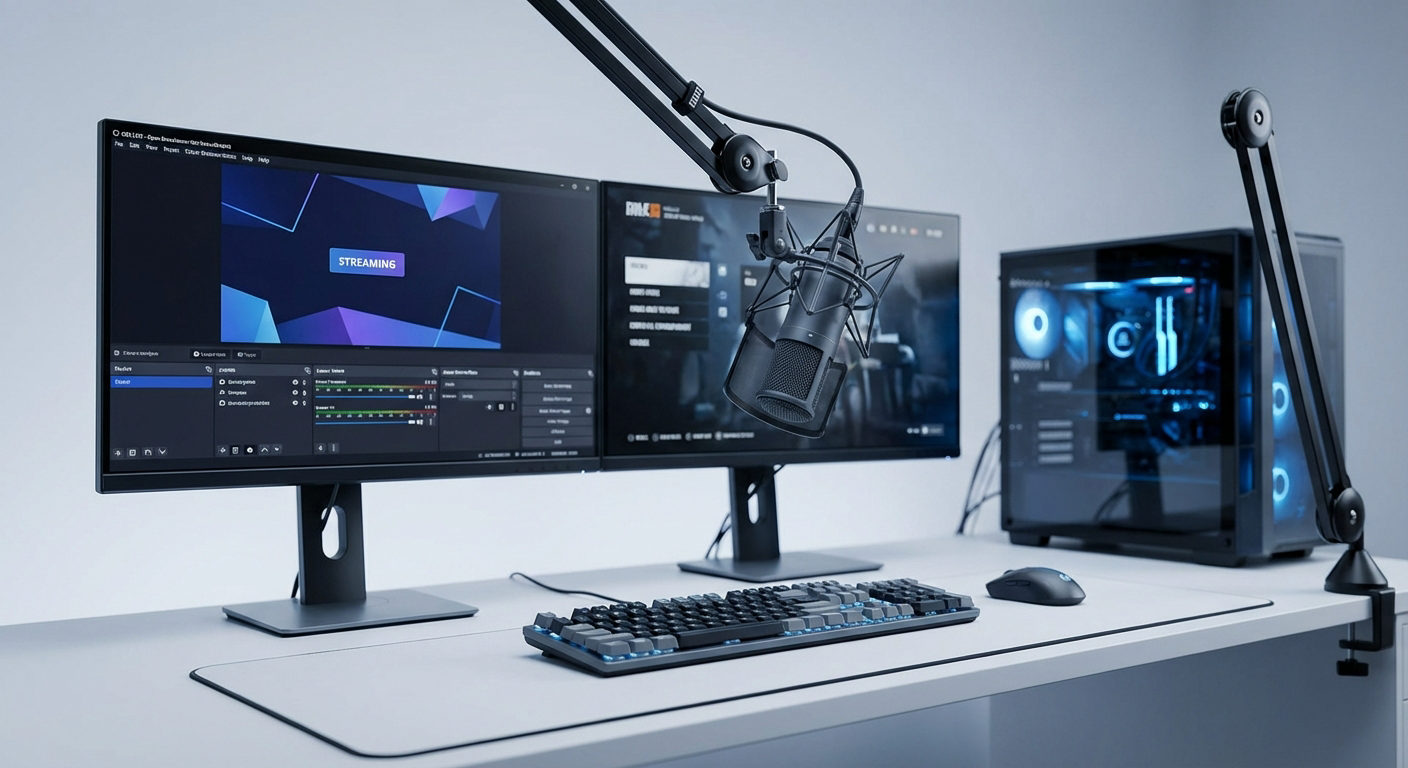
A Good Camera
Since your viewers are here to watch you play and react to your games, a high-quality camera is a must; one that keeps them engaged and watching for longer. The Hollyland VenusLiv Air camera is an excellent option, offering a complete package for streamers with features such as 24/7 streaming, 4K recording at 30FPS, and built-in AI tuning to deliver professional-looking results for first-time streamers.
Invest in a Microphone
Just as a high-quality stream can do wonders, audio also plays a big role. While you can get decent results from your headset’s built-in microphone, investing in a quality mic can be a real game-changer.
3. Install OBS
To download OBS, head over to the official download page, select your platform (Windows, macOS, or Linux), and the download should start automatically.

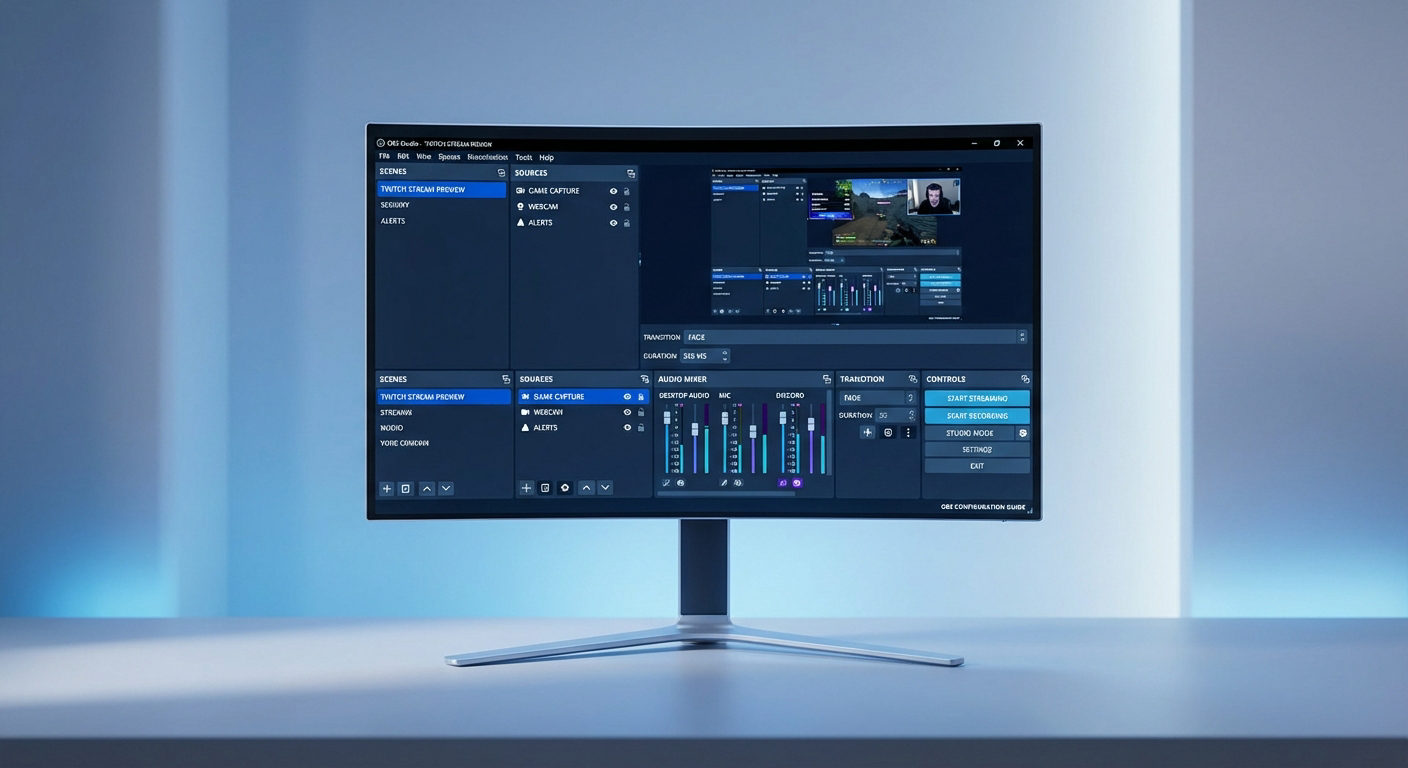
4. Setting up OBS Studio
Launch OBS and then:
- Select the “Optimize for streaming, recording is secondary” option.

- Choose the best video settings, which are generally 1920×1080 for resolution and either 30 or 60 FPS.

- Next, you’ll be asked to enter your stream information. Select Twitch in the “Service” option, then either click “Connect Account” to log in directly to your Twitch account or choose “Use Stream Key” and paste your key.

- Click Next, and OBS will test your bandwidth. Once the test is complete, click Apply Settings to finish.

Output Settings
OBS also lets you choose the Video Encoder and Bitrate settings, which together determine the balance between stream quality and performance. To do this:
- Click on settings at the bottom right corner.

- Head to the “Output tab” from the side bar.

- Here, change the “Video Encoder” from Software (x264) to Hardware H.264 so that OBS uses your graphics card for the heavy lifting and reduces CPU load.

- Then make sure the bitrate is set to 6,000 kbps from the default 2,500 kbps. And hit Apply.

Audio Settings
- Open the Settings tab again and select the “Audio tab” from the sidebar.

- Here, make sure your audio and microphone devices are set to Default in the Desktop Audio and Mic/Auxiliary Audio options.

- Once everything looks good, click Apply and then OK.
5. Add Sources to Your Scenes
The first time you start OBS Studio, you start with a blank screen by default. And to show images, text, video, your webcam, gameplay, desktop, etc, you’ll need to add different kinds of Sources. Here are a few basic Sources to get you started:
Game Capture
Game Capture is a Windows-only option that allows you to capture games with the highest performance. To add game capture:
- Click the “+” button under the Sources section.

- Here, click on the “Game Capture” option.

- Next, hit “Create New” and give the source a name.

- A new window will open up. Here in the “Mode” section, you can choose to capture any full-screen application, specific window, or your frontmost game window using a hotkey.

- In the box titled “Window”, select your game window and click OK.

Window Capture and Display Capture
With window capture, you can capture a specific window, whereas Display capture shows your entire display on stream. To add these:
- Click the “+” button under Sources.

- Here, click on “macOS Stream Capture” (for Mac devices) and “Windows Capture” or “Display Capture” for Windows.

- Hit Create New and name it something.

- Select the desired window or display that you want to capture and click on OK.
6. Add Webcam and Microphone
If you plan to show your webcam and interact with your chat —which is a no-brainer —you’ll need to follow these steps.
- Head to the Sources tab and click on the “+” button.

- Next, select the Video Capture Device or Audio Input Capture options.

Audio Capture
- Click on Create New and give the source a name.

- Next, select your default microphone from the list and hit OK.

- On the homepage, you can adjust the game and mic volumes using the volume bar in the Audio Mixer section.

Video Capture
- Again, click on Create New and name the source.

- Here, select your Video device, and you can adjust the rest of the settings like resolution and framerate to match your preferences.

- Once done, you’ll be back on the homescreen, where you’ll now be able to resize your frame and place it wherever suits best.

7. Bonus: Managing Layers and Using OBS Studio Mode
If you want to take your first stream up a notch and come across as someone who knows what they’re doing, we recommend checking out these two useful features: the Layers System and Studio Mode.
The Layers System is handy when you want OBS to capture multiple video sources on your stream. For example, if you want to stream your game along with your webcam, place your Video Capture Device source first in the list, then add your Game Capture source below it. You can also easily rearrange layers or sources by simply dragging and dropping them.
The second feature is the powerful Studio Mode, which lets you modify your scenes while you are live without your viewers seeing the changes. To access Studio Mode, click the Studio Mode button in the Controls Dock, right where the Settings option is. Your preview screen will be split into two. The right side shows your live stream, while the left side lets you edit scenes, adjust elements, or choose transition styles.

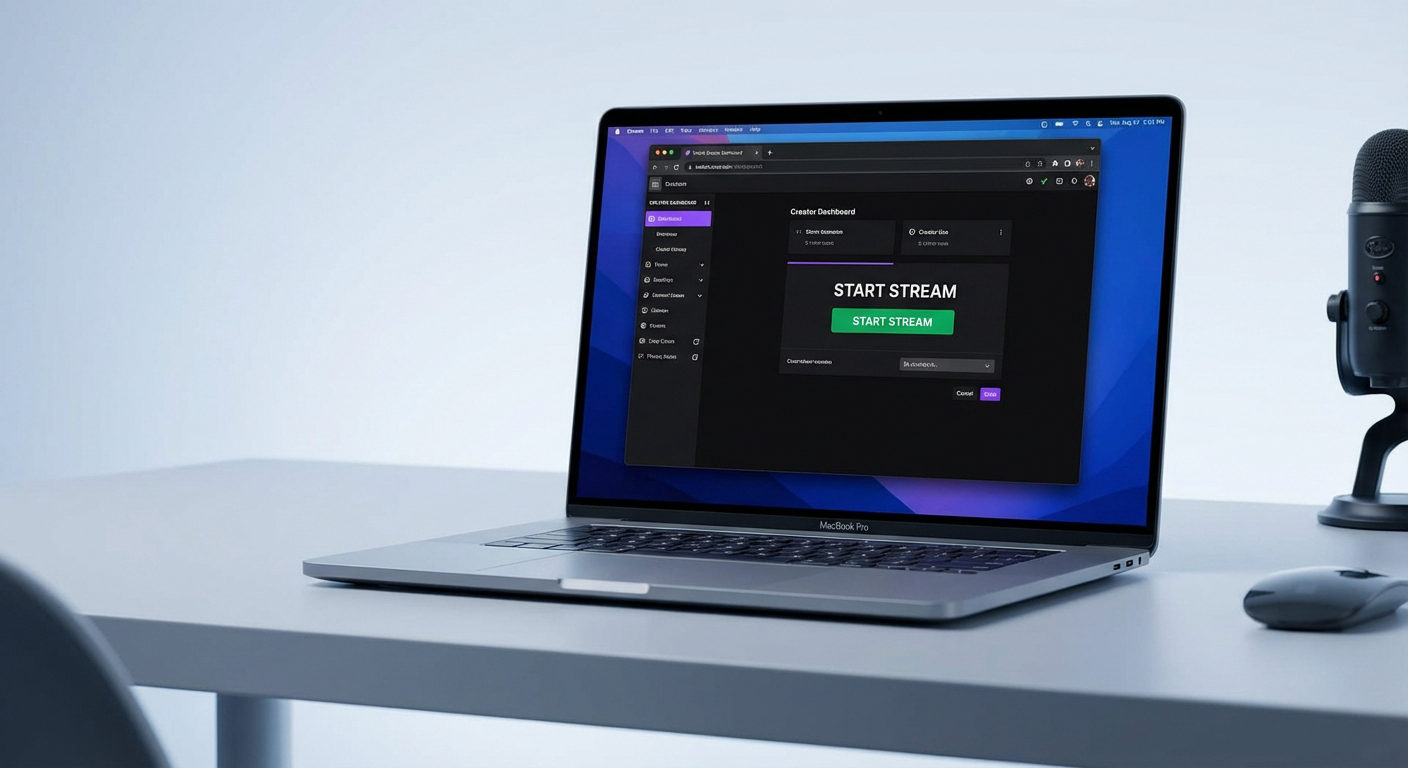
8. Start streaming
With all that done, you’re now ready to start streaming your favorite video games. Before hitting the “Start Streaming” button in OBS, double-check that all your settings are how you want them. We also suggest running a short test stream for a few minutes to make sure there are no issues, rather than jumping into your first stream with problems. You can also edit specific stream information by following these steps:
- Open Twitch.tv and click your profile icon in the top-right corner of the screen.

- From the dropdown menu, select “Creator Dashboard”

- In the left sidebar, go to the Stream Manager section.

- Under Quick Actions, click Edit Stream Info.

- Here, you can set your stream’s title, add tags, choose the stream language, and more.

Conclusion
And that’s it! You should now be ready to start streaming video games on Twitch. Remember, streaming takes consistency and the ability to keep your viewers engaged with your content. Also, make sure to thoroughly go through and follow the Twitch Community Guidelines so your content doesn’t get flagged for something you weren’t aware of.
FAQ
Q1. Can you stream for free on Twitch?
Yes, Twitch streaming is completely free. You just need a Twitch account and streaming software like OBS. However, Twitch also offers Twitch Turbo and Channel Subscriptions, which are paid options that remove ads and offer extra perks, but they’re entirely optional and not required for streaming.
Q2. Should I set up 2FA on my Twitch account?
Yes, absolutely. Enabling two-factor authentication (2FA) adds an extra layer of security to your Twitch account and is required before you can start streaming. It helps keep your account safe from unauthorized access.
Q3. What is the Twitch Inspector?
Twitch Inspector is a free tool by Twitch that helps you test and monitor your stream’s performance. You can use it to check your bitrate, stability, and connection quality before or during a stream to ensure everything is running smoothly.