.png)
Playing a song or audio file backward brings creativity to music production and enables you to discover subliminal messages. For sound engineers, audio reversing lets you create sound effects for unique musical compositions. So, learning to develop reversed audio is essential for high-quality audio files.
Audacity, the leading audio editing software, provides a straightforward approach to reverse the audio. Therefore, this article provides a step-by-step solution from importing to creatively reversing the audio.
How to reverse the audio in Audacity?
Audio reversing in Audacity may seem a complex process, but with simple instructions, it’s easy to reverse the audio. So, hereunder is the complete guide to seamlessly reverse any audio file for a unique musical production.
Step 1- Install Audacity
- Download Audacity
- Download the latest and compatible version of Audacity from the official website.
- After the download, double-click the file to initiate the installation process.
- Install
- Follow the on-screen instructions, select the destination location, and click the “Install” button.
- If you have already installed Audacity, ensure you use the updated version.
Step 2- Open the Audio File
- Open the File menu
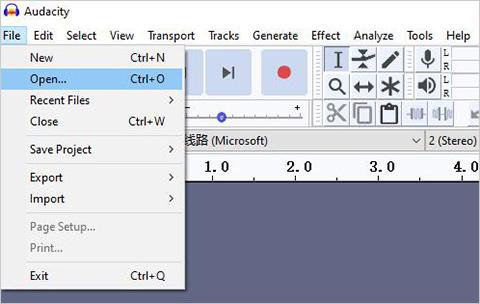
- Launch Audacity
- Navigate to the “File” option in the top-left corner of the menu bar and choose “Open” from the drop-down window.
- Alternatively, use the “Ctrl + O” on Windows or the “Cmd + O” on the Mac shortcut key.
- Select the File

- Browse through the computer to locate and select the audio file.
- Click “Open,” and Audacity will load the selected audio file.
- You can also drag and drop the desired audio file to the Audacity to load it.
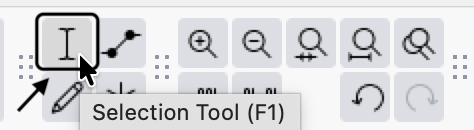
Step 3- Select the Audio Track
- Select Whole Audio Track
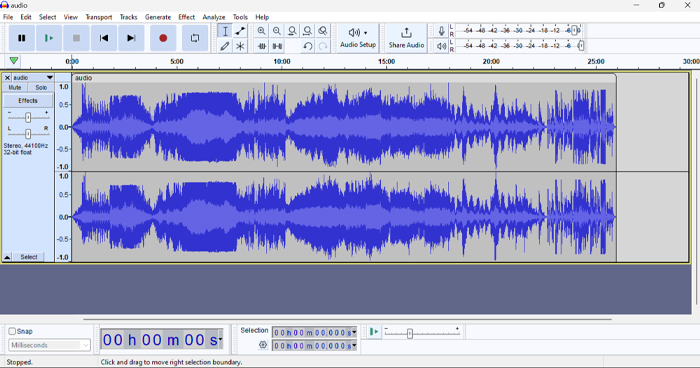
- Click on the audio track and go to the “Select” tab from the menu bar.
- Choose “All” if you want to reverse the whole audio file or use “Ctrl + A” on Windows and “Cmd + A” on Mac.
- Select Specific Audio Part

- To select a specific or partial part of the audio file, zoom in on the audio track and drag your mouse to select the desired section.
- For precise audio selection, use the “Clip Split” tool to split the audio into multiple segments.
Step 4- Reverse the Audio

- After selecting the desired audio track, go to the “Effect” tab in the top menu bar.
- From the drop-down menu, look for “Reverse” or place the cursor on “Special” and select “Reverse.”
- Audacity will process and reverse the selected clip.
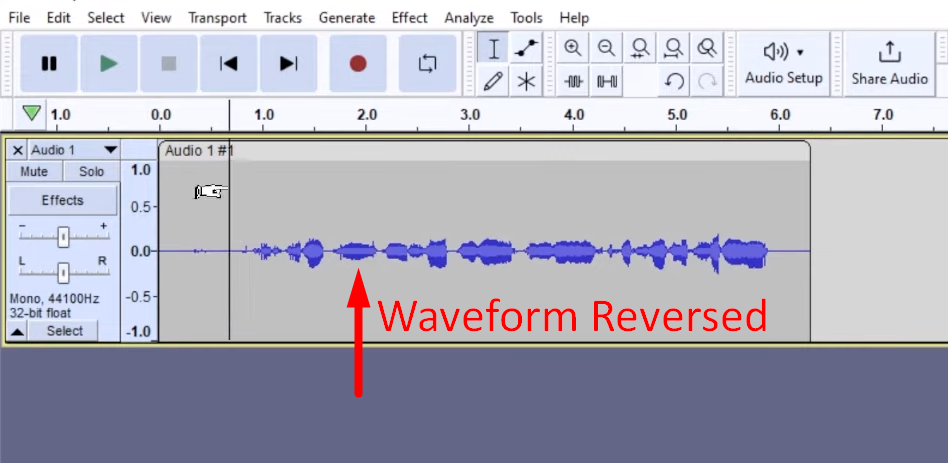
- After the reverse, the waveform of the audio will change.
- Reversing the audio enables you to create unique sound effects even in the time-stretched clips.
Step 5- Previewing the Reversed Audio
- When Audacity is finished reversing the audio, it’s crucial to preview the audio by pressing the “Spacebar” on the keyboard.
- Alternatively, use the “playback controls” from the top-left of the Audacity window and click the “Play” icon to analyze the audio.
Step 6- Export the Reversed Audio
- Export the Audio

- If you are satisfied with the preview, export the reversed audio on your device.
- Open the “File” from the top-left corner and hover over “Export.”
- Then select the “Export Audio” option to save as a new audio file.
- Select location and formats

- Select the desired location, encoding, and audio formats from the export window, such as WAV and MP3.
- Select the compatible audio and encoding options on your operating system. The default “Signed 16-bit PCM” encoding and WAV (Microsoft) is preferred.
- Metadata Tags

- Click the “Save” button, and you will be prompted to edit the “Metadata tags” before saving.
- Make the desired changes on Metadata tags and click “OK” to save the file.
After saving the file, the export progress dialog window will appear, and the audio will automatically save as a new file. Also, properly consider the clip’s speed when applying the reverse effect.
Step 7- Editing the Reversed Audio
- After saving the reversed audio, Audacity enables you to edit the audio, such as applying sound effects or adjusting the audio volume.
- For editing, go to the “Effect” tab on the top-left menu bar and select the desired sound effect from the prompted window.

- Also, drag the edge of the audio to resize or right-click the audio track and select “Split the audio.”
Once you’ve mastered reversing audio in Audacity, it’s time to elevate your audio recordings even further. Using a high-quality wireless lavalier microphone ensures crystal-clear capture, providing you pristine audio material to explore and edit creatively.
Frequently Asked Questions
Can I reverse a specific section of an audio track in Audacity?
Yes, Audacity allows you to reverse a specific section of the audio track, and here’s how you can do it:
- Import the audio file by selecting “File” and “Open.”
- Drag your mouse across the waveform to select the portion you want to reverse.
- Go to the “Effect” menu and select “Reverse.” Then, Audacity will process and reverse the selected section.
Will reversing audio in Audacity affect the audio quality?
Audacity does not affect the sound quality due to its non-destructive editing nature. Also, reversing the audio plays the waveform backward and does not affect the audio. However, saving the audio file as compressed or applying multiple effects might affect the sound quality.
How can I undo the reverse audio effect in Audacity?
There are two prominent ways, using the Undo or History method, to undo the reverse effect in Audacity. Hereunder are methods,
- Using Undo
- Go to the “Edit” tab at the top menu bar and select “Undo.”
- Alternatively, use “Ctrl + Z” on Windows or “Cmd + Z” on Mac.
- It will undo the most recent action and keep pressing it to achieve the desired result.
- History Method
- Click the “View” tab and select “History” from the drop-down menu.
- A window with a complete list of editing actions will appear.
- Locate the “Reverse” section and click the “Undo” then choose “OK.”
Is it possible to batch reverse multiple files at once in Audacity?
Yes, it’s possible to batch-reverse multiple audio files to save time using “Macros” or “Chains” in older versions. Hereunder is the process to reverse various files:
- Go to the “Tools” tab and select “Macros.”
- Click the “New” button to create a new macro and enter the name.
- Select the “Insert” button from the right side of the macro window and select the “Reverse” effect.
- Then select the second effect, “Export as WAV.”
Can reversing audio in Audacity reveal hidden messages in songs?
Yes, reversing the audio can reveal hidden, subliminal messages in Audacity. For this, it’s essential that the message is recorded backward and is clear and concise when recorded initially. Some artists intentionally hide messages for sonic exploration, and it’s only possible with reversed audio tracks.
What file formats does Audacity support for reversing audio?
Audacity supports multiple file formats when reversing the audio, and hereunder are the compatible formats:
- WAV
- MP3
- FLAC
- AIFF
- Ogg Vorbis
It allows you to convert multiple audio files into different formats and enables you to combine various formats. However, sound quality will be lost when exporting the audio as mp3 compared to FLAC or WAV.
Are there any limitations to the length of audio I can reverse in Audacity?
There is no inherent limitation on the audio length you can reverse in the Audacity. However, technical limitations may arise because reversing relies on the computer’s available memory. Also, the 4GB audio exporting limit applies to all files, and it’s essential to free up some space for processing when reversing the audio.
Can I reverse audio in real-time while recording in Audacity?
No, Audacity does not support real-time audio reversing while recording. Audacity provides a straightforward process to record your audio, and then you can use the “reverse” effect when the recording is complete. Also, the reverse effect can only be applied when the audio is entirely recorded because it requires flipping the waveform.
Is Audacity the best software for reversing audio, or are there better alternatives?
Audacity is a widespread audio editing software with flexibility, versatility, and ease of use. It provides free access to multiple professional features and is compatible with diverse audio formats. Audacity allows you to reverse numerous audio tracks but requires more extensive memory storage for smooth function.
However, better professional-grade audio editing software such as Adobe Audition, Logic Pro, or Movai exist. Therefore, consider using paid software for quality audio reversing to retain the audio quality.
How can I ensure the best quality when reversing audio files in Audacity?
Here are some tips or measures to ensure high-quality audio when reversing the files in Audacity:
- Ensure select quality audio files with compatible audio formats, preferably WAV format, to avoid quality loss.
- Avoid conversions because every time the audio format is converted, it loses the quality and data of the original audio.
- Try to apply as minimum effects as possible during the editing.
- When exporting the reversed audio, choose the high-quality format and export it as uncompressed WAV files.