.png)
Have you ever found yourself in the midst of an exciting PS4 session, only to realize your mic is on mute? We know how frustrating that can be. But no worries, we’re here with the ultimate guide to help you swiftly unmute your microphone and get back in the game. No more dealing with silent moments during epic battles or missed chats with your gaming crew.
With easy steps and clear instructions, you’ll be reconnecting with your gaming buddies in no time. So get ready to amp up your communication on your PS4. Let’s get into this quick guide and help you unmute your mic in the gaming universe.
How To Unmute Mic On PS4 – A Comprehensive Guide
Whenever you join a PlayStation party, something annoying happens – a message shows up, saying your microphone is muted. But you haven’t turned it off yourself. You can hear others just fine, but they can’t hear you at all. It’s like they’re talking and you’re not. This keeps happening, and you’re not sure why. You’re left scratching your head, wondering how to fix it and start talking with your friends.
It’s almost like your microphone is playing a trick on you, staying quiet when you want to chat. If you’ve experienced this situation, follow our step-by-step guide to prevent it from happening in the future.
A Simple Step By Step Guide
Regain your voice in the gaming world by following these steps to unmute your PS4 mic.
Step 1: Go to Your Settings
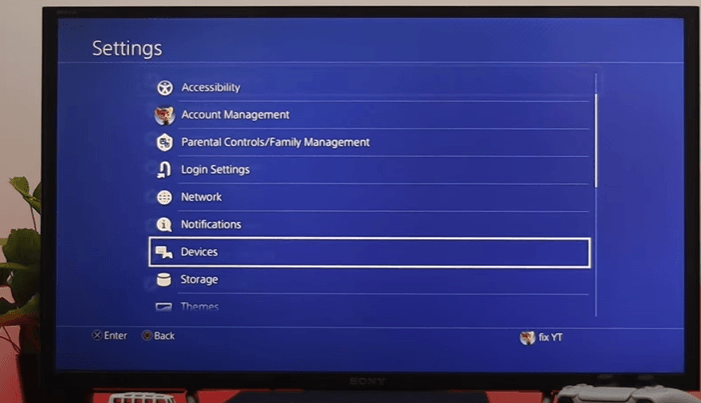
Begin by navigating to your PS4’s main menu and selecting the Settings icon. This is your starting point to get your microphone up and running.

Step 2: Choose Audio Devices
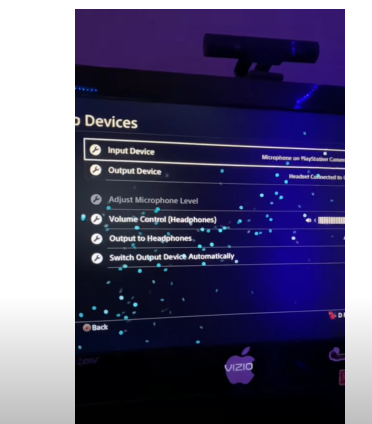
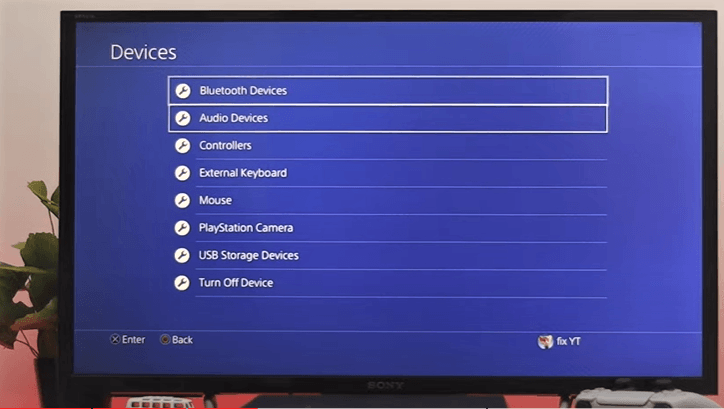
Inside the Settings menu, scroll down to find the Devices section. Within this section, you’ll see Audio Devices – this is where the magic happens. Click on it to proceed.

Step 3: Select Input Device
In the Audio Devices menu, focus on the Input Device option. Make sure that Microphone PlayStation is selected as your input device. This ensures that your PS4 recognizes your microphone for communication.
Step 4: Check Your PlayStation Camera Settings
Access Your PlayStation Camera: Exit the Audio Devices menu and navigate to the PlayStation Camera section. This is where you’ll fine-tune your microphone settings.

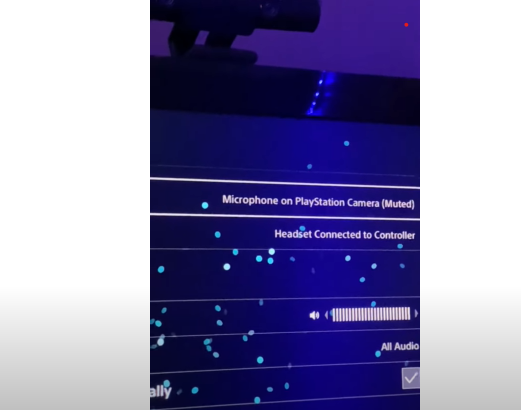
Step 5: Explore Microphone Options
Within the PlayStation Camera settings, you’ll notice Microphone on PlayStation Camera (muted). This is where the source of your microphone issues might be hiding.
Step 6: Unmute Your Mic
Select the option to unmute your microphone. By doing this, you’re allowing your microphone to transmit your voice once again.
Step 7: Test Your Unmuted Mic
With your microphone now unmuted, it’s time to put it to the test. Jump back into your game or a party chat and speak into your microphone. You should now be able to hear your own voice, confirming that your microphone is indeed working as it should.
Congratulations! You’ve successfully navigated through the steps to unmute your microphone on your PS4. No more quiet gaming sessions or missed chats with your fellow players.
But hold on! If the above steps didn’t fix the issue and your games are still muted, it’s time to explore additional options. Let’s take a look at what those options could be.
When Silence Persists: Unmute Your PS4 Mic with These Next Steps!
We understand the importance of a fully functional microphone in enhancing your gaming experience, so if you are unable to unmute your microphone with above steps, consider the following alternative approaches to resolve the issue:
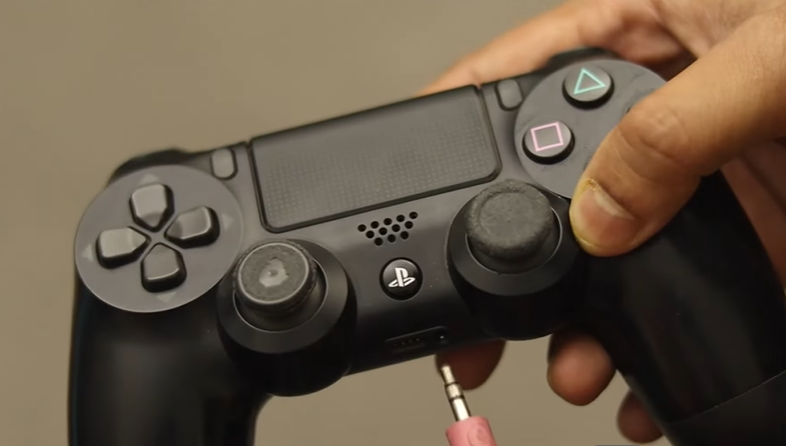
Check Your Microphone Connection
Ensure your microphone is properly and securely connected to your PS4 controller or console. Sometimes, a loose or incorrect connection can be the root cause of microphone issues.
Double-check the port and connection to make sure everything is snug and in place before exploring further solutions. It’s a small step that can often save you time and hassle, ensuring that your microphone setup is correct from the start.
Check Microphone Settings
If the issue persists after checking your microphone Settings, follow these steps:
- Navigate to Settings
From your home page, move to the top and navigate through the Settings.
- Select Devices
In the settings menu, choose Devices.
- Access Audio Devices
Within the devices section, find and select Audio Devices.
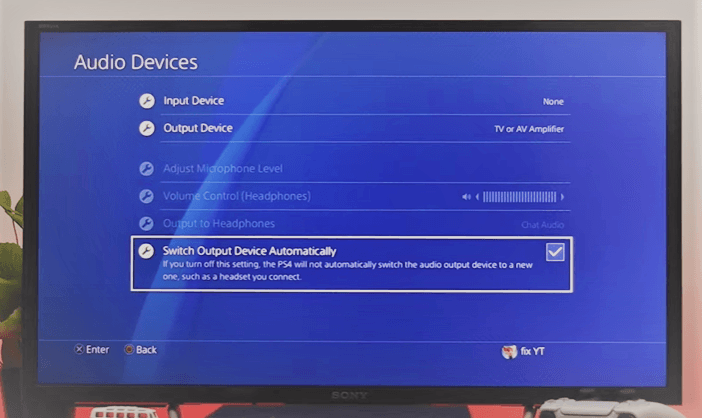
- Verify Switch Device Output Automatically
First, make sure the option Switch Device Output Automatically is checked. This ensures proper audio routing.
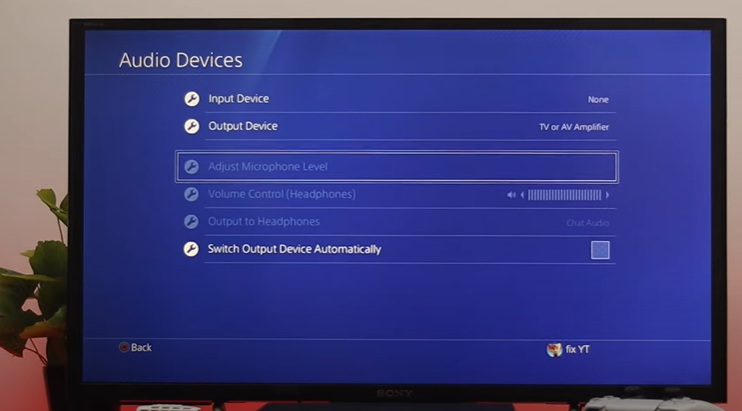
- Check Adjust Microphone Level
Look for Adjust Microphone Level. If it’s grayed out, it indicates your microphone isn’t properly connected to your PS4. On the other hand, if it’s visible and accessible, your microphone is properly connected.
Check Your Mic
Ensure that the microphone you are using is not physically muted. Many microphones have a control button or switch that allows you to mute/unmute. Look for a small button or slider on your mic, and make sure it’s in the unmuted position. Remember even the best tech can sometimes have a simple solution.
Hard Reset the PS4
Occasionally, when you encounter issues with your PS4’s hardware, performing a reset can surprisingly provide a solution. If you’re facing muting problems with your PS4 microphone, here’s a step-by-step guide on how to hard reset your console and attempt to unmute the microphone:
Step 1: Turn On your PS4
Ensure your PS4 is turned on.
Step 2: Hold down the Power Button
Locate the Power Button on your PS4 console. Press and hold it down. Keep holding even if you hear the initial beep.
Step 2: Wait for the Second Beep
After a few seconds, you’ll hear a second beep. This might take around 7-10 seconds. This signals that the console is turning off.
Step 3: Power Off
Release the Power Button after the second beep. The PS4 will start shutting down. Wait until the power light stops blinking and you hear the fans turn off. This ensures that the console is fully powered down.
Step 4: Unplug the Power Cable
Carefully unplug the power cable from the back of the PS4 console. Keep it unplugged for about 30 seconds. This allows any residual power to dissipate and helps in resetting the system.
Step 5: Plug the Power Cable Back In
Reconnect the power cable to the back of the PS4 console.
Step 6: Turn On the PS4
Press the Power Button to turn on the PS4.
Step 7: Re-pair Controller
Press and hold the PS button on the DualShock controller to turn it on. It should automatically pair with the console.
Step 8: Check Settings
Navigate to the Settings menu on the PS4. Go to the relevant section that manages audio and microphone settings. Check if the microphone issue has been resolved.
This process resets the PS4’s software and hardware settings, potentially resolving any glitches or issues. Be patient during each step, especially when waiting for the second beep during the power button hold. The exact labels and menu positions may vary depending on your PS4 model and software version.
This process may not guarantee a solution for everyone, but it’s a common troubleshooting step for various issues.
Conclusion
By carefully following the step-by-step instructions we’ve detailed, you should be able to unmute your microphone and get back to enjoying seamless communication during your gaming sessions.
But sometimes, despite our best efforts, certain problems may persist. In such cases, it’s wise to get some professional help. If your microphone problem continues to persist despite following above troubleshooting tips, you should reach out to the appropriate support channels or technical experts.
If you’re looking for clearer in-game communication on your PS4, upgrading your microphone setup could be the difference-maker. A wireless lavalier microphone ensures crystal-clear audio and comfort, letting teammates hear every word without hassle.
FAQs About PS4 Mics
Q: Can I test my microphone within the PS4 settings to ensure it’s working?
A: Yes, you can test your microphone within the PS4 settings to ensure it’s functioning properly: You can do that by adjusting the ‘’Microphone Level” and following the prompts to speak into the microphone. You’ll see a visual indicator of your microphone’s input.
Q: Are there specific in-game settings I need to adjust to enable my microphone?
A: Yes, some first-person games might have their own in-game microphone settings. Look for an option in the game’s settings menu related to audio or voice communication. Make sure it’s set to “enabled” or “on” for your microphone to work.
Q: Are there any privacy settings that could impact microphone usage?
A: Yes, the PS4 has privacy settings that could affect microphone usage. Navigate to Settings > Privacy Settings > Microphone to ensure that microphone access is allowed.
Q: Could network connectivity affect microphone functionality?
A: Yes, poor network connectivity can impact voice chat quality or functionality. If you’re experiencing issues, ensure a stable internet connection and consider using a wired connection instead of Wi-Fi.