.png)
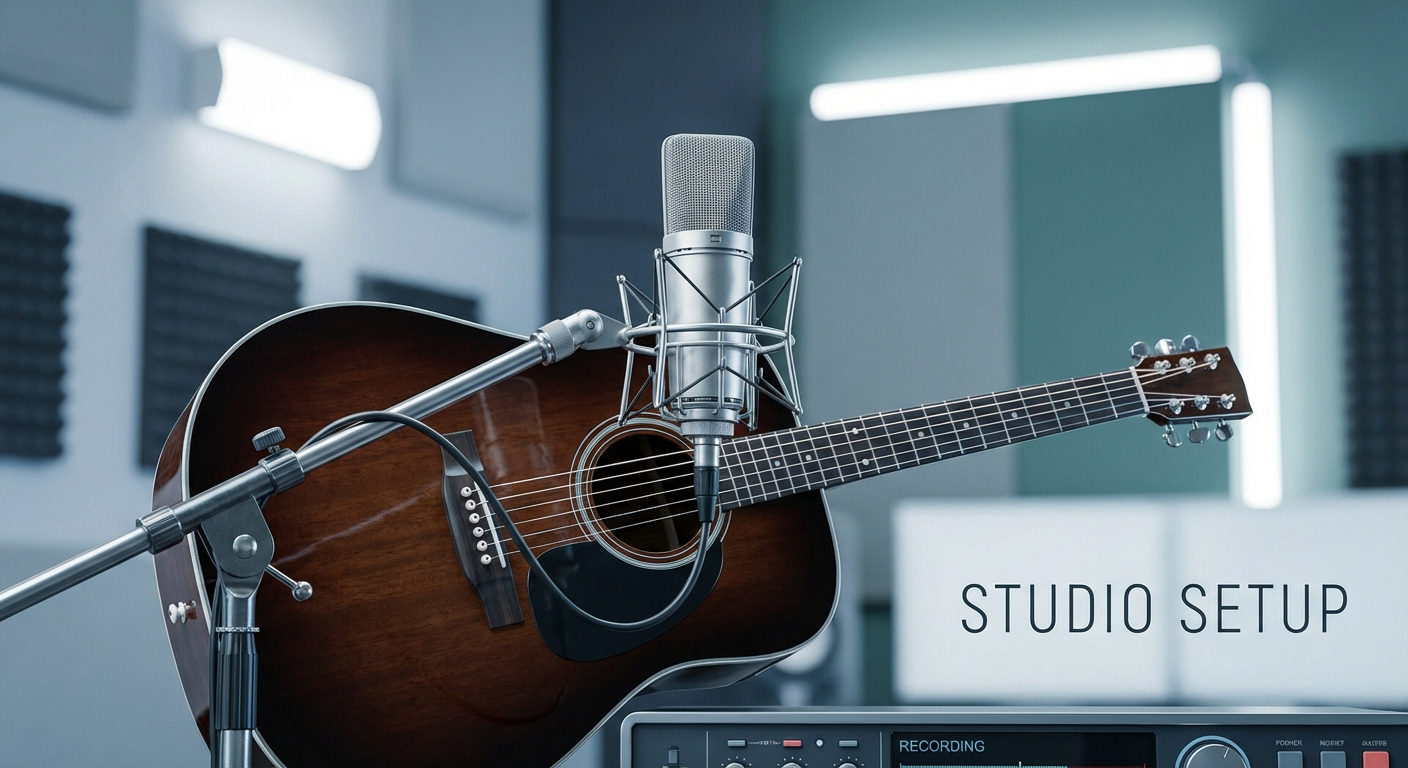
The snare drum is the heartbeat. That signature crack, the sizzling trail, the punch that hits you right in the chest? That’s the snare doing its thing. But capturing that sound perfectly? That’s where the real craft begins. Nailing a snare tone can elevate your mix from good to unforgettable.
This guide dives into the why and how of snare mic from minimalistic setups to full-blown setups. Level up your snare game.
Understanding Your Snare Drum
Before placing a single mic, understand that it’s not just a drumhead being hit, it’s a fusion of shell resonance, head response, and the crisp slap of snare wires.
This creates two main sound sources:
Top head: The initial attack and body.
Bottom wires: The signature buzz and sparkle.
Key variables that change your miking strategy:
Shell depth: Deeper snares bring more boom.
Tuning: Tight snares are all cracked, whereas loose ones lean into thump.
Material: Wood offers warmth, whereas metal gives brightness.
Your mic choice and placement should flatter the drum’s natural tone.
Let’s Talk About Essential Miking Methods
Method 1: The classic single close mic
This setup is speedy, quick to deploy and works well in nearly any musical style.
Steps to do it:
- Grab a dynamic mic
- Place it 2-4 inches above the rim
- Angle it 45 degrees towards the drumhead’s centre
- Keep it 1-2 inches inside the rim
- Roll off below 80- 100Hz to mix low-end mud
- Aim for -12dB to -6dB peaks on your preamp
- Always check for phase alignment with other mics
Why it works: It captures the punch, minimises bleed, and fits neatly into a mix without needing a sonic makeover.

Method 2: Top and Bottom- The Pro Engineer’s Favourite
Want precision? Control? Flexibility in the post? The top-and-bottom approach is unbeatable. This technique allows you to separately control the attack from the top head and the sizzle from the snare wires below.
Here’s the setup:
- Top mic: same position as Method 1
- Botoom mic: dynamic mic aimed up at the snares, 2-3 inches away
- Flip the phase on the bottom mic
- EQ top for body & bottom for crisp snare rattle
- Gate both mics if bleed becomes a problem
- Balance: top mic leads, bottom mic seasons
Why it works: You get clean separation between the thump and the buzz. This is the setup most mix engineers default to when they want surgical control.

Method 3: Off-Axis/Side Miking for Natural Sound
This approach works beautifully for jazz, acoustic music, or anytime you want a more natural, less aggressive drum sound. Side miking captures the drum’s resonance and natural character while reducing harsh attack transients.
How to do it:
- Use a condenser or ribbon mic
- Place it 6-12 inches to the side of the snare
- Aim it at the shell or head at about 45 angle
- Works exceptionally well with ribbon mics for vintage warmth
- Requires less gating due to reduced cymbal bleed
When to use: Jazz, acoustic, single-songwriter, film scores. When the snare needs to breathe in the mix rather than dominate it.
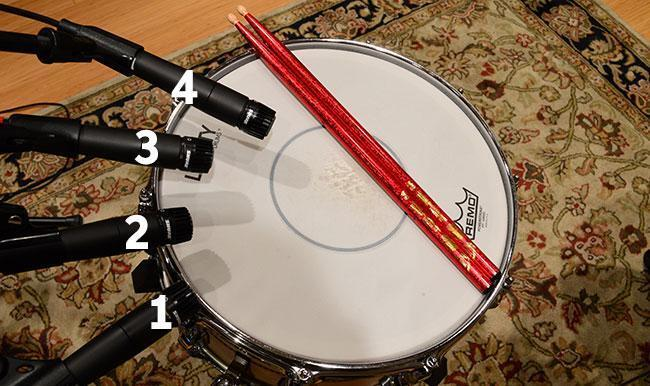

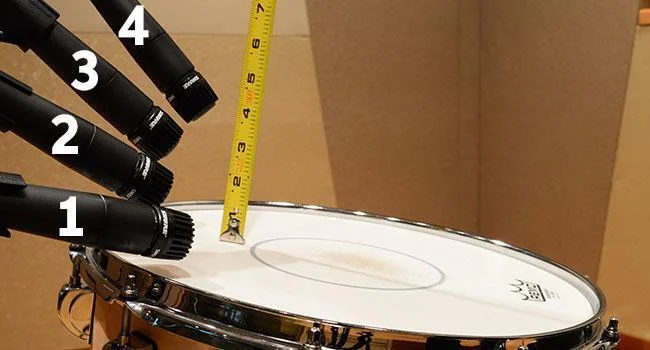
Method 4: Dual Top Mics for Maximum Versatility
Popular in rock and metal production, this method uses two microphones on top of the snare to capture different tonal characteristics simultaneously.
Setup:
- Mic 1: Positioned near the outer edge for crack and articulation
- Mic 2: Aimed at the drum’s centre for punch and weight
- Try adjusting each mic’s position by small amounts to shape the tone more precisely
Best for: Rock, metal, pop and any genre requiring a snare that cuts yet carries weight.
Advanced Techniques and Considerations
Let’s talk about the elements that determine whether your snare recording hits the mark or misses entirely.
Choosing the Right Microphones
The type of microphone you choose can drastically alter the character of your snare. Different mics respond to transients, bleed, and dynamics in unique ways.
Dynamic Mics
- Examples: Shure SM57, Sennheiser MD421, Audix i5
- Built to handle high SPLs
- Excellent off-axis rejection to reduce cymbal bleed
Condenser Mics
- Capture more transient detail and extended highs
- Ideal for overhead or ambient snare capture
- Tends to pick up more background noise
Ribbon Mics
- Naturally roll off harsh high frequencies.
- Add vintage warmth and depth.
- Require delicate handling and appropriate preamps.
Room Acoustics
Your snare’s character is deeply influenced by the environment it’s recorded in.
Common Environments:
- Dead booth: Focused, tight sound with minimal reflections
- Wood-panelled room: Adds natural reverb and warmth
- Concrete or untreated space: Can introduce harsh reflections and noise
Tips:
- In reflective rooms, the mic is closer to the drum to reduce ambience
- In dry rooms, pull back slightly to allow some air around the snare
- Consider the ceiling height and nearby reflective surfaces
Drum Tuning and Prep
Even the best mics can’t compensate for bad tuning. Get the snare sounding right before hitting record.
Checklist:
- Top head tension: Higher for crack, lower for body
- Bottom head: Adjust for snare sensitivity
- Tuning balance: Avoid overtone clashes
- Use dampening (gels, tape, rings) as needed
- Match tuning to genre demands (tight for punk, fat for hip-hop)
Troubleshooting Common Issues
Even with the right setup, snare miking doesn’t always go as planned. From phase problems to intrusive cymbal bleed, plenty can get in the way of a clean snare track. But don’t panic, most issues are fixable with a few quick tweaks.
Phase Cancellation
- Always test the phase between the top and bottom mics
- Flip polarity switches or rewire cables to compare
- Check phase against overheads and tom mics
Cymbal Bleed
- Use directional mics with tight patterns (cardioid, hypercardioid)
- Angle the mic away from the hi-hats
- Ask the drummer to adjust cymbal angles if needed
- Slightly elevate the snare mic for better rejection
Weak Snare Presence
- Position the microphone slightly inward for impact and clarity
- Use parallel compression to thicken the tone
- Boost low-mids around 200Hz if the snare feels thin
Excessive Ring or Resonance
- Apply dampening gels or rings.
- Retune the drum to minimise problem frequencies.
- Use a gate or transient shaper to control the snare’s tail.
Conclusion
Snare miking isn’t just technical, it’s artistic. Each technique covered here provides a unique lens through which the snare can be heard. Start with the fundamentals, listen closely, and don’t shy away from experimentation.
A killer snare sound begins with tuning, playing, and mic placement. But in the hands of a thoughtful engineer, even a modest snare can become the rhythmic centrepiece of a track. So keep your ears open, stay flexible, and let the snare drum do what it does best: speak with authority.
Common FAQs
1. What’s the best way to reduce cymbal spillage into my snare microphone?
Position your microphone closer to the snare and angle it away from cymbals. Use more directional mics, consider asking the drummer to adjust cymbal height, or use gates during mixing. Sometimes, a slight change in mic angle can make a huge difference.
2. Why does my snare sound thin when using multiple mics?
This is usually a phase issue. Check the phase relationship between all your drum mics, not just the snare mics. Try flipping the phase on different channels or slightly moving microphones to find the sweet spot where everything locks in.
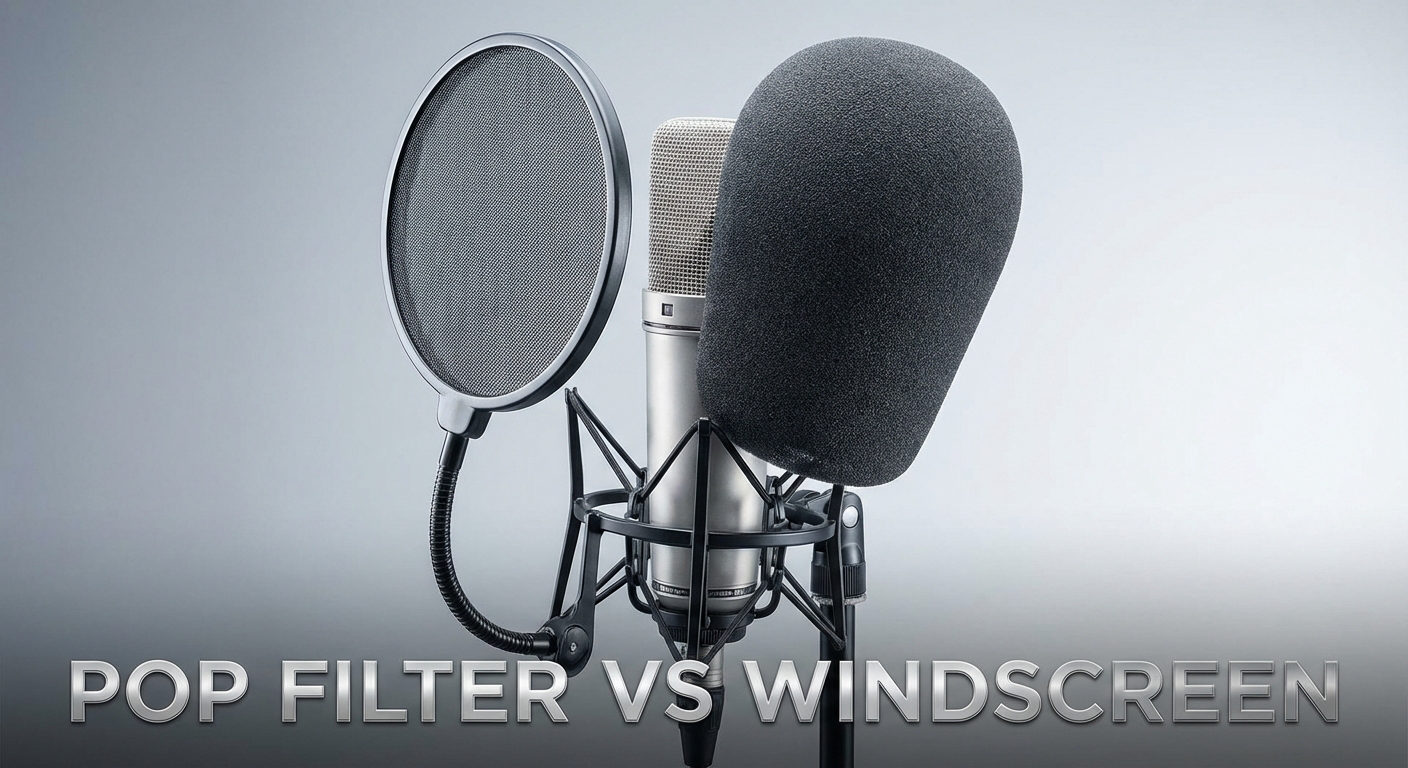
9. Should I use a pop filter on snare mics?
Generally not necessary for snare drums, unlike vocals. However, in very dusty environments or outdoor settings, a windscreen might help protect the microphone capsule. The priority is proper positioning to avoid stick hits rather than filtering air movement.
10. How do I know if my snare mic placement is correct?
Focus on achieving a clean blend of attack, tone, and wire snap with minimal bleed from nearby cymbals. The sound should sit well in your mix without requiring extreme EQ. If you’re fighting the sound with heavy processing, try adjusting the mic position first – small changes can make dramatic improvements.