


































.png)
 简体中文

Getting webcam placement right takes only a few minutes and immediately improves how you appear on video calls. A camera placed too low, too high, or off to one side creates unflattering angles and breaks the natural eye contact that makes conversations feel real. This guide shows mounting, alignment, and framing calibration step by step, using the Hollyland Lyra webcam as the demonstration unit throughout.

Hollyland Lyra - 4K AI Webcam
A flagship 4K AI webcam featuring a large 1/1.5″ CMOS sensor, smart auto-framing, and studio-grade 48 kHz/24-bit audio for effortless streaming and conferencing.
Key Features: 1/1.5″ CMOS & 4K30 | AI Tracking & Auto Framing | 48 kHz/24-bit Audio
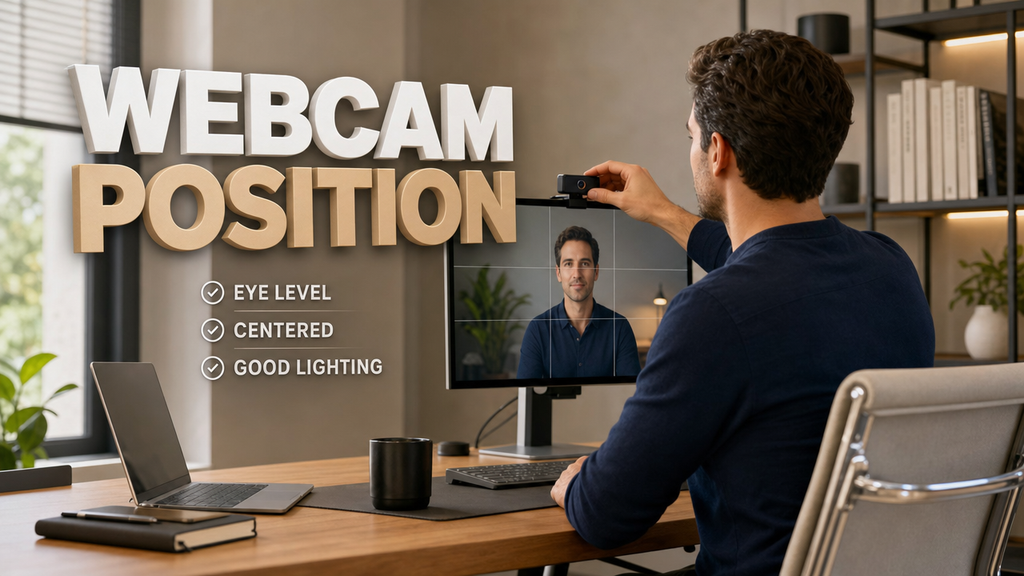
Why Webcam Placement Changes How You Look On-Camera
Your lens position determines the camera angle people see during calls. Even small placement changes can noticeably affect how you appear.
The three most common placement problems are:
- Too low: The camera shoots upward, revealing your nostrils and the ceiling behind you while distorting your chin and jawline.
- Too high: The camera angles down, making you look small and distant.
- Off-center: The lens sits to one side, so your eyes appear directed away from the person you are speaking to, breaking natural eye contact.
Placing the webcam at eye level, top-center of the monitor, solves all three at once.
What You Need Before You Start
Confirm you have the following before mounting:
- A webcam with its clip mount and cable. This guide uses the Hollyland Lyra, which ships with a magnetic monitor bracket (featuring a 1/4-inch threaded hole for optional tripod use), a 1.5 m USB-C to USB-C cable, and a USB-C to USB-A adapter.
- A stable monitor positioned at your normal working height.
The two physical interfaces you will work with on the Lyra are the magnetic clip bracket on its underside and the USB-C port on its rear panel.
Step 1: Attach the Webcam Clip to the Top of Your Monitor
- Open the monitor mount. Attach your Hollyland Lyra to its magnetic monitor mount first. The rubberized inner pads grip your monitor firmly without scratching it.
- Seat the clip on the top bezel. Rest the front lip of the bracket on the front face of the monitor’s top edge, then fold the rear leg against the back of the bezel. The bracket adjusts to accommodate both thin and thick bezels.
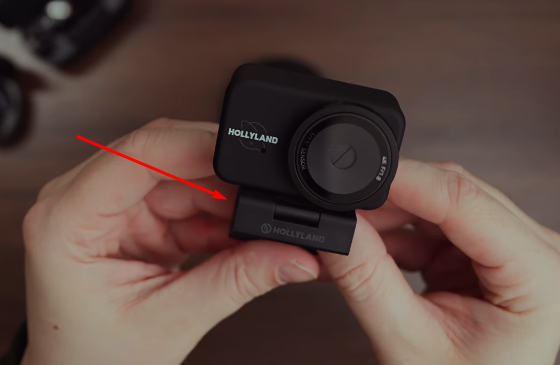
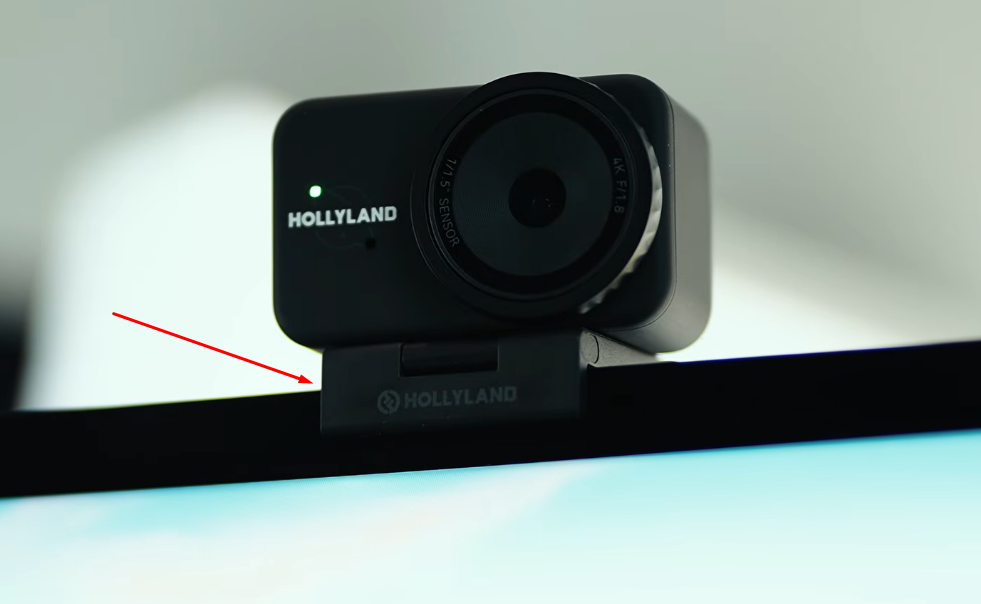
- Route the USB-C cable. Connect the cable to the USB-C port on the rear of the Lyra. Connect the other end of the cable to the USB-C port on your computer.
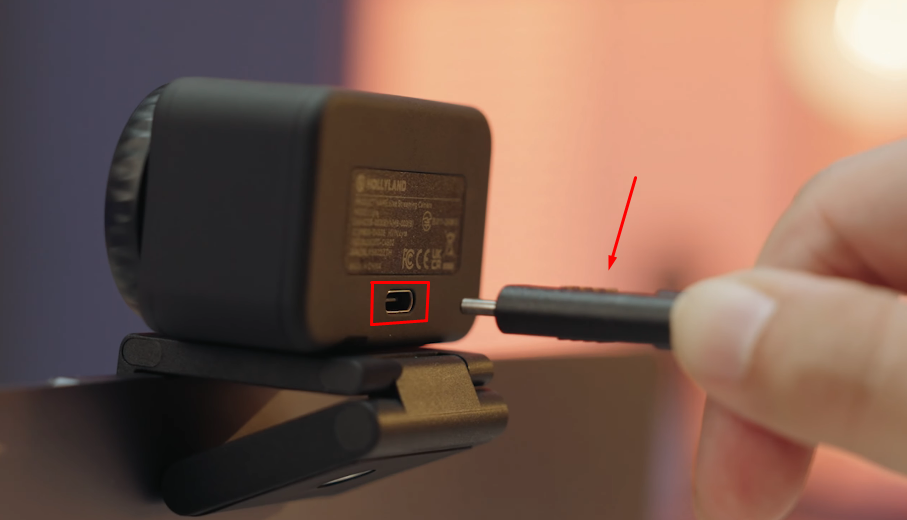

- Plug in and confirm recognition. On Windows, a plug-and-play notification appears in the taskbar when the Lyra is detected as a UVC device. On macOS, go to System Settings, then Privacy and Security, then Camera, to confirm the device is listed. The Lyra’s LED indicator moves to its active state (solid blue) on a successful USB connection, confirming the camera is live and ready to use.
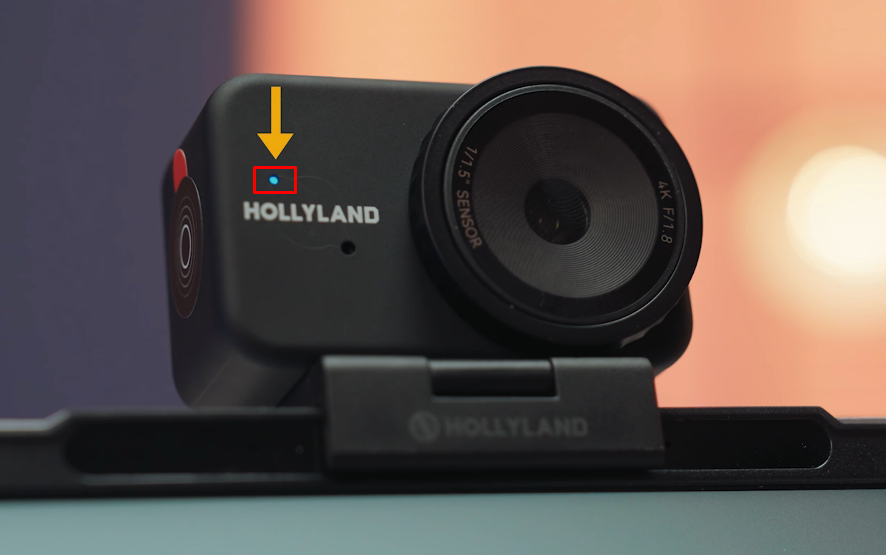
Pro Tip: Anchor the USB cable to the monitor stand with a small cable clip or hook-and-loop strap. Unconstrained cable tension is one of the most common reasons webcams slowly drift out of position over time.
Step 2: Align the Camera Lens with Your Eye Line
Eye-level alignment is one of the most important positioning variables. Complete these steps while seated in your normal working posture:
- Sit down and look straight ahead. Note where your eyes naturally fall relative to the top edge of your monitor.
- Check the camera height. The Lyra lens should sit at your eye level or 1 to 2 inches above it.
- Adjust the monitor if needed. Raise the screen using your stand’s height adjustment or place a monitor riser underneath it until the top bezel reaches the correct height. Raising the monitor is always preferable to angling the camera upward.
- Tilt the Lyra lens downward. The camera body pivots on the clip bracket. Once the clip is fixed to the monitor top, rotate the lens downward so the lens axis points at your face rather than straight ahead at the wall behind you.
Note: Positioning the lens 1 to 2 inches above eye level and tilting it slightly downward produces a more attentive, flattering angle than a perfectly flat horizontal lens. It prevents both the “up the nose” distortion from a camera placed too low and the diminishing overhead effect from a steeply downward angle.
Step 3: Center the Webcam Horizontally on the Monitor
After setting height and tilt, slide the Lyra laterally along the top edge of the monitor until the camera body is positioned directly above the midpoint of the screen.
This matters because when you look at your video-call window during a conversation, your eyes should be directed as close to the lens as possible. A camera shifted to one side makes you appear to be looking past the other person, which reads as disengagement even if you are fully attentive.
Quick Tip: Most monitors have a stand pivot at the base, centered horizontally with the screen. Place the Lyra directly above that spot for better alignment.
Tip: Open your video-call app in preview mode with the call window placed directly below the camera lens. This gives you real-time visual feedback on both centering and tilt as you make final physical adjustments.
Step 4: Fine-Tune Framing with Zoom and AI Track & Auto-Framing Controls
After physical placement, open HollyStudio to refine what the Lyra actually captures:
- Launch HollyStudio. Once the Lyra is connected and the LED is in its active state, open HollyStudio. The app detects the Lyra automatically and displays a live preview.
- Adjust digital zoom through the Focal Length. The Lyra supports 1x to 4x digital zoom via the Focal Length slider on the Image Control page > Advanced section. If the 82-degree field of view is capturing too much background or ceiling, use the zoom slider to pull in to around 1.2x to 1.5x for a standard head-and-shoulders frame.
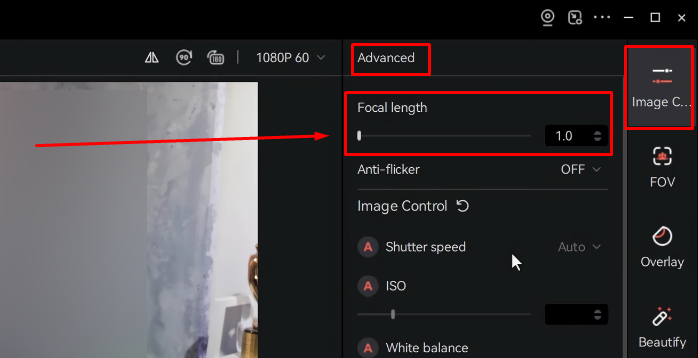
- Check headroom. In the live preview, your eyes should fall roughly in the upper third of the frame, with your shoulders visible at the bottom. Too much empty space above your head indicates the camera is still aimed too low or the zoom is too wide.
- Enable AI Tracking and Smart Auto Framing. The AI Tracking and Smart Auto Framing in HollyStudio instructs the Lyra to actively keep you centered in the frame as you move. This is useful during long calls and provides helpful tolerance for small horizontal placement offsets made during Step 3. Here’s how to activate AI Tracking and Smart Auto Framing:
- On the main HollyStudio app’s interface, go above the preview screen and click the frame icon. A padlock symbol will appear inside the frame icon, confirming that AI Tracking is activated.
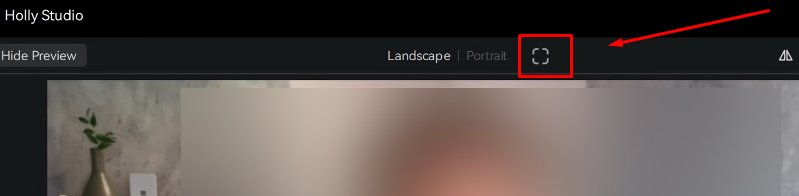
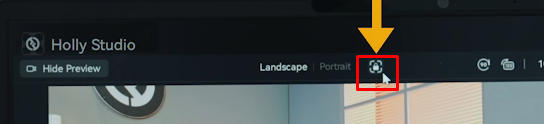
- Now click the gear icon under the preview screen to open Settings.

- Choose Camera Settings, then enable Face Priority Focus and close the window.

- Move to the FOV page.
- Under the Smart Framing section, deselect None and click on the image tile next to the None tile to enable auto framing.

Adjusting Placement for Different Monitor Setups
| Setup | Recommended Placement | Notes |
|---|---|---|
| Single standard monitor | Top-center, at eye level | Follow the main steps above |
| Ultrawide monitor | Top-center of the ultrawide | Move the video-call window directly below the lens; Lyra’s AI auto-framing compensates for the wider horizontal span |
| Dual-monitor setup | Top-center of your primary monitor | Place the video-call window at the top-center of that screen, directly below the camera |
| Laptop and external monitor | Top-center of the external monitor | Disable the built-in laptop camera in your video-call app to prevent it from defaulting to the wrong device |
Note: If a curved bezel or very thin monitor top prevents a reliable clip grip, the Lyra’s magnetic base includes a 1/4-inch threaded hole. A small tripod or desktop stand placed behind the primary monitor at eye height achieves the same position without relying on the bezel clip at all.

Common Webcam Positioning Mistakes to Avoid
- Placing the webcam on the desk, below the monitor. This creates an upward angle that reveals the ceiling and distorts your proportions. Always mount on top of the monitor.
- Mounting too far to one side. A significant lateral offset causes visible gaze aversion. Center the lens directly above the midpoint of the screen.
- Skipping tilt adjustment after clipping. Placing the bracket is only half the job. Always rotate the Lyra lens downward after clipping so it points at your face.
- Allowing the lens to sit behind the bezel overhang. On monitors with a thick top bezel, the lens can end up partially blocked by the front lip. Ensure the lens clears the front edge completely before locking the clip.
- Forgetting to disable the built-in laptop camera. When adding an external webcam to a laptop setup, video-call apps may default back to the internal camera. Select the Lyra explicitly in your app’s camera settings.
Frequently Asked Questions
Should the webcam be above or below the monitor?
Always above, clipped to the top edge. A camera placed below the screen forces an upward angle that shoots toward the ceiling and distorts your face. Top-bezel mounting is the standard for clip-style webcams and gives you the most control over height, tilt, and horizontal centering.
Does it matter if the webcam is slightly off-center?
Small shifts of 1 to 2 centimeters usually won’t matter much. Bigger sideways shifts can make your gaze look noticeably off. Your audience might notice you looking away from the camera. On Lyra, enable AI Tracking and Smart Auto Framing in HollyStudio. Once active, these settings can correct small horizontal placement shifts.
How high should the monitor be so the webcam is at eye level?
The lens should sit at your eye level or 1 to 2 inches above it when you are seated in your normal working posture. Adjust monitor height or use a riser to reach this position. Raising the screen is better than tilting the camera upward, which changes the framing angle and can introduce distortion.
Can I use a webcam on an ultrawide monitor?
Yes. Position the webcam at the top-center of the ultrawide, then move your video-call window directly below the lens. This minimizes the offset between where you look on screen and where the lens is located, keeping the perceived eye-contact angle as natural as possible.
What if my monitor bezel is too thin for the webcam clip?
The Hollyland Lyra has a magnetic mount that attaches atop your screen. Your webcam snaps into place magnetically in landscape or vertical mode. If your monitor bezel is too thin or sleek, the included mount might not stay secure. The magnetic mount’s base has a standard 1/4-inch threaded hole. You can screw it onto a small tripod, desktop stand, or boom arm. Place the stand behind your monitor at eye level for identical framing.
Conclusion
A great webcam setup starts with smart placement, not software tweaks, and the Hollyland Lyra is one of the best examples. Mount it above your monitor, keeping the lens centered at eye level or slightly higher. Then, open HollyStudio to fine-tune zoom and AI auto-framing. These tools can refine your framing, but physical positioning still sets the foundation. Once your camera angle looks right, focus on image quality. Adjust resolution, exposure, and white balance to suit your lighting.
