



































.png)
 简体中文
简体中文 
Holding down the record button is fine for a five-second clip, but the moment you need both hands free, or you’re filming from a tripod across the room, it becomes a real problem. Instagram has built-in hands-free options for both Stories and Reels, plus a few device-level workarounds when you need more control. Here are five methods that actually work, starting with the fastest.

How to Record on Instagram Without Holding the Button (5 Reliable Methods)
Quick Answer: What “Hands-Free” Looks Like on Instagram
Instagram handles hands-free recording differently depending on the format you are using. Stories has a native lock gesture, while Reels uses a built-in timer that lets you step away before the clip starts. Beyond those two, device accessibility settings and Bluetooth remotes give you even more flexibility across both formats.
Method 1 — Use the Hands-Free Lock in Instagram Stories
This is the fastest option for Stories. No settings changes or extra tools required — just a gesture most people have never tried.

Method 1 — Use the Hands-Free Lock in Instagram Stories
- Open Instagram and swipe right from the Home screen.
- Select Story at the bottom.
- Tap the small arrow or ∨ on the left side to expand the camera tools.
- Select Hands-Free.
- Tap the record button once to begin. Tap it again to stop.

Note: Some versions of the Instagram app display a dedicated Hands-Free mode directly in the format carousel at the bottom. If you see it, tap it once to start recording and tap again to stop — no swipe gesture needed.
Hands-Free Lock on Android vs. iOS — Any Differences?
The gesture works on both platforms, but the on-screen cue can look slightly different. On iOS, a padlock icon appears above the record button as you swipe up. On some Android versions, the indicator may appear as a small upward arrow or a lock symbol depending on your device and app build. The core gesture — hold and swipe up — is identical on both operating systems.
Method 2 — Set a Timer in Instagram Reels
The Reels timer is the most reliable hands-free method for planned content. It gives you a countdown before recording starts and stops the clip automatically at the length you set.

Method 2 — Set a Timer in Instagram Reels
- Open Instagram, tap the + icon, and select Reel.
- On the right-hand toolbar, tap the Timer icon (resembles a clock or stopwatch).
- Use the duration slider to set your clip length — up to 90 seconds.
- Choose your countdown: 3 seconds or 10 seconds.
- Tap Set Timer, then press the record button.
- Step back and get into position. The countdown runs, recording starts automatically, and the clip ends at your chosen duration.

The timer handles two jobs at once: it gives you time to step away from the phone and stops the recording at exactly the length you need. No further interaction required.
Method 3 — Use a Bluetooth Shutter Remote + Phone Tripod
For fitness, dance, cooking, or any content where you are moving around the frame, a Bluetooth shutter remote paired with a phone tripod is the cleanest solution.

Method 4 — Use a Bluetooth Shutter Remote + Phone Tripod
- Mount your phone on a tripod and frame your shot.
- Pair a Bluetooth shutter remote with your phone through your device’s Bluetooth settings.
- Open Instagram’s Stories or Reels camera and prepare your settings.
- Step into your filming position and press the remote button to start recording.
Bluetooth remotes are compact, affordable, and compatible with both iOS and Android. Most work with Instagram’s camera without any additional app or configuration.
One thing to plan for: the further you get from your phone, the worse the built-in microphone performs. A clip-on wireless mic like the Hollyland LARK M2 (9g, button-sized, 40-hour battery life) keeps audio quality consistent no matter how far you are from the device, which makes a noticeable difference in the final clip.
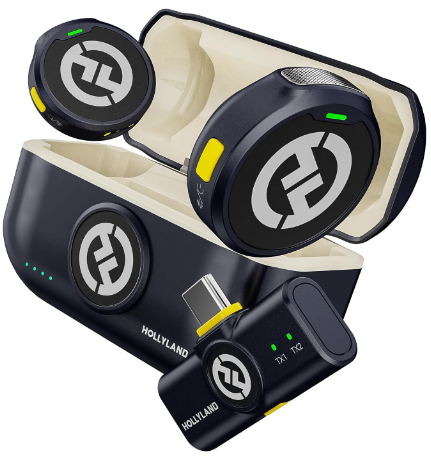
Hollyland LARK M2 - Mini Lavalier Microphone
An incredibly lightweight and compact wireless button microphone that captures high-fidelity audio.
Key Features: 9g Button Size | 48 kHz/24-bit | 40 Hours Battery
Method 4 — Volume Button Shortcut (Quick Tip)
On certain Android devices, pressing the volume down button while in Instagram Stories camera mode triggers recording. It is a useful shortcut when it works, but availability varies by device model, Android version, and app build.

This shortcut is not available on iOS. Test it on your specific device, but treat it as a secondary option rather than a method to rely on.
Which Method Should You Use? (Quick Comparison)
| Method | Best For | Requires Extra Tools? |
|---|---|---|
| Hands-Free Lock (Stories) | Quick solo Stories clips | No |
| Reels Timer | Planned Reels with a set duration | No |
| AssistiveTouch / Accessibility | Any format, remote trigger via screen | No |
| Bluetooth Remote + Tripod | Distance recording, both hands needed | Yes (remote + tripod) |
| Volume Button | Android quick shortcut | No (Android only) |
Frequently Asked Questions
Why doesn’t my Instagram Stories camera show the hands-free option?
The lock gesture and Hands-Free mode both require an up-to-date version of the Instagram app. If the swipe-up lock is not appearing, update Instagram through the App Store or Google Play. Also confirm you are in the Stories camera specifically — the Reels camera does not use the same lock mechanism.
Can I record a hands-free Instagram Reel longer than 90 seconds?
The Reels timer supports clips up to 90 seconds. For longer uninterrupted content, Instagram Live allows hands-free streaming without a per-clip length cap. You can also record multiple Reel segments and combine them using Instagram’s built-in clip stitching tool in the editor.
Does hands-free recording affect video quality?
No. Hands-free mode uses the same camera settings and resolution as standard recording. The one variable that does change with distance is audio quality — the further you are from the phone’s built-in microphone, the more pickup loss and ambient noise will affect your clip.
Conclusion
For most creators, the two fastest starting points are the Hands-Free Lock for Stories and the Timer for Reels — both are built into the app and require no extra gear. Whatever method you choose, mounting your phone on a stable surface is the single setup change that makes everything else work better. If you film regularly from a distance, pairing that setup with a wireless microphone closes the last gap and keeps your audio as clean as your video.
