.png)
 简体中文

Streaming games on PS5 has become a traditional day-to-day activity for gamers, especially the professional ones. It is an interesting space where gamers share their gaming sessions with viewers every day. On PlayStation 5 (PS5), you can either stream directly from the console or connect it to a computer. The latter is what gives you total control over how your stream appears to viewers, the sound, and the layout. What you want to achieve determines the method you would use. If all you need is just to play and interact with viewers, the PS5’s built-in broadcasting feature is a go-to. But if you want custom scenes, overlays, audio controls, and a more professional presentation, you need a computer running OBS Studio. This guide explains both approaches step-by-step, including how to use the Hollyland LARK A2 wireless microphone in your streaming setup.
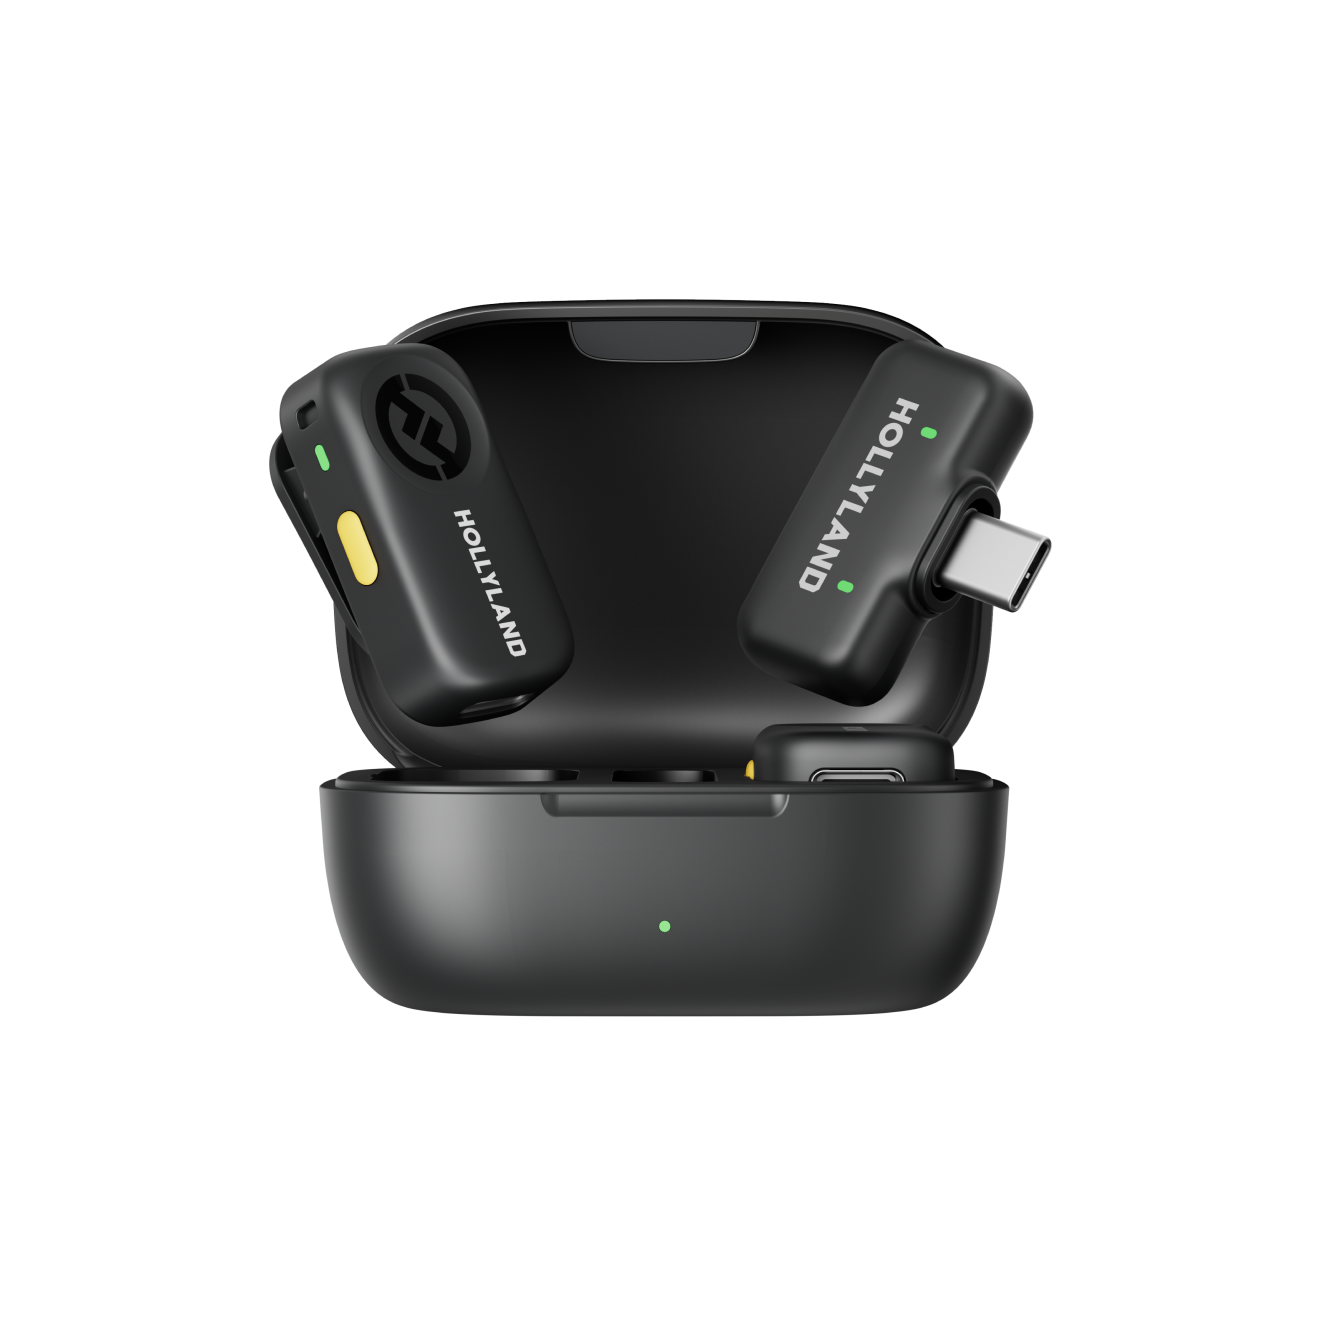
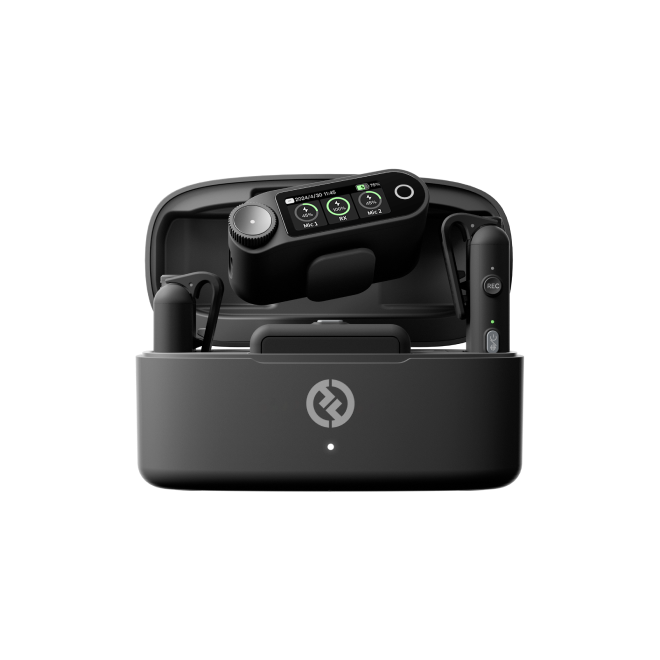
Hollyland LARK A2 - Clip-on Microphone
An ultra-light 8.5g wireless microphone engineered for effortless mobile recording, featuring smart AI noise cancellation and studio-grade sound.
Key Features: 8.5g Clip & Go | AI Noise Cancellation | 42 Hours Battery
Step 1: First, Set Up Your PS5 Streaming Channel
Before connecting anything, decide how you want to broadcast. You have two options: direct console streaming or computer-based streaming.
Direct Console Streaming
This uses the PS5’s built-in broadcast feature. You do not need a computer or capture card at all.

Computer-based Streaming
Here, you connect the PS5 to a capture card and a computer. Use OBS Studio to manage the gameplay feed, microphone, overlays, and broadcast settings.

The first option requires less equipment. The second option is better for creators who want control over production.
Step 2: Start Streaming Directly From Your PS5
For your first broadcast, you can use the console’s built-in tools. Connect your PS5 to the internet. A wired connection is preferable when available because it can provide a more consistent connection.
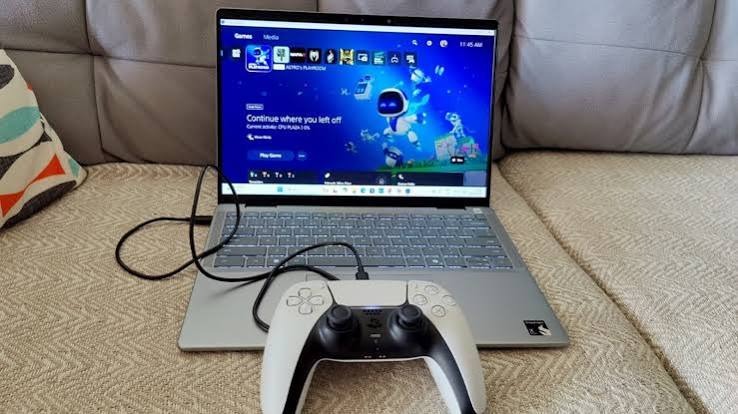
Sign in to your PlayStation account manually on your PS5 console and set up a supported streaming service. You can either use YouTube or Twitch. If you don’t have an account yet, use the ‘Create an account’ button to open one. The PlayStation app should be downloaded on your mobile phone to configure the sign-in.

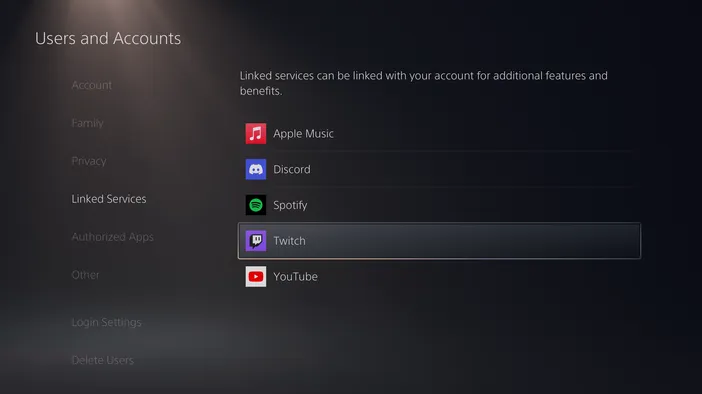
On the PS5 home screen, open Settings, go to Users and Accounts, then Linked Services. Follow the instructions to link your streaming account. You can also begin the linking process when you first select Broadcast.

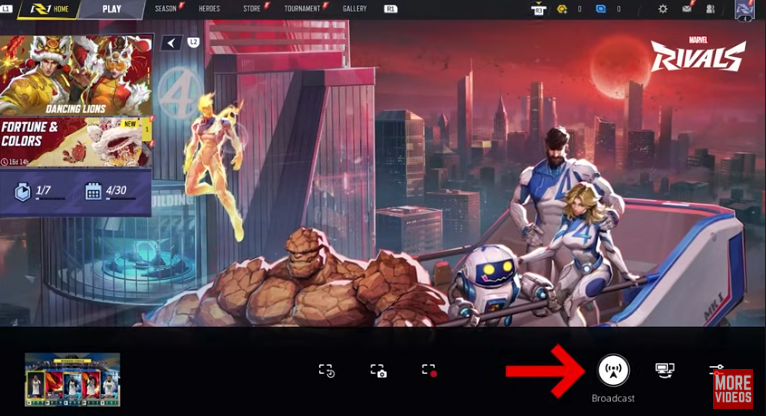
Launch your Marvel Rival game and give it a title. Press the Create button on your controller and select Broadcast.
Choose your linked service, enter your stream title, and configure the available broadcast options.

Also check your video quality and confirm if your microphone audio is working before you Go Live. You can use the broadcast controls to check viewers, manage your microphone, and stop the stream when finished.

You can do this without a computer. However, with direct broadcasting, you have less control over layouts and audio routing than using a streaming application. That is where a computer-based setup becomes useful.
Step 3: Prepare Your Computer and Streaming Equipment
Many pieces of equipment go into having an advanced streaming setup. All you need to start with includes;
- A PS5 console and game
- A computer capable of running OBS Studio
- A compatible HDMI capture card
- HDMI cables
- USB connection
- A stable internet connection
- A Hollyland LARK A2 microphone
- Headphones to monitor sound and reduce the chance of audio feedback.
What Does a Capture Card Do?
A capture card receives the console’s video and audio signal and makes it available to the computer. Check that the capture card supports your intended resolution and frame rate before buying it.
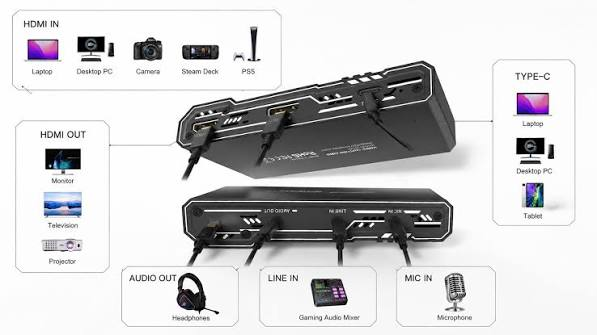
Connect the PS5’s HDMI output to the capture card’s HDMI input. Connect the capture card to your computer, and use its HDMI output for your display if the device supports passthrough. This lets you play on your display while the computer captures the same gameplay.
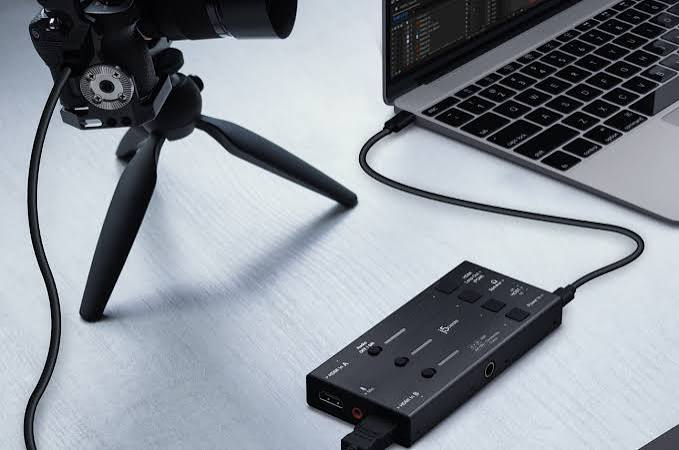
If the capture card displays a blank screen, check the PS5’s HDCP setting. For just gameplay capture, HDCP may need to be disabled. Just go to ‘Settings’ to ‘System,’ next ‘HDMI,’ and enable HDCP. Disabling it can prevent protected video content from playing, so enable it again when needed.
Step 4: Install OBS Studio and Configure the Stream
OBS Studio is a free streaming application that lets you broadcast your gaming session seamlessly. Download it from the official OBS Studio website. Open the application once downloaded and run the Auto-Configuration Wizard if it is offered. This establishes a starting point for your computer and connection.

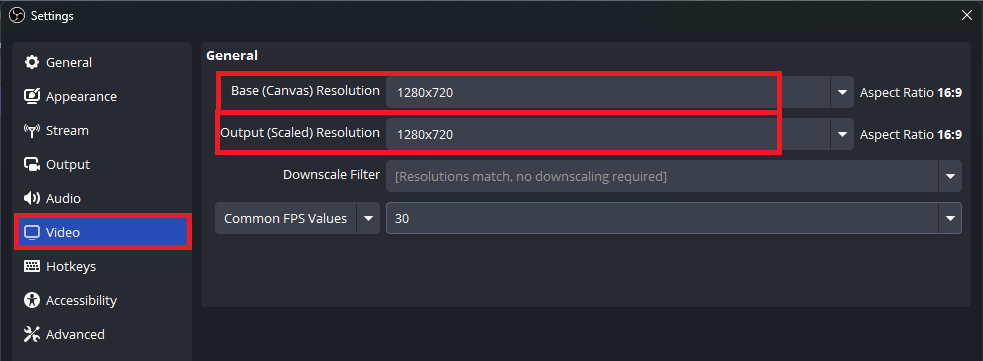
Next after installing the application is to configure the video settings. Go to Settings and then Video. Use this value for your setup.
| Settings | Video resolution |
| Base (Canvas) Resolution | 1920 x 1080 |
| Output (Scaled) Resolution | 1920 x 1080 |
| Common FPS Value | 60 |

With these settings, you are good to go with seamless streaming. But then, if your computer performance or bandwidth is limited, start with 1280 × 720 at 30 FPS instead. The base canvas is what defines the space used to arrange your sources, while the output resolution determines the size of the video sent to viewers.
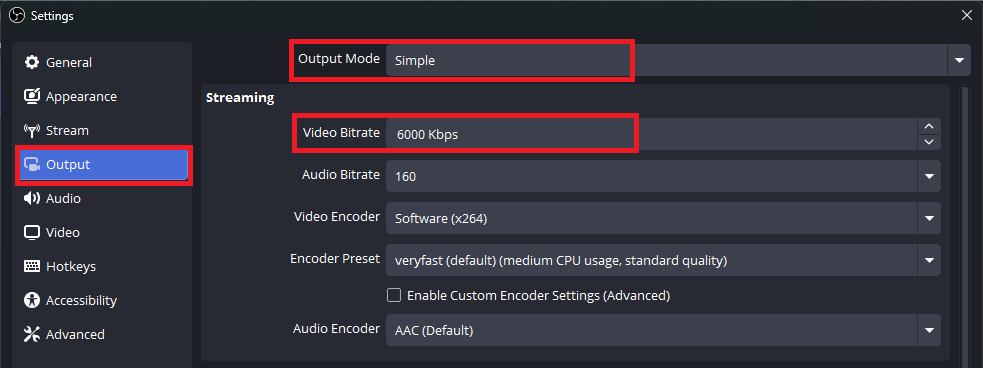
Under Settings, click on Output to select an appropriate encoder and set a video bitrate that supports your streaming service and upload connection. For a 1080p stream, a starting bitrate around 6,000 Kbps may be suitable where the service permits it. But the correct value depends on its current limits and your network stability. Do not assume that a higher bitrate automatically produces a better stream.
Select your streaming service and connect your account or enter the required stream key. Treat your stream key like a password; never show it in screenshots or share it publicly.
Step 5: Add Your Marvel Rival Game, LARK A2 Microphone and Other Sources
OBS uses scenes to organise what viewers see and sources to determine what appears in each scene. A source might be gameplay, a microphone, a camera, an image, or text. Pair all these pieces together as you prepare your live Marvel Rival session on a computer. The same OBS workflow applies to PS5 gameplay when you use a capture card.
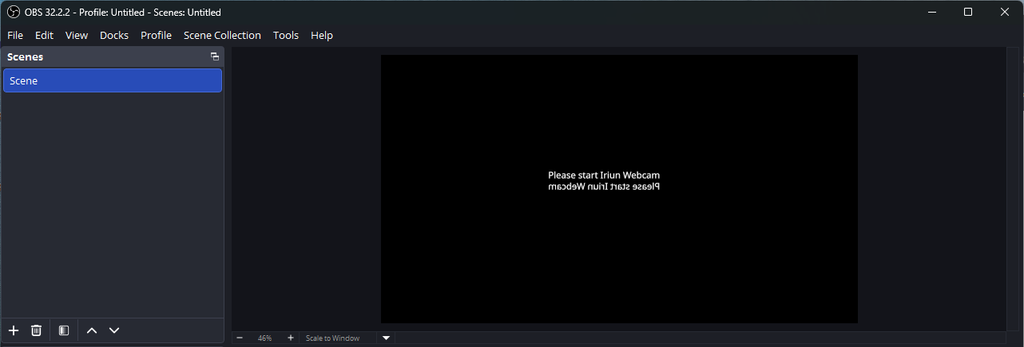

Start by creating your Marvel Rival game scene. Under Sources, click the plus icon and add the appropriate game source.
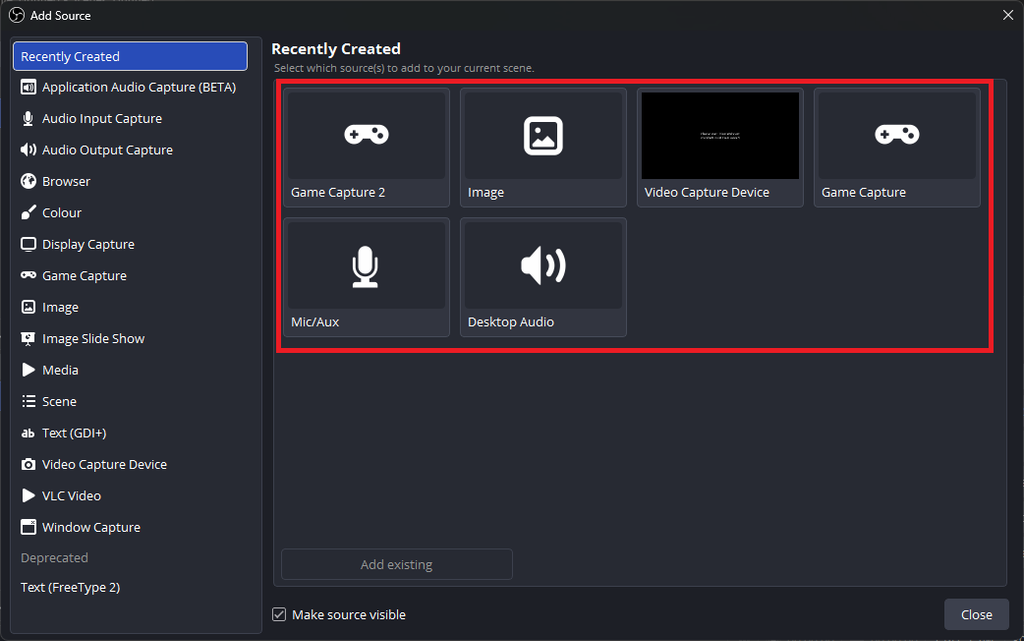
For Marvel Rival running on Windows, try Game Capture and select the game. If that method does not capture the game correctly, use Window Capture or another suitable capture method.

For PS5 gameplay, choose Video Capture Device and select your connected capture card instead. Resize the source to fill the preview without stretching the picture.

Next, add a text source for your stream title if needed. You can also create a second scene called Starting Soon with a simple image and text. Keep the layout uncluttered so the game remains easy to see.
How To Set Up the Hollyland LARK A2 Microphone
One thing that makes viewers follow your commentary well is clear audio, even when the game becomes noisy. That is why the Hollyland LARK A2, a compact wireless microphone system, is suitable for this type of creator setup.

Follow these steps to set up the microphone for your computer-based stream.
- Charge the transmitter and receiver, then pair them according to the given instructions.
- Connect the LARK A2 USB-C receiver to a compatible USB-C port on your streaming computer. If your computer does not have a suitable port, use a compatible connection arrangement supported by the receiver.
- Clip the transmitter securely to your shirt, close enough to capture your voice without rubbing against clothing.

- In OBS, open Settings, go to Audio, and select the LARK A2 as the microphone input. Alternatively, add an Audio Input Capture source and choose the receiver there.
- Speak at your normal gaming volume and watch the microphone meter in the Audio Mixer. Adjust the input gain so your voice is clear without repeatedly reaching the red area.
- Put on headphones and listen to a short test recording. Check for clipping, background noise, excessive game volume, and any noticeable audio delay.

The LARK A2 comes with AI noise cancellation and gain-control options, depending on the receiver and configuration. If you are streaming from an already quiet room, you can put off the noise cancellation at first, or set it to a low frequency. You can later test whether a higher setting improves the result. However, avoid relying on processing to compensate for a noisy room or poor microphone placement.


Understand that connecting the LARK A2 to your streaming computer does not automatically make it the PS5’s microphone. In a capture-card workflow, OBS receives your voice directly from the computer-connected receiver. If you stream directly from the console, you need a microphone connection and configuration that the PS5’s broadcast feature supports.
Step 6: Balance the Game and Microphone Audio
Return to your Marvel Rival gaming scene. Start the game and speak while moving around the interface. Check that the gameplay appears in OBS and that the microphone meter responds whenever you speak.

Keep the game audio lower than your voice during commentary. There is no single correct fader position for every setup, so listen to a recording rather than relying only on the meter. If the game is too loud, lower its audio source. If your voice sounds distorted, reduce the microphone gain.

For PS5 streaming through a capture card, confirm that the capture card’s audio is also reaching OBS. Some capture cards expose audio through the video source, while others require a separate audio configuration. If you are recording party chat, make sure the other players know their voices may be broadcast. Also check that the game and any other content you stream can legally be shared.
Step 7: Connect OBS to Your Streaming Platform and Test the Broadcast
Once your scenes and audio are ready, return to Settings and then Stream. Connect your streaming account and confirm the service settings. In OBS, check that the correct scene is selected and that the audio meters are responding.

For the Marvel Rival session, use the following end-to-end configuration as a starting point:
| Component | Configuration |
| Game | Marvel Rival |
| Streaming Software | OBS Studio |
| Streaming Platform | YouTube Live |
| Base Canvas | 1920 x 1080 |
| Output Resolution | 1820 x 1080 |
| Frame Rate | 60 FPS |
| Video Source | Game Capture |
| Voice Source | Hollyland LARK M3 |
| Monitoring | Headphones |
| Scene | Gameplay |
Turn on your PS5 game console, select the capture card, and record a short local test before going live. Check the picture, voice clarity, game sound, and synchronisation. If the recording runs smoothly, connect to YouTube Live and start the broadcast.

Common Streaming Problems and How To Troubleshoot Them
Just in case you encounter issues like the ones to be listed below, these are what to do to troubleshoot them.
- Black screen: Check the HDMI connections, capture-card selection, and HDCP setting. Confirm that the chosen source supports the console’s output mode.
- Microphone not working: Confirm the LARK A2 receiver is connected, paired, and selected as the OBS input. Check for accidental muting.

- Voice sounds distorted: Reduce input gain, improve microphone placement, and test noise-cancellation settings.
- Gameplay stutters: Reduce output resolution or frame rate, check your upload stability, and close unnecessary applications.
- Voice and game audio are out of sync: Check the capture card’s audio configuration and adjust OBS audio synchronisation only after testing.
- Viewers report buffering: Try a lower bitrate and verify that your upload connection can sustain it.
Change one setting at a time and run another test. This makes it easier to identify the cause instead of changing several settings without knowing which one helped.
Conclusion
Setting up a PS5 stream can be as simple as using the console’s built-in broadcast feature or as flexible as building a computer-based production workflow with OBS Studio and a capture card. Start with a stable internet connection, a clear gameplay feed, and balanced audio. If you want more control over your voice and broadcast layout, the Hollyland LARK A2 can provide a practical wireless microphone solution when connected to a compatible streaming computer. Test your setup before going live, keep the layout simple, and improve it as your streaming needs grow.
Step 1: First, Set Up Your PS5 Streaming Channel
Before connecting anything, decide how you want to broadcast. You have two options: direct console streaming or computer-based streaming.
Direct Console Streaming
This uses the PS5’s built-in broadcast feature. You do not need a computer or capture card at all.

Computer-based Streaming
Here, you connect the PS5 to a capture card and a computer. Use OBS Studio to manage the gameplay feed, microphone, overlays, and broadcast settings.

The first option requires less equipment. The second option is better for creators who want control over production.
Step 2: Start Streaming Directly From Your PS5
For your first broadcast, you can use the console’s built-in tools. Connect your PS5 to the internet. A wired connection is preferable when available because it can provide a more consistent connection.

Sign in to your PlayStation account manually on your PS5 console and set up a supported streaming service. You can either use YouTube or Twitch. If you don’t have an account yet, use the ‘Create an account’ button to open one. The PlayStation app should be downloaded on your mobile phone to configure the sign-in.

On the PS5 home screen, open Settings, go to Users and Accounts, then Linked Services. Follow the instructions to link your streaming account. You can also begin the linking process when you first select Broadcast.


Launch your Marvel Rival game and give it a title. Press the Create button on your controller and select Broadcast.

Choose your linked service, enter your stream title, and configure the available broadcast options.

Also check your video quality and confirm if your microphone audio is working before you Go Live. You can use the broadcast controls to check viewers, manage your microphone, and stop the stream when finished.

You can do this without a computer. However, with direct broadcasting, you have less control over layouts and audio routing than using a streaming application. That is where a computer-based setup becomes useful.
Step 3: Prepare Your Computer and Streaming Equipment
Many pieces of equipment go into having an advanced streaming setup. All you need to start with includes;
- A PS5 console and game
- A computer capable of running OBS Studio
- A compatible HDMI capture card
- HDMI cables
- USB connection
- A stable internet connection
- A Hollyland LARK A2 microphone
- Headphones to monitor sound and reduce the chance of audio feedback.
What Does a Capture Card Do?
A capture card receives the console’s video and audio signal and makes it available to the computer. Check that the capture card supports your intended resolution and frame rate before buying it.

Connect the PS5’s HDMI output to the capture card’s HDMI input. Connect the capture card to your computer, and use its HDMI output for your display if the device supports passthrough. This lets you play on your display while the computer captures the same gameplay.

If the capture card displays a blank screen, check the PS5’s HDCP setting. For just gameplay capture, HDCP may need to be disabled. Just go to ‘Settings’ to ‘System,’ next ‘HDMI,’ and enable HDCP. Disabling it can prevent protected video content from playing, so enable it again when needed.
Step 4: Install OBS Studio and Configure the Stream
OBS Studio is a free streaming application that lets you broadcast your gaming session seamlessly. Download it from the official OBS Studio website. Open the application once downloaded and run the Auto-Configuration Wizard if it is offered. This establishes a starting point for your computer and connection.

Next after installing the application is to configure the video settings. Go to Settings and then Video. Use this value for your setup.
| Settings | Video resolution |
| Base (Canvas) Resolution | 1920 x 1080 |
| Output (Scaled) Resolution | 1920 x 1080 |
| Common FPS Value | 60 |

With these settings, you are good to go with seamless streaming. But then, if your computer performance or bandwidth is limited, start with 1280 × 720 at 30 FPS instead. The base canvas is what defines the space used to arrange your sources, while the output resolution determines the size of the video sent to viewers.

Under Settings, click on Output to select an appropriate encoder and set a video bitrate that supports your streaming service and upload connection. For a 1080p stream, a starting bitrate around 6,000 Kbps may be suitable where the service permits it. But the correct value depends on its current limits and your network stability. Do not assume that a higher bitrate automatically produces a better stream.

Select your streaming service and connect your account or enter the required stream key. Treat your stream key like a password; never show it in screenshots or share it publicly.
Step 5: Add Your Marvel Rival Game, LARK A2 Microphone and Other Sources
OBS uses scenes to organise what viewers see and sources to determine what appears in each scene. A source might be gameplay, a microphone, a camera, an image, or text. Pair all these pieces together as you prepare your live Marvel Rival session on a computer. The same OBS workflow applies to PS5 gameplay when you use a capture card.


Start by creating your Marvel Rival game scene. Under Sources, click the plus icon and add the appropriate game source.

For Marvel Rival running on Windows, try Game Capture and select the game. If that method does not capture the game correctly, use Window Capture or another suitable capture method.

For PS5 gameplay, choose Video Capture Device and select your connected capture card instead. Resize the source to fill the preview without stretching the picture.

Next, add a text source for your stream title if needed. You can also create a second scene called Starting Soon with a simple image and text. Keep the layout uncluttered so the game remains easy to see.
How To Set Up the Hollyland LARK A2 Microphone
One thing that makes viewers follow your commentary well is clear audio, even when the game becomes noisy. That is why the Hollyland LARK A2, a compact wireless microphone system, is suitable for this type of creator setup.

Follow these steps to set up the microphone for your computer-based stream.
- Charge the transmitter and receiver, then pair them according to the given instructions.
- Connect the LARK A2 USB-C receiver to a compatible USB-C port on your streaming computer. If your computer does not have a suitable port, use a compatible connection arrangement supported by the receiver.
- Clip the transmitter securely to your shirt, close enough to capture your voice without rubbing against clothing.

- In OBS, open Settings, go to Audio, and select the LARK A2 as the microphone input. Alternatively, add an Audio Input Capture source and choose the receiver there.
- Speak at your normal gaming volume and watch the microphone meter in the Audio Mixer. Adjust the input gain so your voice is clear without repeatedly reaching the red area.
- Put on headphones and listen to a short test recording. Check for clipping, background noise, excessive game volume, and any noticeable audio delay.

The LARK A2 comes with AI noise cancellation and gain-control options, depending on the receiver and configuration. If you are streaming from an already quiet room, you can put off the noise cancellation at first, or set it to a low frequency. You can later test whether a higher setting improves the result. However, avoid relying on processing to compensate for a noisy room or poor microphone placement.


Understand that connecting the LARK A2 to your streaming computer does not automatically make it the PS5’s microphone. In a capture-card workflow, OBS receives your voice directly from the computer-connected receiver. If you stream directly from the console, you need a microphone connection and configuration that the PS5’s broadcast feature supports.
Step 6: Balance the Game and Microphone Audio
Return to your Marvel Rival gaming scene. Start the game and speak while moving around the interface. Check that the gameplay appears in OBS and that the microphone meter responds whenever you speak.

Keep the game audio lower than your voice during commentary. There is no single correct fader position for every setup, so listen to a recording rather than relying only on the meter. If the game is too loud, lower its audio source. If your voice sounds distorted, reduce the microphone gain.

For PS5 streaming through a capture card, confirm that the capture card’s audio is also reaching OBS. Some capture cards expose audio through the video source, while others require a separate audio configuration. If you are recording party chat, make sure the other players know their voices may be broadcast. Also check that the game and any other content you stream can legally be shared.
Step 7: Connect OBS to Your Streaming Platform and Test the Broadcast
Once your scenes and audio are ready, return to Settings and then Stream. Connect your streaming account and confirm the service settings. In OBS, check that the correct scene is selected and that the audio meters are responding.

For the Marvel Rival session, use the following end-to-end configuration as a starting point:
| Component | Configuration |
| Game | Marvel Rival |
| Streaming Software | OBS Studio |
| Streaming Platform | YouTube Live |
| Base Canvas | 1920 x 1080 |
| Output Resolution | 1820 x 1080 |
| Frame Rate | 60 FPS |
| Video Source | Game Capture |
| Voice Source | Hollyland LARK M3 |
| Monitoring | Headphones |
| Scene | Gameplay |
Turn on your PS5 game console, select the capture card, and record a short local test before going live. Check the picture, voice clarity, game sound, and synchronisation. If the recording runs smoothly, connect to YouTube Live and start the broadcast.

Common Streaming Problems and How To Troubleshoot Them
Just in case you encounter issues like the ones to be listed below, these are what to do to troubleshoot them.
- Black screen: Check the HDMI connections, capture-card selection, and HDCP setting. Confirm that the chosen source supports the console’s output mode.
- Microphone not working: Confirm the LARK A2 receiver is connected, paired, and selected as the OBS input. Check for accidental muting.

- Voice sounds distorted: Reduce input gain, improve microphone placement, and test noise-cancellation settings.
- Gameplay stutters: Reduce output resolution or frame rate, check your upload stability, and close unnecessary applications.
- Voice and game audio are out of sync: Check the capture card’s audio configuration and adjust OBS audio synchronisation only after testing.
- Viewers report buffering: Try a lower bitrate and verify that your upload connection can sustain it.
Change one setting at a time and run another test. This makes it easier to identify the cause instead of changing several settings without knowing which one helped.
Conclusion
Setting up a PS5 stream can be as simple as using the console’s built-in broadcast feature or as flexible as building a computer-based production workflow with OBS Studio and a capture card. Start with a stable internet connection, a clear gameplay feed, and balanced audio. If you want more control over your voice and broadcast layout, the Hollyland LARK A2 can provide a practical wireless microphone solution when connected to a compatible streaming computer. Test your setup before going live, keep the layout simple, and improve it as your streaming needs grow.