.png)
If your Twitch or YouTube stream keeps looking blurry, laggy, or pixelated, especially during fast gameplay. You’re not alone. Most creators struggle with dropped frames, bad bitrate, grainy webcams, and inconsistent quality across scenes.
The good news? You can upgrade your stream with a few targeted adjustments and settings. This beginner-friendly guide walks you through every essential method step-by-step, with references to help you follow along easily.
What Factors Affect Your Streaming Quality?
Before adjusting settings, it helps to understand what factors impact your stream quality the most:
- Your internet upload speed
- Bitrate settings in OBS/Streamlabs
- Encoder choice (software vs hardware)
- Resolution & framerate
- Network stability
- Camera quality
- CPU/GPU workload
- Scene & source optimization
Fixing even 2-3 of these can drastically boost your output quality. Now that you understand the key components behind clear streaming output, let’s begin optimizing each one inside OBS Studio.
How to Improve Streaming Quality in OBS Studio
Let’s start with the most essential core settings inside OBS and work our way outward to your hardware, camera, and network. OBS Studio controls most of your core quality settings, so optimizing these parameters is the fastest way to reduce blur and pixelation.
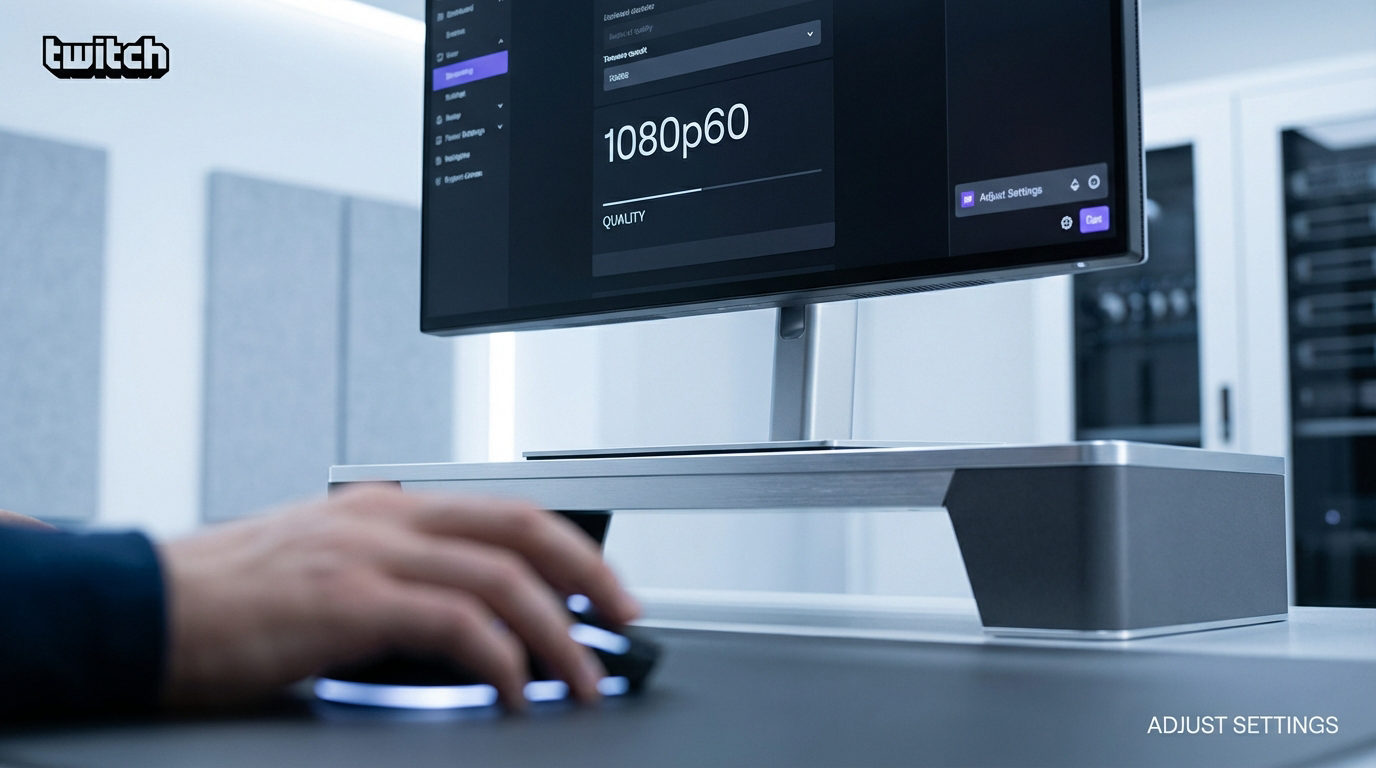
Step #1 – Optimize OBS Output Settings for Best Quality
These settings directly influence encoding performance, clarity, and bitrate stability, so follow them carefully.
- Go to: OBS → Settings in the bottom right corner.

- Click on Stream → ensure to uncheck the ‘Enable Enhanced Broadcasting’ → check the ‘Ignore streaming service setting management’.
- This will allow us to make changes manually.

- Then click on the Apply button.

- Next, go to Output → Output Mode → Advanced.

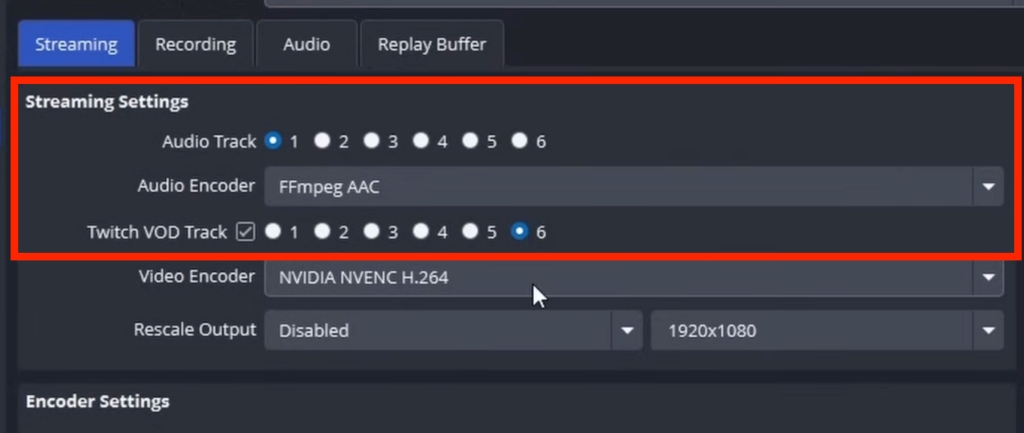
- Now, in the streaming settings, choose:
- Audio track → 1, Audio Encoder → FFmpeg AAC, Twitch VOD Track → 6 to add copyright-free music to streams.
- If You Have an NVIDIA GPU → Select NVENC (New)
- Uses GPU for encoding
- Better quality at the same bitrate
- Lower CPU usage
- If You Have an AMD GPU → Select H.264/AVC or AMF
- If You Have No GPU → Use x264

- Now, in the Encoder Settings, set the Rate Control → CBR.
- For streaming → choose CBR (Constant Bitrate)
- For recording → choose CQP for sharper local files

- Next, set the Proper Bitrate, recommended Bitrate → 8000Kbps.

You can use this bitrate guide:
| Resolution | Framerate | Recommended Bitrate |
| 720p | 30 fps | 2500-3500 kbps |
| 720p | 60 fps | 3500-4500 kbps |
| 1080p | 30 fps | 4500-6000 kbps |
| 1080p | 60 fps | 6000 kbps or above |
Check your upload speed first on speedtest.net, keeping the bitrate at or below 70% of your upload.
- Next, enable Keyframe Interval = 2. This is required by Twitch and YouTube for stable playback.

- For the Preset, you can have anywhere between P5 and P7, depending on your computer.

- Next, set up Tuning → High Quality, Multipass Mode → Two Passes, Profile → high, GPU → 0, Max B-frames → 2.

- Go to the Audio menu and set the Audio Bitrate → 320 for all the tracks.

- Finally, hit the Apply button.

Now that your core encoding and bitrate settings are optimized, let’s fix your resolution and framerate.
Step #2 – Improve Base & Output Resolution (Scaling for Quality)
OBS scaling settings significantly impact sharpness.
- Go to: Settings → Video and Set Base Resolution (Your Monitor Resolution) and Output (Scaled) Resolution to 1920×1080
- If your stream lags, scale down to:
- 1600×900
- 1280×720
- 720p60 often looks better than 1080p30 if your bitrate is limited.

- Choose the Best Downscale Filter. Select: ✔ Lanczos (36 samples). This gives the sharpest results.
- If your resolutions match, then no need for downscaling.

- Next, hit the Apply button.

- Now, go to the Advanced tab, find Automatically reconnect is enabled. This is helpful if your stream gets disconnected.
- Set Retry Delay → 2s and Maximum Retries → 25. Then hit the Apply button.

Once resolution and scaling are configured, the next biggest improvement comes from adjusting your camera setup.
STEP #3 – Improve Webcam Quality in OBS
Even a good webcam looks bad without proper configuration. We will now manually configure camera settings.
- In the sources, right-click your camera → Properties

- Deactivate and again activate to just refresh your camera before optimizing settings.

- Select the Resolution type Custom.

- Now, Increase Resolution & Framerate. Higher framerate = smoother talking & movement. Set camera output to:
- 1080p 30fps or
- 720p 60fps
If you want smoother, higher-quality streaming and stable backups across multiple scenes, the Hollyland VenusLiv Air integrates naturally into your workflow. It supports clean audio capture, high-resolution output, and 24/7 stable streaming.

- Next, set buffering to Auto detect and click OK.

- Now again go to sources, right-click your camera → Properties → Configure Video

- Change the given settings and click Apply.
- Exposure: Manual
- Gain: Low (reduces noise)
- White balance: Manual
- Sharpness, Brightness: Adjust moderately

How to Improve Streaming Quality in Streamlabs
Streamlabs follows similar principles to OBS, but the interface differs slightly.
- Go to Settings → Output → Output Mode → Advanced.

Now, as we did for OBS, we can similarly set all the settings for Streamlabs too in the same manner.
Additionally, you can follow these steps to improve your setup for streaming outside the applications.
- Use good lighting. It improves the quality more than the camera itself. You can use softbox, ring light, and LED Panels.
- Improve Internet Stability for Higher Stream Quality. You can prefer Ethernet over Wi-Fi. Ethernet eliminates drops and reduces latency significantly.
- Enable QoS on Your Router. This prioritizes streaming/video traffic so your bitrate stays stable.
- Avoid Streaming During Peak Hours. Upload speeds often fluctuate; test speed before going live.
- Close Background Apps. These steal bandwidth and cause bitrate drops
Conclusion
Improving your streaming quality doesn’t require expensive upgrades. Just the right settings. By optimizing your encoder, bitrate, resolution, camera, and network stability, you can eliminate lag and produce sharper, more professional streams.
FAQs
Q1. Why is my stream blurry even though my internet is good?
This usually happens because your bitrate is too low for your chosen resolution. Lower your stream resolution to 720p60 or increase your bitrate if your upload speed allows it. Also, check OBS downscale filters and enable Lanczos for maximum sharpness.
Q2. What encoder should I use for the best stream quality?
Use NVENC (New) if you have an NVIDIA card. It delivers better results than x264 with less CPU usage. AMD users can choose AMF, while CPU-only users should stick to x264 at “veryfast” or “superfast” presets.
Q3. Why does my webcam look grainy?
Grain happens when the gain or ISO is too high. Lower gain, improve lighting, and set your webcam to manual exposure/white balance. Also, ensure your webcam is outputting at 1080p or 720p at the correct framerate.
Q4. How do I stop dropped frames while streaming?
Dropped frames are caused by network instability. Use Ethernet, reduce bitrate, remove bandwidth-heavy apps, and enable QoS on your router. OBS logs can also show if drops are network or rendering-related.
Q5. Do I need hardware upgrades to improve quality?
Not always. Optimizing OBS and internet settings often makes the biggest difference. But upgrading your GPU, capture card, or using stable streaming hardware can boost both quality and reliability.