.png)
.png) Français
Français .png) Deutsch
Deutsch .png) Italiano
Italiano .png) 日本語
日本語 .png) Português
Português  Español
 In today’s fast-paced, digital age, videos have become an extremely important part of our lives. In fact, you can’t have a strong online presence unless you post high-quality videos on all your social media platforms. Luckily, you can get rid of pixelated and blurry videos, and showcase your incredible editing skills by creating high-quality videos with CapCut.
However, with so many different options on the app, it can be difficult to find the right video settings. To ensure you only create the highest-quality videos, we’ve detailed the entire process of editing videos in CapCut. From choosing the right frame rate to exporting the final edited video, this guide includes all the important tips and tricks needed to make all your videos stand out. But before we dive into the nitty gritty of video editing, let’s see what CapCut really is and how you can improve the resolution of your videos with the tool.
What is CapCut?
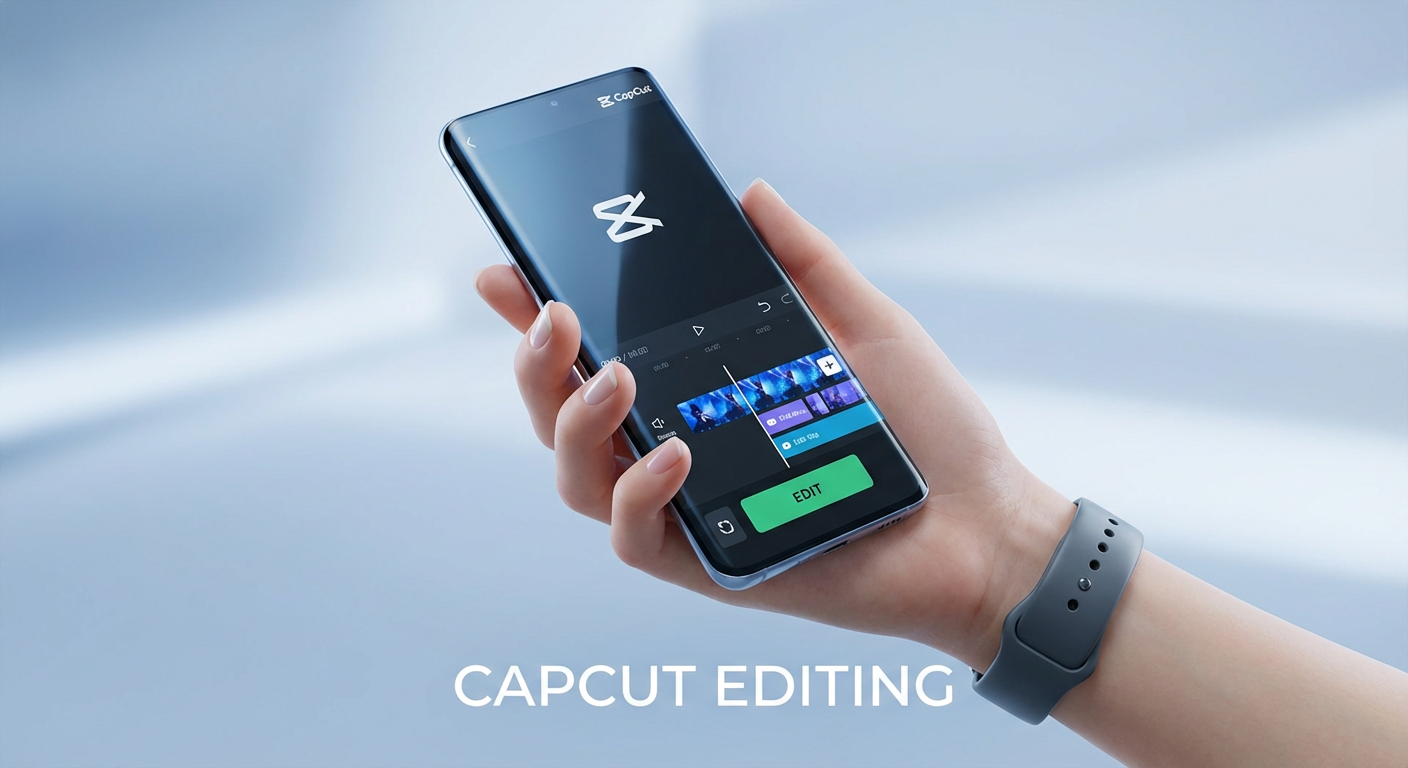
CapCut is an incredibly powerful and popular video editing app that enables users to easily enhance and edit their videos. The app offers a wide variety of features, including music, transitions, filters, and text. Along with being extremely easy to use, it’s also free to download and use on both iOS and Android devices.
The app comes with a range of editing tools as well and helps users improve their videos by improving their quality and making them appear more professional and engaging.
What’s the Highest Resolution Accepted by CapCut?
When it comes to editing videos in CapCut, it’s important to understand that there are two different video resolutions:
- Imported video resolution: The resolution of the videos you upload to CapCut for editing.
- Exported video resolution: The resolution of the video you download from CapCut after editing.
CapCut doesn’t have a maximum limit on the resolution of imported videos. This means that you can import HD, Ultra HD, 720p, or even 4K resolution videos in the app. However, what might irk you is the fact that regardless of the resolution of your imported video, CapCut will compress it into 1080p if you don’t have a powerful enough device.
In simpler words, you can only export 1080p resolution videos with CapCut, which might result in dropped quality. Luckily, you can enhance your videos by following the steps below.
How to Get Good Quality Videos With CapCut
Unfortunately, CapCut doesn’t have a magic button that automatically improves video quality. However, the app does have a wide range of settings that can significantly enhance the look of your video with the proper configuration. Here’s what you need to do:
Step 1: Import Your Video to CapCut
The first thing you need to do after opening the CapCut app on your device is to import the video you want to edit. You can edit videos by selecting them from the ‘Edit’ option on the app’s home screen or start a completely new project by selecting the ‘New Project’ tab at the top.
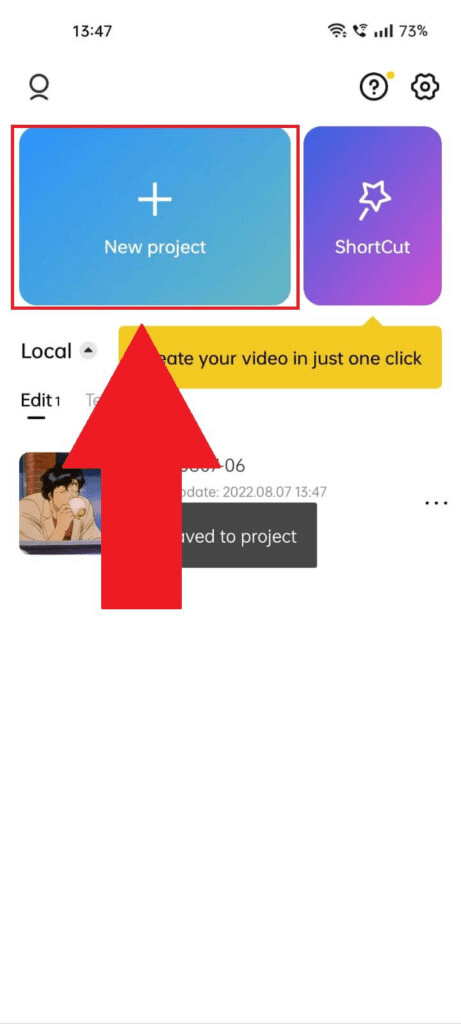
If you select ‘New Project,’ CapCut will direct you to your ‘Gallery.’ Choose the video you want to enhance and then click the ‘Add’ option at your screen’s bottom-right corner. The app will then compress your video into 1080p.

Step 2: Add Overlay
Once the video is compressed, you’ll be taken to CapCut’s editing interface. To add an overlay, click on ‘Overlay’ and then tap the ‘Add overlay’ option at the bottom of your screen.
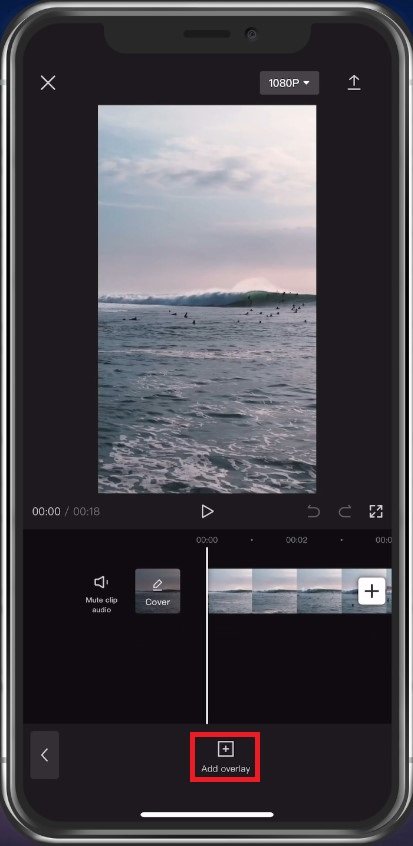
This step is essential, as it adds several light layers from different angles to your video, providing it with much more depth.
Next, select a completely black photo from your gallery and tap ‘Add’ at your screen’s bottom-right corner. Make sure you zoom in on this black image until it completely hides your video.
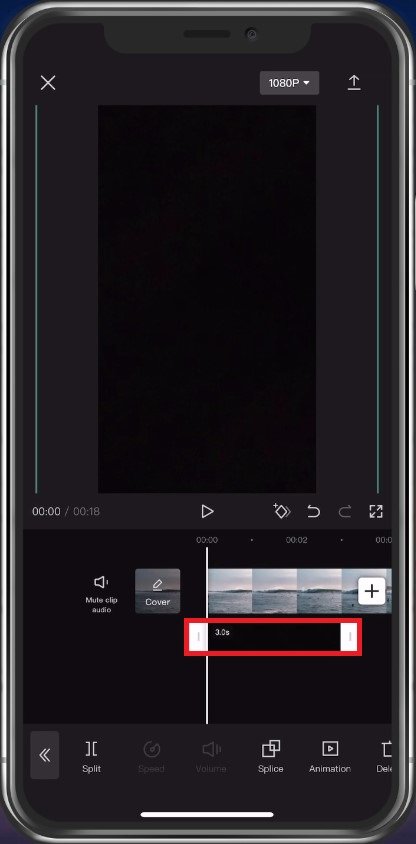
Step 3: Adjust Video Overlay
Tap the ‘Splice’ option from the panel at the bottom of your screen to connect your video to the black overlay. Again, make sure the black photo completely covers the video before moving on to the next step.
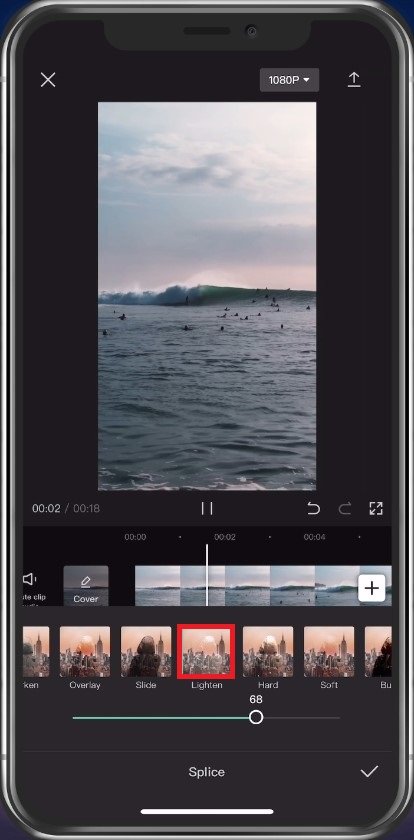
Step 4: Apply a Filter
Go back to the various editing options and then select ‘Filter.’ For best results, choose the ‘Opacity’ filter and set the video’s opacity to ‘40.’ The ‘Ochre’ filter also works well, but ultimately, it’s best to pick the filter you like best.

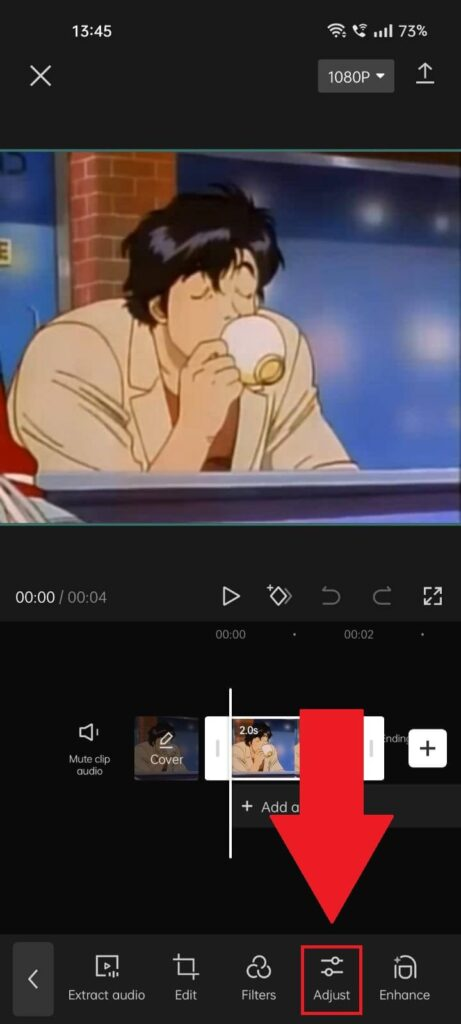
Step 5: Adjust Video Saturation, Contrast, and Sharpen
Next, you’ll have to adjust a few settings to enhance the video quality. Move back to the panel of editing options, and then tap ‘Adjust’ at the bottom of your screen.
The next screen will display several different properties, such as ‘Contrast,’ ‘Exposure,’ ‘Brightness,’ ‘Saturation,’ and ‘Sharpen.’ You can easily change all of these settings by moving their sliders towards the right.
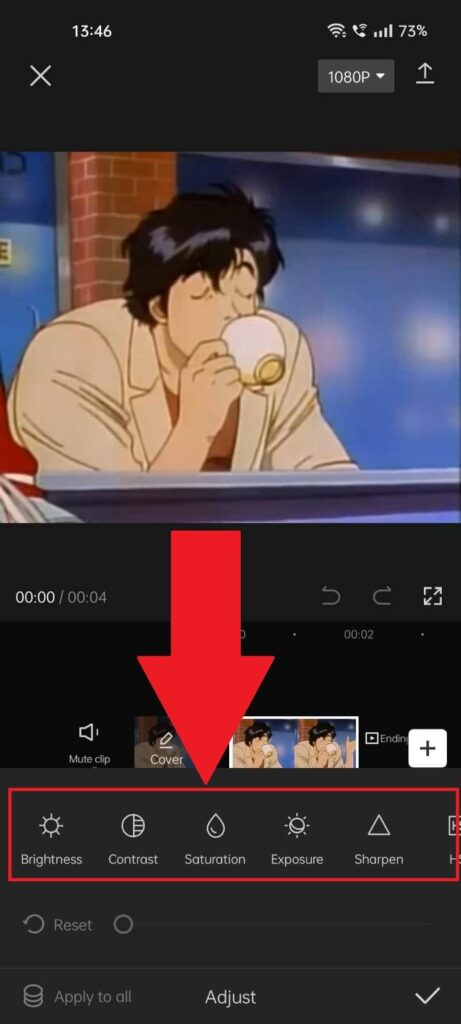
It’s advisable to test each setting and only select the ones that further improve the quality of your video. However, here are a few settings that can help you get started with your first foray into video editing:
- Brightness: From -10 to -5, depending on the lighting of your video.
- Contrast: Start from +20 and increase as needed.
- Saturation: Set at approximately +10 if your video has brighter colors.
- Vignette: Set between +30 and +20
- Exposure: Between +20 and -20
- Sharpen: Set to +40
- Highlight: Approximately between -15 and -20
However, it’s important to note that these settings aren’t ideal for all videos. Make sure you consider the context before you determine the kind of visual enhancement you need. It’s best to experiment a bit with these settings and then adjust them as needed.
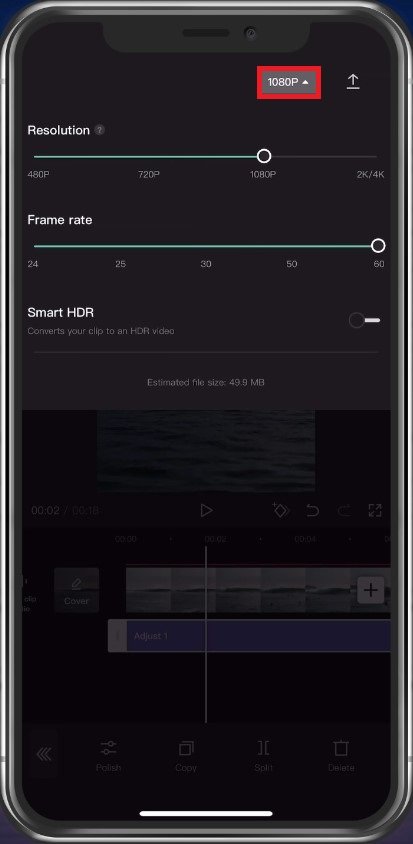
Step 6: Change Frame Rate and Video Resolution
Before exporting your video, it’s also advisable to change its frame rate and resolution to prevent poor video quality. At the top of your screen, tap the button to the left of the ‘Export’ icon. Here, you’ll find the frame rate and resolution options.
Increase the frame rate to 60fps and the video resolution from 480p or 780p to 1080p. Keep in mind that making these changes will alter your file size, which you can view below the ‘Smart HDR’ option.
Step 7: Export your Video
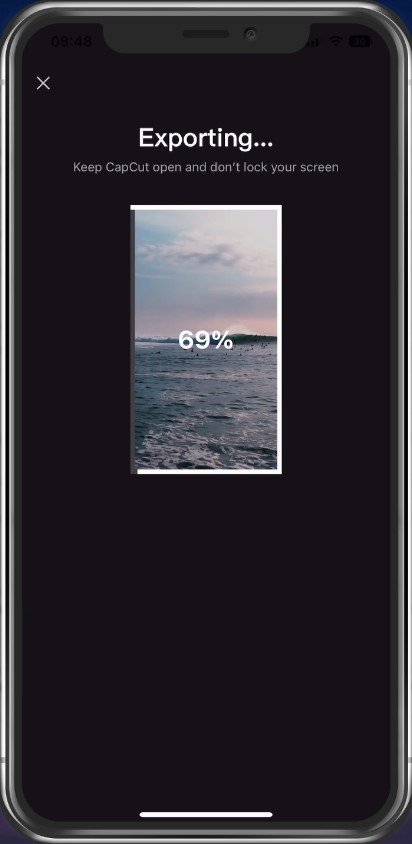
Finally, tap the ‘Export’ icon or the upward arrow at your screen’s top-right corner. Wait a few seconds for CapCut to finish exporting the video, and make sure you don’t lock the screen or close the app during the process. The app will notify you once it successfully exports and saves the video to your CapCut projects and Gallery.
Essential Tips and Tricks for Getting High-Quality Videos
Here are a few tips that can help transform your video into a high-quality one with CapCut:
- Import higher-quality videos for the best possible results.
- Use different settings and filters to adjust the brightness, contrast, and color of your video.
- Add music and text to your videos to make them more professional and engaging.
- Export your video in 1080p to get the highest quality possible.
Still waiting to receive high-quality results from CapCut after exporting your content? Chances are that your camera has a low resolution or lacks color adjustment settings, which is downgrading the quality of your videos. The simplest way out is to utilize the Hollyland VenusLiv’s 1080p resolution and 12MP sensor for the visuals. Creators love the impeccable outcomes when the videos are recorded on VenusLiv and edited on CapCut. Moreover, with the option to connect an external mic to this camera. And by using the magnificent built-in color correction tool of this camera. You can easily maintain the video quality on CapCut.
Conclusion
To sum it up, you can easily get high-quality videos by following the aforementioned steps. These tips will help improve the quality and reachability of your videos, allowing you to create professional and engaging content for YouTube, Instagram, TikTok, Facebook, and other social media platforms.
As a starting point, it’s advisable to set the brightness somewhere between -5 and -10, the contrast at +20 or above, the saturation at approximately +10, the exposure between -20 and +20, the vignette somewhere between +20 and +30, and the highlight between -15 and -20. While you can use these numbers as a reference point, keep in mind that these values will change according to the video you’re working on.
FAQs
Do I need a high-end device in order to edit with CapCut?
You don’t necessarily need a high-end device to edit your videos with CapCut. The app works with basic devices as well, but you might need to compromise in terms of video quality and resolution. So, if you want to import high-quality videos, it’s better to use a powerful device.
What is the best resolution for CapCut?
The best resolution for CapCut is 1080p, as it offers the perfect balance between video quality and file size. However, if you’re working with a more powerful device, then you can choose 4K resolution for the best result possible.
How do you professionally edit videos?
Here are a few tips on editing videos like a pro:
- Select the right format.
- Select the right software.
- Use title templates.
- Use just the right amount of effects and transitions (not too many and not too less).
- Sketch a storyboard.
- Apply a bit of motion to stills.
- Add some background music.
- Export to the correct format.
Can you edit YouTube videos with CapCut?
Although CapCut is well-known for short-form, vertical videos, like those on TikTok, you can also use the app for editing your YouTube videos. However, there is a 15-minute limit on CapCut, so it’s more suitable for editing shorter videos or YouTube Shorts.
Does TikTok support 4K videos?
Unfortunately, TikTok only supports 1080p videos. This means that 4K videos will automatically be compressed, leading to dropped video quality. For this reason, it’s advisable to only upload 1080p videos on the platform to get the best results.