.png)
.png) Français
Français .png) Deutsch
Deutsch .png) Italiano
Italiano .png) 日本語
日本語 .png) Português
Português  Español
 Whether you’re a streaming newbie or an OBS wizard, our 6 easy-peasy methods will elevate your broadcast game in no time.
So grab your favorite snack, settle in, and let’s make your chat the co-star of your stream.
Ready, set, stream!
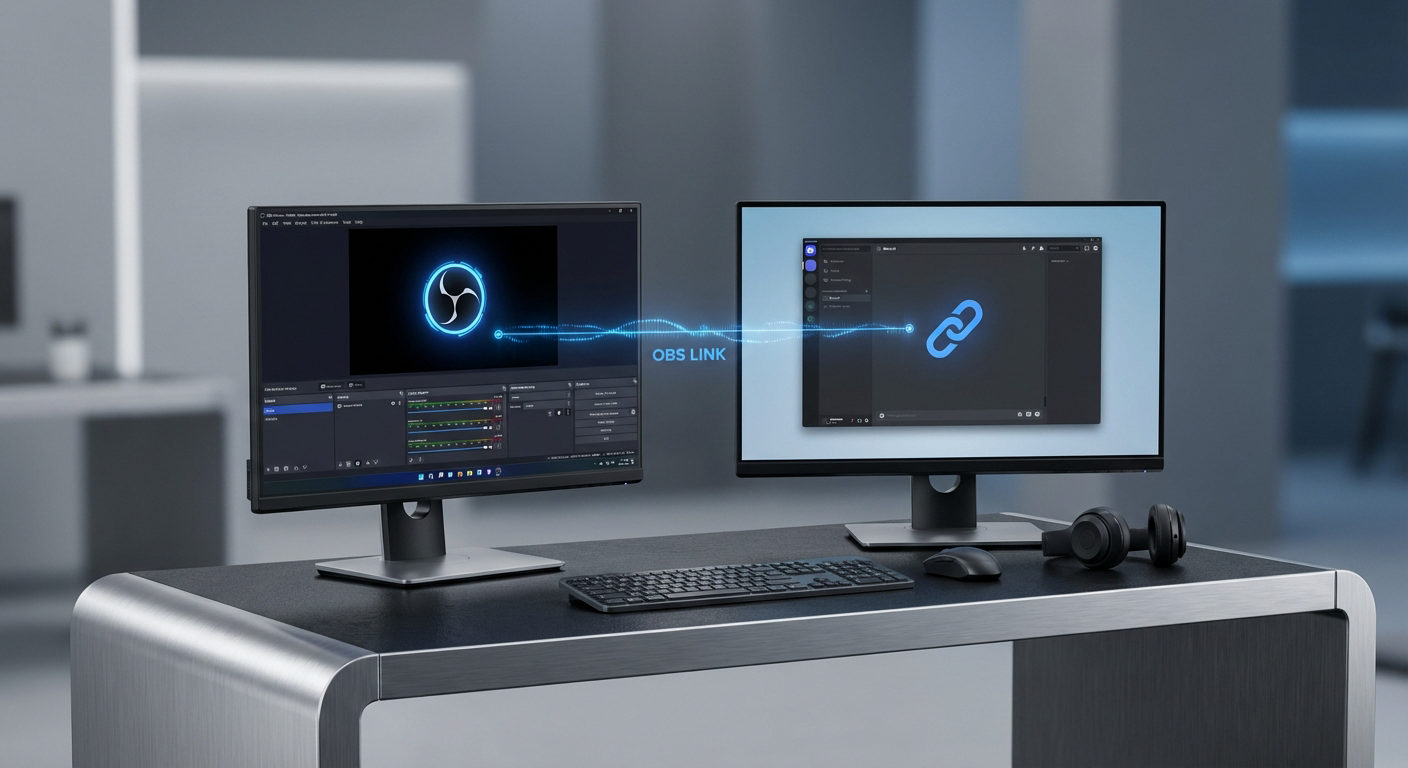
Method 1. The Docking Method
Pre-game Checklist
First up, make sure you’ve got OBS installed on your computer. If you don’t, go ahead and grab it—it’s free and fabulous!
Step-by-Step Guide
- Peek-a-Boo into Twitch:
Open Twitch in your web browser.
Find your channel as if you’re one of your adoring fans.
Nope, you don’t need to be logged in!
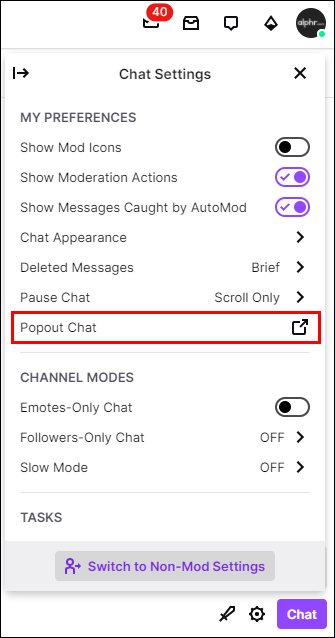
- Open the Chat Treasure Chest:
On the right side, you’ll find this cute little cogwheel in the chat section.
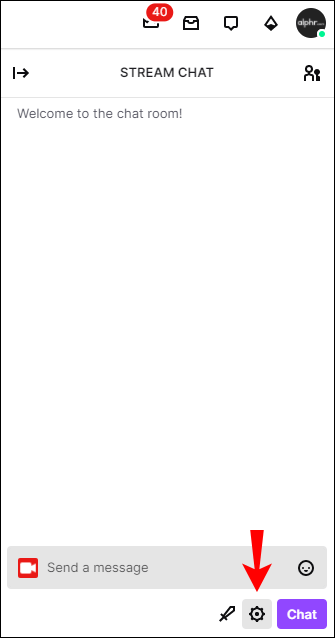
Click on that and choose “Popout Chat.”
- Grab the Link:
Boom!
A new window will pop up with your chat.
Take that URL at the top and copy it.
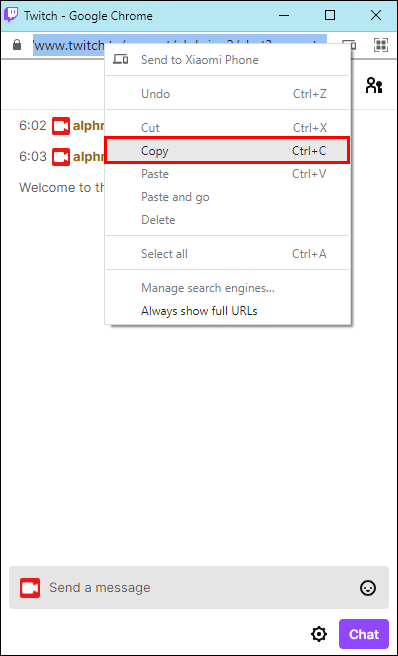
We’ll need it in a jiffy.
- Enter the OBS Castle:
Open OBS if it’s not already up and running.
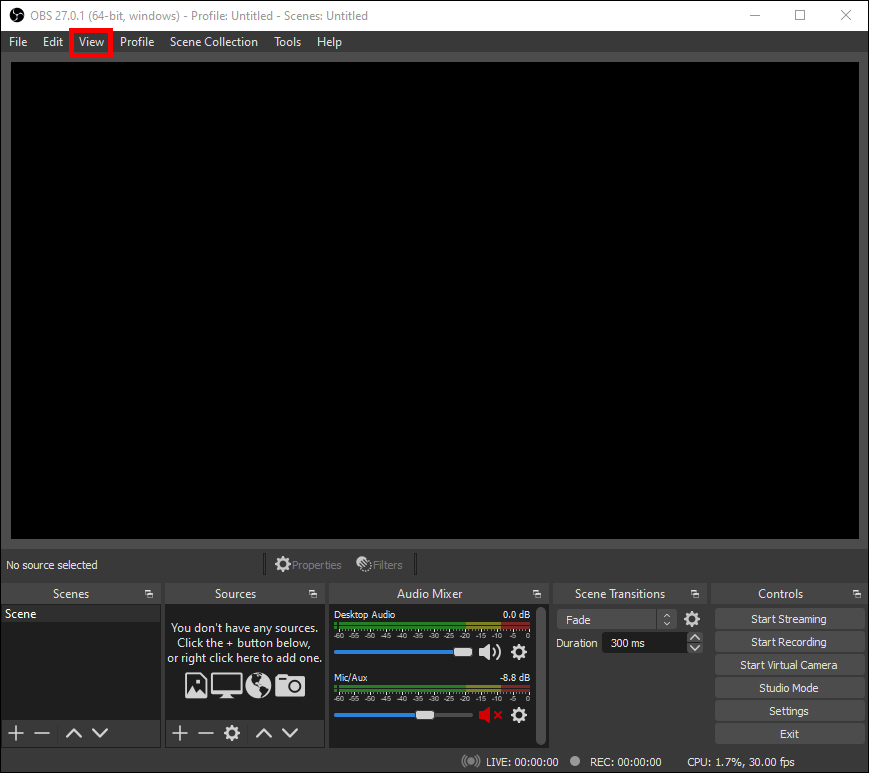
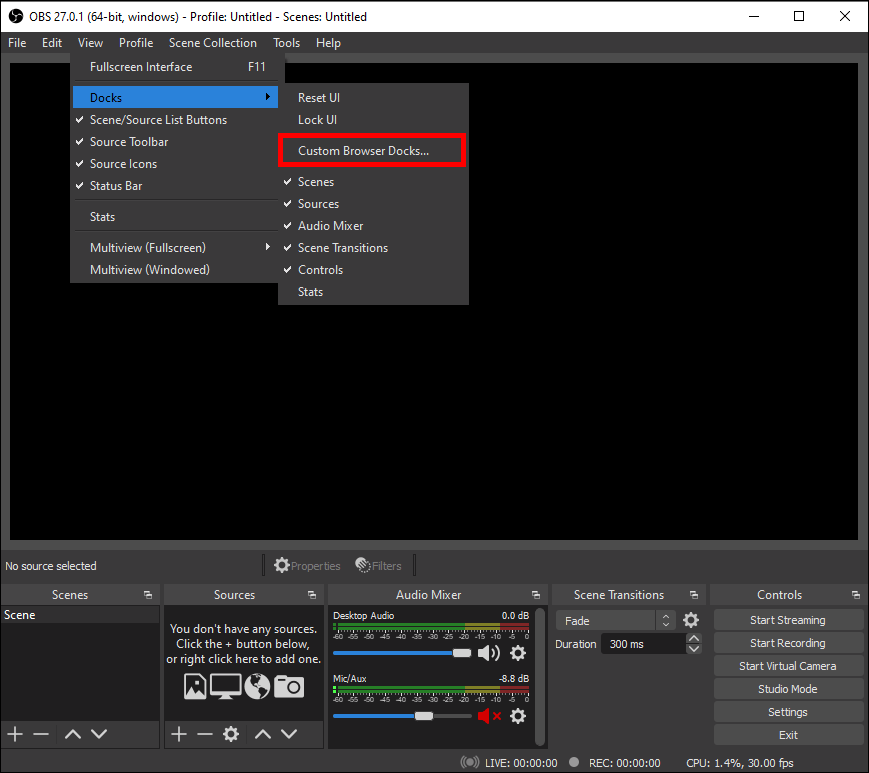
- Custom Dock, Ahoy!:
In OBS, go to the “View” tab, and then sail to “Docks,” and finally anchor at “Custom Browser Docks.”

- Name Your New Buddy:
You’ll see an empty box asking for a “Dock Name.”
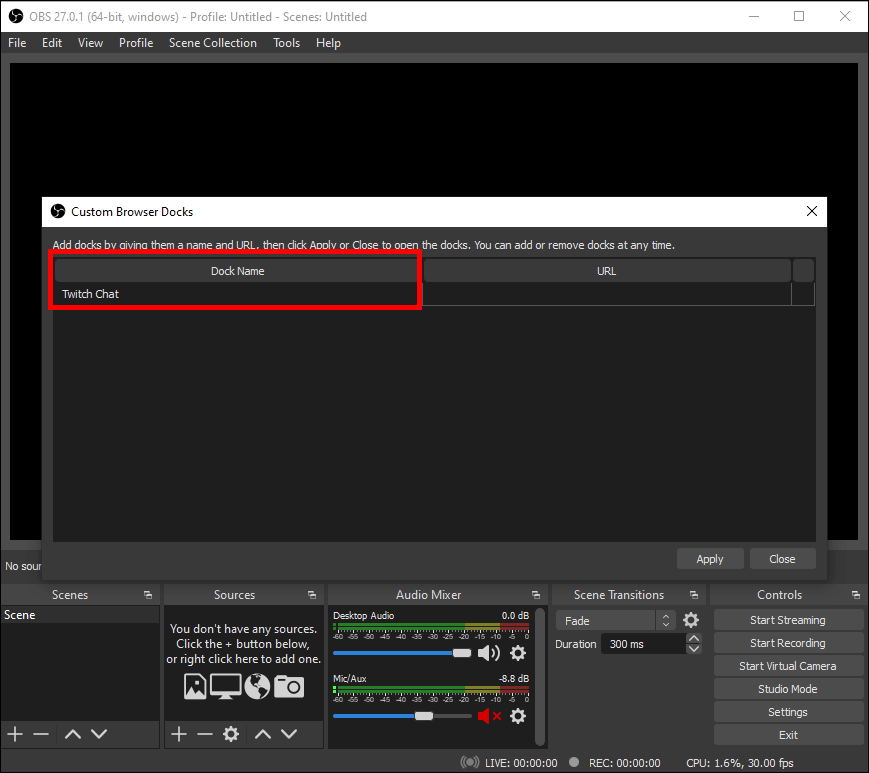
Give it something snazzy!
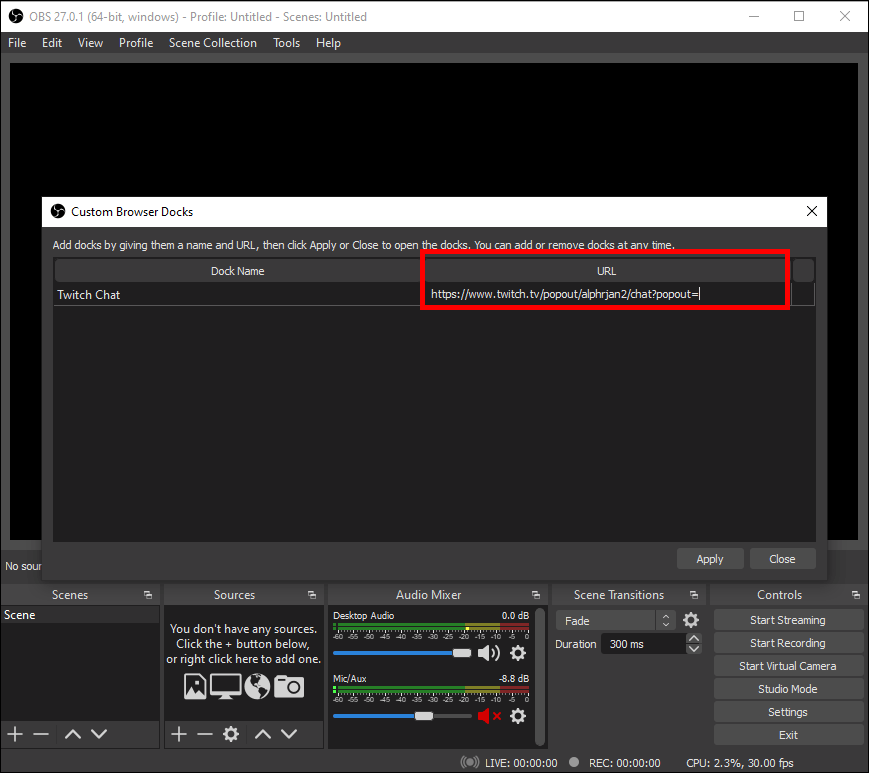
- Paste the Potion:
Remember the URL we copied?
Paste it in the empty “URL” box.
- Apply the Magic:
Don’t forget to hit that “Apply” button!
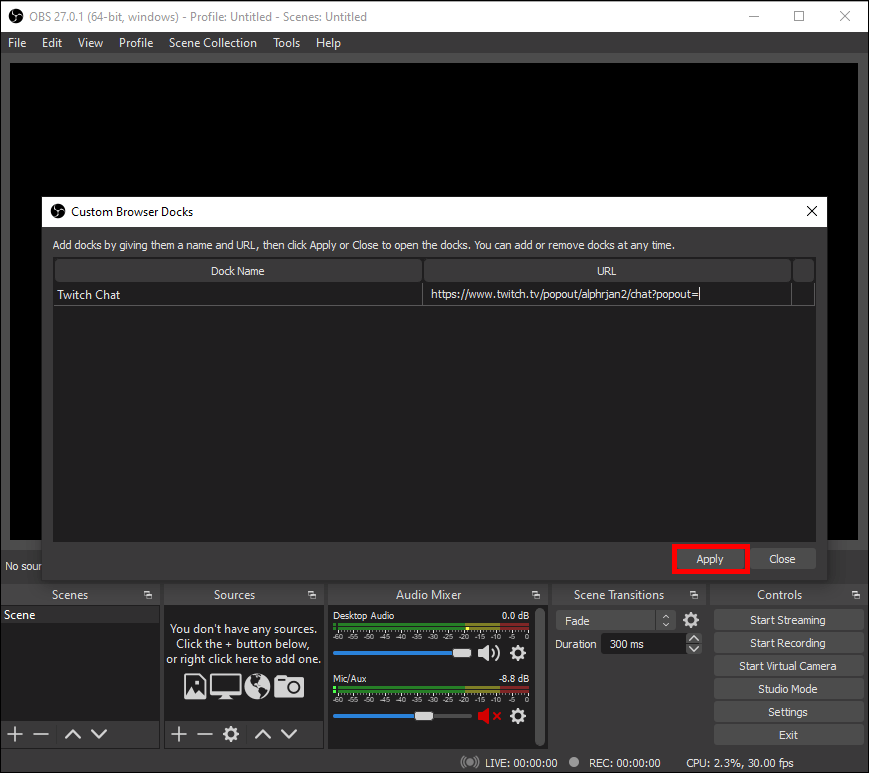
Voila! You did it!
Now you’ve got a sleek, movable Twitch chat window right within OBS. Drag it wherever your heart desires.
How Do I Turn This Off?
Need a break from the spotlight? Just go to the “Docks” menu in OBS and uncheck your custom dock.
Why Is This the Golden Method?
You might think, “Hey, I’ll just pull up my own Twitch stream on another browser, mute it, and I’m golden!” (THIS TOO IS A WAY TO GET THINGS DONE)
Ah, but hold on a sec!
Let’s talk about why it seems like its trying to play an electric guitar with a spoon; it’ll work, but not very well.
- First off, running a live stream AND watching it at the same time is like asking your computer to juggle while riding a unicycle.
You want your stream to be as smooth as your best dance moves, not laggy and jittery!
- And, not everyone’s got that fancy double monitor action going on.
Maybe you’re just streaming for fun, or you’re away from your mega-setup.
Two monitors might be nice, but let’s keep it real; sometimes, you’re working with what you’ve got!
So, what’s the easy-peasy, lemon-squeezy solution? Use a dockable chat window in OBS!
Method 2. Integrating Twitch Credentials Into Obs
What You’ll Need
- OBS Studio installed on your computer
- An active Twitch account
Step-By-Step Guide
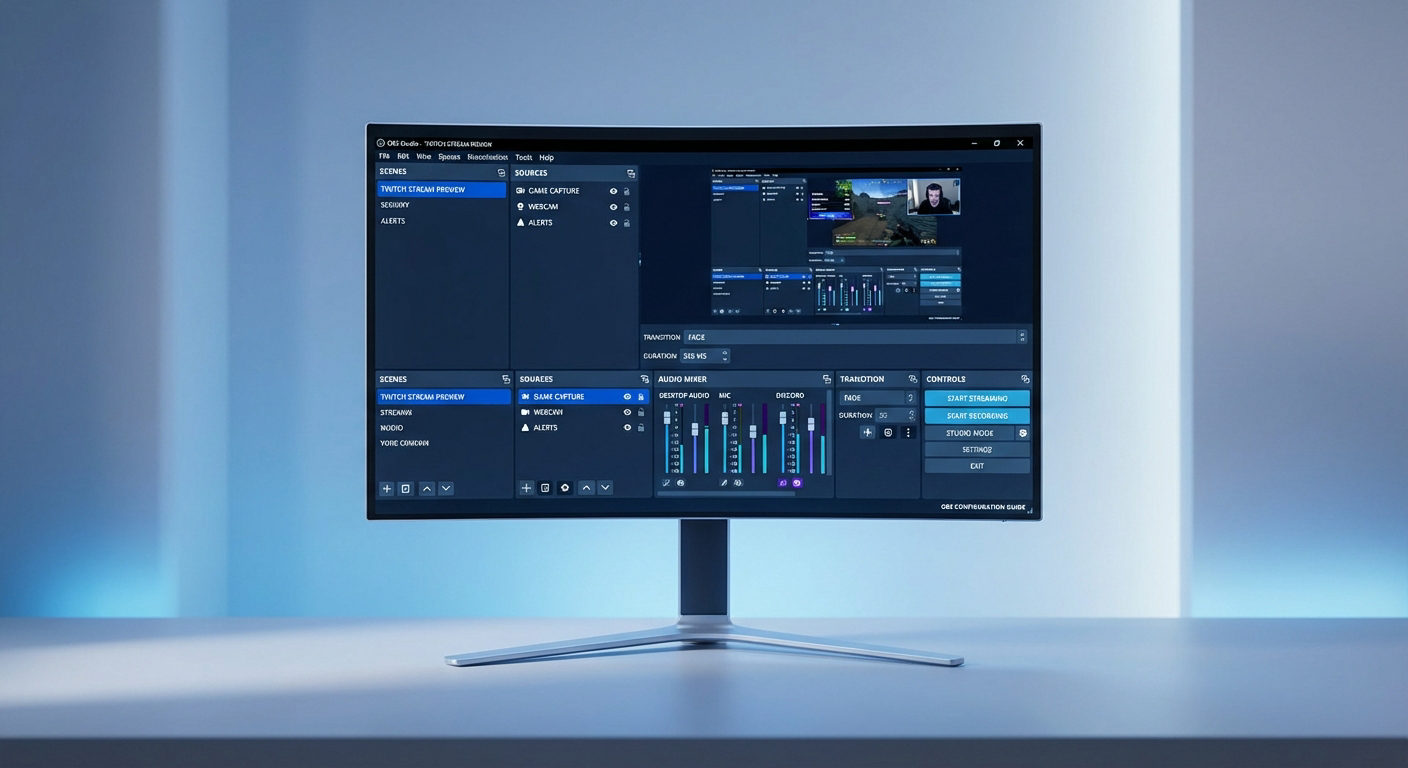
- Fire Up OBS Studio
If you are all geared up to begin your stream, double-click on the OBS Studio icon on your desktop to get this streaming party started!
However, you may experience some technicalities if you have turned your DSLR into a streaming cam. So make sure you have accurately configured your streaming setup. On the other hand, if you have a proper streaming camera like the Hollyland VenusLiv V2, you don’t have to suffer from a complicated setup process to go live on OBS.
All you need to do is connect the camera to your PC through the USB port, choose VenusLiv as your input source, and you’re good to go!
- Access the Control Room
Look for the word “File” at the top of your OBS screen and click it.
A dropdown will appear. Click on “Settings”. This is your control room for all things OBS.
- Time to Stream!
On the left-hand side, find the word “Stream” and click on it.
- Choose Your Platform
You’ll see a “Service” option with a dropdown menu next to it.
Click the dropdown and pick “Twitch.”
- Let’s Get Connected!
Click the button that says “Connect Account.”
No magic words are needed, just a simple click.
- Log In to Twitch
A new window will pop up that looks just like the Twitch login page. Don’t worry; it’s legit!
Type in your Twitch username and password.
Click “Log In.” You’re almost there!
What’s Next?
Now, you should see two new windows in your OBS Studio.
- Chat Box:
This is where all your viewers’ messages will appear. Say hi to them; they’ve been waiting!
- Stream Activity:
This window will show you all the cool stuff happening on your stream, like new subscribers or donations!
Method 3. Third-Party Widgets
Want to add some MORE flair to your Twitch streams?
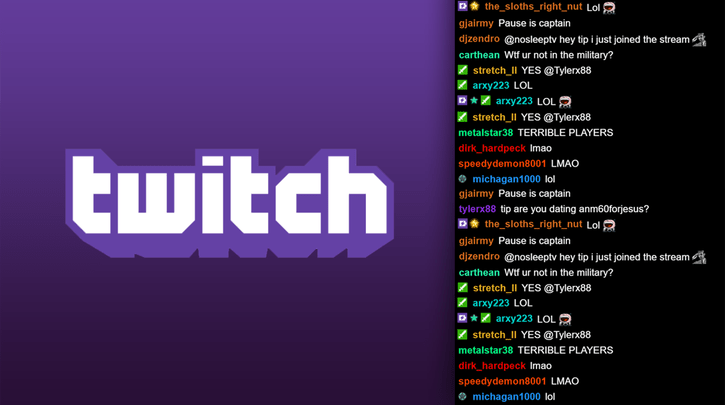
Using chat overlays can increase viewer retention by up to 20%!
Viewers love to see their messages on screen, and it creates a sense of community. Plus, it’s super fun to interact in real-time!
StreamElements
- First things first, open up OBS Studio. If you haven’t installed it yet, download it here.
- Navigate to StreamElements.com and log in using your Twitch account.
Creating your Overlay
Go to ‘Streaming Tools’ > ‘Overlays’ > ‘Create New Overlay’.
Choose an overlay resolution (1080p recommended).
Changing the Stream Settings
Click the “+” icon to add a chat box. From ‘Stream Tools’, choose ‘Your Stream’s Chat’. Customize your chat settings, such as message display and delay.
Customize Chat Style
Under ‘Position, Size, and Style’, set the dimensions to 541px by 670px.
Enable custom font, choose ‘Impact’, and set the text size to about 25.
Add Chat Box to OBS Studio
Copy your StreamElements chat overlay link and paste it as a new ‘Browser’ source in OBS Studio.
Testing the Chat Box
Test the chat box by sending a test message.
Make the Chat Box Transparent
Go back to StreamElements and adjust settings for chat transparency.
Final Test
Test again to ensure everything works as expected.
Adding Overlays
To add more overlays like countdown timers or Twitch panels, you can get them from various sites like Streamdesignz.com.
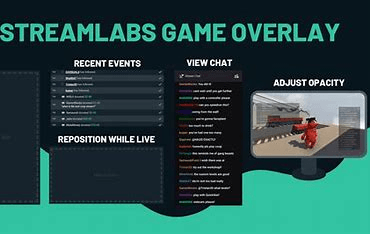
Streamlabs
- Visit Streamlabs:
Go to Streamlabs chat box widget website and log in with your Twitch.
- Copy Chat Box URL:
Once authorized, copy the chat box widget URL.
- Integrate into OBS:
Add a new browser source in OBS and paste the copied URL.
Restream Chat: Merge Chats from Multiple Platforms
When you’re live streaming on multiple platforms, keeping up with all the different chats can be a challenge.
Restream Chat solves this by amalgamating chats from different platforms, including Twitch, into one handy interface.
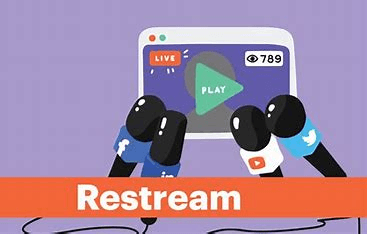
Here’s how to integrate it into OBS:
- Install Restream Chat
Head over to the Restream website and download the Restream Chat application.
Once installed, open it and log in using your Restream account.
- Configure Chat
In the Restream Chat application, navigate to the settings (usually a gear icon).
Here, you can customize how you want your consolidated chat to look and behave.
- Generate Chat Overlay URL
In the settings, locate the ‘Embed in Stream’ option.
This will give you a unique URL that you can use in OBS to display the amalgamated chat.
- Add to OBS
Open OBS and add a new ‘Browser’ source to your scene.
Name it ‘Restream Chat’ for clarity.
Paste the copied URL from Restream Chat into the URL box.
Adjust the width and height according to your preference.
- Position and Test
Position the chat overlay where you want it on your stream.
Test, send messages on your streaming platforms, and you should see them appear in the Restream Chat overlay in OBS.
Method 4. Plugins and Extensions
Here, you’ve got several options, each with its own set of advantages.
So let’s break it down!
OBS Websocket + Custom Script
What You’ll Need: OBS Websocket Plugin, Text Editor (like Notepad++ or VS Code), Basic Understanding of JavaScript
- Install OBS Websocket Plugin
- Download the plugin from OBS Websocket GitHub page.
- Install it and restart OBS.
- Write the Custom Script
- Open your text editor, write or paste your JavaScript code.
- Save it as your_custom_script.js.
- Tip:
Make sure to utilize OBS Websocket JavaScript API to interact with Twitch chat. For example, to pull chat messages, you can use Twitch’s TMI.js library.
- Load the Script into OBS
- Open OBS, go to Tools → Scripts → + → Add your_custom_script.js.
- Test
- Stream a test video and see if the chat appears on your OBS preview.
Pro Tip: Test the chat on a private stream first, so you can adjust aesthetics like font size, opacity, and scroll speed.
OBS CLR Browser Plugin (For the Old Souls Running Older OBS Versions)
- Download CLR Browser Plugin
- Search for CLR Browser Plugin compatible with your OBS version and download it.
- Installation
- Run the installer and make sure it integrates with your OBS directory.
- Add Chat Source
- Open OBS, click on + under Sources → CLR Browser.
- Paste the URL of your Twitch chat.
Tip: You can find your Twitch chat URL by right-clicking the chat on Twitch and selecting Copy URL.
FrankerFaceZ (For Those Who Want to Make Chat Fun with Emotes and More!)
- Install FrankerFaceZ Extension
- Download and install the FrankerFaceZ browser extension for Chrome or Firefox.
- Add Browser Source in OBS
- Open OBS, click on + under Sources → Browser.
- Paste your Twitch chat URL and add ‘?ffz-embed’ at the end.
- Style and Test
- Feel free to resize and position the chat on your OBS preview.
- Don’t forget to test before going live!
OBS Lua Scripting (When You’re Feeling a Bit Like a Programmer)
- Learn Basic Lua
- No need to be a pro but understanding Lua basics helps.
- Write Your Lua Script
- Use a text editor to create a .lua file.
- You’ll need to interact with the Twitch API to pull chat messages.
- Import Lua Script into OBS
- Open OBS, go to Tools → Scripts → + → Add your .lua file.
Pro Tip: Keep a backup of your scripts. Lua can be tricky; you don’t want a small mistake wiping out your hard work.
Method 5. Additional Software
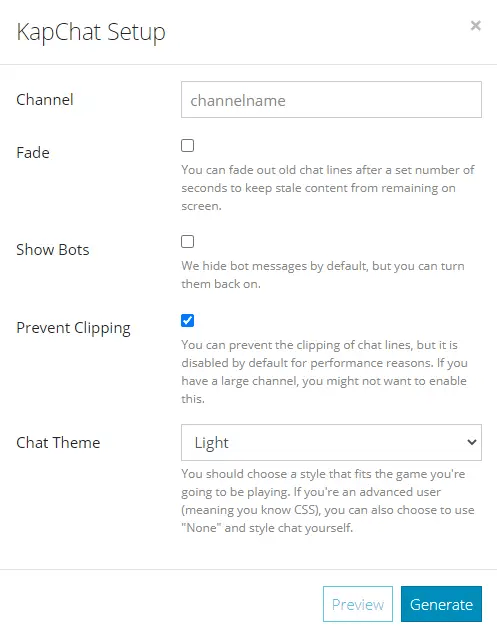
KapChat: The Cool Kid on the Block
- The Starting Point:
Picture going to a fun digital store.
This store is called KapChat’s webpage.
Look for the big flashy “Get It” button and give it a good ol’ click.
Boom! You should see a pop-up window.
- Details, Details!:
Now, think of this as filling out a fun quiz about yourself (but Twitch related).
Enter your deets, and hit the exciting “Generate” button.
- The Link:
After you hit “Generate”, they’ll hand you a special URL. It’s like a golden ticket! Copy it.
- The Add Button:
In OBS, that’s our movie studio, find the section labeled “Sources.”
Click on the tiny “+”.
- New Window Time!:
Choose “Browser” from the list.
- Paste the Golden Ticket:
In this new scene, there’s a place for our golden ticket (the URL from KapChat).
Paste it! Then, excitedly, hit “OK.”
Pro Tip:
Let’s talk about chat window sizing.
Imagine you’ve bought a picture frame (that’s your chat window).
Rather than stretching the picture (the chat) and making it look weird, go back to the store (KapChat) and get the right size.
In OBS, you can adjust the width and height easily without distorting your lovely chat.
Chatty: The Friendly Neighborhood App
Think of Chatty like your neighborhood postman but for Twitch chat.
It’s a separate app, sitting on your computer, making reading Twitch chats super easy.
- Download & Open:
Get Chatty and open it up. It’ll look like a typical chat window.
- Capture the Chat:
Now, back in our OBS studio, instead of adding a browser, we’re going to capture a window (Chatty). It’s like filming a scene through a window.
Method 6. Set up Those Chat Notifications
- You don’t want to miss any interaction, right? Notifications alert you when something’s up in your chat.
- This way, you’re always in the loop but not constantly distracted.
How to Do It?
- Go to Twitch Settings: It’s usually the little gear icon.
- Navigate to Notifications: You’ll find options for what kind of interactions you want to be notified about.
- Enable Chat Notifications: Turn on the settings that alert you when someone sends a new message in chat.
- Enjoy Your Stream: Now, each time a notification pops up, you’ll know it’s time to engage with your audience!
Conclusion
Whether you’re a tech whiz or a streaming newbie, these easy-peasy tricks, from docking your chat in OBS to mobile mini-screens, add a sprinkle of magic to your broadcast, making it as smooth as your best dance moves!
Enhancing your Twitch stream isn’t just about chat visibility – it’s also crucial to deliver high-quality visuals to keep your audience engaged. Upgrading to a dedicated streaming camera can significantly elevate your stream’s image clarity and make your content stand out.
FAQs
Why isn’t my Streamlabs chat showing up?
Just click the “Refresh Chat” button at the top of the chat box. Also, log out of the Streamlabs website and close the Streamlabs OBS program. Then log back in to make sure the chat and you are still best friends.
Sometimes, the chat needs to know you’re the real deal so that re-authenticating can do the trick!
Why can’t I see my Twitch chat?
This could be your browser’s extra add-ons, stored data, or maybe you’re on a network that doesn’t like Twitch.
Try disabling any browser extensions and clearing your cache to coax it back into view!