.png)
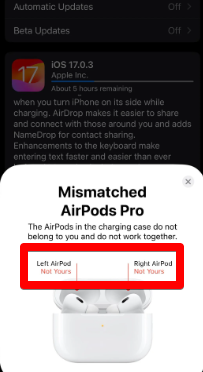
If you’ve ended up with AirPods from two different generations (like a first-gen right and a second-gen left), you’ve probably seen the “Mismatched AirPods” error message on your iPhone. But don’t worry—there’s a workaround that can get them playing in sync so you can enjoy full stereo sound again.
How to Connect Mismatched Replacement AirPods
It’s possible that you’ve got the replacement AirPods, and when you try to connect them to your iPhone, a mismatch error pops up showing that they don’t belong to you.
To match the replacement AirPods, do these steps:
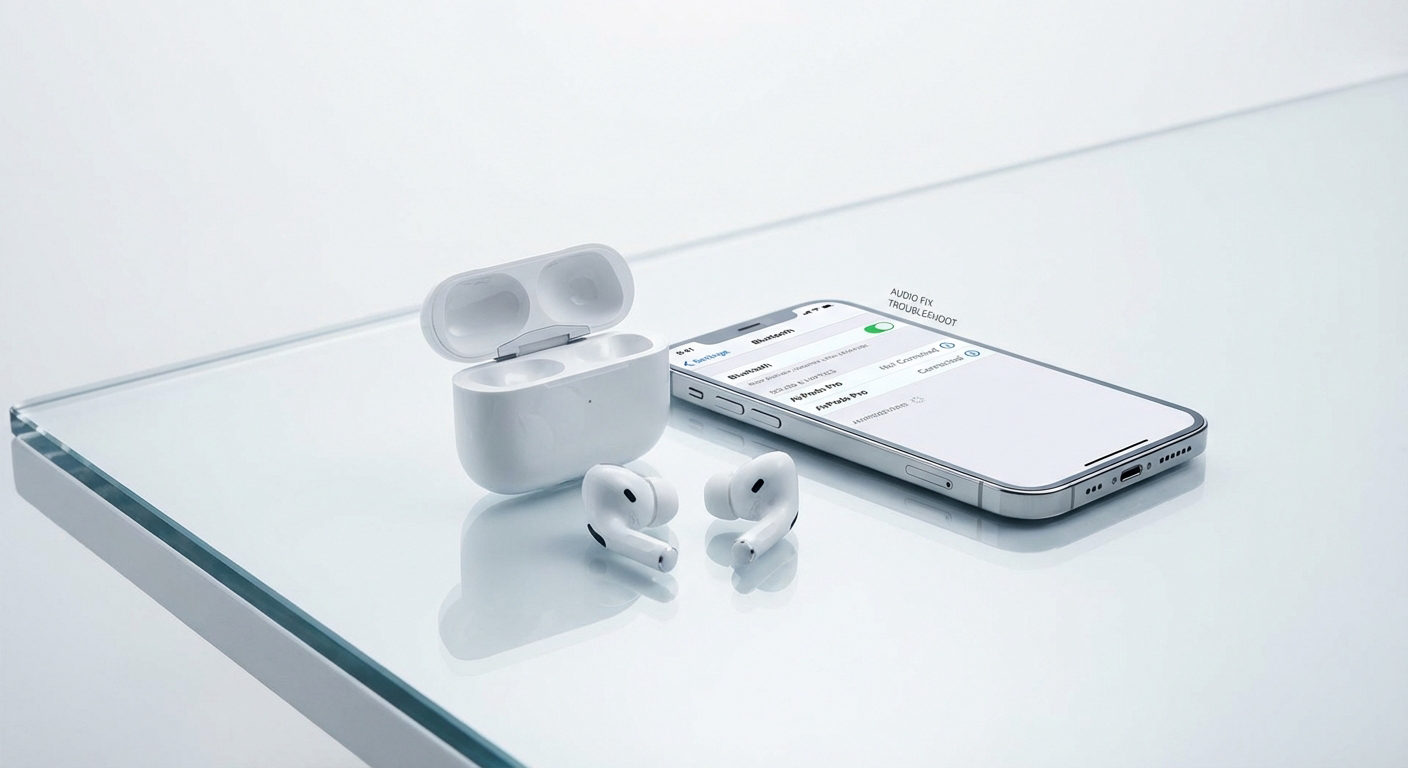
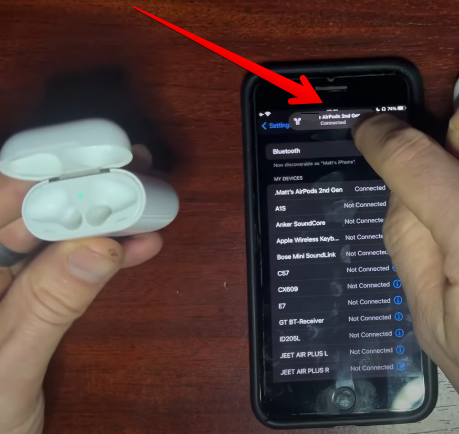
- Open iPhone Settings, then tap “Bluetooth.”.
- Tap the name of your previously owned AirPods that will show as “Not Connected.”.
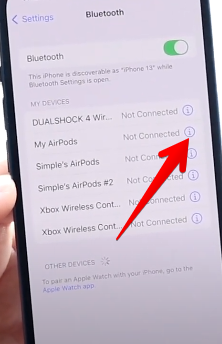
- Scroll below and tap “Forget This Device.”

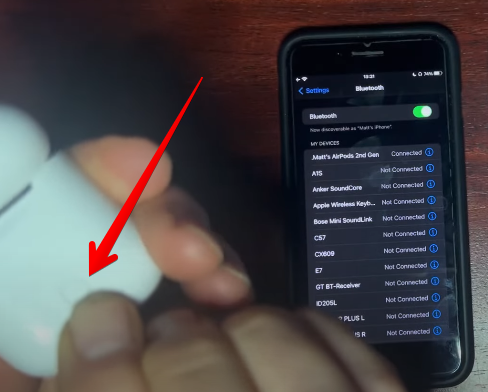
- Then, put both of the replacement AirPods in the case on the charger. Also, make sure your iPhone is placed next to the charging case.

Now leave the AirPods in the case like this for 2-4 hours to let them update and sync. Now, pair them again to your iPhone, and they will work like genuinely synced AirPods.
But what if you have one AirPod from one generation or another from another generation?
Let’s give you another solution for this to match both of them.
How to Pair Two Mismatched AirPods? Step-by-Step Workaround
Got a left AirPod from one generation and a right AirPod from another? Here’s what to do:
Step 1: Pair the First AirPod
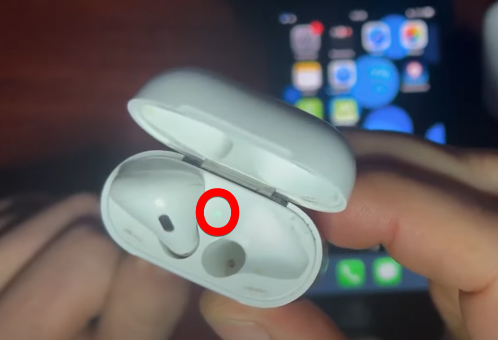
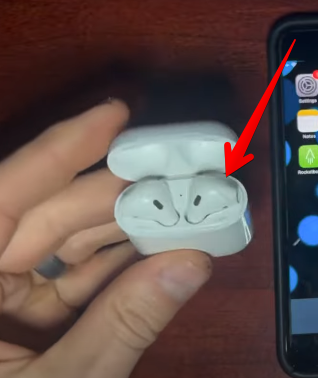
- Place the first AirPod into its charging case and make sure the lid is open.
- Check the LED indicator on the front of the case—if the light is solid green, it means the AirPod is not in pairing mode yet.
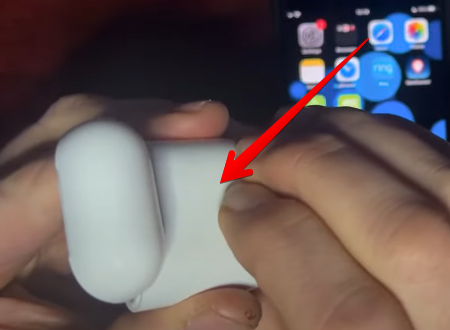
- Press and hold the button on the back of the case for a few seconds until the LED starts flashing white, which means the AirPod is now in pairing mode.
- Look at your iPhone screen; a pairing dialog should pop up. If it does, tap Connect to pair the first AirPod.

- If the pairing pop-up does not appear, you’ll need to reset the case by holding the button on the back for about 15 seconds, until the LED flashes amber, or turns off and then starts flashing white again.
- Once the first AirPod is paired, go to your iPhone’s Settings app and confirm that it shows as connected, with access to all available AirPods controls.

- Optionally, you can rename the AirPods in the settings, so it’s easier to recognize during the rest of the process.
Tip: If you have an AirPod that you are already using and paired with your phone, while the other one is lost or damaged, and you got a replacement, skip this step and start from Step 2.
Step 2: Sync the Other AirPod
- Remove the other AirPod from its original case and insert it into the first one’s case, alongside the AirPod.
- A pop-up message will appear that says “Mismatched AirPods: The AirPods in the charging case are different generations and do not work together.” The pop-up will label which generation each AirPod belongs to.

- Since they don’t connect at this stage, take the second AirPod back out and set it aside for now. Make sure the first AirPod is still connected to your iPhone.
- Now, take out the first AirPod, put it in your ear, and wait for the chime sound to confirm it’s active and connected—you’ll also see a notification on your screen.
Step 3: Sync the Second AirPod Using the First AirPod Case
- With the first AirPod still in your ear and connected, take the second AirPod and place it into the first AirPod case.

- Press the button on the back of the case and hold it until the LED starts flashing white—this puts the AirPods into pairing mode again.
- When the pairing pop-up appears, it will simply say “AirPods” without any mismatch warning—tap Connect.

- The second AirPod is now paired successfully along with the first AirPod.
- Remove both AirPods from the case and place them in your ears—one in each ear.
- At this point, both AirPods are connected, but by default, you’ll only hear sound in one ear.

Step 4: Enable Stereo Output for Both Mismatched AirPods
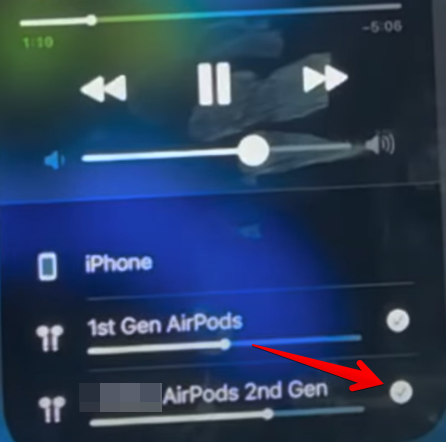
- On your iPhone, swipe up from the bottom or top of the screen if you’re using an older iPhone, or swipe down from the top-right corner if you’re using a newer iPhone model.
- In the Control Center, locate the “Now Playing” section and tap the AirPlay icon (a triangle with circles above it).

- You’ll see a checkmark next to one AirPod—tap the other AirPod to activate it too.
- Now you should be hearing audio in both ears, with stereo sound working perfectly across mismatched AirPods.
Step 5: Adjust Microphone Settings if You Plan to Make Calls
- Go to Settings > Bluetooth, then tap the “i” icon next to your connected AirPods.

- Here, you can adjust the settings for the left and right AirPods.

- Under Microphone, you can choose between:
- Automatically switch AirPods,
- Always Left AirPod,
- Always Right AirPod.

Since these are different generations, you might want to manually assign the mic to the more reliable AirPod if you plan to use them for calls.
So there you have it. The audio quality should be the same, and you’ll still be able to enjoy stereo sound, even though your AirPods are technically mismatched.
Conclusion
In this guide, you have been given a complete overview of how to connect mismatched AirPods, which covers methods for both the replacement AirPods and connecting AirPods from different generations.
Now, you can use both of your AirPods to listen in stereo mode and also configure which one to use for calls and other features.
FAQs
What happens if you mismatch AirPods?
If you place two AirPods from different generations into the same case, your iPhone will show a “Mismatched AirPods” error. They won’t connect or function together by default because Apple doesn’t officially support syncing different-generation AirPods. However, there’s a workaround. Pair one AirPod first (using its original case), connect it to your iPhone, then add the mismatched AirPod into the same case, which puts both into pairing mode, and then reconnect to your iPhone. This tricks the system into accepting both, even though they’re from different generations.
Why is one of two AirPods not connecting?
If one AirPod isn’t connecting, it might be from a different generation, which causes a mismatch. Another common reason is poor contact of the AirPod with the charging pins inside the case due to dirt or misalignment. Fully inserting it, cleaning the case, or resetting usually helps restore the connection.
How to hard reset AirPods?
To hard reset AirPods, place them in the charging case, open the lid, then press the back button and hold it for about 15 seconds until the LED flashes amber and then white. This clears all the previous connections, which is helpful when trying to pair mismatched AirPods.