.png)
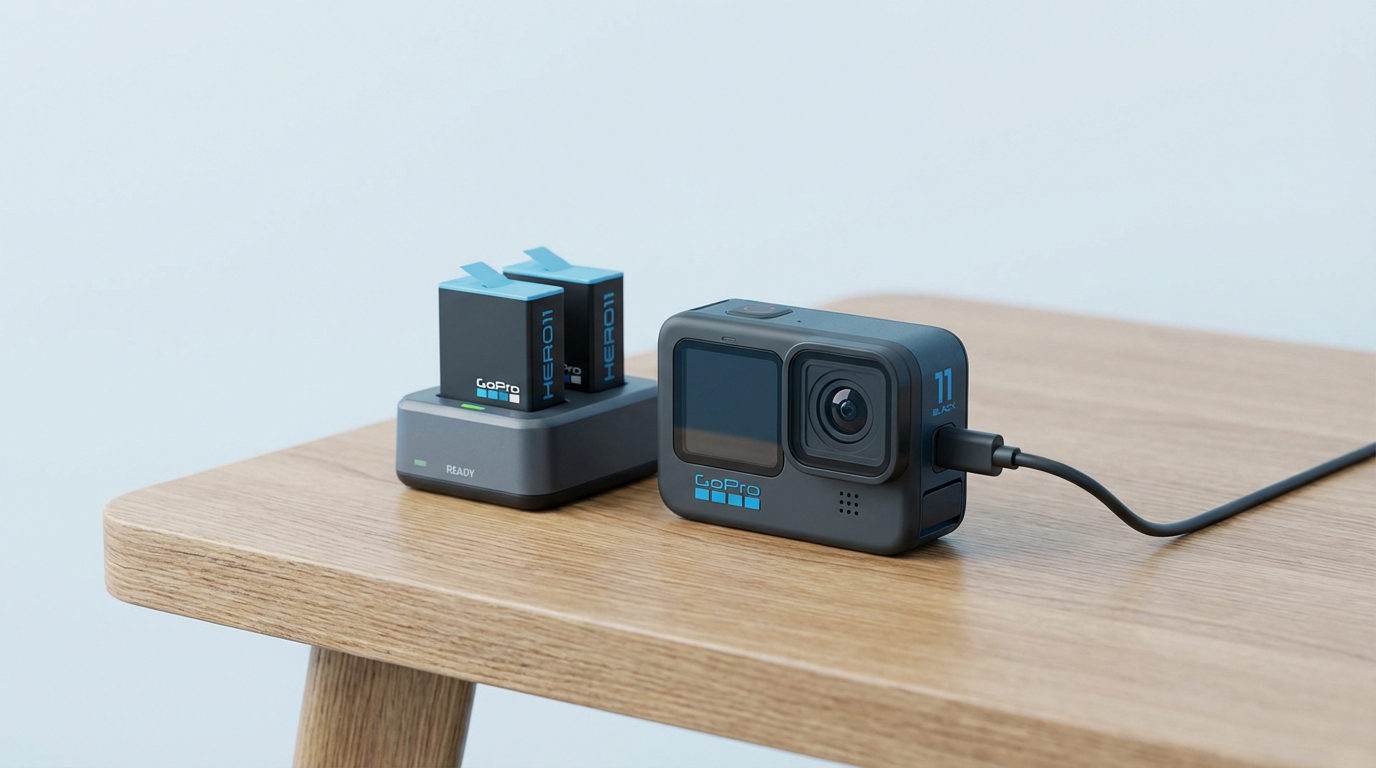
The GoPro Hero 11 is a small camera that records high-quality video. It works well for travel, workouts, and fun family events. Most importantly, it is the model that is popular. That is the reason we have chosen it to explain how a GoPro works. Even if you have an older or newer model, the things you learn here will be beneficial. Thus, this guide is for anyone who wants clear and steady footage. Each part explains what to do using short and simple explanations.
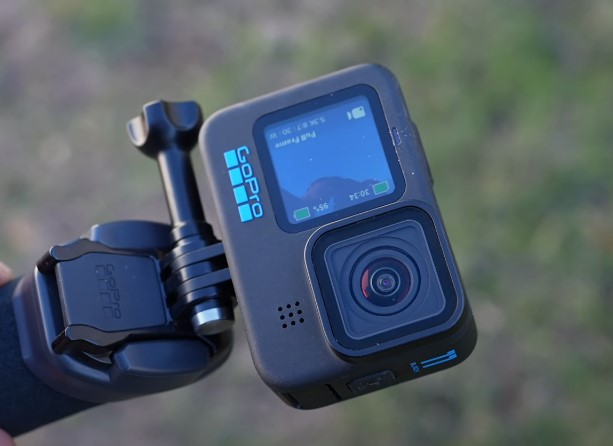
The Body of GoPro (HERO 11)
We know you’re excited to turn on your GoPro and start recording. But it will be fair if you understand the physical structure or body of this camera.
The GoPro has two screens. The back screen lets you control settings.

The front screen helps you see yourself while filming.
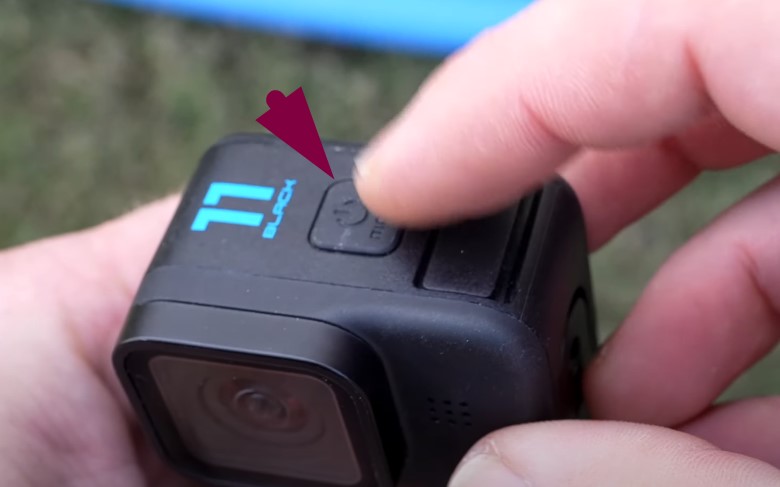
A button on the side turns the camera on and off.
The touchscreen works like a phone. Swiping changes modes and settings quickly.
First-Time Setup for the GoPro
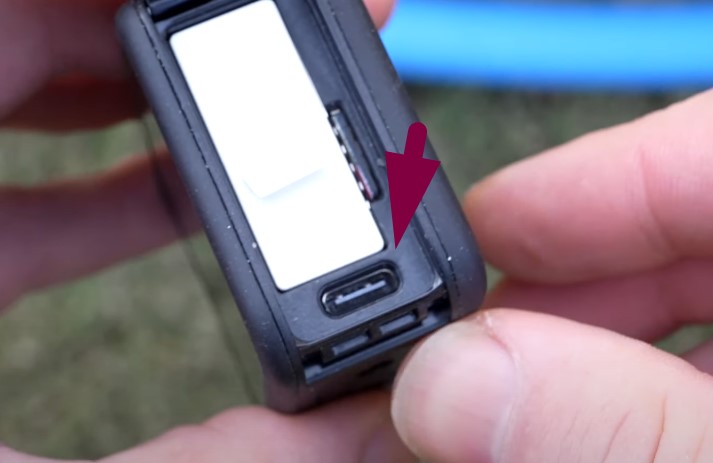
- Charge the battery using the USB cable.
You can also replace the battery by opening the latch on the side of this camera and pulling it out.
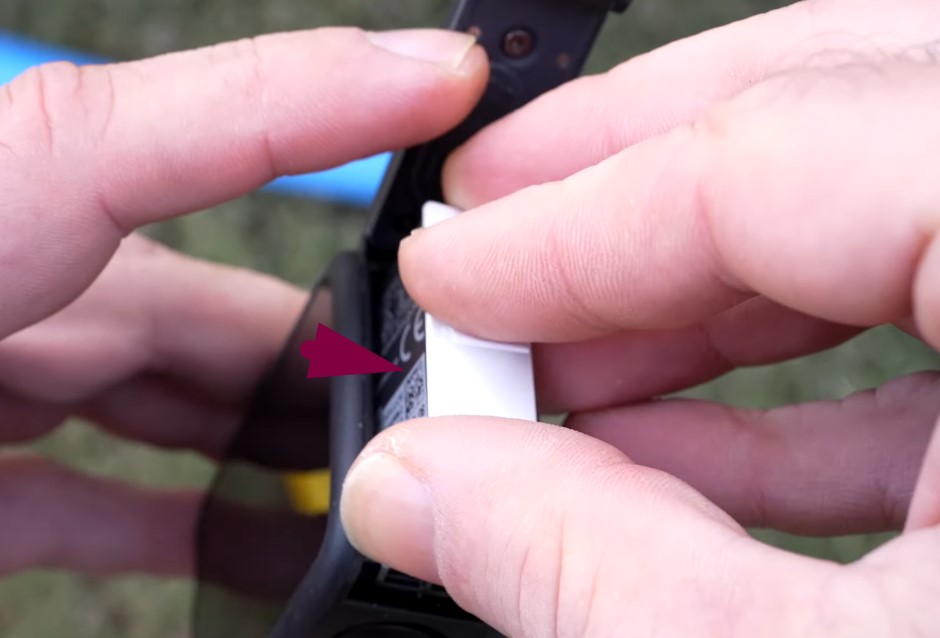
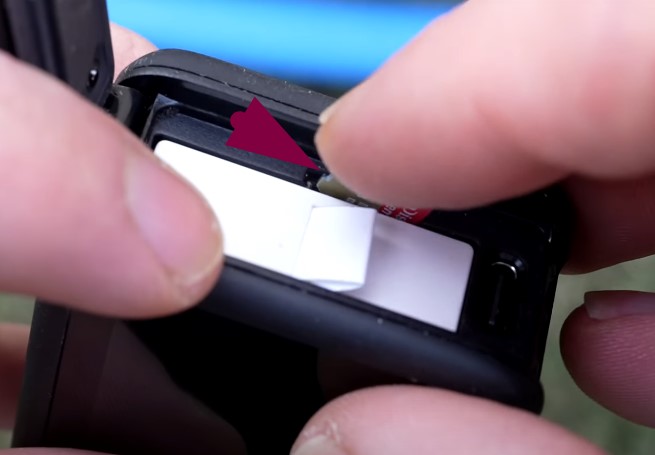
- Insert a microSD card in the slot.
- Hold the side button to power it on.
- Choose your language and region.
Once the setup is complete, the main screen will appear. You can now swipe to switch between Video, Photo, and Time Lapse modes. The screen layout is clean and simple.
Switching Between Pro and Easy Controls
- Easy Mode is simple, with fewer settings.
- Pro Mode offers full control.
To switch controls:
- Turn on your GoPro HERO 11.
- Swipe down on the main screen.
- Swipe right and choose Controls.

- Select Easy or Pro modes by swiping up the white-round slider.
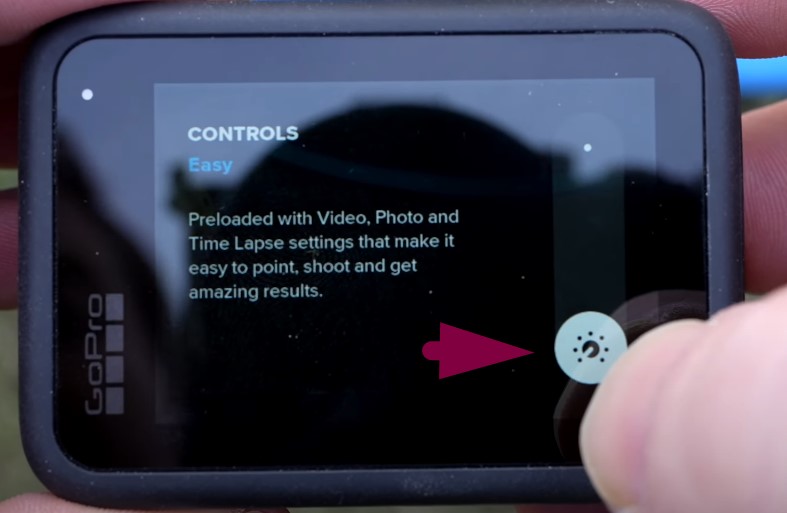
Start with Easy Mode, then switch to Pro as you learn more.
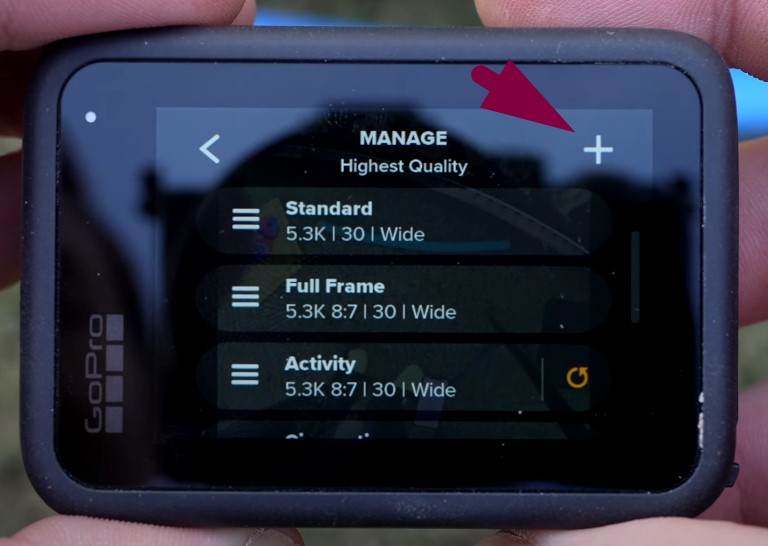
Selecting and Editing a Video Preset
The Hero 11 includes multiple default presets:
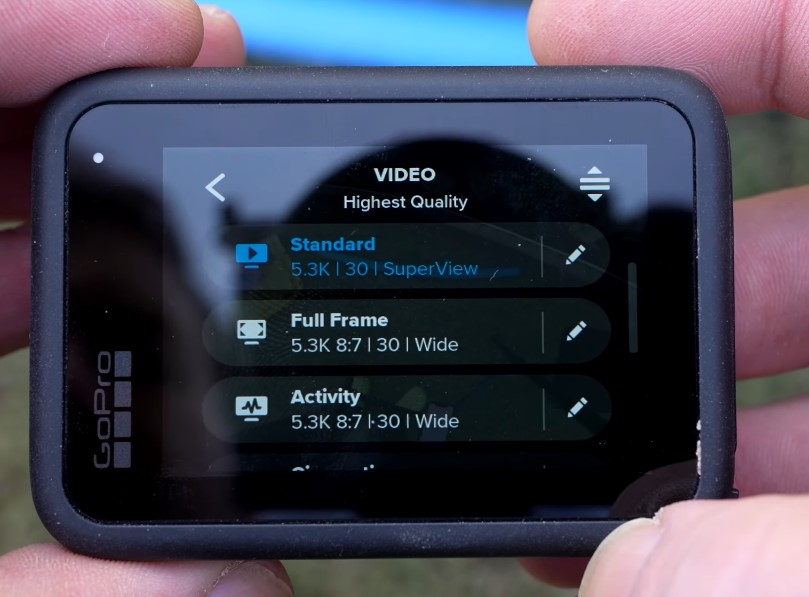
- Standard: for everyday shooting.
- Full frame: for wider frame shooting.
- Activity: for movement and sports.
- Cinematic: gives a movie-like look.
- Slo-Mo: slows fast actions for effect.
To select any video recording preset:
- Click on the current recording mode option, such as Standard.

- Tap to select the preset.
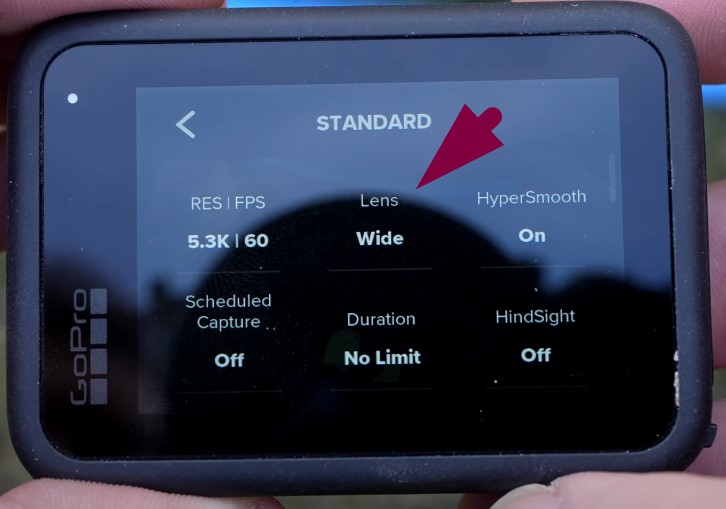
You Can Also Adjust the Preset in GoPro:

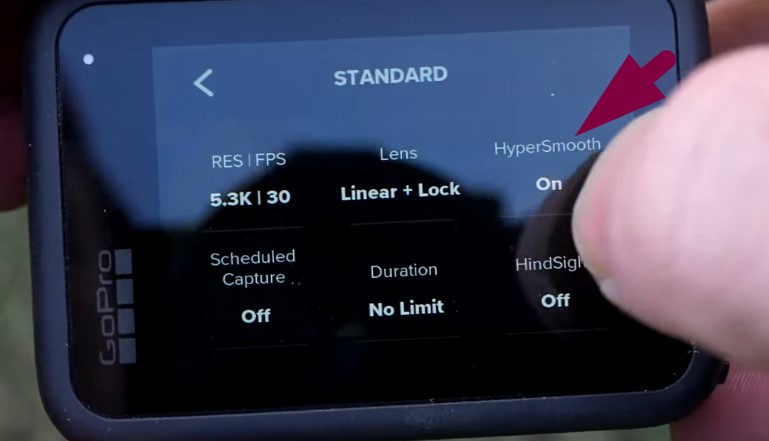
- Tap the preset name on the screen.
- Tap the pencil icon to edit.
- Adjust resolution, frame rate, and lens view.
- Turn on or off HyperSmooth as needed.
- Tap the checkmark to save the changes.
This lets you return to the same setup later.
TIP: You can also create a custom preset by pressing the Plus button.
Knowing the Lens Options
The lens setting controls what the camera sees. To choose a lens mode, click on the lens option in the preset menu and select from the following:
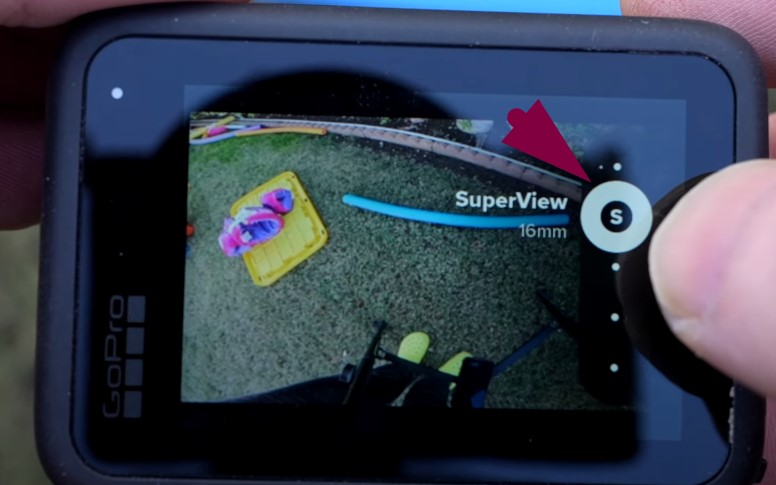
- Wide: captures more of the scene.
- SuperView: even wider view, good for action.
- Linear: keeps lines straight, avoids bending.
- Linear with Horizon Lock: prevents tilting in video.
Use Horizon Lock for running or biking. It keeps videos straight even if the camera tilts.
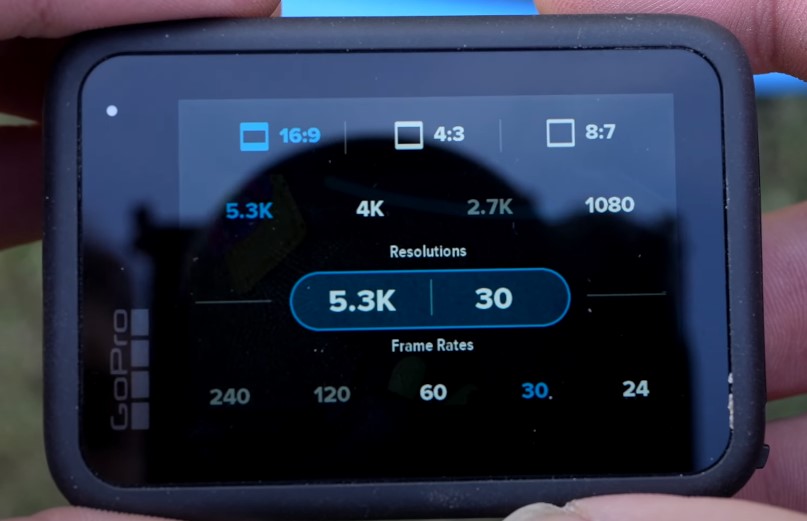
Changing Resolution and Frame Rate
These two settings control how your video looks.
Resolution:
- 5.3K: very detailed, but uses more space.
- 4K: still clear, and easier to handle.
- 2.7K or 1080p: good for saving space.
Frame Rates:
- 24fps: soft, cinematic feel.
- 30fps: normal everyday use.
- 60fps: smoother for fast scenes.
- 120fps or 240fps: best for slow-motion.
How to Change These:
- Tap the pencil icon in the preset.
- Select the resolution and frame rate.
Using HyperSmooth for Stable Videos
HyperSmooth helps reduce camera shake.
- Turn it on in the preset settings.
- Use the AutoBoost mode for action shots.
It makes your videos smoother while moving or walking.
Color, Sharpness, and Bit Rate Settings
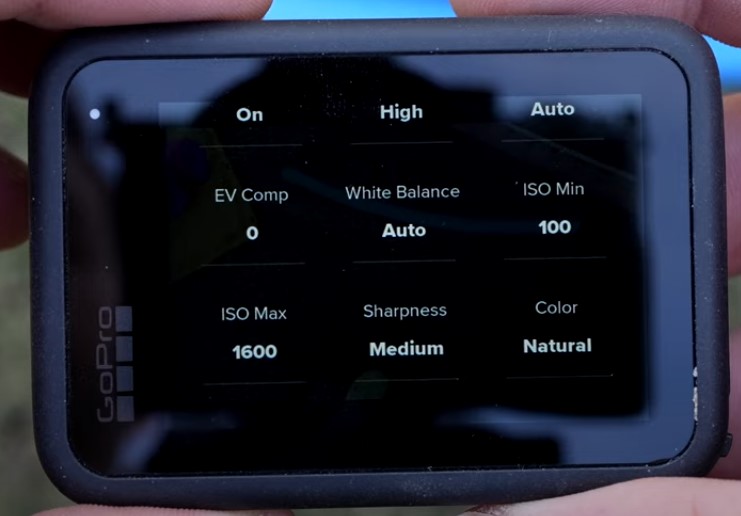
Color style options:
- Natural: looks good straight from the camera.
- Flat: better if editing later.
Sharpness levels:
- Low: soft video.
- Medium: best choice for most shots.
- High: very sharp, sometimes too much.
Bit rate:
It affects how much data is recorded. Higher bit rate gives better quality but uses more space.
Fixing Audio for Better Sound
The built-in mic is okay, but not the best.
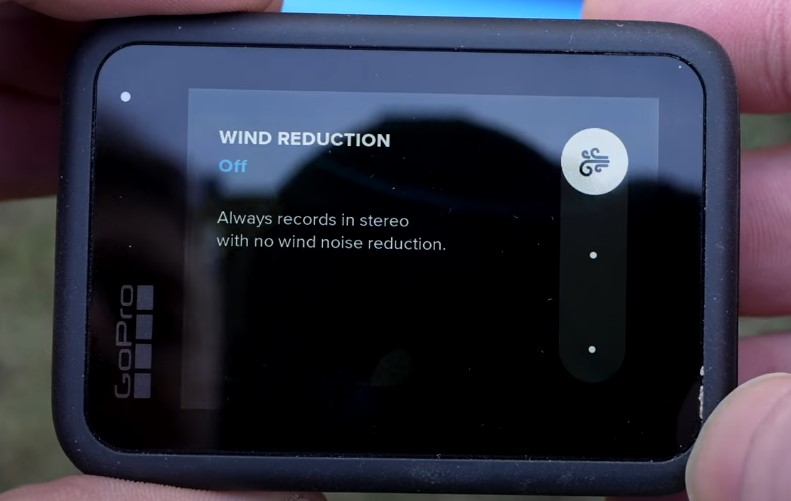
- Turn off Wind Reduction for indoor sound.
- Use a media mod or mic cover outside.
This helps capture clear sound without wind noise.
But if you’re still not satisfied with GoPro’s internal mics’ performance, get yourself an external microphone like the Hollyland LARK M2S that has a solid titanium clip, logo-free design, and Environmental Noise Cancellation.

Hollyland LARK M2S - Wireless Hidden Microphone
An ultra-discreet wireless microphone featuring a clip-on transmitter for an “invisible” fit.
Key Features: No-Logo Fit | Ti+ Design | 48 kHz/24-bit
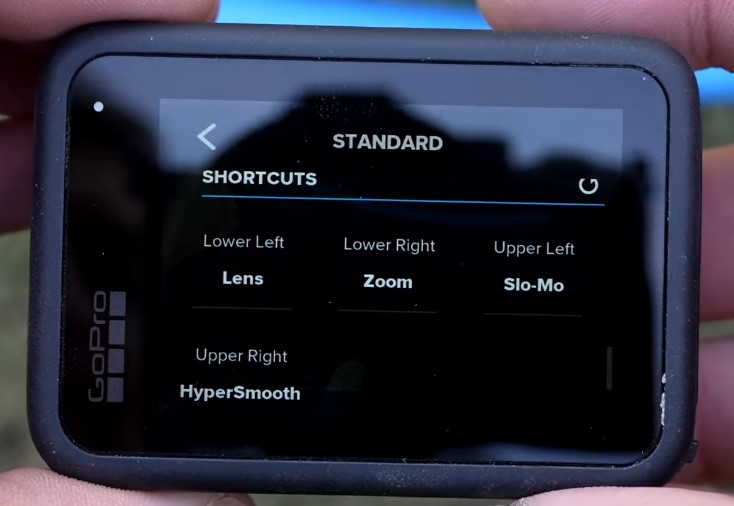
Screen Shortcuts for Quick Control
The main screen shows a few shortcut buttons, including:
- Frame rate
- Lens mode
- HyperSmooth setting
- Zoom level
Tap the center of the screen to hide all icons. Tap again to bring them back. You can also set a new shortcut for any control by replacing the current one. But we will suggest keeping them as they are.
Using Swiping Gestures
- Swipe up: see saved clips.
- Swipe left or right: change shooting modes.
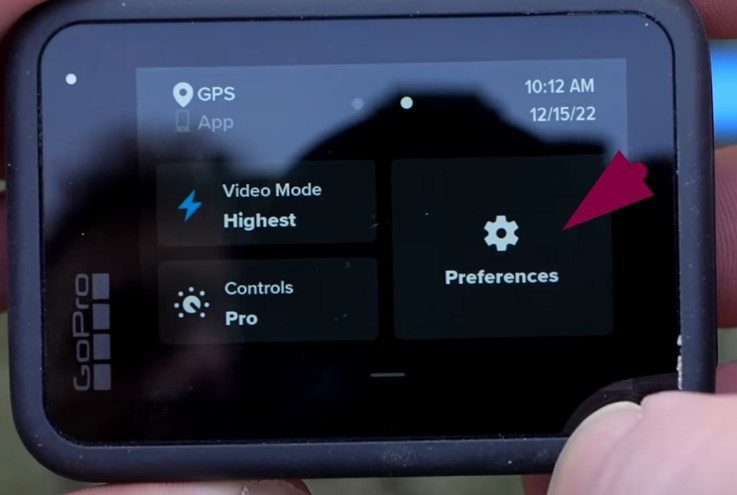
- Swipe down: go to Preferences and other settings.
These swipes make it fast to change modes or check files.
Using Voice Control with the GoPro
You can give commands without touching the screen.
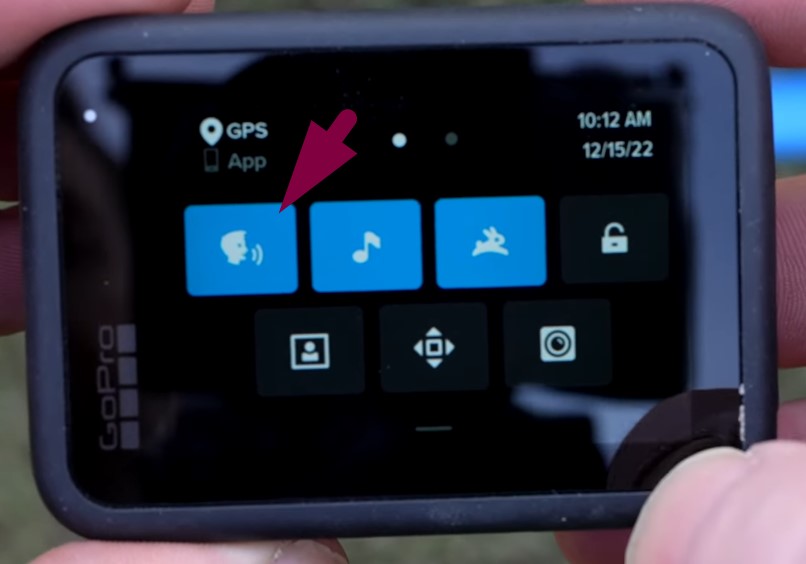
- Turn on Voice Control under Preferences.
- Say “GoPro start recording” or “GoPro stop recording.”
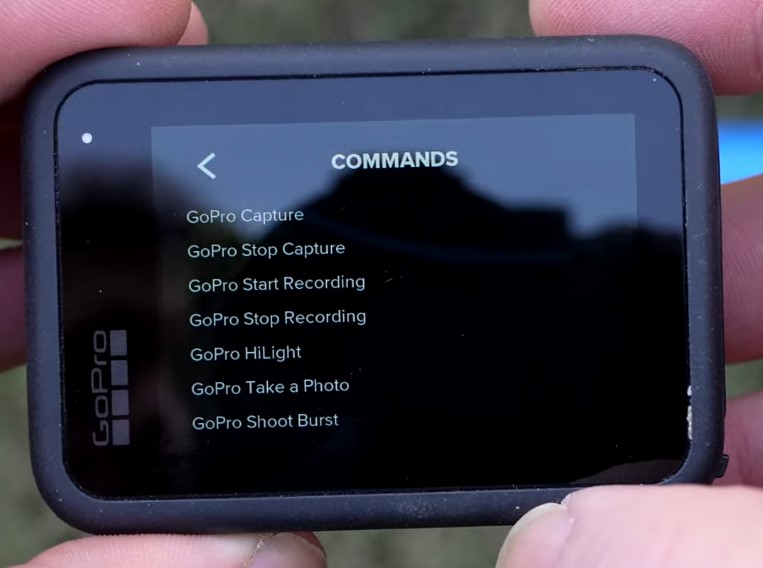
TIP: Swipe right and go to Preferences > Voice Control > Commands to view all commands.
Understanding the Beeping Sounds
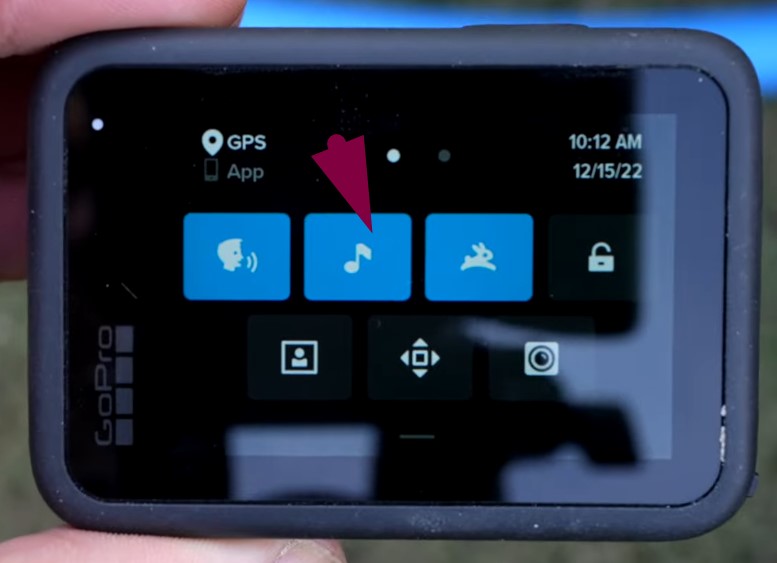
- 3 beeps: starts recording.
- 7 beeps: stops recording.
This helps when you can’t see the screen. Listen to know if it’s filming.
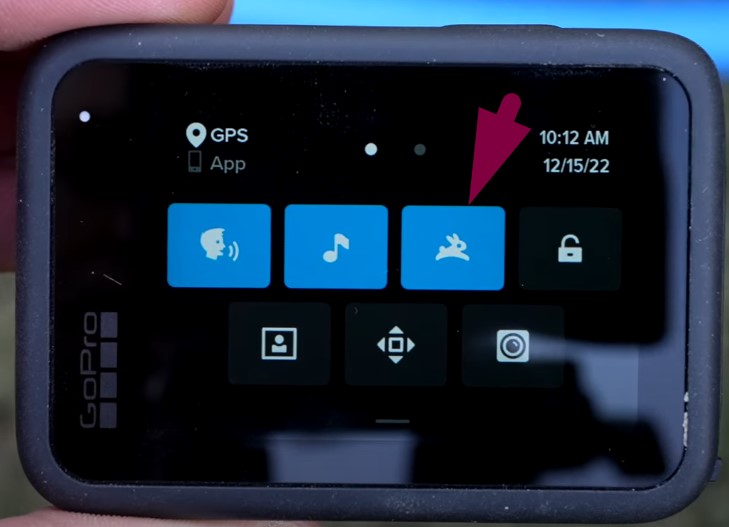
How Quick Capture Works (The Bunny Icon)
Quick Capture starts filming fast, even when off. You can enable or disable this option by tapping the bunny icon in the menu.
- Press the shutter/record button once to begin.
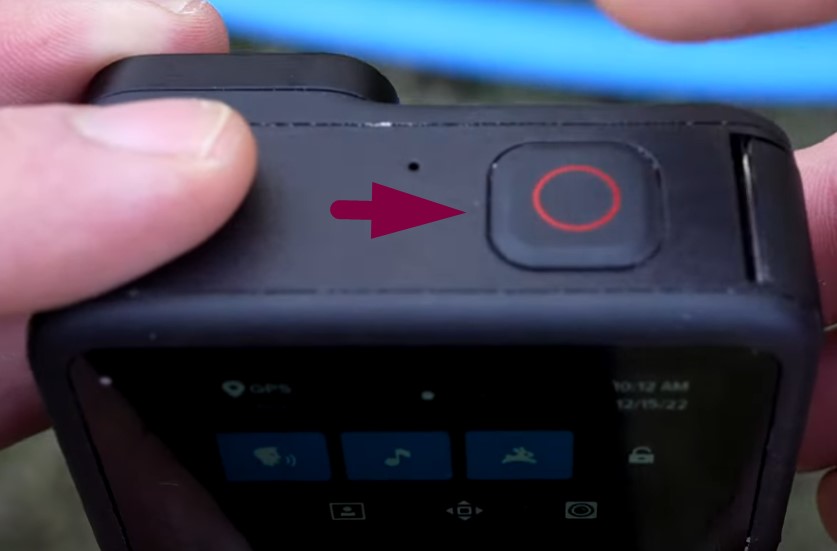
- The camera powers on and records right away.
- Press again to stop and power off.
This is useful for saving battery during short clips.
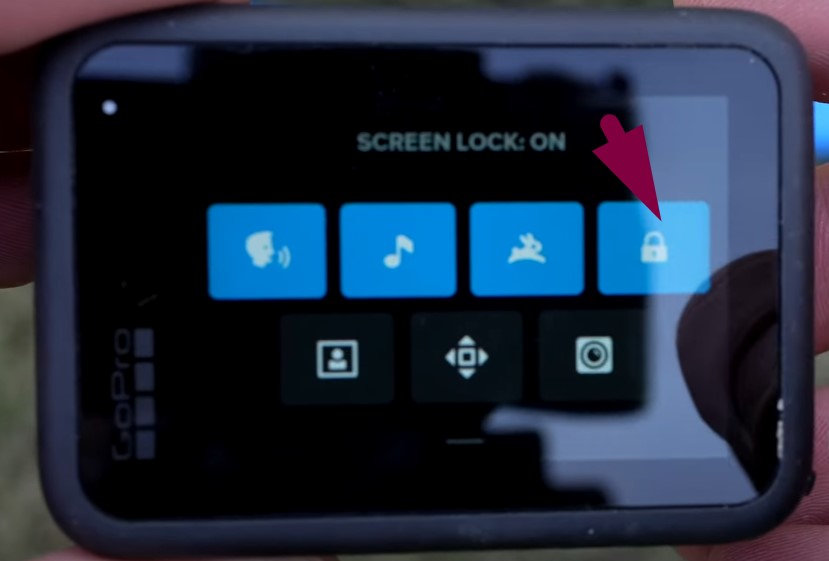
Using the Lock and Orientation Features
- Screen lock stops unwanted screen touches.
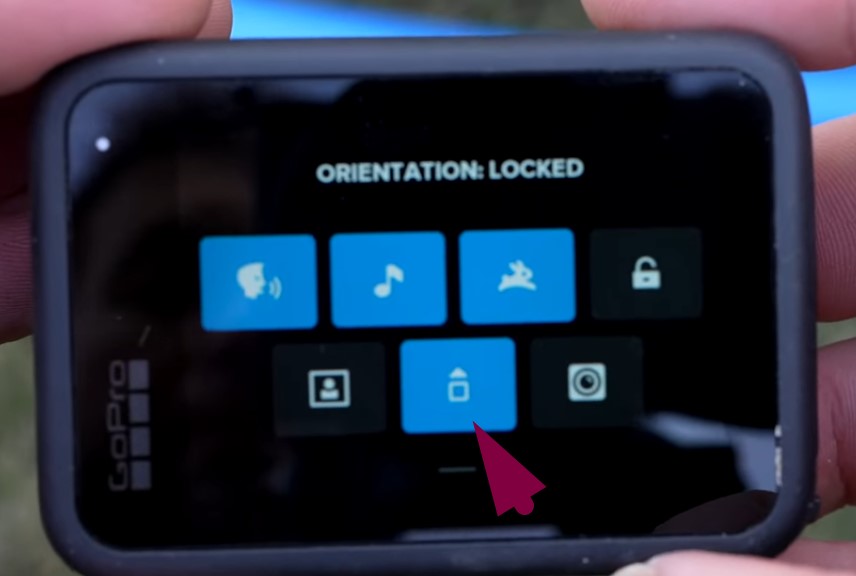
- Orientation lock keeps the screen from flipping.
To activate the screen lock, tap the lock icon before water activities or action shots.
In the same way, click on the orientation lock icon to activate or deactivate this option.
Setting the Front Screen Options

You can control what shows on the front screen:
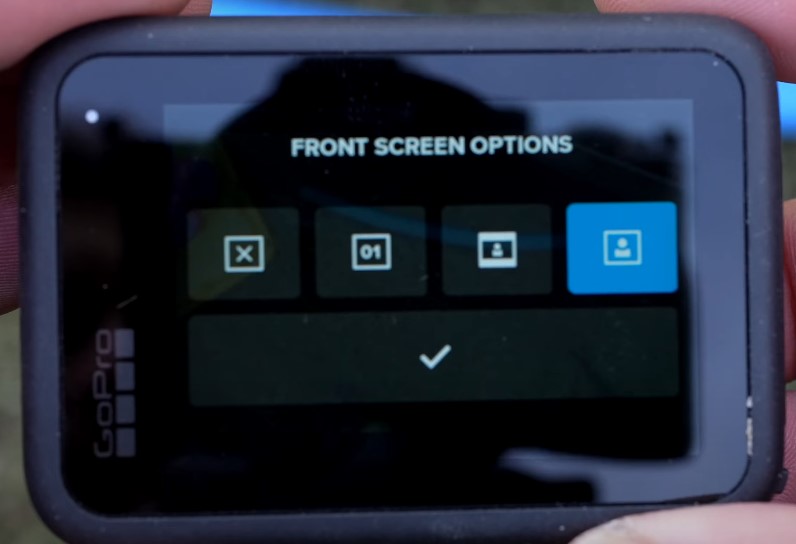
- Full screen: shows the full camera view.
- Actual screen: displays the true shot frame.
- Status only: hides the video, shows info.
- Off: turns off the screen to save power.
Use status-only or off when filming for long periods.
Saving Battery and Storage
- Lower the resolution to 1080p or 4K.
- Use Quick Capture to avoid long idle time.
- Turn off the front screen during long shoots.
- Set the brightness low under Display settings.
Exploring Preferences and Wireless Settings
In Preferences, you’ll find deeper settings:
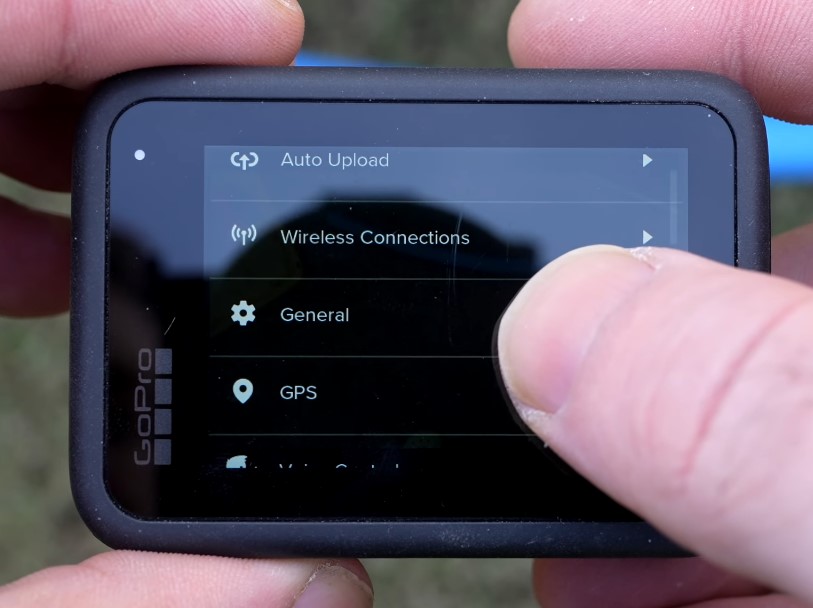
- Auto Upload: uploads videos to the GoPro cloud.
- Wireless Connection: pairs with the app or Wi-Fi.
- GPS: tags video with speed, location, and altitude.
TIP: Turn GPS on if you want location data in your edits.
Display Customization Options
- Adjust screen brightness.
- Set a screen saver timeout.
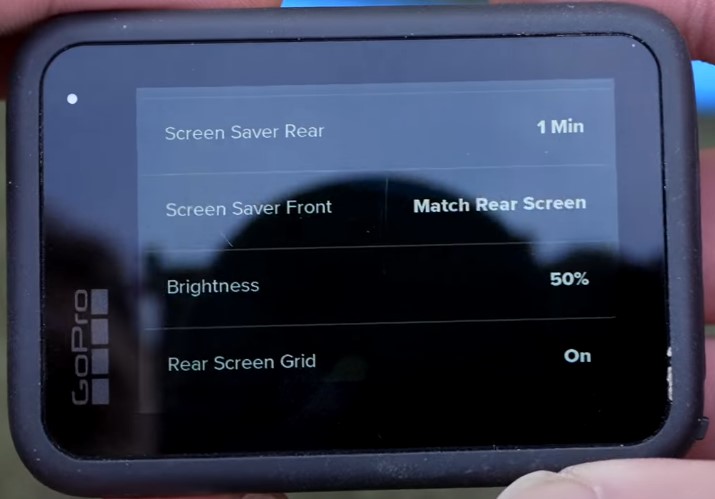
- Choose portrait or landscape mode.
- Turn on the rear grid for better framing.
Using the GoPro in Photo Mode
Photo Mode can be selected from the Preferences menu, and it lets you take still pictures:
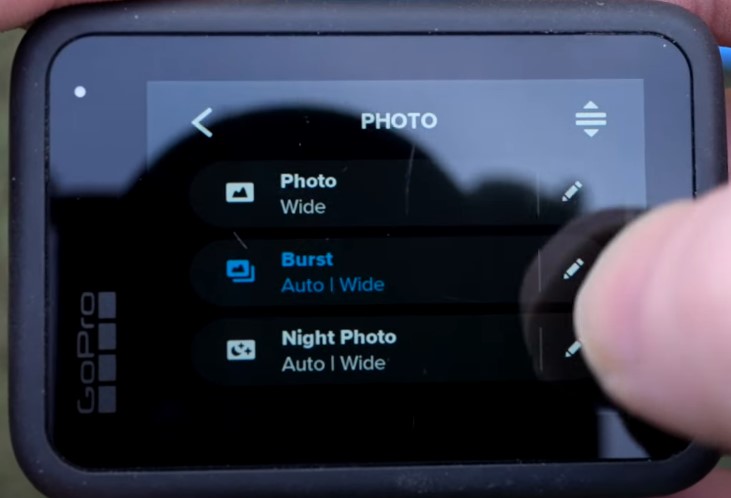
- Pick your lens and zoom level.
- Choose RAW or JPG format.
- Use the timer if needed.
TIP: You can also use the Burst Mode to take many pictures quickly. It’s good for fast-moving subjects.
Applying Time Lapse and Enjoying Its Features
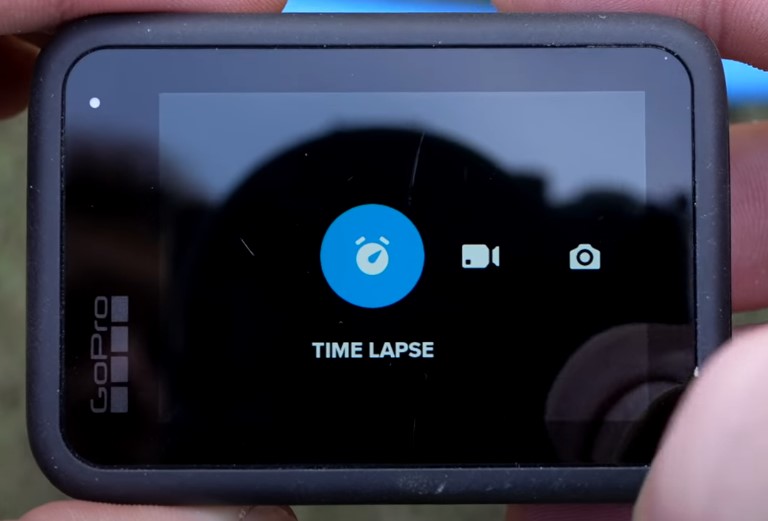
Time Lapse offers cool visual tools:

- TimeWarp: for stable, moving time lapses.
- Star Trails: shows stars in motion.
- Light Painting: draws light with movement.
- Vehicle Lights: tracks car movement in the dark.
Using the GoPro Quik App
Connect the camera to the app using Bluetooth or Wi-Fi. The app lets you:
- Control the camera from your phone.
- View, trim, and edit clips.
- Update software easily.
- Post to social platforms quickly.
Quick Suggestions to Get Better Results with GoPro
- Clean the lens before every use.
- Film in bright areas for clear footage.
- Use chest or helmet mounts for stability.
- Use Flat color if editing videos later.
- Keep videos short to avoid overheating.
Wrap Up
The GoPro is full of helpful tools if you know how it works and what functions to use. It performs great once the basic settings are clear. Beginners can rely on presets to start, while advanced users can adjust every detail. And whether it’s GoPro HERO 11 or any other model, the menus are simple. Also, the swiping system helps change modes fast in the latest models.
FAQs
1. How do you open the Preferences menu on GoPro?
Swipe left from the main screen to find Preferences. This menu holds settings like screen brightness and screen saver. You can also adjust auto upload and GPS options there. It helps you change how the camera works and responds. Most users go there when they want better control. It only takes a few taps to adjust everything.
2. Are GoPro cameras good for taking still pictures?
GoPro takes decent photos, especially with the HDR mode on. The shots look sharp in bright outdoor light. Still, many people prefer their phones for pictures. Phone cameras often feel quicker and easier to use. A phone may also give better results in low light. GoPro works best for photos during action or adventure shots.
3. What are the most commonly used GoPro models today?
Popular models include Hero11, Hero12, and Hero13 Black. The Hero10 Black is also widely used and trusted. The GoPro MAX 360 gives a different wide-angle view. Some still like the older Hero8 for basic needs. Each model brings something useful for different video styles. Pick the one that fits your type of shooting.
4. How many built-in microphones do GoPro cameras have?
Most GoPro models come with three built-in microphones. These help capture better sound from different directions. The system also works to block out background noise. Even though the mics are small, they record pretty well. They’re protected since the camera is waterproof by design. So, you still get sound while filming in wet conditions.