.png)
Have you encountered the stuttering effect when listening to music or an audio production, but are you wondering how to do it yourself? You shouldn’t worry anymore since an open-source software like Audacity allows you to do that easily. An audio stutter adds energy and drama to your production, making it more captivating.
If you want to quickly record audio before getting started with Audacity, ensure you use a reliable microphone like the Hollyland LARK M2S, which comes with a logo-free design, hence completely unnoticed. Its titanium clip-on holds it firmly in place even during intense movement.

Hollyland LARK M2S - Wireless Hidden Microphone
An ultra-discreet wireless microphone featuring a clip-on transmitter for an “invisible” fit.
Key Features: No-Logo Fit | Ti+ Design | 48 kHz/24-bit
What Is the Stutter Effect & Why Create It?
When you chop up a segment of audio and then play it quickly and repeatedly, you create a “stutter effect.”
Now, why create a stutter effect? Well, this production trick is popular due to the following reasons:
- It helps draw people’s attention by emphasizing a beat, word, or note.
- Creating a stutter adds rhythmic interest by breaking monotony in a loop.
- The stutter effect is vital for creating a glitch aesthetic in musical categories like glitch-hop, EDM, or drum and bass.
- A stutter effect helps to build tension in songs and acts as a transition.
If you already have your audio, the next section will outline how to create a stutter effect using Audacity.
How to Make Audio Stutter in Audacity
Audacity provides a conducive platform for applying different stutter effects to your audio or music. This section will discuss five ways to make audio stutter in Audacity, including the following:
- Manual Cut and Paste Stutter.
- Using the Repeat Effect.
- Reverse Stutter.
- Time Stretching for Stutter Variations.
- Multi-layered Stutter.
Read along as we discuss each method in detail.
Method 1. Manual Cut and Paste Stutter
Considered one of the easiest ways to create an audio stutter, this method allows you to select a portion of your track, then duplicate it across different sections to create a rapid-fire repetition effect. This method grants total control over your stutter’s intensity, timing, and placement. Check these steps:
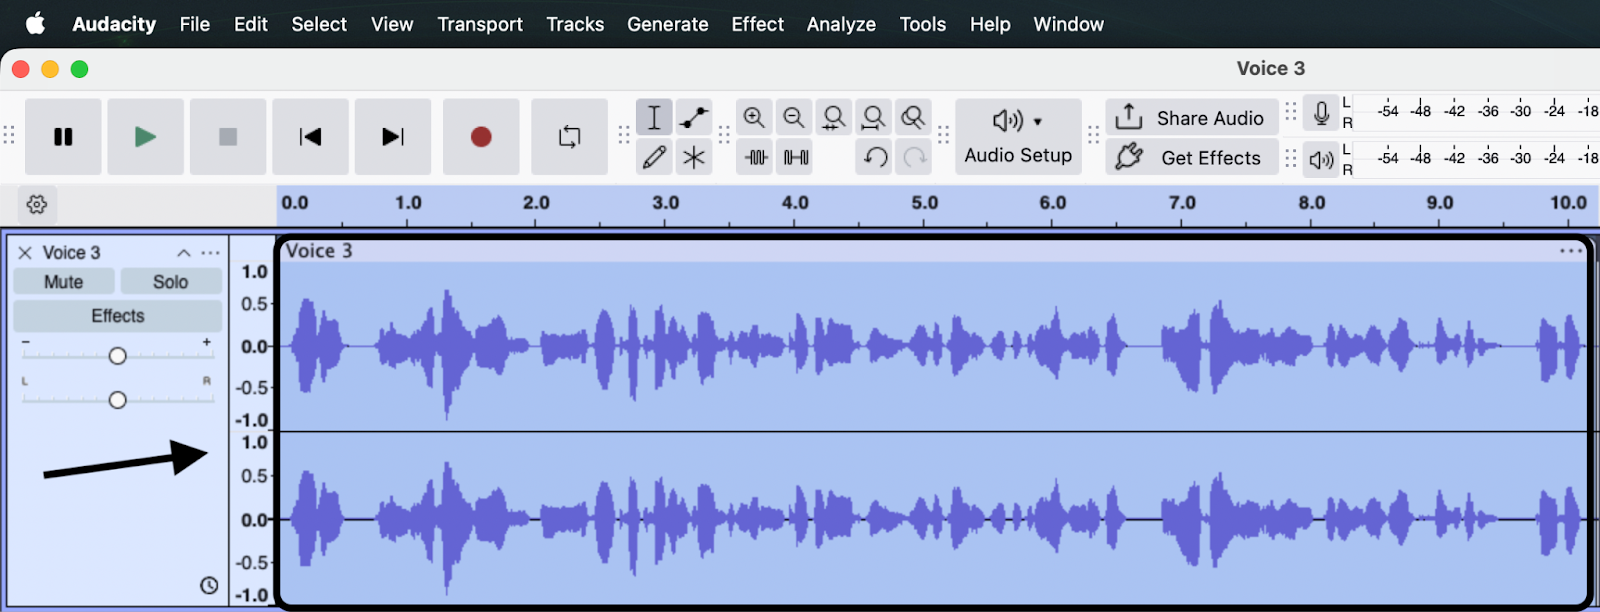
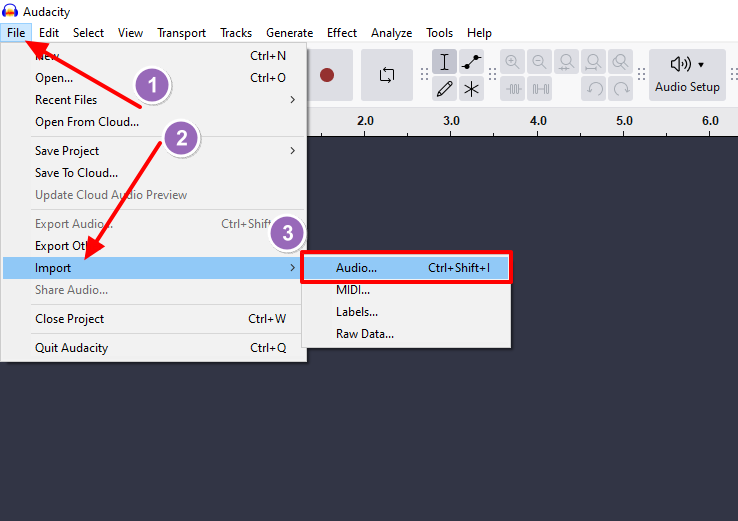
Step 1. Launch Audacity on your computer. Next, you can import an audio file for your project by going to “File”>”Import”>”Audio.”
Step 2. Once you’ve imported your audio file, highlight the section you want to stutter using the selection tool, an “I-beam” icon in the upper section of your screen. You must select only a brief section of your audio, i.e., between 1/16 and 1/32 (for music) or a fraction of a second (for vocals).

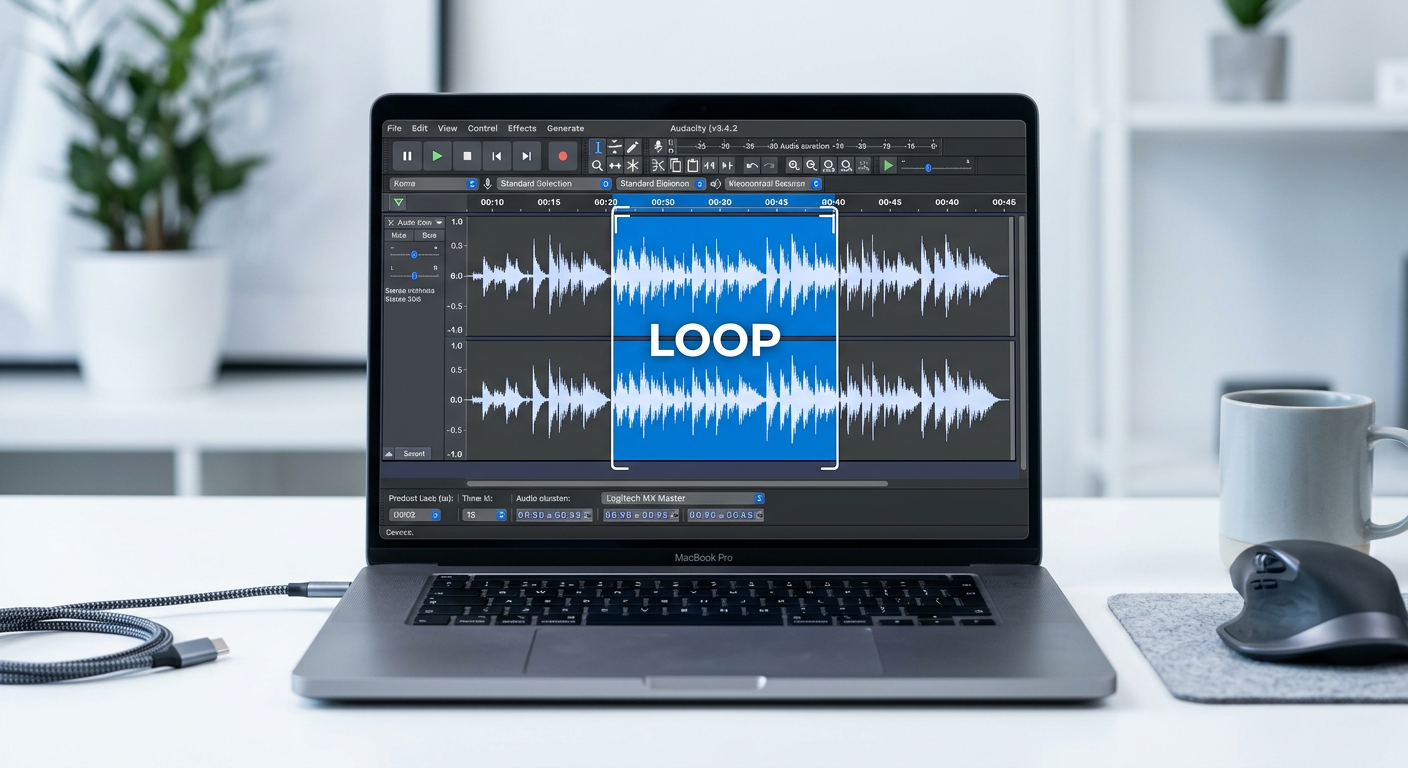
Step 3. Once you’ve highlighted the snippet you want to stutter, hit Ctrl + C to copy it, then move the cursor to the region you want to paste it. Hit Ctrl + V to paste it several times across different audio sections.
Step 4. To align and fine-tune the stutter, use the time shift tool, which resembles a double-headed arrow icon. This allows you to align each pasted snippet so that you have no gaps.
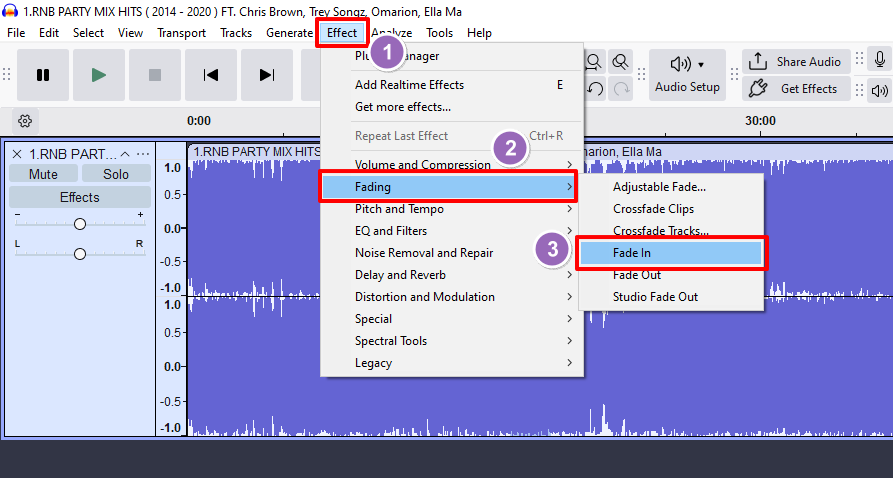
Step 5. For a smoother build and release of your stutter, you also use the optional Fade-In/Fade-out feature. You can find it by going to “Effect”>”Fading” then selecting “Fade In” or “Fade Out.”
Method 2. Using the Repeat Effect
Audacity also allows you to create stutters automatically using a built-in “Repeat” effect feature, which doesn’t require you to manually copy and paste like in method 1. The feature allows you to duplicate a snippet several times in just a few clicks, creating machine-like stutters. Follow these steps:
Step 1. Import your audio file and select the snippet you want to repeat.
Step 2. Next, go to “Effect”>”Special”>”Repeat.”

Step 3. In the dialog box, select the number of times you want the repeat to happen (for a fast stutter, set between 4 and 10). Click the “Apply” button to effect the changes.

Step 4. To create a machine-gun-like effect to your stutter, use the “Zoom in” or “Zoom out” features, represented by a magnifying glass with a plus (+) or minus (-) sign.

Method 3. Reverse Stutter
This method differs from the traditional stutter approach since it plays a backward snippet. It repeats the reversed sound multiple times, forming a unique stutter that is less mechanical and only helps create a transition effect. Follow the steps below to create a reverse stutter:
Step 1. Select the short snippet that you want to stutter.
Step 2. Next, go to “Effect”>”Special” then select “Reverse.” Stay patient for the changes to apply. Your selected sound snippet will now play backwards.

Step 3. If you want to duplicate the stutter across different sections of your track, copy and paste it to your desired multiple locations.
Step 4. To add fades to your reversed stutter, go to “Effect”>”Fading” and select “Fade In.”
Method 4. Time Stretching for Stutter Variations
This method seeks to develop creative stutters by varying each snippet’s repetition speed. In the long run, this helps simulate a tape-stop effect or create tension. The time stretching effect creates stutter variation by altering tempo and speed, leading to a progressive speed up or slow down. Check the steps below:
Step 1. Create a basic stutter using the steps described in methods “1” or “2.”
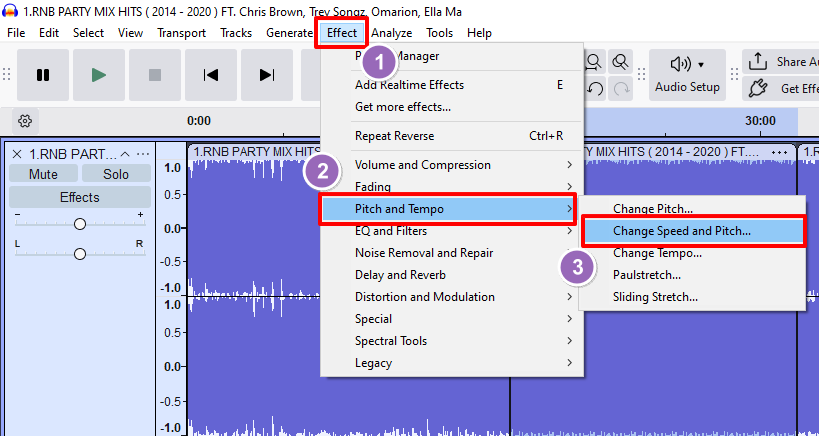
Step 2. Next, to change the speed, highlight a selected snippet. You can then navigate to “Effect”>”Pitch and Tempo” and select “Change Speed and Pitch.”
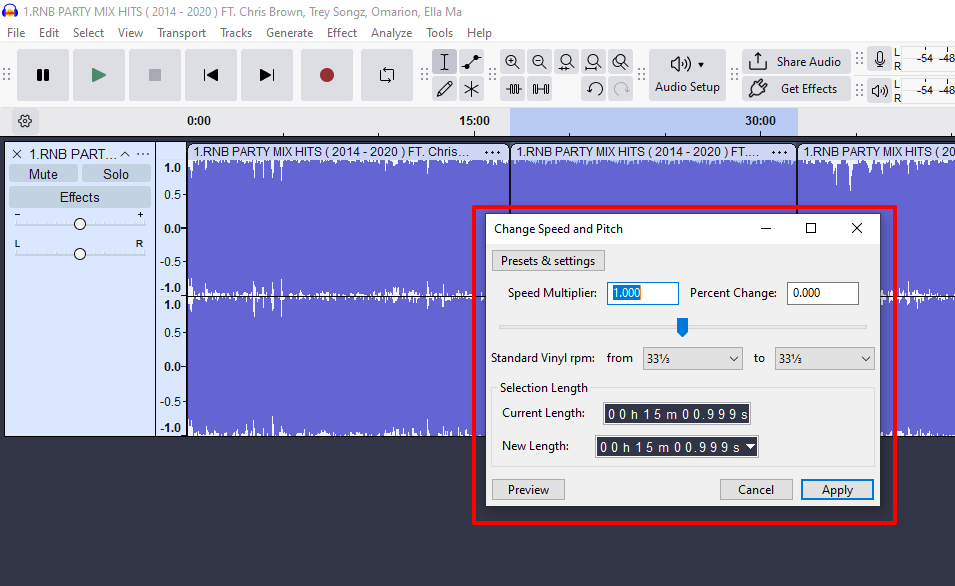
Step 3. Input your preferred speed settings in the dialog box that appears. Once done, click “Apply.”
Step 4. Repeat steps “2” and “3” above for all your other snippets, aiming to adjust their speed variations, either faster or slower. This will create a spiraling effect on your audio stutter.
Method 5. Multi-layered Stutter
As the name indicates, this method entails placing multiple stutter patterns on top of each other. A multi-layered stutter, panned from left to right, creates an immersive stereo effect for the listener. You can create it via the following steps:
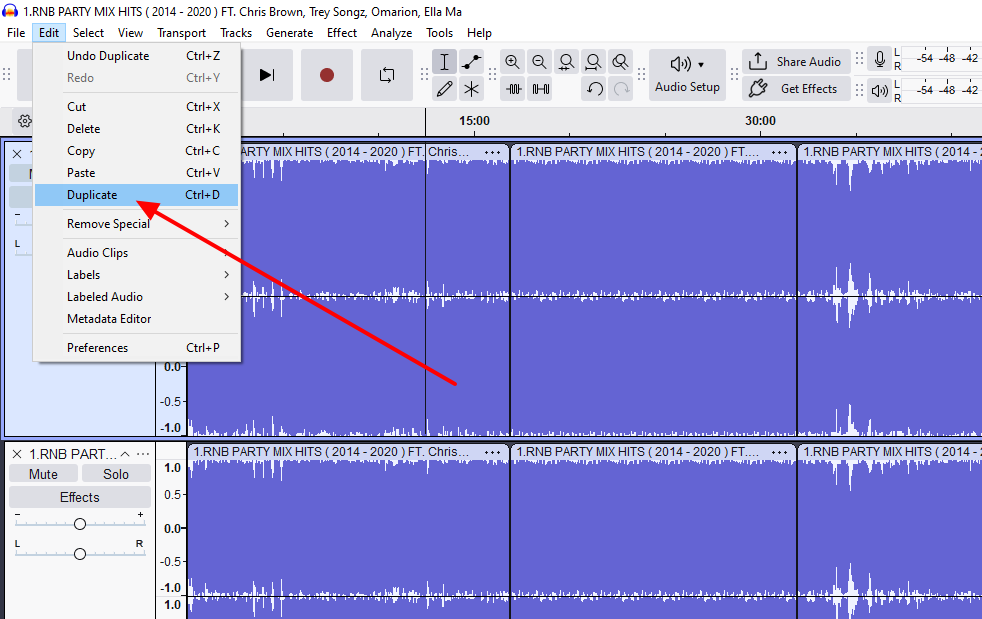
Step 1. You’ll first need to duplicate the track to create a multi-layered stutter. You can do that by selecting your track, then going to “Edit”>”Duplicate.”
Step 2. It’s now time to apply different stutter patterns. For example, you can select the first track and do a short, rapid stutter. You can use a slower and more paced-out stutter for the next one. This will create a multi-layered stutter pattern.
Step 3. If you want to adjust the stutter position, use the pan slider in the track controls to move it to the left or right, creating a wider stereo feel for the listener.
How to Get Professional-sounding Stutters (TIPS)
Ensure you apply the following tips to get more polished stutters in Audacity:
- Combine with effects: Ensure you combine your stutter with effects such as “Reverb,” “Delay,” or “Distortion.” These help to add a spicy glitch, echo, or an aggressive edge.
- Use different snippets: Alternating between different snippets enhances creativity in your stutter.
- Work with tempo in mind: Ensure your stutter length conforms to the track’s beats per minute (BPM).
- Automate volume: The envelope tool in Audacity lets you automate the volume of each stutter, creating a dynamic movement and making it sound more professional.
The above are the most essential tips for professional-sounding stutters.
Common Mistakes to Avoid When Creating Stutters in Audacity
If you want better results with your stutters, avoid the following issues:
- Using very long snippets.
- Overusing a stutter effect.
- Selecting a snippet that is off-beat or has noise.
- Ignoring rhythm when making stutter selections.
- Clipping audio, hence causing volume spikes.
Conclusion
If you want to conveniently create an audio stutter for your musical or audio production without compromising quality, Audacity is your go-to solution. The tool is open source, so you won’t need to worry about extra costs. To ensure better audio clarity, using a quality microphone for your recording is good, minimizing incidents of unnecessary background noise.
FAQs
1. What’s the best length for a stutter snippet?
This will significantly vary depending on the tempo. If you want your stutter to sound more glitchy, go for shorter snippets. Otherwise, slightly longer snippets are suitable for creating a rhythm.
2. Can I make a stutter effect in Audacity without cutting the audio?
The answer is yes. You can achieve that using the “Repeat” effect feature, which automatically duplicates a selected audio snippet.
3. Can I automate stutter speed in Audacity?
It’s not currently possible to do that. However, you can simulate automation by manually changing speed or pitch over time and shortening selections.