.png)
With just a few taps, your iPad can become a powerful tool for creating quick, clear guides — whether you’re a content creator, a YouTuber, or simply sharing a tutorial with friends. The built-in screen recording feature makes it easy to capture everything happening on your display, from demonstrating app features to saving a video call with a loved one. In this guide, we’ll explore several efficient methods to record your iPad screen with audio, ensuring you get the best results every time.
Understanding iPad’s Screen Recording Features
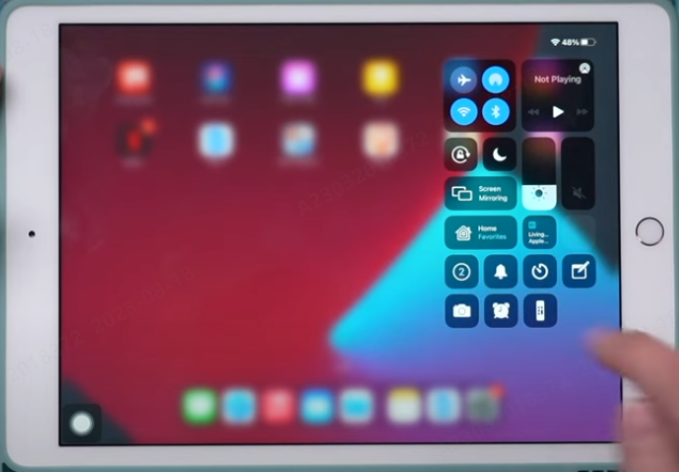
You can activate the iPad’s built-in screen recording feature from the Control Center by selecting Settings → Control Center → Screen Recording, then swiping down from the top-right corner to locate the record button.
When recording, you can choose between system audio only, which records sounds from the device, such as app music or in-video audio, or microphone audio, which records using the iPad’s built-in microphone, capturing both your voice and background noise.
Although the built-in microphone is practical, it has drawbacks: it can pick up ambient noise easily and may sound distant if you are far from the device. For clearer, more polished audio, you might need an external microphone.
Enabling Screen Recording on iPad
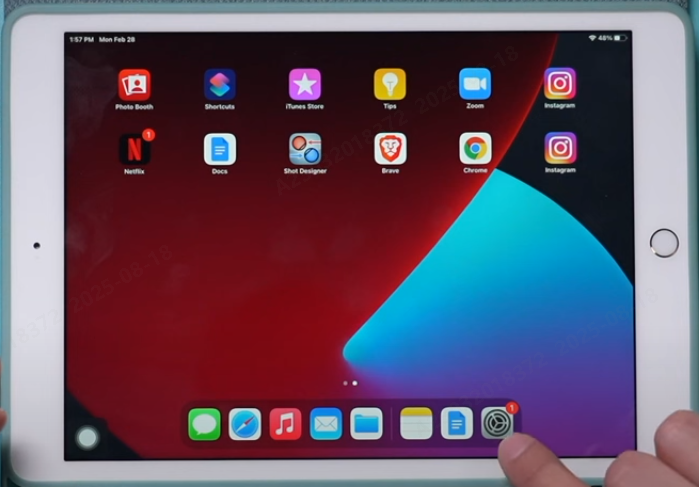
- Step 1: Launch the Settings application, then choose Control Center from the menu on the left.
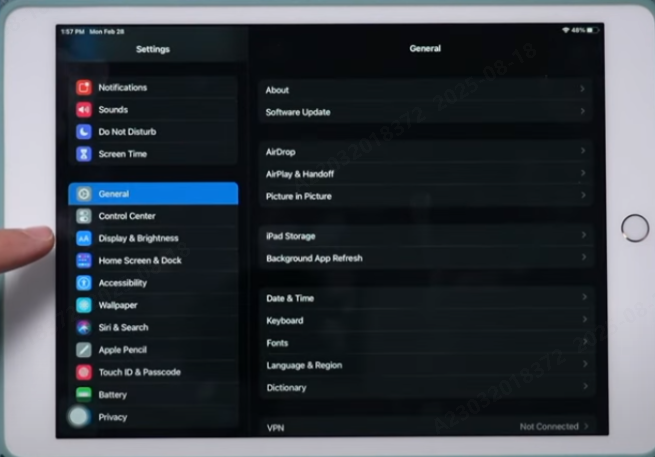
- Step 2: To add Screen Recording to your Control Center, locate it under “More Controls” and hit the green plus (+) symbol.

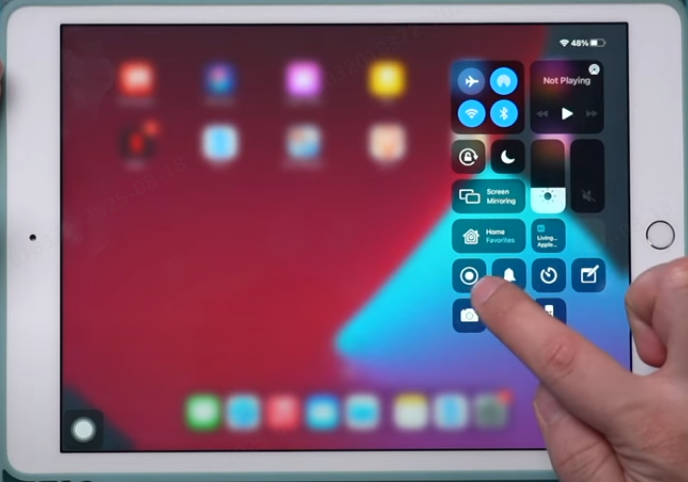
- Step 3: To access the Control Center, swipe down from the iPad’s top-right corner. You should now be able to see the Screen Recording button, which is represented by a solid circle inside another circle.

Recording with iPad’s Internal Microphone
- Step 1: Swipe down from the top-right corner of the screen to open the Control Center, then long-press the Screen Recording button.
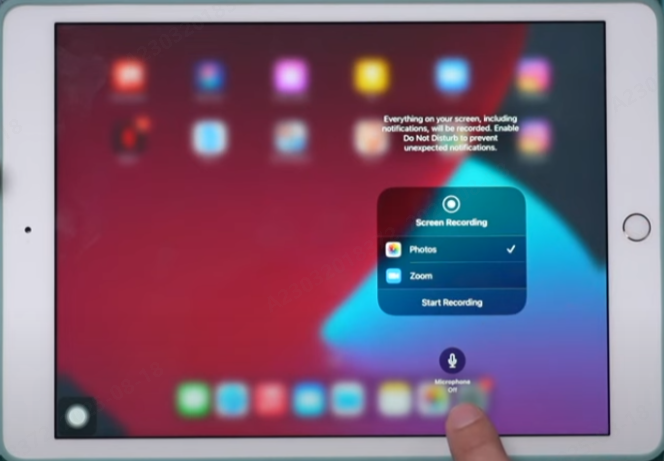
- Step 2: Press the microphone audio button to activate it; when enabled, it will turn red.
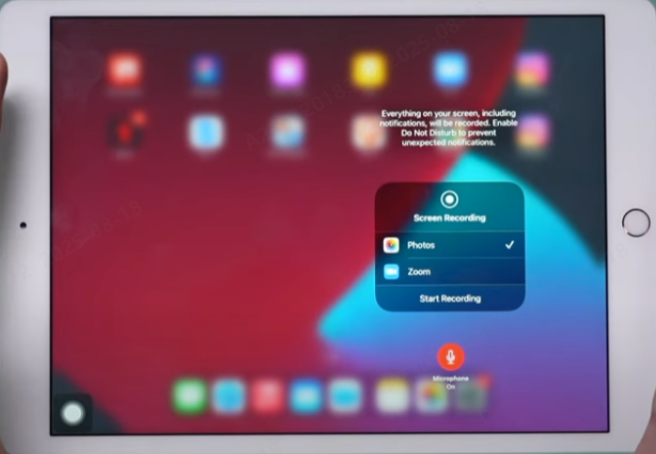
- Step 3: Tap “Start Recording”. Before the recording starts, there will be a three-second countdown. As you perform your tasks on the screen, narrate.
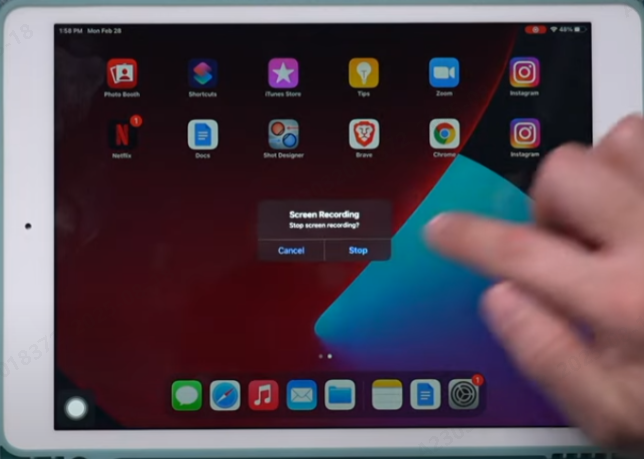
- Step 4: To end the recording, press the Screen Recording button near the Control Center. The video will be immediately stored in the Photos app.

Extra Tip: To reduce background noise for a clearer narration, avoid covering the iPad’s built-in microphone and select a quiet area.
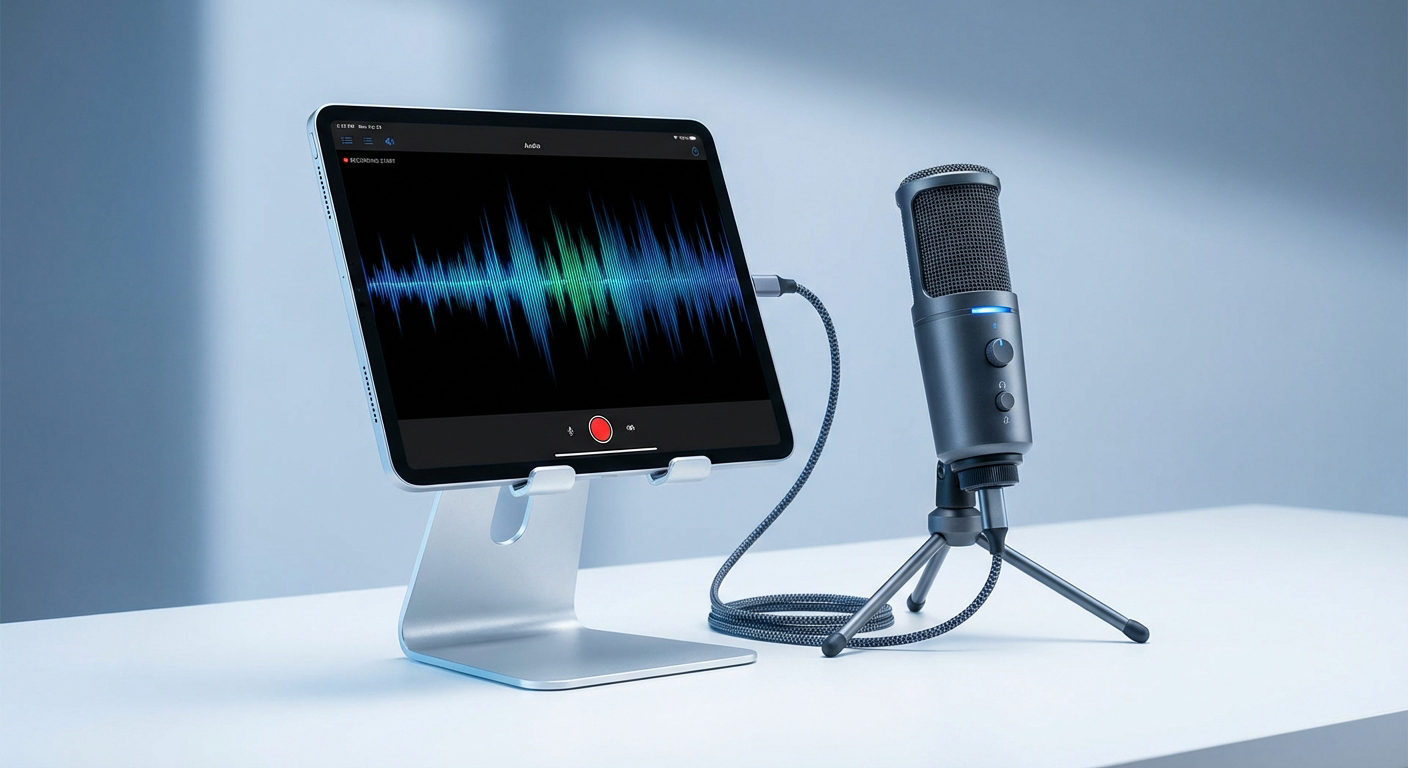
Recording with an External Wireless Microphone for Best Results
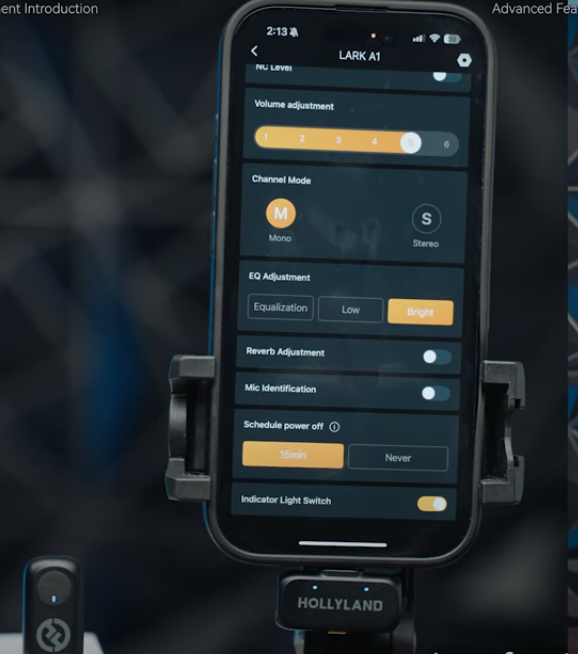
If you want your iPad screen recordings to sound as clear as they look, pairing them with the Hollyland LARK A1 wireless microphone is a game-changer. Designed for plug-and-play simplicity with iPads, it delivers 48kHz/24-bit high-fidelity audio that captures every nuance of your voice. At the same time, its 3-level intelligent noise cancellation filters out background distractions like wind or traffic.

Hollyland LARK A1 - Affordable Wireless Microphone
A perfect starter mic for creators on a budget. It’s simple to use and features effective noise cancellation.
Key Features: 48kHz/24-bit | 3-Level Noise Cancellation | 54-Hour Battery
Step 1: Connect the LARK A1 receiver to your iPad using the appropriate Lightning or USB-C adapter, depending on your model.
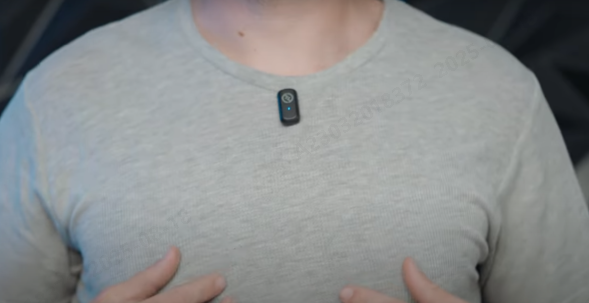
Step 2: Clip the ultra-light transmitter (only 8g) to your collar or place it close to the sound source for consistent pickup.
Step 3: Open the iPad’s Control Center and long-press the Screen Recording button. Toggle Microphone Audio to “On.”
Step 4: Start your screen recording — the iPad will now capture video along with crystal-clear audio from the LARK A1.
Step 5: Stop the recording when finished and review your video with professional-quality sound.
Extra Tip: Adjust the LARK A1’s noise cancellation level (Weak, Medium, or Strong) depending on your environment. For quiet rooms, “Weak” keeps the audio natural; for outdoors, “Strong” helps block wind and ambient noise.

Editing Your Recording (Optional)
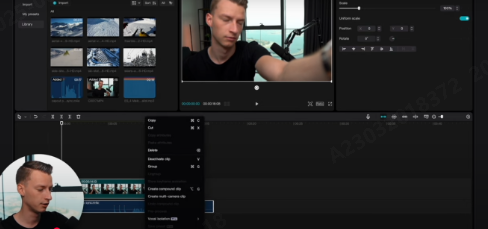
Once you’ve captured your iPad screen recording, a little editing can make it look polished and professional. Apps like iMovie (free and built into most iPads), CapCut, or LumaFusion offer easy-to-use tools for trimming, enhancing, and customizing your video.
Trimming Unwanted Parts: Import your recording into the editor of your choice and cut out unnecessary pauses, mistakes, or loading screens. This helps keep your final video engaging.

Adjusting Audio Levels: If your recording sounds too quiet or loud, use the app’s audio controls to balance the volume. You can also mute sections or amplify key points for emphasis.
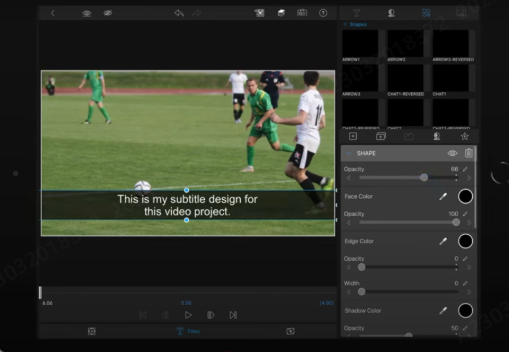
Adding Captions or Overlays: Captions improve accessibility, while overlays (such as arrows or text labels) can highlight important points on screen. Most editing apps allow you to customize font style, color, and placement.
Troubleshooting Common Issues
Even with the right setup, you may occasionally run into problems when screen recording with audio on your iPad. Here’s how to quickly solve the most common ones:
- No Audio Recorded: If your video plays without sound, open Control Center, long-press the Screen Recording icon, and ensure Microphone Audio is turned on. For external mics, verify that your audio input is set correctly in the app you’re using.
- External Mic Not Detected: If your external microphone isn’t recognized, disconnect and reconnect the receiver. Or, if you’re using a wired microphone, reconnect the cable. Make sure you’re using the correct Lightning or USB-C adapter for your iPad model. Restart the iPad if needed.
Extra Tip: Always do a 10–15 second test recording before starting your actual session to catch any issues early.
Conclusion
Screen recording with audio on your iPad is simple and versatile. While the built-in mic works, pairing it with the Hollyland LARK A1 ensures professional, crystal-clear sound. Experiment with different setups, practice your narrations, and soon you’ll be creating polished, engaging recordings with ease and confidence.
FAQs
Can I screen record with both system and microphone audio on an iPad?
Yes. Long-press the Screen Recording button in Control Center and turn on Microphone Audio. This will capture both system sounds and your voice.
What file format are iPad screen recordings saved in?
iPad screen recordings are saved in the .MOV format, compatible with most devices and editing software.
Can I edit my recordings directly on the iPad?
Yes. You can use built-in apps like iMovie or third-party apps such as CapCut or LumaFusion for editing.