.png)
Recording audio on your Android device can be incredibly useful for a variety of purposes, whether it’s capturing important meetings, interviews, or even just making voice memos. In this comprehensive guide, we’ll explore the various methods and tools available for recording audio on Android devices. From built-in features to third-party apps, we’ll cover everything you need to know to get started with audio recording on your Android phone or tablet.
Android’s Built-In Audio Recording Capabilities
Android devices come equipped with a built-in Voice Recorder app that allows users to easily capture audio. This tool is convenient for various purposes such as recording lectures, interviews, or personal memos. The Voice Recorder app on Android provides a simple interface for recording audio with just a few taps. Users can start, pause, and stop recordings effortlessly, making it ideal for quick and on-the-go audio capturing.
Limitations and Strengths of the Built-In Recorder
The Voice Recorder software has certain restrictions even if it is effective and user-friendly for simple audio recording purposes. For example, the software could not include sophisticated functionality like audio editing or noise reduction.
Before you start recording audio on your Android device, it’s important to ensure that you are set up for success. Here are a few key steps to consider:
- A peaceful setting with less background noise is necessary to produce high-quality audio recordings. Locate a quiet area where you may concentrate on recording crystal-clear audio without interruptions.
- Make sure your Android device has enough battery life to last the entire recording session before you start recording. It is advisable to charge your smartphone in advance because running out of battery in the middle of a recording can cause a lost file.
- Check to see if the microphone on your device is available and operating properly. It’s best to clean the microphone before recording because dust and dirt can interfere with its functionality. In addition, for better audio quality in noisy settings, think about utilizing an external microphone.
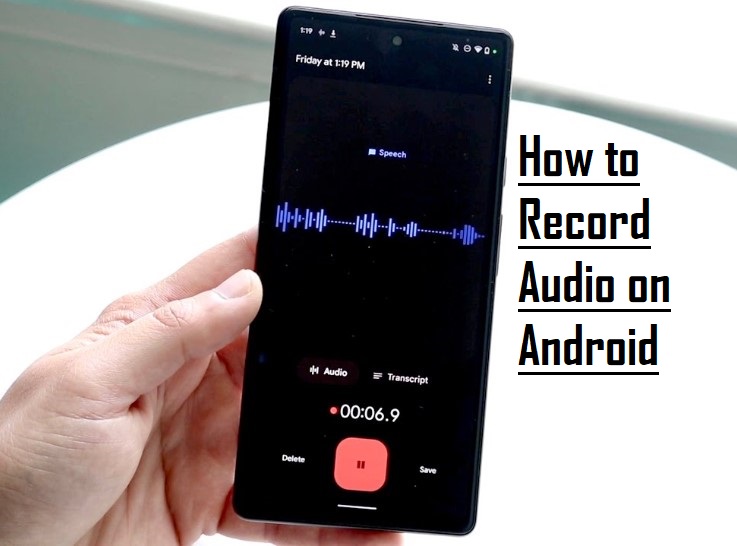
Recording Audio on Android Via Voice Recorder
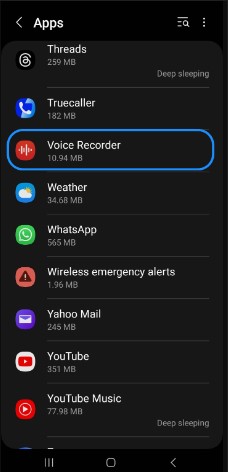
Step 1: Access the Voice Recorder App
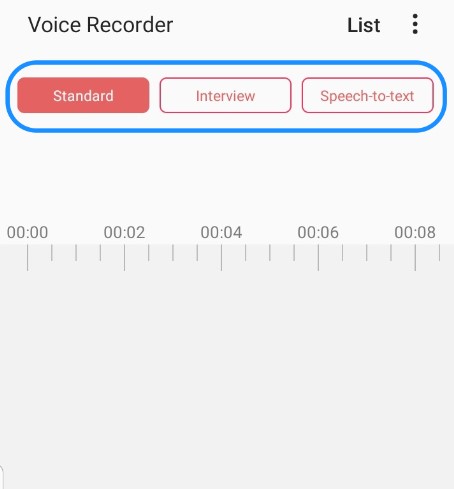
Locate and launch the Voice Recorder app on your Android device. If not visible, navigate through Settings > Apps, then search for Voice Recorder. For Samsung Galaxy models, choose between Standard, Interview, or Speech-to-text modes depending on your preference.
Step 2: Adjust Settings
Tap the More button at the top right corner of the screen and select “Settings” to customize recording options. Adjust settings such as recording quality, call blocking, auto-play, and deletion preferences.
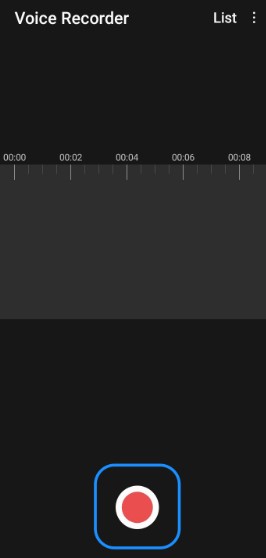
Step 3: Initiate Recording
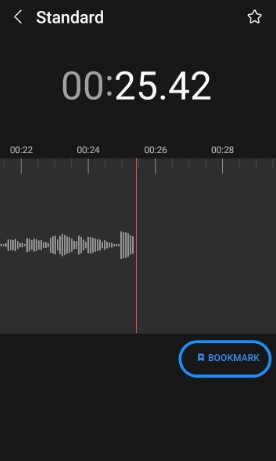
Tap the red Record button to start recording audio. In Standard mode, a label indicating the mode appears during recording. Pause or resume recording as needed, and use the bookmark feature to mark important sections.
Step 4: Manage Recording
Tap the Pause button to halt recording,
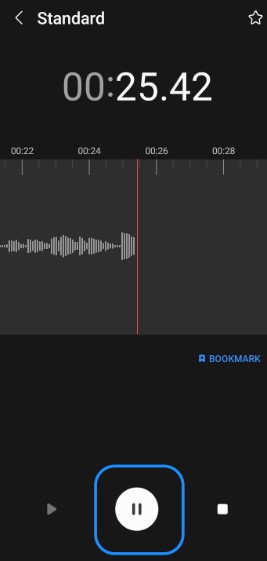
Use the Bookmark button to highlight key sections.
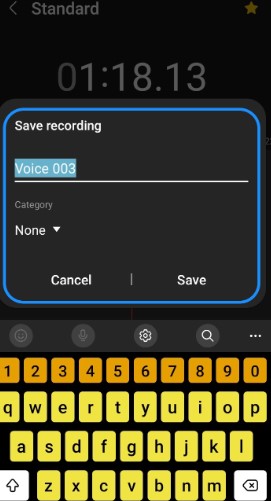
When finished, tap the Stop button to save the recording. Name the audio file and tap “Save” to confirm.
Step 5: Playback and Save
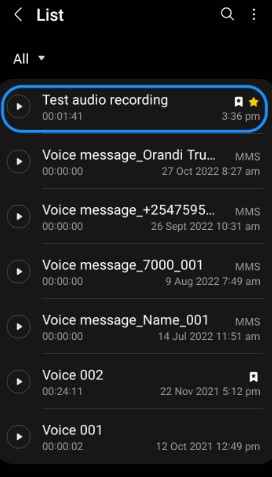
Access your saved recordings by selecting “List” in the Voice Recorder app. Choose the desired audio file and tap play to listen. Your recordings are saved on the device for future playback and reference.
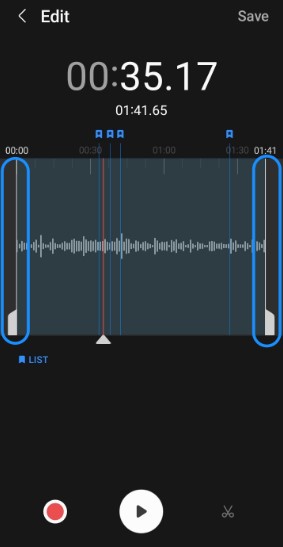
Editing Audio Recordings
Step 1: Access Editing Options
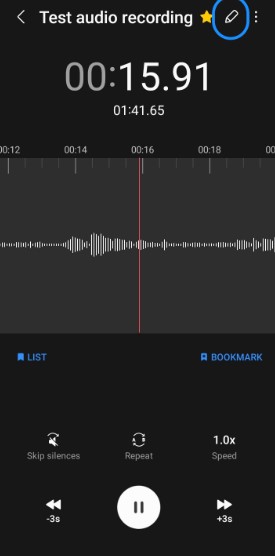
Tap the Edit (pencil) icon located at the top of the screen within the Voice Recorder app to initiate editing.
Step 2: Trim Unwanted Portions
Drag the ends of the recording to select the desired portion, then tap the Cut (scissors icon) at the bottom right corner to remove unwanted sections. Confirm deletion of the selected area to refine the recording.
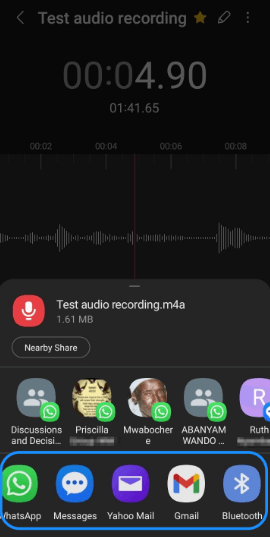
Step 3: Save and Share
Once satisfied with the edits, tap “Save” to preserve the edited file.

Access additional options by tapping More (ellipsis) and selecting “Share” to distribute the recording through various applications.
Advanced Recording Options with Third-Party Apps
Consider using reputable third-party apps like Notta, Voice Memos, RecForge II, or Hi-Q MP3 Voice Recorder for high-quality recordings on mobile devices.
Key Features to Look for in a Third-Party App
- Look for apps that offer a variety of audio file formats such as WAV, MP3, AAC, and FLAC to suit different needs.
- Choose apps with editing features like trimming, merging, and adding effects to enhance recordings.
- Opt for apps that allow easy sharing of recordings via email, messaging apps, or cloud storage platforms.
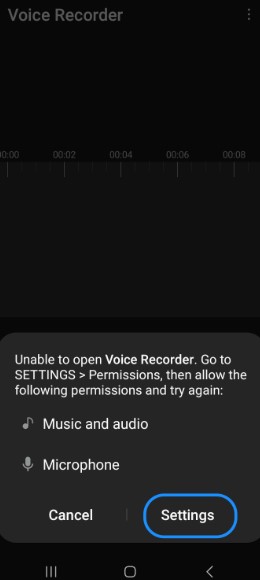
Install the desired app from the respective app store and follow on-screen instructions for setup. Grant necessary permissions for microphone access and adjust settings as needed.
Recording Audio Via Third-Party App
Let’s delve into the process of capturing high-quality audio on Android using Notta:
Launch the Notta application on your Android device.
- Sign in using your Google account credentials.
- Locate and tap the ‘Plus’ icon located at the bottom of the screen.
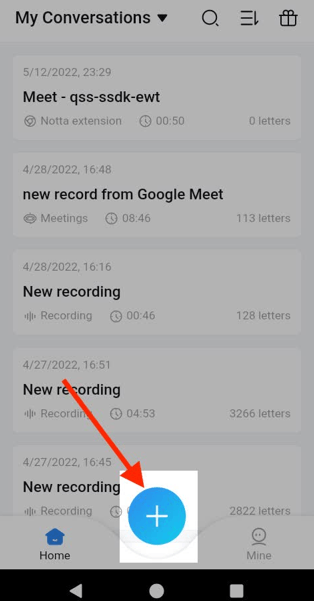
- Select the option labeled ‘Record Now’ from the menu.
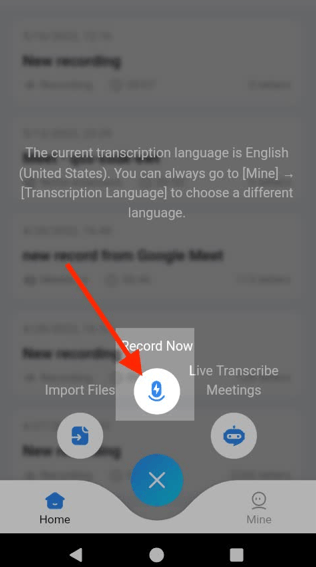
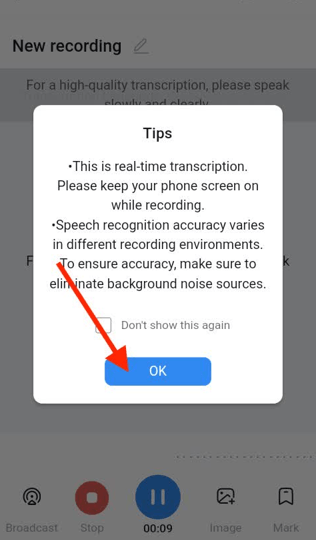
- Grant permission for Notta to access your device’s microphone by tapping ‘Allow’ when prompted. Proceed by tapping ‘Ok’ on the subsequent dialog box. Your recording session will commence.
- When you’ve finished recording, tap the ‘Stop’ button to cease the recording process.
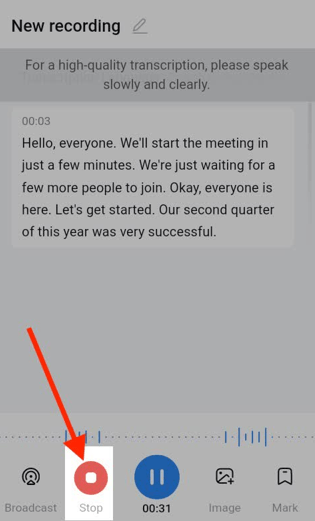
- Provide a name for your recording and finalize the process by tapping ‘Done’.

Tips for Optimizing Audio Quality with Third-Party Apps
- Use external microphones for better sound quality. Like Hollyland Lark C1, A cutting-edge wireless microphone system designed to revolutionize your audio recording experience. With its compact and user-friendly design, the LARK C1 offers unparalleled convenience and versatility for content creators, filmmakers, vloggers, and more.
- Adjust recording settings such as bitrate and sample rate for optimal results.
- Minimize background noise by recording in quiet environments.
- Regularly update the app to access new features and improvements.
Conclusion
In Conclusion, audio recording on Android with confidence using the Voice Recorder app, equipped with easy steps to start, pause, save, and share your recordings. Whether capturing lectures, interviews, or personal memos, this built-in tool offers simplicity and efficiency. While it lacks advanced features like editing, it serves as a solid foundation for beginners. For those seeking more, third-party apps expand possibilities, offering editing capabilities and various file formats. Remember to optimize your recording environment and respect legal and ethical considerations.
We value your thoughts! Share your experience with using Notta to record audio on your Android device. Did you find the app easy to use? Were you satisfied with the audio quality of your recordings? We welcome your feedback and suggestions for improvement. Let us know your thoughts in the comments below!
Frequently Asked Questions
What are the best audio recording apps for Android?
Easy Voice Recorder, RecForge II, and Smart Recorder stand out among the best audio recording apps for Android. Easy Voice Recorder offers simplicity and reliability, while RecForge II provides advanced features like real-time monitoring. Smart Recorder is praised for its user-friendly interface and automatic gain control.
How can I improve the sound quality of my recordings on Android?
Use an external microphone like Hollyland Lark C1, record in a quiet environment, and adjust audio settings in the recording app.
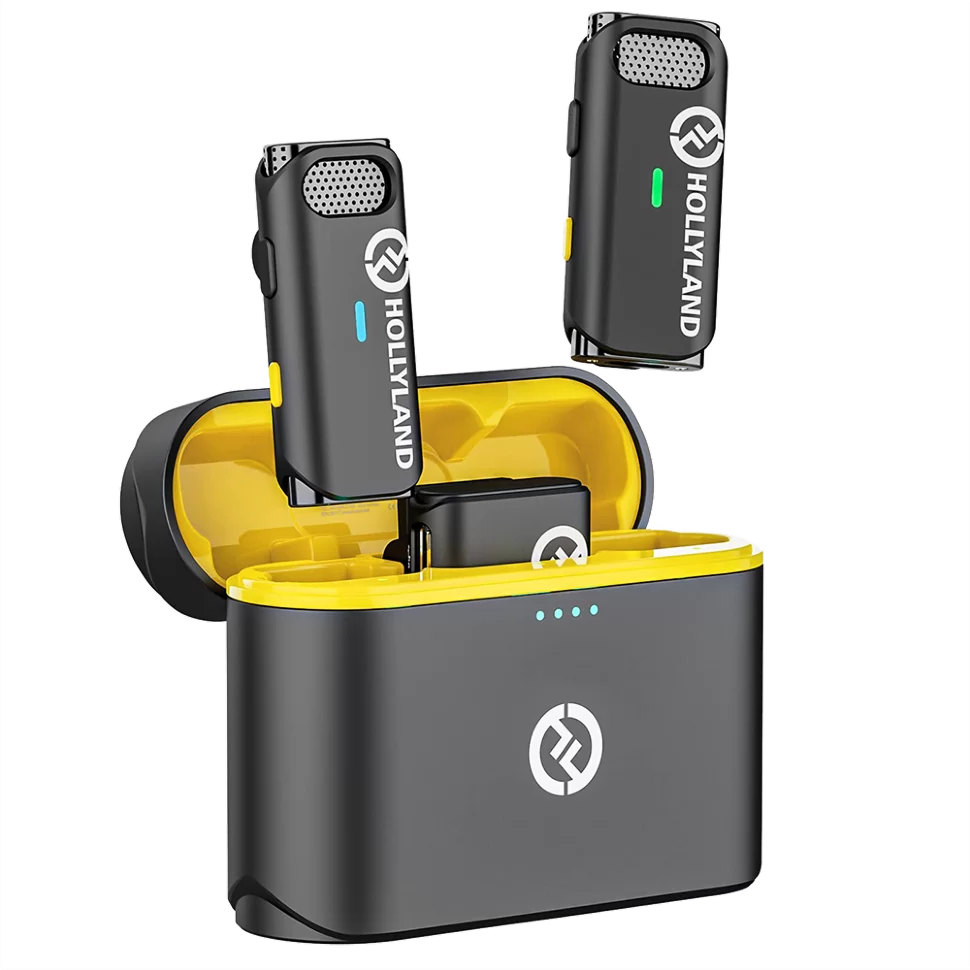
Hollyland Lark C1 - Wireless Microphone for Mobile
A plug-and-play wireless microphone system designed for mobile devices.
Key Features: MFi-certified | Hi-Fi Audio | 32 Hours Duration
Can I record phone calls with the default Android recorder?
The default Android recorder usually lacks phone call recording capabilities. However, third-party call recording apps on the Google Play Store can fulfill this need, but users should be mindful of legal considerations regarding call recording.
How do I transcribe audio recordings on my Android device?
You can use transcription apps or services available on the Google Play Store, such as Otter.ai or Google’s Live Transcribe. These apps can automatically transcribe your audio recordings into text.
How do I record internal audio on Android?
To record internal audio on most Android phones, you can typically access the Screen Recorder option from the Quick settings section of the notification dropdown. If you don’t see this option, you can add it by tapping the pen tool icon in the dropdown and selecting Screen Recorder. Once you’ve opened Screen Recorder, navigate to the Settings (gear icon) on the floating widget. From there, go to the Audio source settings and choose Internal Audio.
How do I record audio on my phone?
Recording audio on your phone is simple. You can usually find a built-in Voice Recorder app either in your app drawer or by searching for “Voice Recorder” in your apps menu. After locating the app, open it to access recording options. Inside the app, you’ll typically find buttons for recording, playing back, and managing your recordings.
Where is the recorder on my Android phone?
To locate the recorder on your Android phone, start by swiping up from the bottom of the screen to open the app drawer. From there, search for the Recorder app and launch it. Once opened, you’ll see a round microphone button at the bottom of the screen. Tap this button to start recording. If you haven’t already enabled microphone permissions for the Recorder app, you’ll be prompted to do so before you can begin recording.