Recording audio on your PC is a valuable skill for various purposes, from creating podcasts and music tracks to conducting interviews and capturing memorable moments. With the right tools and techniques, anyone can easily record high-quality audio directly on their computer. In this comprehensive guide, we’ll walk you through everything you need to know to start recording audio on your PC effectively.
Audio Recording through Built in Options
If you’re looking for built-in software, both Windows and Mac operating systems offer their own solutions. For Windows users, the built-in Voice Recorder app provides a simple and straightforward way to record audio. On Mac computers, QuickTime Player offers similar functionality, allowing you to capture audio with ease.
For Windows
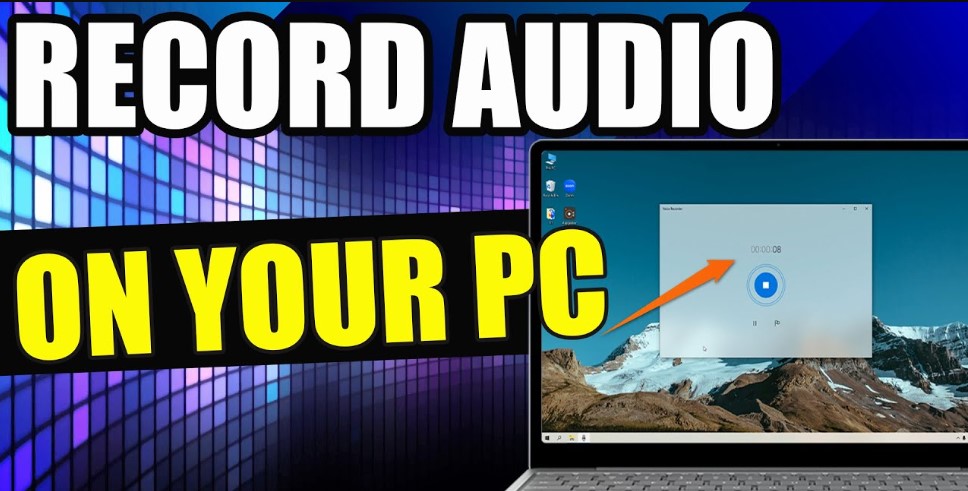
- To begin, open Voice Recorder either by typing its name into the search box or downloading it from the Microsoft Store if it’s not already installed on your system.
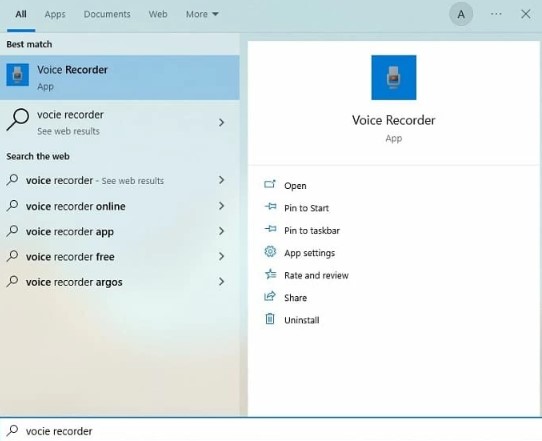
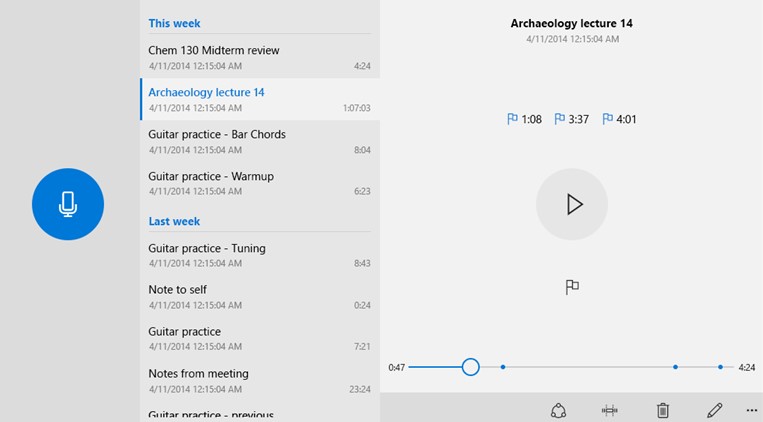
- Once open, press the microphone button to initiate recording, which will then change to a Stop button.

- If you need to pause the recording, simply press the pause button, and to resume, press it again.
- When you’re finished recording, press the Stop button to conclude.
- Your recording will appear automatically on the left side of the screen, where you can right-click it to rename or share the file.
For Mac
To learn how to record computer audio on your Mac using QuickTime Player, follow these steps:
- Launch the QuickTime Player app and navigate to File > New Audio Recording.

- In the Options menu, choose your preferred microphone and recording quality level. Adjust the volume using the slider if necessary.
- Initiate the recording by clicking the Record button or utilizing the options on your Touch Bar (if available on your MacBook Pro).

- To pause the recording, hold down the Option key and click the Record button; resume by clicking it again.
- When finished, click the Stop button to conclude the recording.
- If needed, trim your audio clip by selecting Edit > Trim.

- Finally, name and save your file, selecting the desired location for storage.
Audio Recording Via Third-Party Apps
To begin recording audio on your PC, you’ll need the right software. There are numerous third-party options available, ranging from basic to advanced, each offering unique features and capabilities. Some popular choices include:
Audacity
A free, open-source audio recording and editing software with a user-friendly interface. To record your voice and microphone using Audacity, follow these steps:
Step 1: Connect your Microphone
- Plug your microphone into the appropriate port based on its type, for USB microphones, use a USB port. For microphones with a 3.5mm jack, use a mic-in port, for XLR microphones, connect them to an XLR-USB audio interface, then plug the interface into a USB port.
- Refer to your computer and microphone manuals for specific instructions, and use adapters if necessary.
Step 2: Select your Microphone
- In Audacity’s Audio Setup toolbar, choose your microphone from the list of available recording devices.
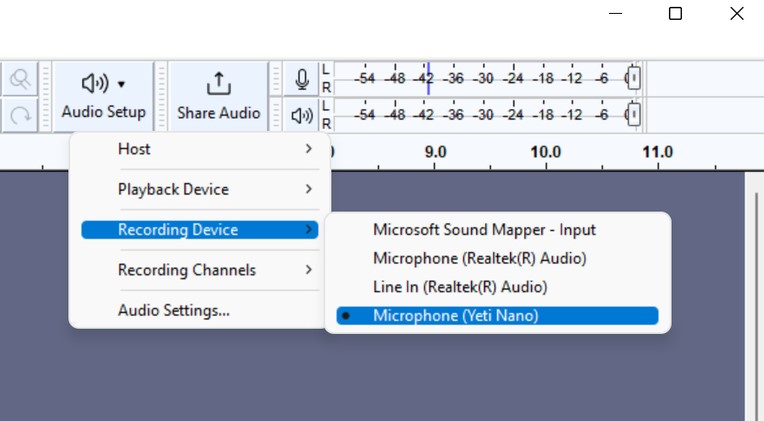
- Ensure you select the correct microphone and choose between Mono or Stereo recording options as needed.

Step 3: Test your Settings
- Activate monitoring and tap on your microphone to check if the green bar moves, indicating the correct device selection.
- Speak in a normal volume and monitor the microphone level to ensure it stays within the optimal range (generally between -18 and -12 dB).

- Adjust your microphone volume if needed to avoid recording too low or too high.
- Conduct a test recording by pressing the red record button in Audacity’s Transport toolbar.

- After recording, listen to the playback to ensure your voice is clear and of good quality.
Adobe Audition
A professional-grade audio editing software with advanced features for precise recording and editing. To record system audio using Adobe Audition, follow these steps:
Step 1: Launch Adobe Audition and access the preference settings.
- Click on the Edit option in the menu tab. Hover your mouse over the preference option to reveal a dropdown list on the right. Select “Audio Hardware” from the dropdown list.

- In the Audio Hardware dialogue box, click on “Default Input” to view available options.

- Look for the option labeled “Stereo Mix (Realtek High Definition Audio).”
- If this option is not available, proceed to the next step without making any changes and click “Cancel” to close the dialogue box.

- Minimize Adobe Audition and access your computer’s sound settings.
- Right-click on the speaker icon located on the taskbar and select “Open Sound Settings” from the menu.

- In the Sound Settings window, click on “Manage sound devices” under the input section.

- This will display a list of input and output devices.
- Locate the “Stereo Mix” option under the input devices.

Note: If it’s disabled, you may see another device such as “Microphone Array,” which is typically the built-in laptop microphone. Its location may vary depending on your computer’s brand and operating system. By following these steps, you’ll be able to configure Adobe Audition to record system audio effectively.
GarageBand (For Mac)
A versatile digital audio workstation (DAW) that’s ideal for beginners and professionals alike. The software offers two sets of controls: Fun View and Studio View. Fun View allows users to modify the sound of recorded tracks, while Studio View provides features for enhancing recordings. Here’s a step-by-step guide on how to record audio with Garageband:
Step 1. Launch Garageband on your Mac and navigate to “Project Templates” in the left-hand side column. Choose the “Voice” tab to create a new project. Close any unnecessary windows to focus on the editing timeline.

Step 2. Click the red “Record” icon in the secondary menu to start recording. Once finished, click the red icon again to stop recording. You can use the playback controls or the green “Play” icon to review the audio track.

Step 3. Edit your recording as needed, such as rearranging clips or trimming lengthy sections. When ready, click “Share” > “Export Song to Disk” to rename the file and choose a destination folder. Select the desired quality and format, then click “Export” to successfully record your audio with Garageband.

Microphone’s Setup
Setting up your microphone is crucial for achieving high-quality audio recordings. Here’s a brief overview of the key steps involved:

Selecting a Microphone
- USB Microphones: These are convenient plug-and-play options that connect directly to your computer’s USB port. They’re ideal for beginners and those looking for simplicity.
- XLR Microphones: XLR microphones offer professional-grade audio quality and versatility. They require an XLR-USB audio interface to connect to your computer, providing more control over sound levels and settings. Opting for Hollyland Lark Max is the best decision if you are going for an xlr microphone. The lightweight and small form is one of its best qualities; it makes it simple to incorporate into your content creation setup without adding weight or bulk.
Microphone Placement and Environment
Position your microphone correctly to capture clear and balanced audio. Avoid placing it too close to sources of noise or too far away from the sound source. Experiment with placement to find the optimal position for your recording needs. Choose a quiet recording environment to minimize background noise. Consider using noise-canceling features in your recording software or physical barriers to block out unwanted sounds.
Configuring Audio Settings
Configuring audio input settings is essential for capturing clear and high-quality audio recordings. Here’s a concise guide to help you through the process:
Accessing Sound Settings
- On Windows: Navigate to the Sound Settings menu by right-clicking on the speaker icon in the taskbar and selecting “Open Sound Settings” from the menu.

- On Mac: Access Sound Settings by clicking on the Apple menu, selecting “System Preferences,” and then clicking on “Sound.”

Selecting the Correct Microphone
Once in the Sound Settings menu, choose the correct microphone from the list of available input devices. Ensure that the desired microphone is selected to capture audio.
Adjusting Input Levels
Fine-tune the input levels of your microphone to optimize audio quality. Adjust the input volume slider to achieve an optimal level without clipping or distortion. Experiment with different levels to find the balance that works best for your recording needs.
By following these steps, you can effectively configure your audio input settings to ensure clear and accurate audio recordings.
Tips for Better Audio Recording
- Make sure there are no distractions and that the area you are filming in is peaceful
- Make sure your microphone is positioned properly so that it records quality sound without picking up extraneous background noise.
- In order to prevent technical difficulties when recording, test your equipment beforehand.
- To improve the sound, think about utilizing acoustic panels or pop filters.
- Pay attention to the input levels to avoid clipping or distortion.
- Take into account the volume of the sound source when adjusting the microphone sensitivity.
- Put on headphones so you can see the sounds in real time and modify as needed.
- Remove any unwanted noise or gaps in the audio using editing software.
- Enhance the overall sound quality by adjusting levels, applying filters, or adding effects.
- Export the final audio file in a high-quality format for optimal playback.
Unlock the potential of your PC recordings with the Hollyland Lark Max Microphone. Simply connect, select the microphone input, adjust levels, and start recording crisp, professional audio. Elevate your projects effortlessly with this compact yet powerful microphone.
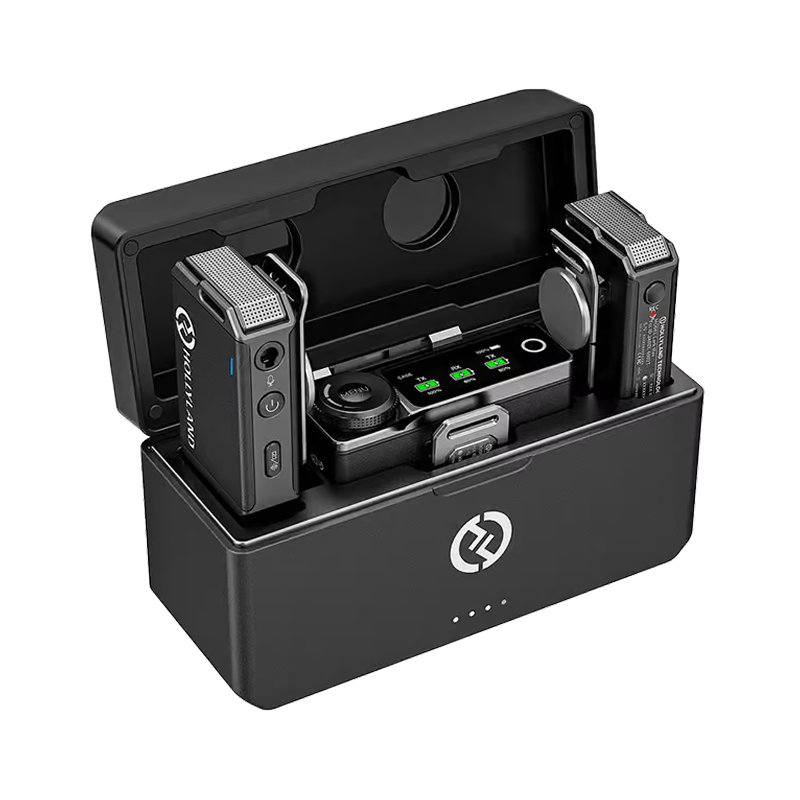

Hollyland LARK MAX - Professional Wireless Microphone
A professional wireless microphone system featuring studio-quality audio with advanced noise cancellation.
Key Features: Studio-Quality Audio | Magnetic Attachment | 8GB Internal Recording
Conclusion
Recording audio on a PC offers a range of options, from built-in software like Windows Voice Recorder to third-party solutions like Audacity or Adobe Audition. With the right microphone setup and environment, you can achieve professional-quality recordings. Editing tools allow for further enhancement, and choosing the correct file format ensures compatibility and quality. The Hollyland Lark Max microphone system provides an excellent option for content creators seeking reliable and high-quality audio recording solutions.
Frequently Asked Questions
What are the best free software options for recording audio on a PC?
When it comes to recording audio on your PC, there are several free software options available that can help you achieve professional results without breaking the bank.
How can I improve the sound quality of my recordings?
To enhance the sound quality of your recordings, consider investing in a high-quality microphone that suits your recording needs.
What are the differences between USB and XLR microphones?
USB microphones are plug-and-play devices that are easy to use and connect directly to your computer via a USB port. They are ideal for beginners or those looking for a quick and convenient recording solution.
Can I record high-quality audio using just my PC’s built-in microphone?
While built-in microphones on PCs are convenient for basic tasks like video calls or voice memos, they may not provide the best audio quality for professional recordings.


.png)


