.png)
Google Slides is ideal for quickly creating visually stunning presentations and sharing them online with your clients and coworkers. If you want to make your presentations a bit more interesting, you can jazz them up by recording audio and adding it to your slides.
Unfortunately, Google Slides doesn’t have a built-in recording option, so you can’t automatically select a particular slide and start recording. However, with the right tools, you can easily put together a clear and crisp audio and insert it into your presentation. Here’s how.
Preparing to Record Audio
Recording audio on Google Slides may seem like a very complex and confusing process. Luckily, by following the correct steps, it becomes something almost anyone can do. However, before you start recording, here are a few tips that can help you prepare for the presentation and elevate it to the next level:
Select the Right Equipment
One piece of equipment that can completely enhance your presentation is a good microphone. While most computers and cell phones have built-in microphones, they don’t offer the professional-grade audio quality you’re aiming for. For this reason, it’s advisable to invest in a high-quality microphone, like the LARK MAX, or even one that’s on the lower cost side of the spectrum.

Hollyland LARK MAX - Professional Wireless Microphone
A professional wireless microphone system featuring studio-quality audio with advanced noise cancellation.
Key Features: Studio-Quality Audio | Magnetic Attachment | 8GB Internal Recording
Write a Script
It’s better to prepare a script for every slide you’ll add audio to. Since you’ll know what to say and when to say it, you’ll be able to record your audio more quickly and easily.
Keep in mind that a good script breaks down the entire presentation into a few important points. Make sure you also add an introduction to give listeners an overall idea of the topic you’ll be describing, and then explain each point, step, or sub-idea included in the presentation.
It’s also advisable to match the tone of your script to the environment. For instance, if you’re presenting to board members, use formal language, while a more casual speech will be suitable for a discussion between your friends. Lastly, try to be clear and concise, and avoid going off-topic in the script.
Choose the Right Recording Platform
There are several different recording software available today, so make sure you choose one that best suits your needs. Consider the factors that matter the most to you, such as ease of use, virtual guest capabilities, cost, or recording tools, before making a decision. Make sure you also choose software that’s compatible with your device and provides high-quality recordings, so you can enjoy the crispest and clearest audio.
Pick the Ideal Recording Environment
The right room for recording depends on a wide range of factors, such as the room’s size, acoustics, and shape. Rooms with minimal reverberation or echo, good sound insulation, and a moderate size, are more suitable for recording audio. Carpets, curtains, and soft furnishings can further help absorb unwanted sound and enhance your recording’s sound quality.
Clear your Throat
Most people underestimate the importance of a smooth, good-quality voice. There’s no need to hire a professional voice-over artist – simply have the right warm-up, and you’ll be able to deliver much better content.
Sound Confident
Your confidence won’t increase with teleprompters and high-quality microphones alone. Practice your script in front of a mirror to ensure you sound great.
Recording the Audio
While there’s a wide range of recording software available, it’s important to remember that a difference in quality also exists. To ensure you choose the right option, the following are two popular recording platforms and the steps to recording audio with them:
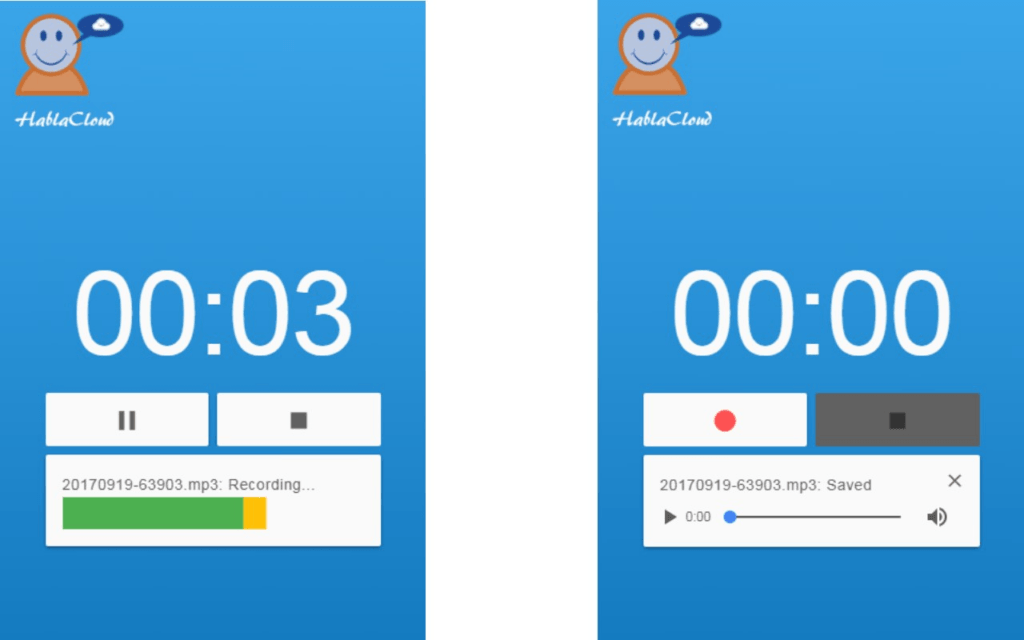
ChromeMP3 Recorder
A free recording application, ChromeMP3 is perfect for beginners who want to make an audio recording quickly and easily. The app allows you to start, stop, playback, and rewind a recording, and more. It saves your recording as a compact MP3 file, but you can also save your recording directly to Google Drive for easier uploads to Slides. However, keep in mind that it only works with ChromeOS.
Here are the steps you need to follow to record audio with ChromeMP3:
- Download and install ChromeMP3 Recorder, and then launch the app.
- Click on the button with the circle to start recording.
- End your recording by clicking on the button with the square. A window should appear on your screen for the location of the saved audio file.
- Navigate to the Google Drive tab, click on My Drive, and then name and save the recording.
Audacity
Audacity is a free, versatile audio recording tool that allows you to capture and edit your audio recordings. With effects like tempo and speed changes, you can also tweak your audio to fit the style of your presentation. The app supports popular audio files, like WAV and MP3, making it ideal for quick hands-on recording sessions.
Here’s how you can record audio for Google Slides with Audacity:
- Download and install Audacity, and then launch the app.
- Personalize features like audio drivers and sample rate (optional).
- Navigate to the toolbar header and use the drop-down menu to choose your microphone and speaker.
- Click on the red circle button to start your recording and click on the black square button next to it to stop the recording.
- If you want to edit the recording, use the app’s tools, such as the cut, copy, and paste tools.
- Click on File > Export, and then select a file type, like mp3, to export the audio.
- Give a name to your recording and save it.
Uploading Audio to Google Drive and Inserting Audio Into Google Slides
Once you’ve recorded your audio, you can upload it to Google Drive and then insert it into each slide. Here’s what you need to do:
- Log into your Google Drive, select New, and then click on File Upload.

- Locate your audio file on your computer and select it.
- Wait for Google to upload the files. It’s better to organize the audio files by naming them according to the slide you want to add them to.
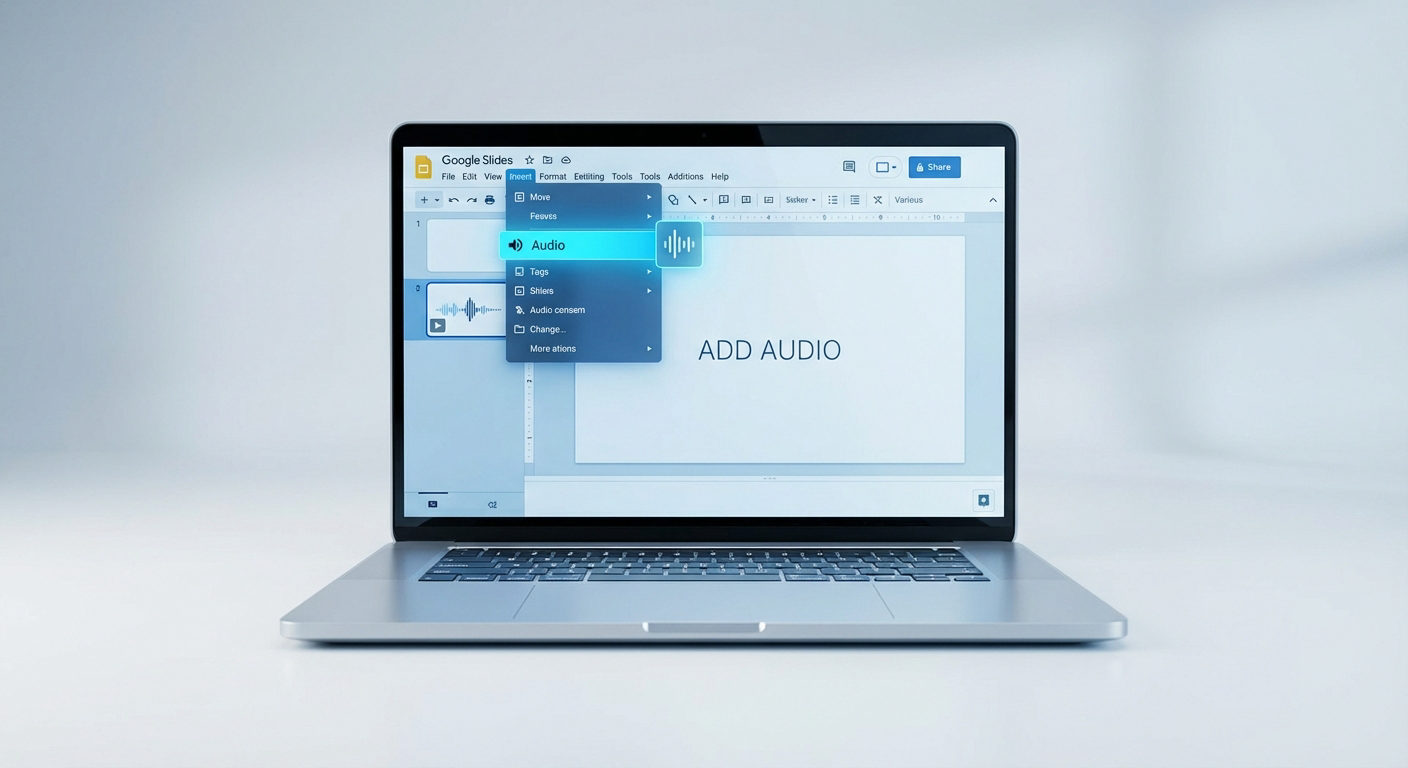
- Open your presentation on Google Slides and navigate to the slide on which you want to add the audio. Click on Insert and choose Audio from the drop-down menu.

- The new window will display all the audio files you have in your Drive. Locate the audio you want to add, choose it, and click on Select.

- Your slide should now have a small icon that indicates the slide has an audio file. There should also be a new menu on your screen’s menu listing Audio Playback options.
- Replay the audio and explore the audio menu to ensure the sound is playing just like it should. You can have the audio play automatically or on click, and even adjust the volume level for when the recording plays. Google Slides also gives you the option to loop the audio and stop it from playing when you switch to the next slide.

- Once you’ve configured the settings, your slide should play the recording the way you want it to. Repeat this process for any other slides that you want to add audio to.
When recording audio for presentations, clear, professional-quality sound is essential to engage your audience. A wireless lavalier microphone is a great solution, allowing you the freedom to move while capturing consistently crisp audio directly into your slides.
FAQs
Can I record audio directly on Google Slides?
Unfortunately, Google Slides doesn’t allow you to record audio directly. However, you can record audio using a third-party app, upload it to your Google Drive, and then insert it into your slides.
What audio file formats are supported by Google Slides?
Google Slides supports WAV and MP3 file formats. It’s also important to note that it only supports files that are in your Google Drive, so make sure you upload them beforehand.
How can I ensure my audio plays automatically in a Google Slides presentation?
To ensure your audio plays automatically in your presentation, insert your audio, navigate to the Audio Playback options, and under the Start Playing header, click on Automatically.
Are there any limitations to the size of the audio file I can upload to Google Drive for use in Google Slides?
While Google Slides doesn’t have a strict limit on the file size, it’s advisable to optimize the audio file for faster loading times.