.png)
Rode Central is an extremely easy-to-use application for compatible Rode devices that allows you to unlock advanced features, update your firmware, modify device settings, and deactivate and activate functions. The app is free to download and has both desktop versions for Windows and Mac and mobile versions for Android and iOS.
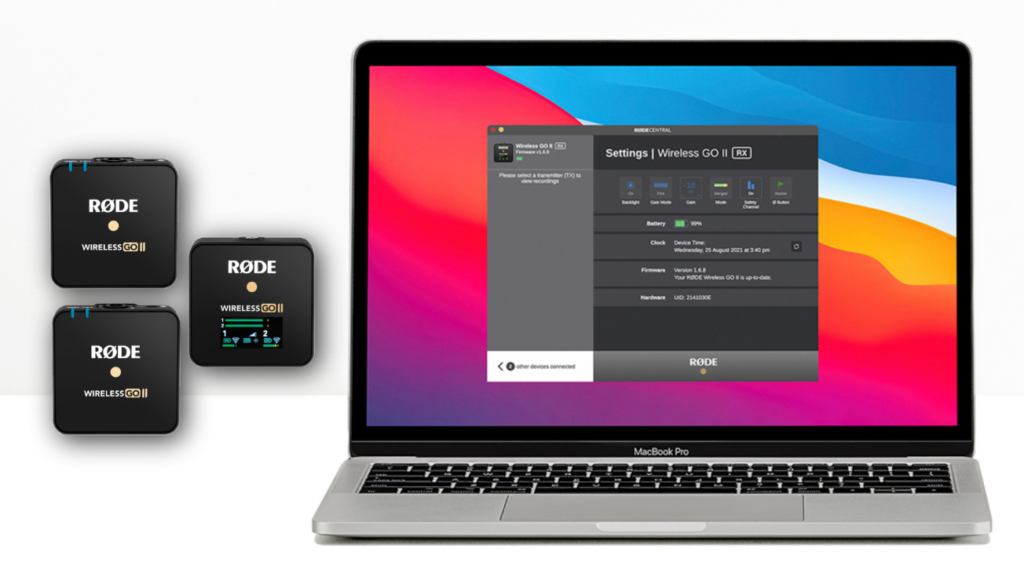
Thanks to the mobile version, you can easily make small changes and adjustments to your device’s settings without opening up your laptop. However, users have reported a few issues with the app. To help ensure seamless operation, we’ve listed and explained a few fixes you can try when your Rode Central app stops working:
Solution 1: Try a Different USB Cable
Your Rode Central app may not be working because of a faulty USB cable. For Android users, it’s best to use the Rode SC16 cable (USB-C to USB-C), while the Rode SC15 cable (USB-C to Lightning) is best for iOS users. Try to avoid using third-party cables, as they may be the reason why your app isn’t working.
Solution 2: Update the App
The Rode Central app allows you to configure all Rode devices, so it’s important to update it regularly. Here’s how you can update the app on different devices:
On Windows
You can set your Windows laptop or computer to automatically install application updates by following these steps:
- Click on the Windows icon in the lower right corner of your screen and then scroll down and select ‘Microsoft Store.’
- Click on the account menu on the top right of the screen and then choose ‘Settings.’
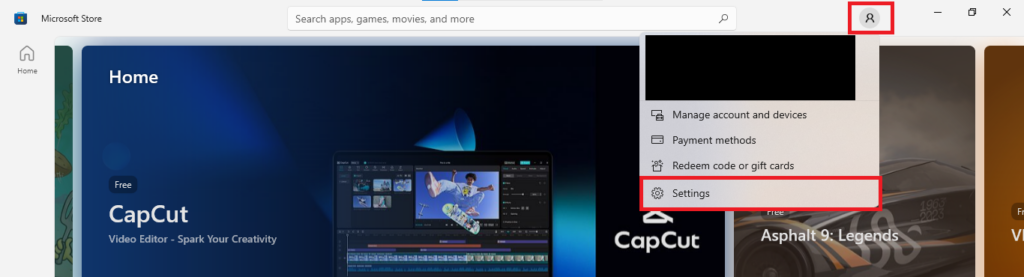
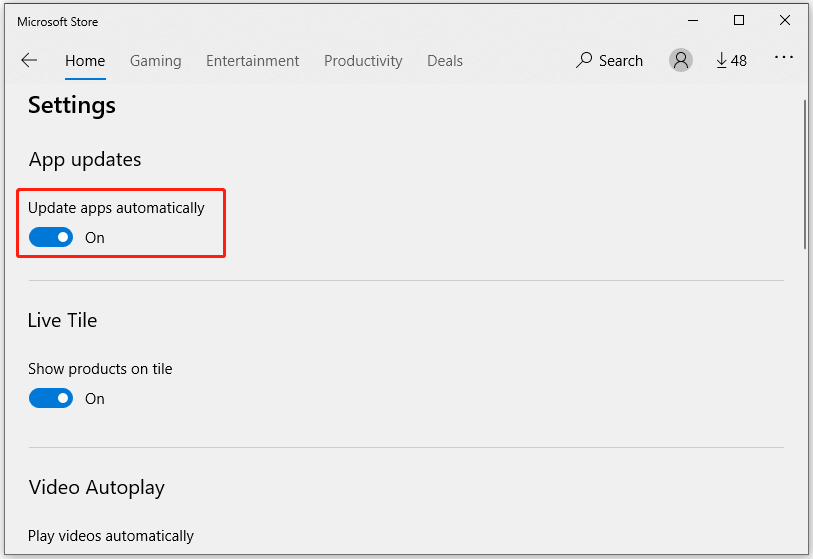
- Under the ‘App Updates’ section, toggle the ‘Update Apps Automatically’ button.
If you still face any issues, try uninstalling and reinstalling the app to see if that fixes the problem.
On Mac
Here’s what you need to do to update the Rode Central app on a Mac:
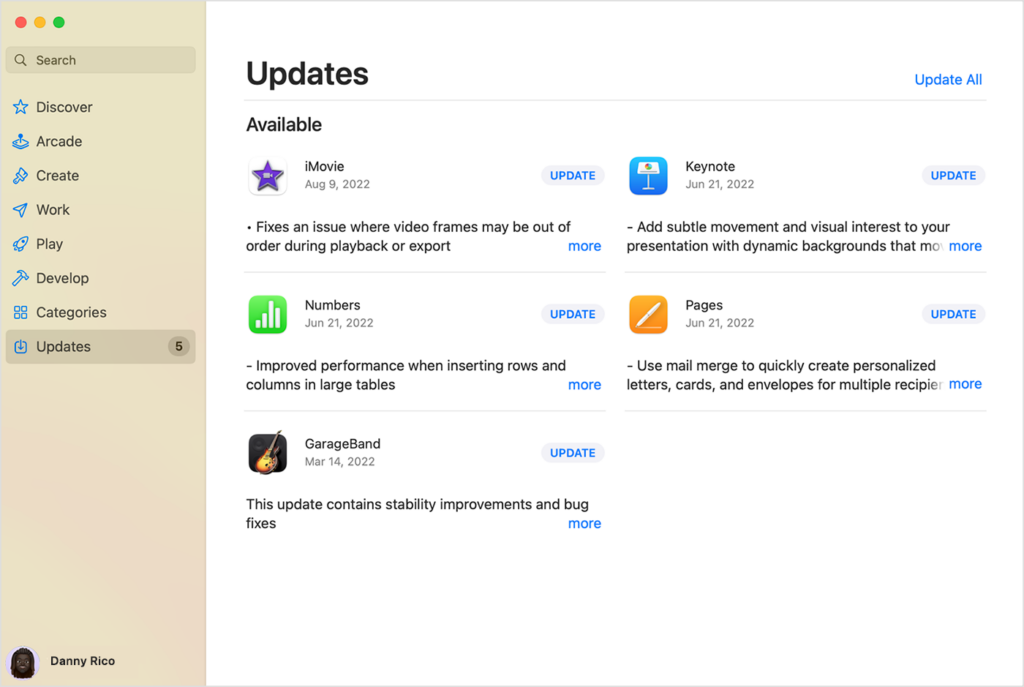
- Launch the App Store.
- Select ‘Updates’ from the sidebar.
- Click on the ‘Update’ button next to the Rode Central app, or select ‘Update All’ to update all applications on your Mac.
However, if you have macOS Ventura, you may be unable to install the latest version of the Rode Central app. This is because Apple enhanced security for apps and software not downloaded from the App Store with the Ventura OS 13.2 update. When you first try to download an installer from the web, your Mac will ask you whether you want to ‘Don’t Allow’ or ‘Allow’ the installer to run.
If you choose ‘Allow,’ the install will successfully run and the latest version of the Rode Central app will install as well. However, if you choose ‘Don’t Allow,’ the Mac will set this setting as default, preventing you from using any installer, including Rode software. Luckily, you can change this setting by following these steps:
- Update your Mac to the latest OS. Ventura 13.4 and later versions don’t have this issue.
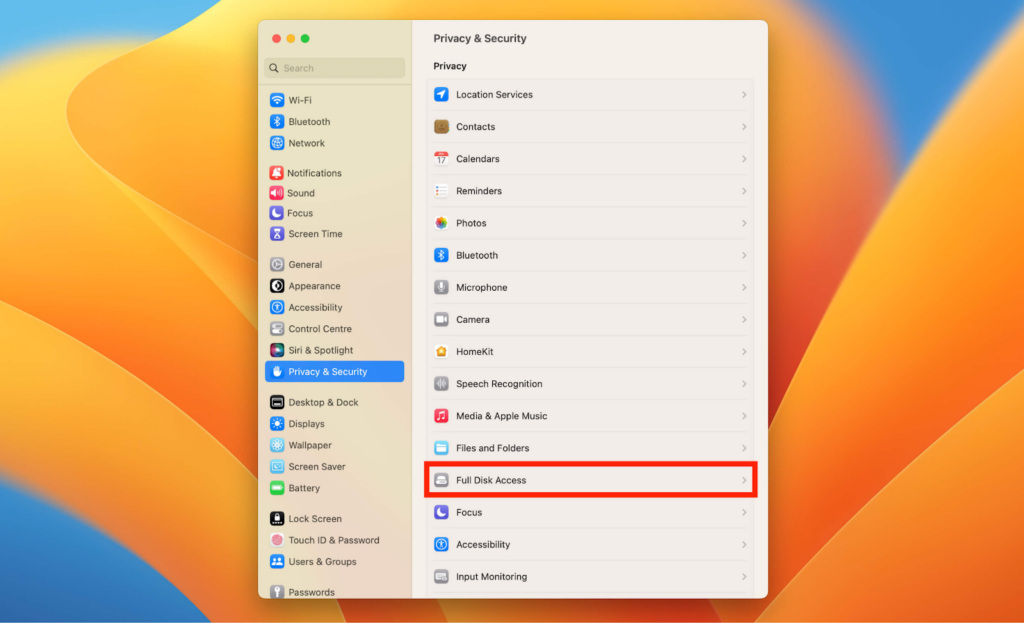
- Open ‘System Preferences’ and select the ‘Privacy & Security’ option from the left-hand menu bar.
- Select ‘Full Disk Access,’ and then toggle the ‘Installer’ setting to enable it.
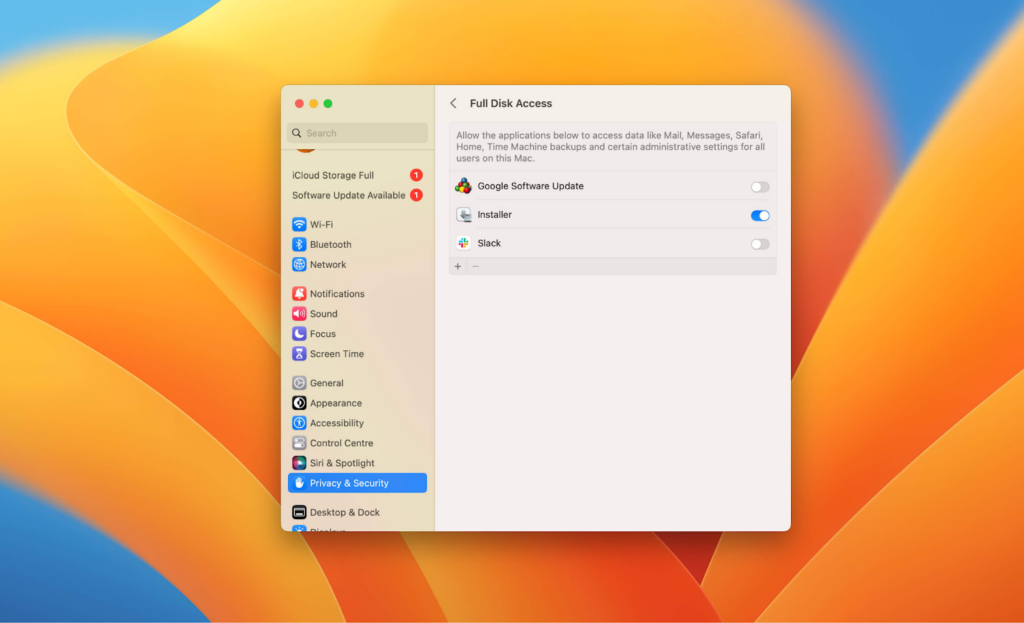
These steps will provide the Rode Central app with the necessary permissions it needs to run successfully.
On iOS
Here’s how you can update the Rode Central app on an iOS device:
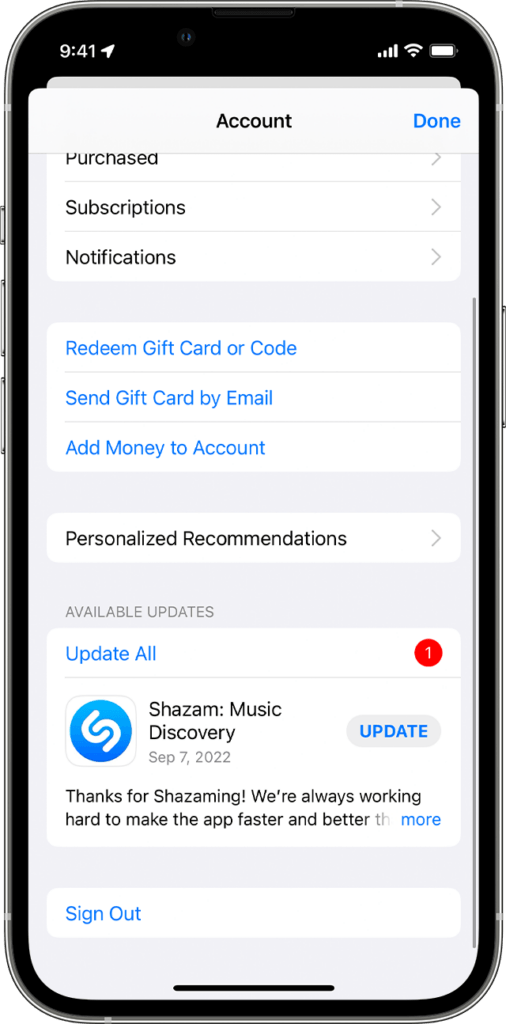
- Launch the App Store.
- Tap the profile icon at the top-right corner of the screen.
- Scroll down to the ‘Upcoming Automatic Updates’ or ‘Available Updates’ section to see release notes and pending updates. Tap the ‘Update’ button next to the Rode Central app or select ‘Update All.’
On Android
Follow these steps to update the Rode Central app on an Android device:
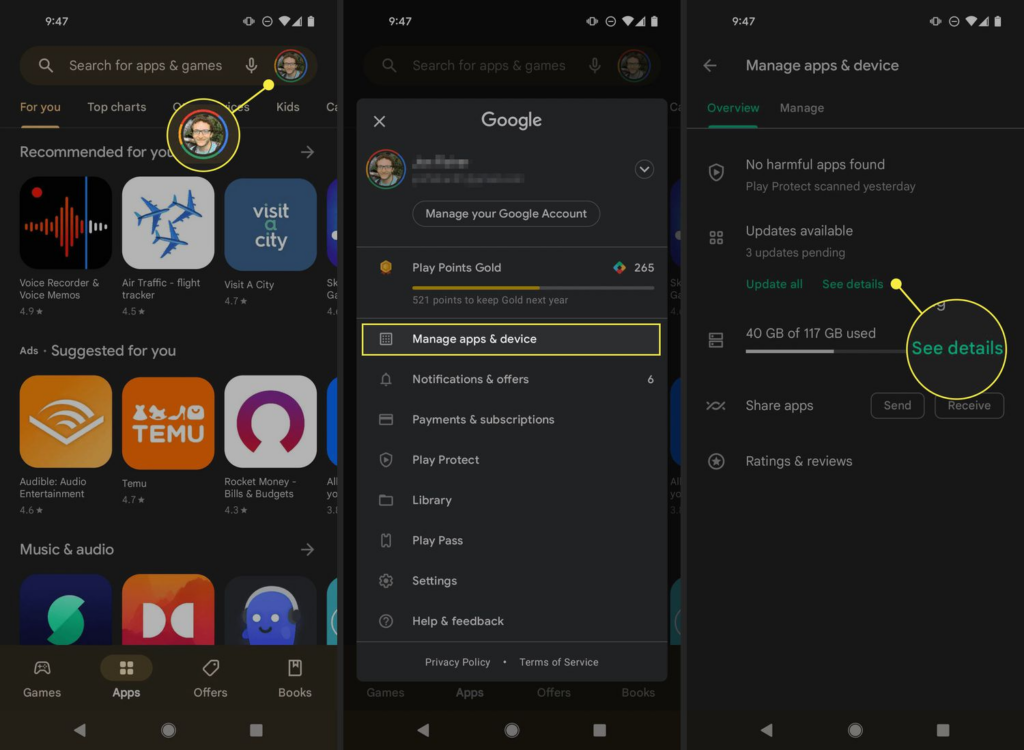
- Launch Google Play Store
- Tap your profile icon at the top right corner of the screen.
- Select ‘Manage apps & device,’ and then tap ‘Updates available.’
- Find the Rode Central app and then tap the ‘Update’ option in front of it or select ‘Update All.’
Along with the app, make sure you also update all your Rode Wireless Receivers and Transmitters to the latest firmware for a seamless user experience.
Solution 3: Force Stop Your Rode Central App
If your Rode Central app still isn’t working, try force-stopping it to solve the issue. Here’s what you need to do if you have an iOS device:
- Swipe up on the home screen of your device and hold until you see the App Switcher on the screen.
- Locate the Rode Central app, and then swipe up.
For force-stopping the application on an Android device, here’s what you need to do:
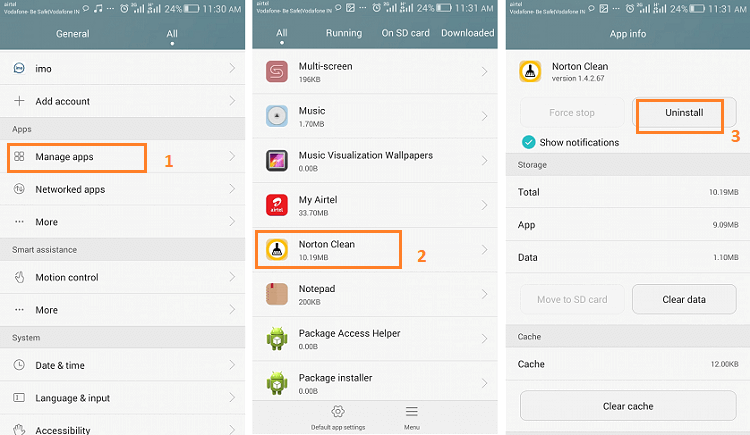
- Launch ‘Settings.’
- Scroll down to find the ‘Apps’ section and select it.
- Tap ‘Manage Apps.’
- Find the Rode Central app and then tap on ‘Force Stop.’
Solution 4: Restart your Device
If your Rode Central app keeps crashing, you can try fixing it by simply restarting your device. Along with clearing the memory, this will shut down and restart all processes run by the device and the app.
Some phones might not have a restart option, so you may need to power it off and then switch it on to restart it manually.
Solution 5: Check App Permissions
If you always update your app, but it still doesn’t work, then the problem might be because you haven’t given the app the permissions it needs for a smooth and successful operation. Fortunately, you can easily solve this problem by turning on all required permissions. Here’s what you need to do:
On Android
- Launch the Settings app.
- Tap ‘Apps’ and then select ‘Manage Apps.’
- Locate and select the Rode Central app.
- Tap ‘App Permissions.’ If you’ve denied or allowed any permissions, you’ll find them in this section.
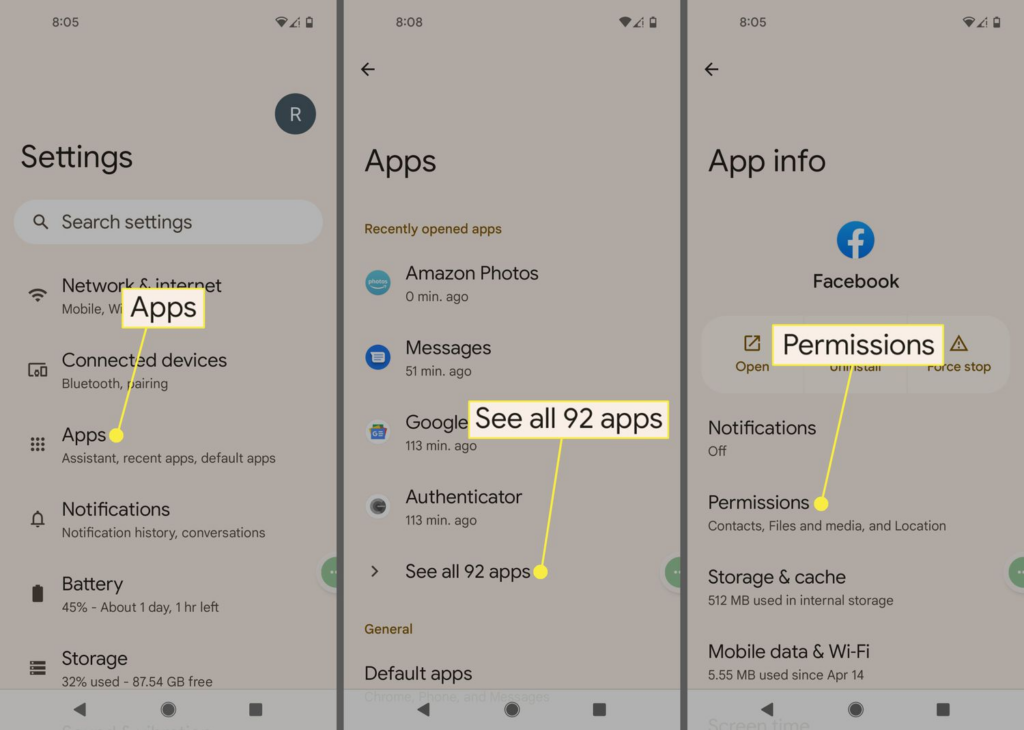
- To modify a permission, tap it, and then choose Don’t Allow or Allow.
On iOS
- Launch the Settings app and then tap ‘Privacy & Security.’
- Select a category, such as Reminders, Motion & Fitness, or Calendars. The list will then show all applications that requested access to that specific category of information. You can then change the permission setting of any app on that list.
Solution 6: Free Up Some Storage Space
The reason behind your Rode Central app not working might be insufficient storage space. You can clear up some storage space by uninstalling and deleting unwanted files and apps. Here’s what you need to do:
On iOS:
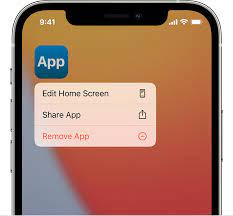
- Tap and hold the app’s icon on the Home Screen until a menu appears on the screen.
- Select ‘Remove App’ and then tap ‘Delete App’ to uninstall it from your iOS device.
On Mac:
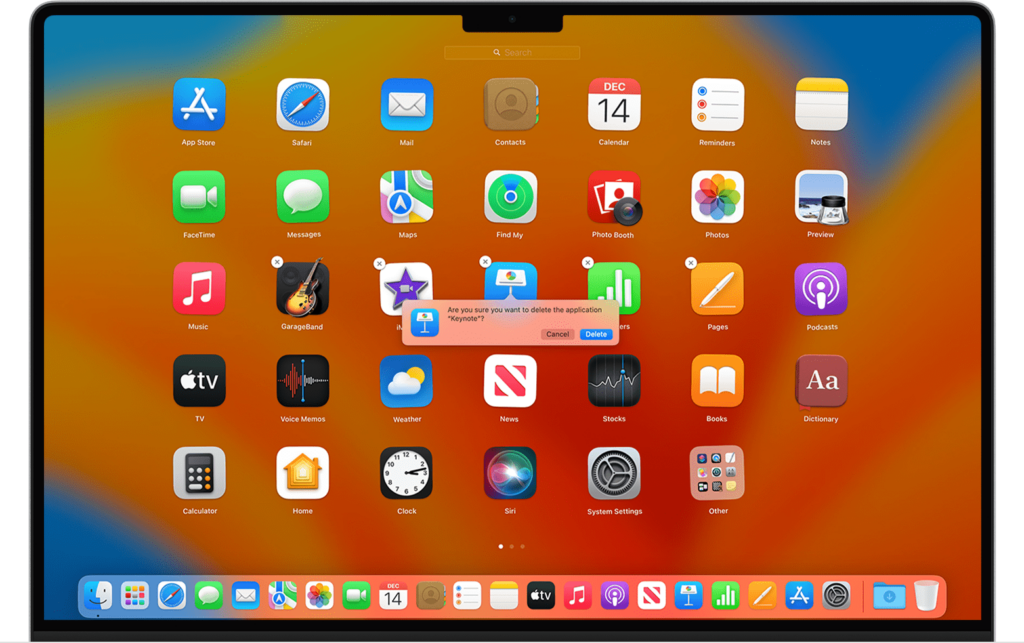
- Open Launchpad from the Applications folder or by clicking on it in the Dock. You can also pinch three of your fingers and thumb closed on the trackpad to open the Launchpad.
- Type the name of the app you want to delete in the search bar at the top of the Launchpad.
- Click and hold any application or hold down the Options key until all apps start jiggling.
- Select the Delete option next to the application you want to uninstall, and then click on ‘Delete’ to confirm. This will delete the app automatically.
On Windows:
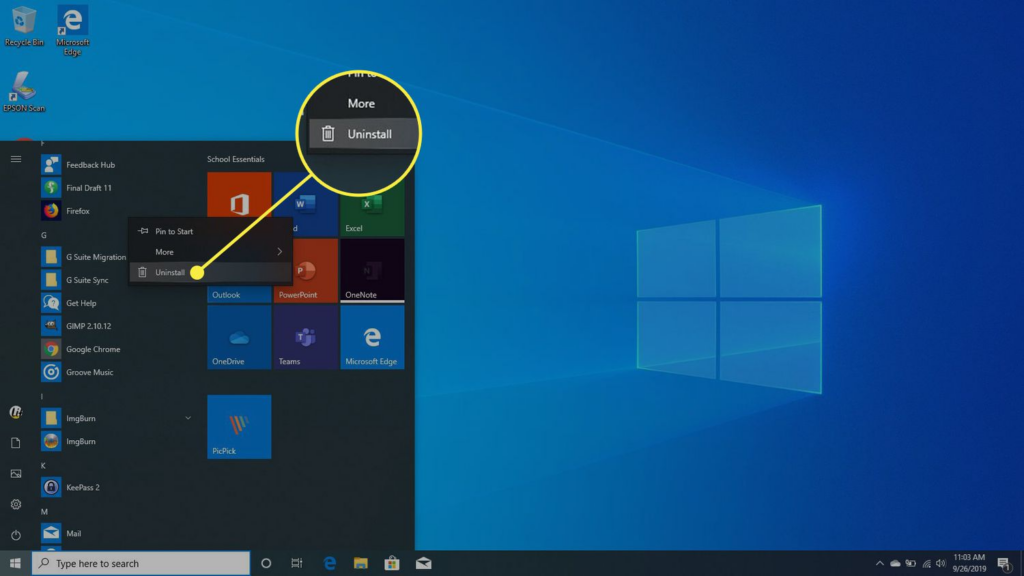
- Click on Start in the lower-right corner of your screen and then locate the program or app you want to delete.
- Right-click on the app and then click on ‘Uninstall.’
On Android:
- Launch Google Play Store
- Tap your Profile icon at the top-right corner of the screen.
- Select ‘Manage apps & device.’
- Find the app you want to uninstall, tap on it, and then select ‘Uninstall.’
After attempting all the possible solutions, if the Rode Central App is still causing trouble, try using a different wireless microphone that also comes with an application. However, make sure you choose a brand that has been vouched by several users for its seamless connectivity with the app. So far, the LarkSound App with Hollyland Lark M2 suits all creators’ needs because of its user-friendly interface and effortless integration with the microphone. It lets you adjust volume, fine-tune noise-canceling settings, monitor audio status in real-time, and update the firmware, all from a single window.

Hollyland LARK M2 - Mini Lavalier Microphone
An incredibly lightweight and compact wireless button microphone that captures high-fidelity audio.
Key Features: 9g Button Size | 48 kHz/24-bit | 40 Hours Battery
Conclusion
Once you’ve restarted your device, updated the Rode Central app, and run troubleshooting, use the right cable to connect your Rode device to the app and check if the problem still persists. Make sure you push in the cable from both sides and ensure that the device is turned on and not simply charging. If the app still doesn’t work, then it’s best to contact Rode support and ask them for help.
FAQs
How do I know if there’s a firmware update available for my Rode device?
In order to check whether there’s a firmware update available for your Rode device, you’ll first need to download and install the newest version of the Rode Central desktop app. Then, you’ll need to connect your Rode device directly to your computer. If you see a red arrow next to your device, there’s a firmware update available for it.
How do I connect my Rode device to the Rode Central app?
To connect a Rode device to an Android phone or any device with a USB-C port, you’ll need a USB-C to USB-C cable, such as the Rode SC16. On the other hand, you’ll need a Lightning Cable (USB-C to Lightning), such as the Rode SC15, to connect a Rode device to an iOS device.
Why is my Rode Wireless Go’s light flashing?
The transmitters and receivers of the Rode Wireless Go II are all designed with a built-in lithium-ion battery that can work for up to seven hours. When the transmitter’s battery starts to run out, the LED will start flashing.