DaVinci Resolve is a powerful video editing software used by professionals and amateurs alike. Keyframes are essential in animation and video editing as they allow you to control changes in parameters over time. These tiny markers hold immense power, allowing you to create smooth transitions, dynamic animations, and precise adjustments throughout your video clips. In DaVinci Resolve, a powerful non-linear editing software, keyframes are your tools for achieving professional-looking edits. This guide will explain how to see and manage keyframes in DaVinci Resolve in a detailed and easy-to-understand manner.
What’s the Use of Keyframes in DaVinci Resolve
Keyframes serve as crucial markers that direct the software to alter specific parameters in video or audio at designated points. These markers enable dynamic changes, such as moving an image across the screen or gradually brightening a scene.
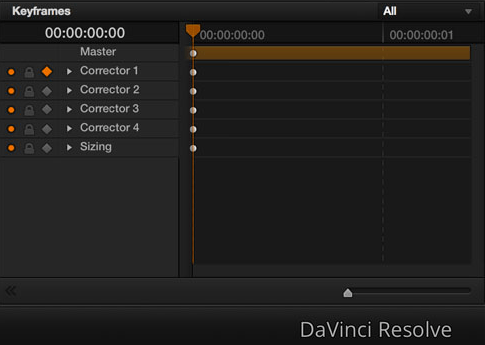
Keyframes pinpoint specific locations on the timeline where changes initiate or conclude. Here are the primary applications of keyframes in DaVinci Resolve:
- Motion Control: Animate an object’s position, scale, or rotation over time to create movement.
- Color Grading: Adjust brightness, contrast, and color dynamically throughout a clip to maintain a consistent look across different scenes. This method complements the use of LUTs for uniform styling.
- Audio Manipulation: Modify volume levels, panning, and other audio attributes during playback.
- Special Effects: Control parameters like the intensity of a blur for various special effects.
- Transitions: Create customized transitions between clips by altering properties such as opacity or crop settings.
- Text and Titles: Change parameters like size, location, and even the text itself over time.
- Speed Changes: Manage variable speed changes within a clip.
- Zoom and Pan: Produce a Ken Burns effect where the camera appears to zoom into or pan across a still image.
Keyframes are fundamental to constructing most audio and video effects in DaVinci Resolve. Mastering keyframe usage is essential before advancing to more complex editing techniques.
Basic Keyframe Controls and Interface
Keyframes in DaVinci Resolve manage a variety of processes, from video and audio adjustments to animating logos and modifying effects. Understanding how to navigate and utilize keyframe controls is essential for effective video editing.
To access keyframe controls in DaVinci Resolve, follow these steps:
- Open your project and go to the Edit tab.
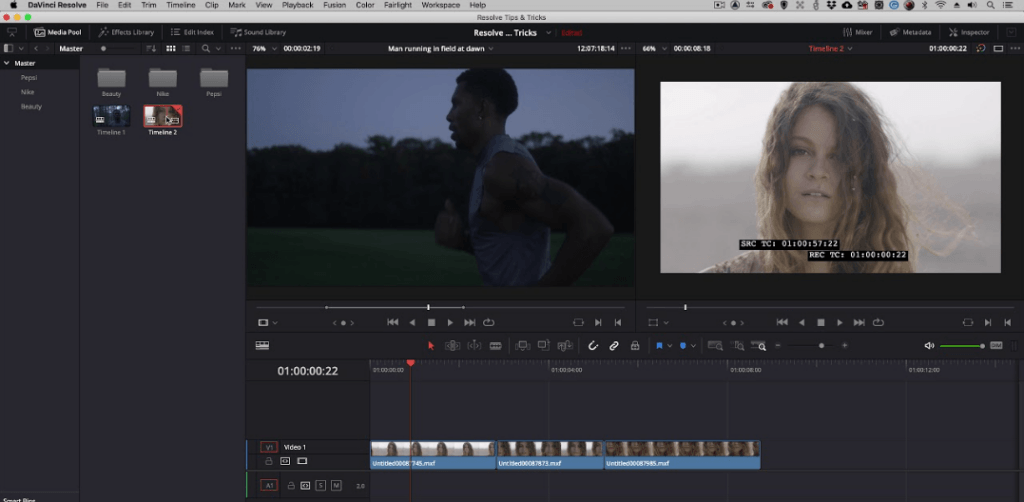
- Click on the Inspector in the top right-hand corner of the interface.
- Select the category you wish to modify – such as Video, Audio, Effects, or Transitions.
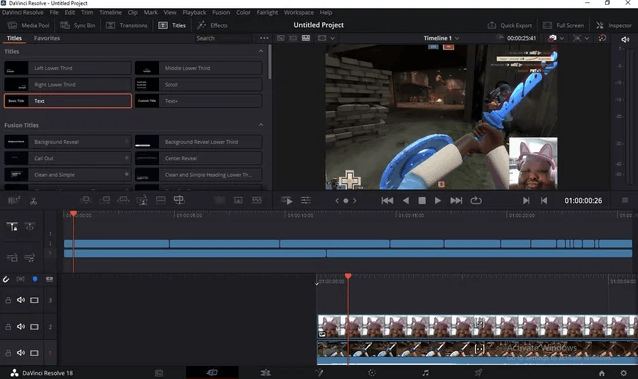
The Video tools in DaVinci Resolve are extensive, including options for cropping, zooming, lens correction, and image stabilization. These tools offer a wide range of capabilities to enhance and perfect video projects.
How to Add and View Keyframes in DaVinci Resolve
Adding, and viewing keyframes in DaVinci Resolve is straightforward with its intuitive keyframe editor. Follow these steps to add keyframes effectively:
Step 1: Import Media
Import video, audio, and image assets into DaVinci Resolve and drag them onto the timeline. Navigate to the Edit page to access the keyframe editor. Under the preview window, enable Transform controls from the dropdown for on-screen adjustments like position, scale, and rotation.
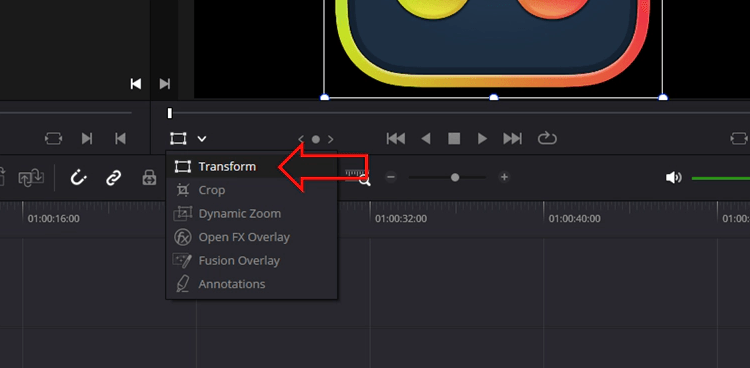
Step 2: Set the Start Keyframe
Move the playhead to the desired starting point on the timeline. Use the on-screen controls in the Inspector panel (Video tab) to position, scale, or rotate the element as needed. Click the diamond-shaped icon next to the transform parameter(s) you wish to animate. The icon will turn red/orange, indicating a keyframe is set.
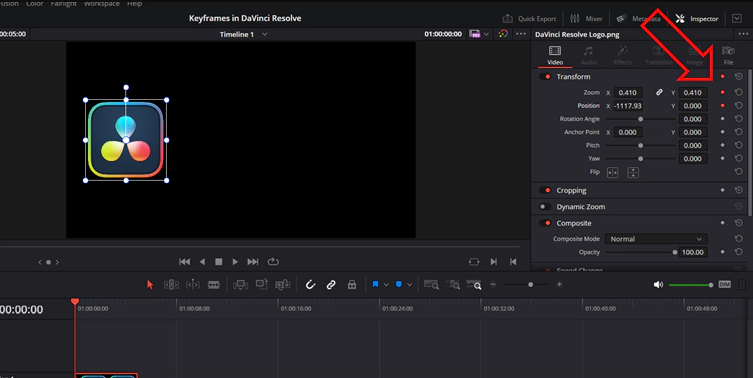
Step 3: Set an End Keyframe
Move the playhead to the desired endpoint for the animation. Adjust the on-screen controls for the ending position, scale, rotation, or other effects. For precision, manually enter coordinates or click and drag. Hold the shift key while dragging to stick to the X or Y axis for more control.
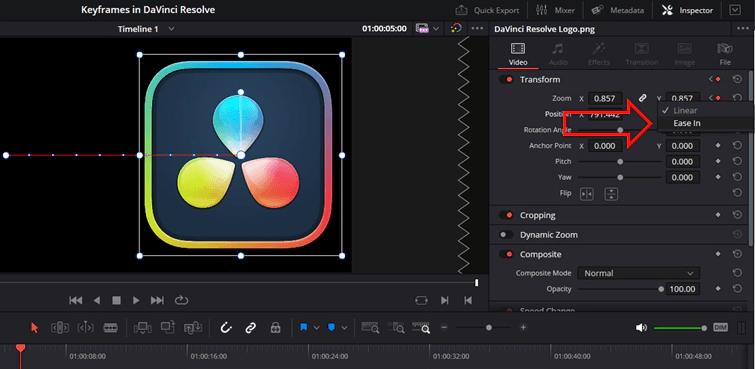
Step 4: Adjust the Animation Curve
Ensure the playhead is at the location of the keyframe you want to edit. Right-click the keyframe diamond icon and select Ease In, Ease Out, or Linear to control the animation’s pacing. Ease In/Out provides smoother transitions.
Step 5: Preview and Navigate
Play back the timeline to preview the animation. Use the diamond-shaped keyframe icons in the Inspector or on the preview screen to navigate to specific keyframes for further adjustments.
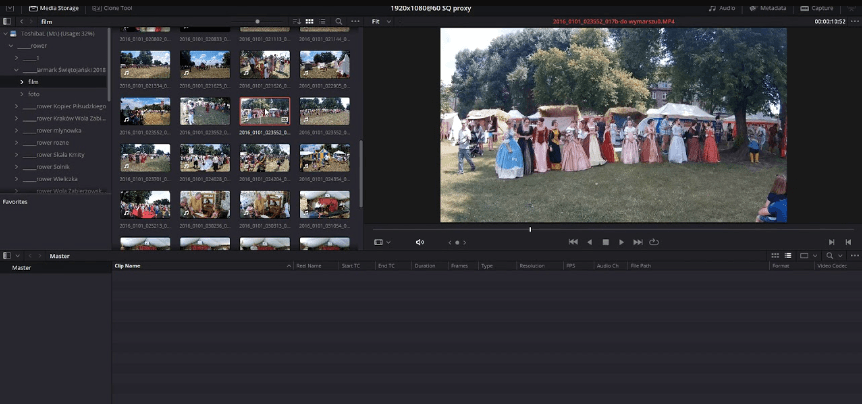
Following these steps creates a simple animation, such as moving an object from left to right while increasing its size.
Editing Keyframes on the Timeline
Editing keyframes directly on the timeline in DaVinci Resolve provides a quick way to adjust keyframe positions without leaving the timeline editing space. Follow these steps to reveal and adjust keyframes on individual clips:
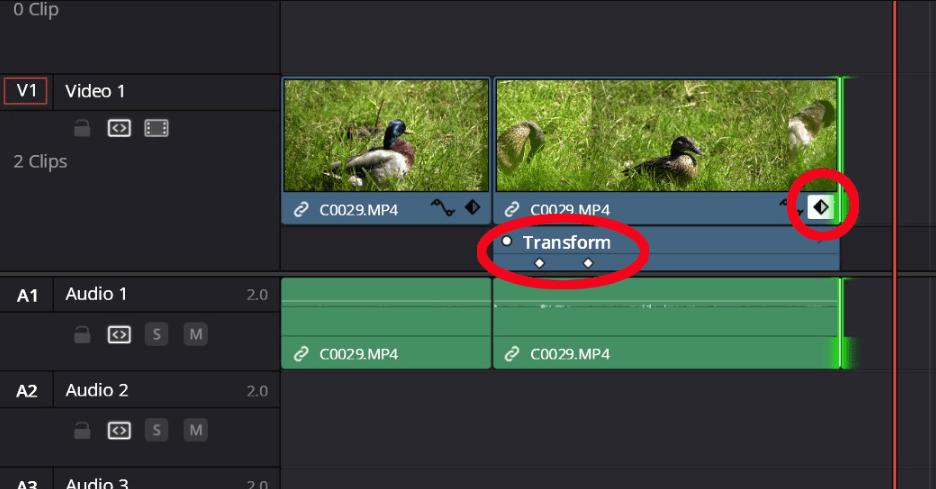
Step 1: Select the Clip
In the Edit tab, navigate to the clip on the timeline where you want to view keyframe information.
Step 2: Reveal Keyframes
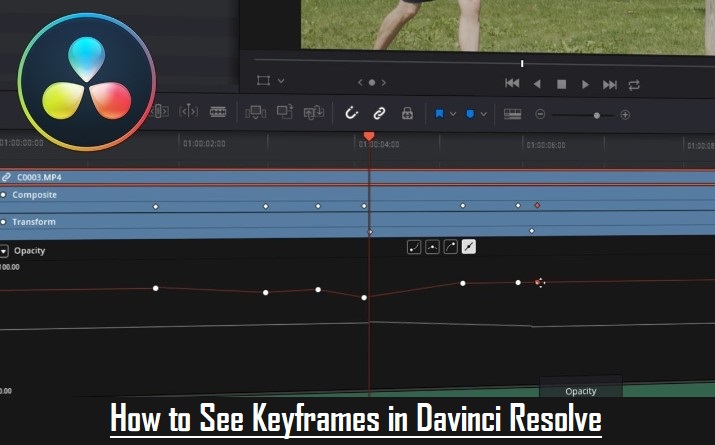
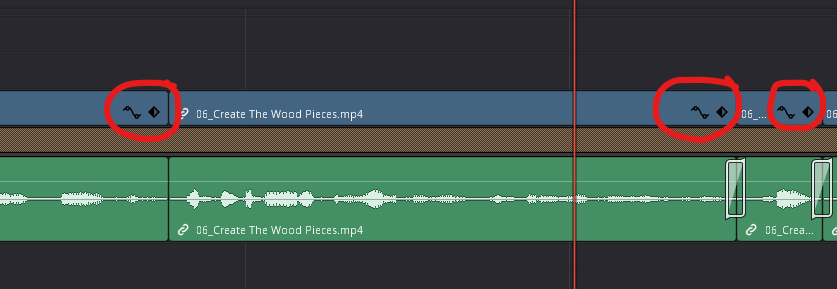
Click the black and white diamond icon in the bottom right-hand corner of the timeline clip. This action will display a second bar beneath the clip preview, showing keyframe positions and the type of effect, such as Transform.
Step 3: Adjust Keyframes
Dots beneath the effect type represent keyframes.
Click and drag these dots left or right to reposition the keyframes.
Step 4: Use the Inspector Panel for Fine-Tuning
The Inspector panel in the top right corner remains the primary area for fine-tuning keyframes.
Although the timeline allows quick adjustments, not every parameter is accessible here, making the Inspector essential for detailed editing.
This method is convenient for making swift adjustments to keyframe positions while working directly within the timeline.
How to Display the Keyframe Editor on the Edit Page in DaVinci Resolve
Displaying the keyframe editor on the Edit page in DaVinci Resolve allows for smoothing and adjusting keyframes more effectively. Follow these steps to access and use the keyframe editor:
Step 1: Select the Clip
Click on the clip on the timeline where keyframes have been added.
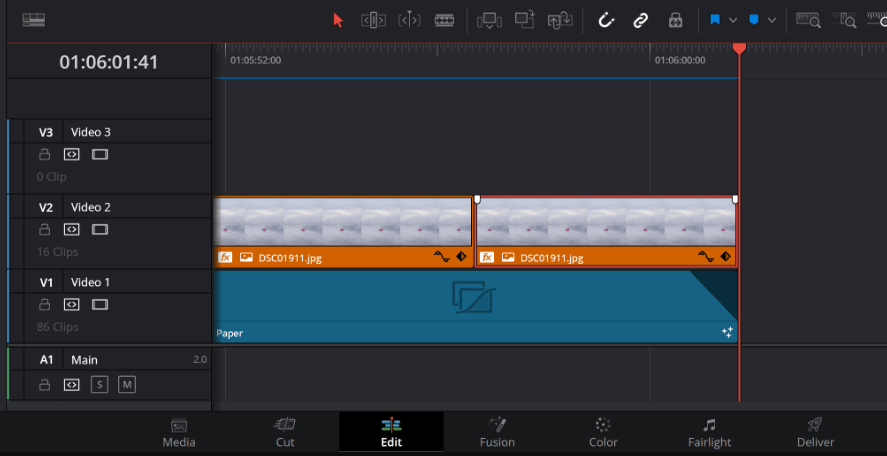
Step 2: Show Keyframe Editor
Navigate to the Clip menu at the top of the interface. Select Show Keyframe Editor from the dropdown menu.
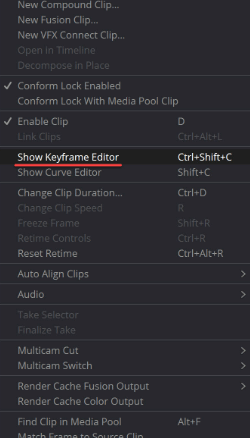
NOTE: Keyframe editor should b shown to you by following these two simple steps, if this doesn’t happen, then you can proceed with following additional steps
Step 3: Access Keyframe Controls
Click the two black icons in the bottom right corner of the clip (located in the orange area):
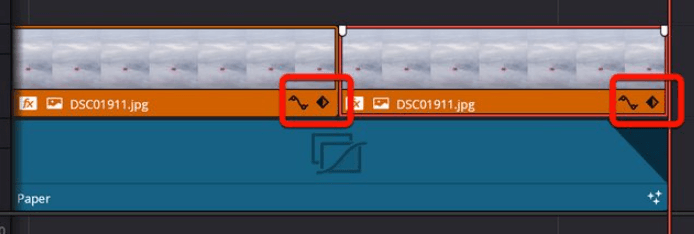
Right Icon: Displays the position of keyframes relative to the clip.
Left Icon: Opens the full curve editor for detailed adjustments.

Step 4: Verify Keyframes
Ensure that keyframes exist on the clip. The keyframe icons in the Inspector should be red, indicating active keyframes.
Step 5: Handling OpenFX Keyframes
OpenFX keyframes do not appear in the keyframe editor. Use the curve editor instead: Click the down arrow in the top left corner of the curve editor.
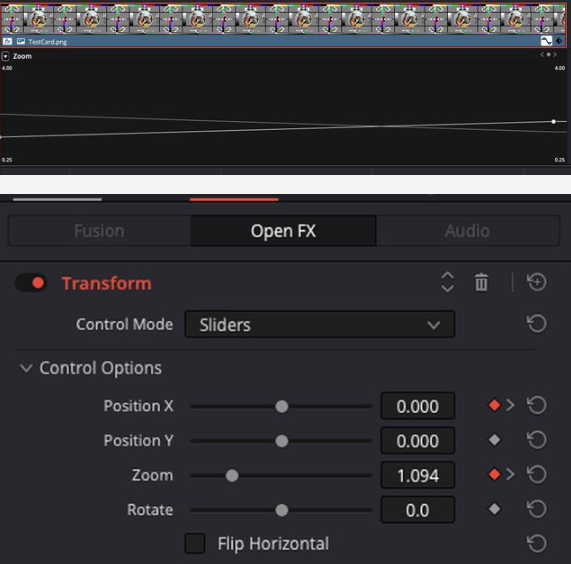
Select the specific parameters, such as Transform OFX Zoom and Position X, to view and edit the keyframes.

Step 6: Smoothing Keyframes
Once the keyframes are visible in the curve editor, adjust them to smooth the animation. Use the Ease In and Ease Out options to create smoother transitions.
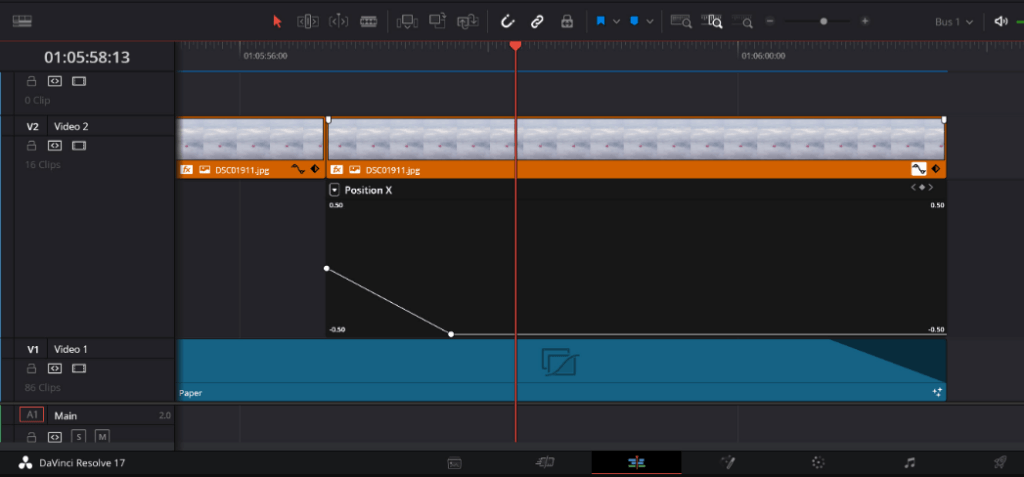
By following these steps, keyframes can be effectively managed and smoothed, even for OpenFX effects, ensuring a polished final result.
Applying Keyframes to Audio in DaVinci Resolve
Adding keyframes to audio in DaVinci Resolve enhances the control over various audio effects and parameters, such as creating fades and adjusting volume levels. Follow these steps to apply keyframes to your audio clips:
Step 1: Set the Playhead
Move the playhead to the point on the audio clip where the first keyframe should be created.
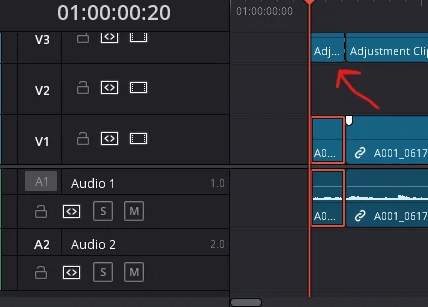
Step 2: Add the First Keyframe
In the Inspector panel, navigate to the Audio settings. Click the keyframe icon next to the desired audio effect (e.g., volume, panning, pitch).
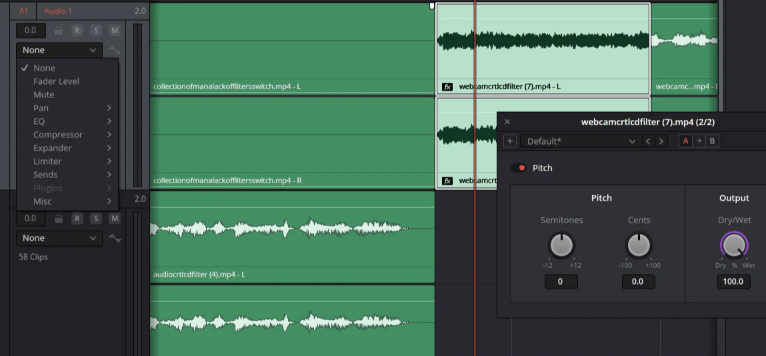
Step 3: Adjust Parameters for the End Keyframe
Move the playhead to the frame where the effect should end. Adjust the audio parameters in the Inspector, such as lowering the volume for a fade-out effect.
Step 4: Use the Curve Editor for Precision
For finer control over audio changes, use the curve editor. This allows for more detailed adjustments during the clip’s duration.
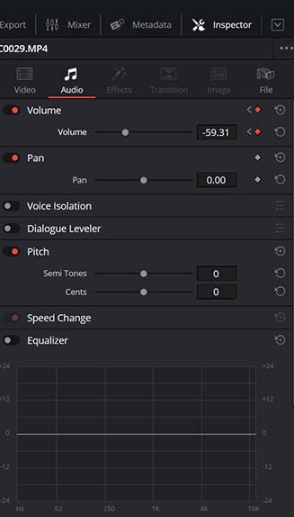
DaVinci Resolve offers a range of audio values and tools for keyframe adjustments:
- Volume and Panning: Adjust the levels and spatial placement of audio.
- Voice Isolation: Enhance voice clarity by isolating it from background noise.
- Equalization: Modify the frequency balance for a cleaner sound.
- Dialogue Leveling: Ensure consistent audio levels for dialogue.
- Pitch and Speed: Change the pitch and speed of the audio to match your project’s needs.
By following these steps, audio keyframes can be effectively managed to create dynamic and precise audio effects in your DaVinci Resolve projects.
How to Remove Keyframes in DaVinci Resolve
Removing unnecessary keyframes in DaVinci Resolve can streamline your project and enhance the final output. Follow these methods to efficiently remove keyframes:
Step 1: Remove a Single Keyframe
Right-click the keyframe in the preview screen. Select Delete Keyframe from the context menu.
Step 2: Batch Remove Keyframes
To remove all keyframe effects, click the circular arrow icon next to the keyframe diamonds in the Inspector panel. This action will delete all keyframes and associated animation effects. If this action is accidental, use the undo function to revert the change.
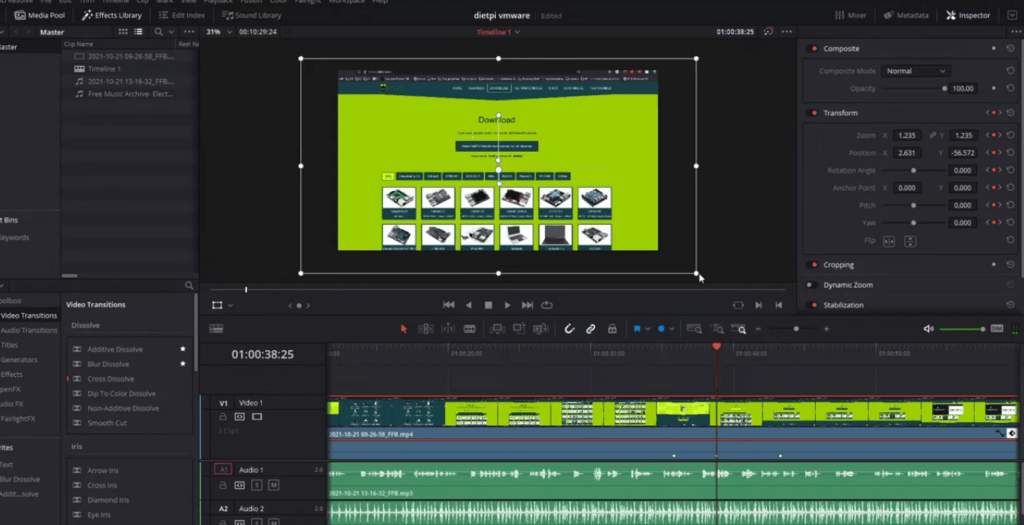
Step 3: Verify Changes
Scrub through the timeline or play back the clip to ensure the keyframe removal has achieved the desired effect. Fine-tune the project as needed to perfect the outcome.
Advanced Keyframe Techniques
Enhance your video editing projects with these advanced keyframe techniques in DaVinci Resolve:
- Dynamic Keyframe Zoom
Create a smooth zoom-in or zoom-out effect using keyframes. This technique focuses on specific parts of the footage or creates dramatic reveals.
- Keyframe Color Changes
Dynamically alter the color grading of your footage over time. Use this for transitions from day to night, emphasizing mood changes, or highlighting specific moments in the storyline.
- Advanced Audio Keyframing
Manipulate audio levels and effects over time to produce unique and out-of-the-ordinary sound effects.
- Motion Tracking with Keyframes
Combine motion tracking with keyframes to attach objects or effects to moving elements within the footage. Attach text to moving objects, apply effects that follow a character, or create dynamic interactions between elements in the scene.
These advanced techniques unlock the full potential of the keyframe editor in DaVinci Resolve, enabling the creation of unique and compelling video effects.
Tips and Best Practices for Working with Keyframes
Use Ease In and Ease Out
To make animations smoother, use ease in and ease out options available in the keyframe settings. This adjusts the speed of the transition, making it more natural.
Zoom In for Precision
When working with keyframes, zoom in on the timeline to place keyframes more accurately. This is especially useful for fine-tuning animations and effects.
Use the Spline Editor for Advanced Control
The Spline editor provides advanced control over keyframe animations. Use it to adjust the curves and fine-tune the transitions between keyframes.
Regularly Save Your Work
Keyframe work can be detailed and time-consuming. Make sure to save your project regularly to avoid losing your progress.
Use the Keyframe Navigation Tools
DaVinci Resolve provides tools to jump between keyframes quickly. Use the keyframe navigation buttons to move to the next or previous keyframe efficiently.
Group and Label Keyframes
For complex projects, group related keyframes and label them clearly. This helps in managing and adjusting keyframes without confusion.
Conclusion
Mastering keyframes in DaVinci Resolve unlocks a world of dynamic and creative possibilities in video editing. From basic motion control and color grading to advanced techniques like dynamic zoom, audio keyframing, and motion tracking, keyframes offer precise control over various elements of your project. Whether adjusting simple transitions or creating complex animations, understanding how to effectively use keyframes is essential for any video editor aiming to elevate their work.
Your thoughts and feedback are valuable! How did this guide help you with keyframes in DaVinci Resolve? Share your experience and any tips you have discovered in the comments. If you have questions or need further clarification, let us know so we can improve and provide more helpful content.
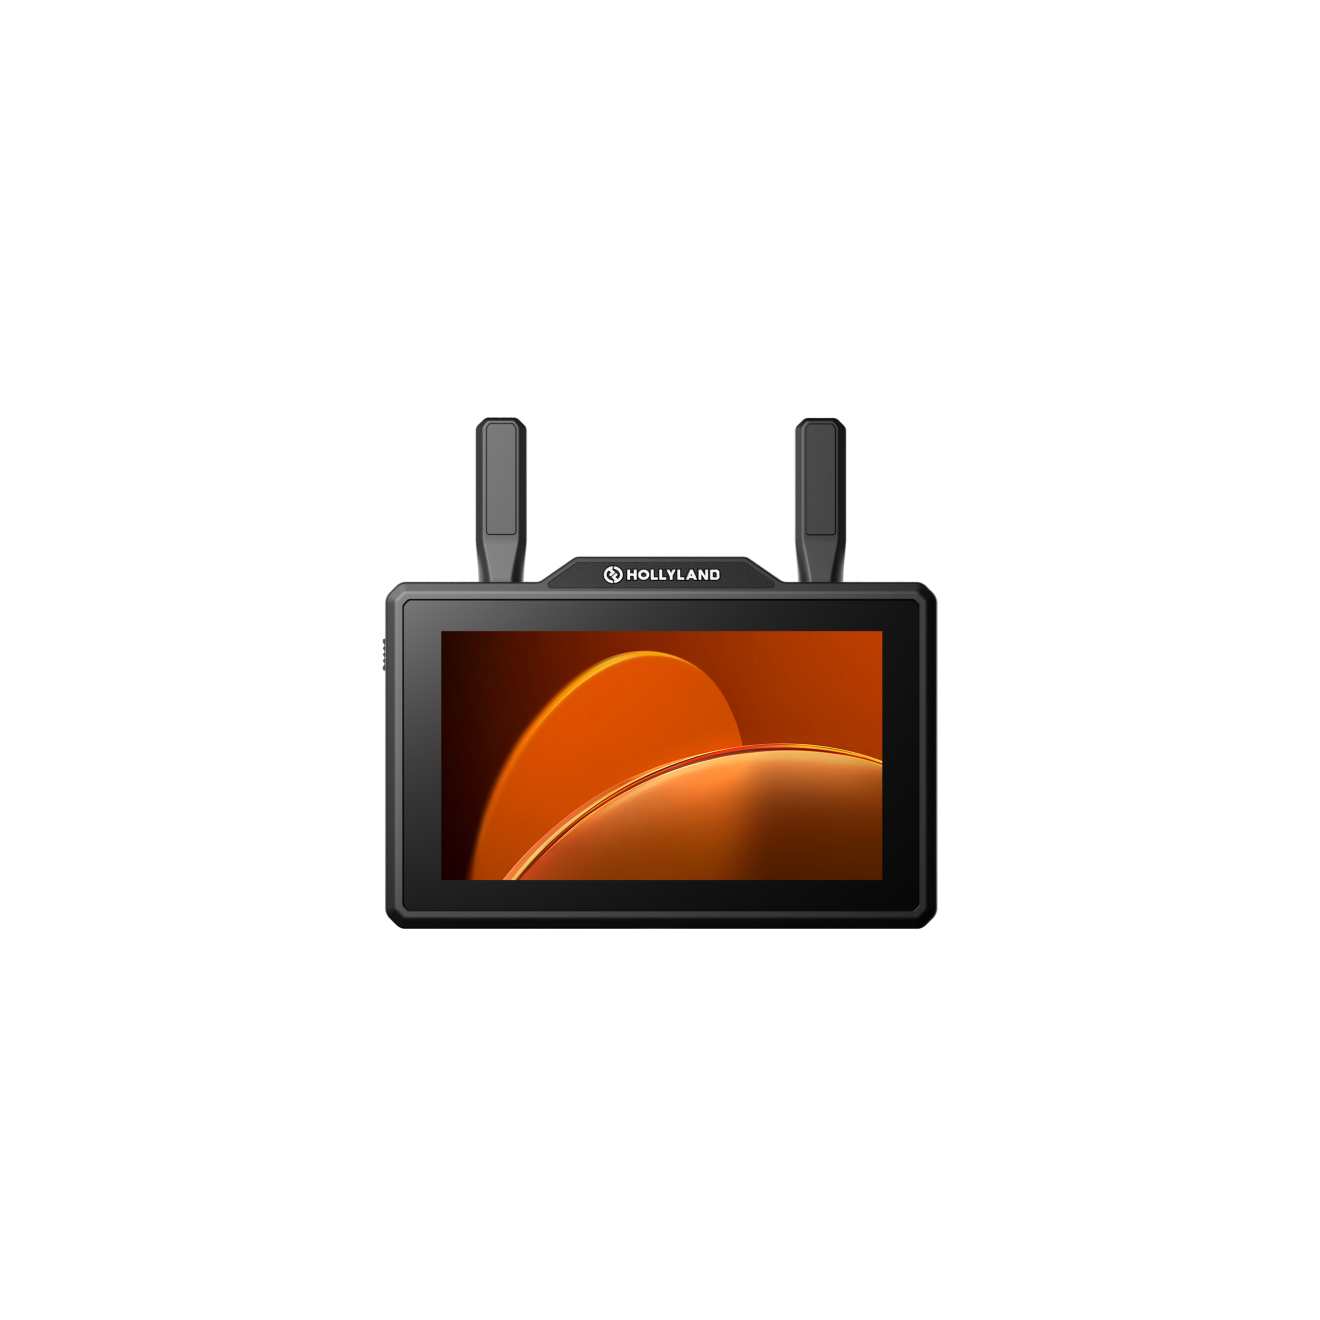
When working with precise keyframe adjustments in Davinci Resolve, having a clear and accurate view of your footage is essential. A reliable camera monitor helps you clearly preview every detail on-set, ensuring your shots align perfectly with the exact adjustments you’ll make in Davinci Resolve.
Frequently Asked Questions
How can I view keyframes in DaVinci Resolve?
To view keyframes in DaVinci Resolve, navigate to the timeline where you’ll see diamond markings indicating keyframes. Clicking on these markings reveals the set keyframes. You can then drag them to adjust the timing and speed of the animation as needed.
Does DaVinci Resolve support keyframes?
Yes, DaVinci Resolve supports keyframes. To access the keyframe editor, navigate to the Edit page and ensure that Transform controls are enabled under the preview window. This allows for on-screen adjustments such as position, scale, and rotation using keyframes.
How to show keyframes on the timeline in DaVinci Resolve?
Showing keyframes on the timeline in DaVinci Resolve is essential for visualizing and editing animations. To do this, navigate to the Edit page and select the clip or element containing the keyframes. Look for diamond-shaped markers along the clip’s track in the timeline; these indicate the presence of keyframes. You can zoom in or out of the timeline for a closer look at the keyframes and their positions, facilitating precise adjustments.
How do I check the frame rate in DaVinci Resolve?
To check the frame rate in DaVinci Resolve, go to the “File” dropdown menu in the menu bar at the top of the interface. Select “Project Settings” and then choose “Master Settings.” Under “Timeline Format,” you’ll find a dropdown menu displaying the timeline frame rate.
How do I set frames in DaVinci Resolve?
Setting frames in DaVinci Resolve involves specifying the duration of individual frames within your project. This can be done during project setup or when adjusting project settings. Go to the File menu and select Project Settings. In the Project Settings panel, navigate to Master Settings. Under Timeline Format, specify the desired frame rate for your project. This determines the number of frames displayed per second in your timeline, allowing you to align your project with specific timing requirements.
Where can I find the frame display mode in DaVinci Resolve?
To access the frame display mode in DaVinci Resolve, go to the Media Page and open Media Storage. Click on the three dots at the top of the Media Storage window, then select “Frame Display Mode” and choose “Individual” from the dropdown menu.
How do I open the DaVinci keyframe editor?
To access the keyframe editor in DaVinci Resolve, you’ll need to navigate to the Edit page. Once there, select the clip or element you want to work with. Then, head to the Inspector panel where you can find parameters like position, scale, or rotation. Click on the diamond-shaped icon next to the parameter value to add a keyframe. After adding keyframes, you can further manipulate them by clicking on the keyframe icon to the right of the parameter value, opening the keyframe editor for adjustments.
Why can’t I see my keyframes?
If you’re unable to see your keyframes in DaVinci Resolve, there are a few troubleshooting steps you can take. Firstly, ensure you’re on the correct page, typically the Edit page, where keyframes are visible. Check if the parameter you’re working with has keyframes applied, as keyframes will only be visible for parameters that have been animated. Additionally, verify that the keyframe display settings are enabled, which can be adjusted in both the Timeline and Inspector panels to show or hide keyframes as needed.


.png)


