.png)
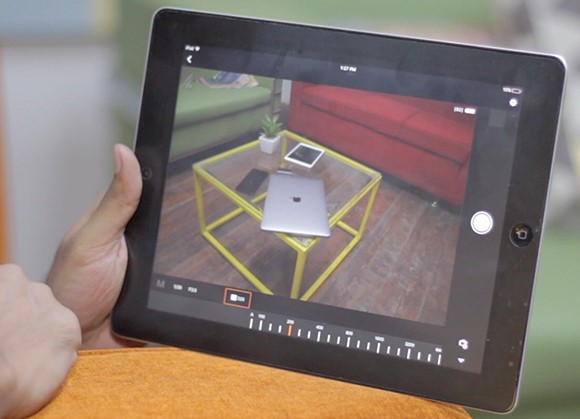
In the fast-paced and constantly evolving realms of photography and videography, the role of a dependable camera monitor cannot be overstated. It stands as the crucial link between the photographer or videographer and their creative vision, facilitating the capture of that perfect shot or frame. With technology’s continuous advancements, professionals and passionate enthusiasts have uncovered a remarkable solution to this need – harnessing the incredible versatility of an iPad as a camera monitor.
In this all-encompassing guide, we embark on a journey to unlock the full potential of your iPad as an invaluable camera monitor. Whether you’re an established professional or a budding enthusiast, the steps detailed here are designed to be your guiding light through the intricacies of setting up your iPad for this purpose. By the time you’ve completed this comprehensive guide, you’ll not only be proficient in using your iPad as a camera monitor but also equipped to elevate your photography and video recording experiences to new heights
Why Use an iPad as a Camera Monitor?
Before delving into the specifics of using your iPad as a camera monitor, it’s crucial to grasp the numerous advantages this approach offers:
- Enhanced Visibility: The larger screen of an iPad extends a generous canvas for your visuals, delivering an unparalleled clarity of the subject you’re capturing. This heightened visual clarity empowers you to compose your shots with precision and attention to detail, resulting in visually striking images or videos.
- Touchscreen Functionality: The intuitive touchscreen interface of the iPad provides a dynamic connection to your camera’s settings and focus. This hands-on interaction fosters a more engaging and efficient creative process. It places the power to adjust settings and focus at your fingertips, enhancing your ability to control and fine-tune your shots, ensuring each frame meets your artistic vision.
- Real-time Preview: With an iPad as your camera monitor, you’re granted the remarkable ability to review your shots or footage in real-time. This real-time feedback loop is invaluable for immediate adjustments, allowing you to tweak settings on the fly to achieve the exact results you desire. It transforms your photography or videography into a dynamic and responsive process, where you can see the outcome as it unfolds.
- Wireless Connectivity: The integration of wireless connectivity into the camera-monitoring process offers significant advantages. By eliminating the need for cumbersome cables, it reduces clutter and simplifies your setup, making it more adaptable to various shooting conditions. You gain the freedom to move about more easily, explore different angles, and experiment with your shots without the hindrance of physical connections. This wireless convenience not only streamlines your workflow but also elevates your creativity, granting you greater flexibility in your photography and videography endeavors.
Equipment You’ll Need
To get started, make sure you have the following equipment:
- An iPad (compatible with your camera)
- A compatible camera with Wi-Fi or Bluetooth connectivity

- The manufacturer’s app for your camera (often available for free)

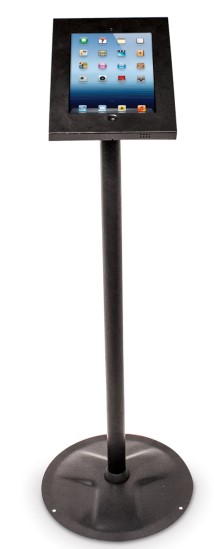
- A stable and secure iPad stand or holder
- A Wi-Fi network or a wireless connection method, depending on your camera’s capabilities
Setting Up Your iPad as a Monitor
We’ll be referring to the canon camera connect app for your understanding. The process is almost the same for all other manufacturers like Nikon, Fujifilm etc.
STEP 1: Download the Canon Camera Connect app for your smartphone, compatible with both Android and iOS. We tested the app on both platforms, and it performed seamlessly.
NOTE: For Nikon camera users, explore alternative applications such as Camera Connect & Control or Camera Remote Control (DSLR). These third-party apps also offer the capability for remote photo and video capture.
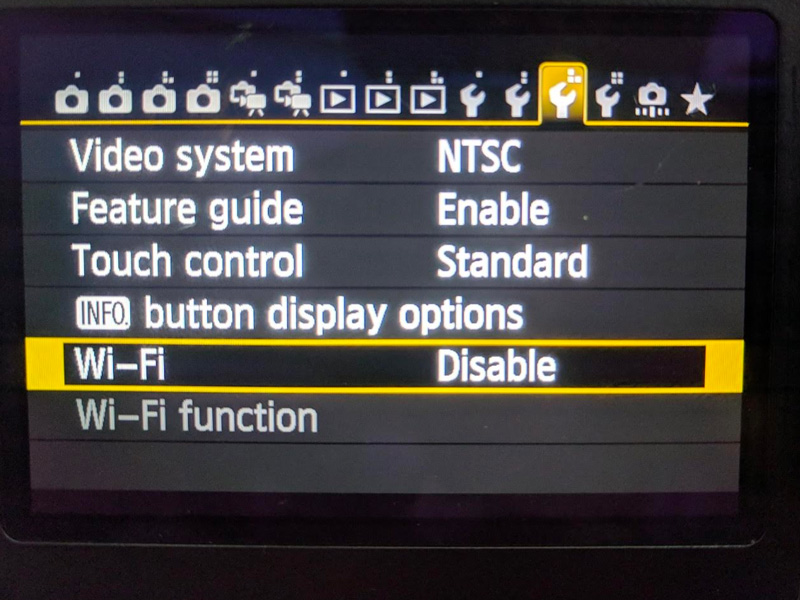
STEP 2: After installation, launch the Camera Connect app. It will prompt you to activate Wi-Fi on your DSLR to establish a new connection.
Now, move to your DSLR and access the Settings menu. Locate the Wi-Fi option. If your DSLR lacks Wi-Fi support, wireless remote shooting won’t be possible, but we’ll cover the cable alternative later in this article. If your DSLR supports Wi-Fi, simply enable it.
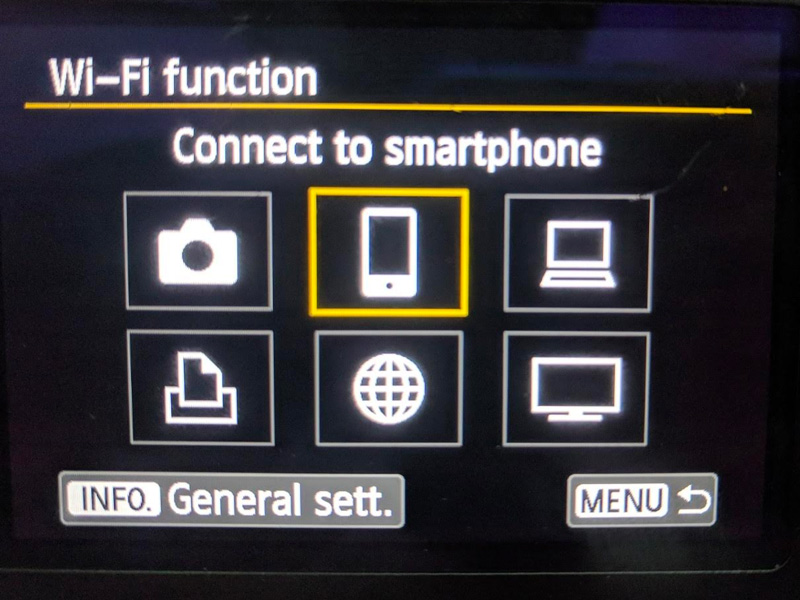
STEP 3: Continuing, access the Wi-Fi function. You’ll then be prompted to assign a nickname for your camera. Enter a name of your preference and click “OK” to proceed.

STEP 4: In the following step, you’ll need to establish a connection between your Camera and your smartphone/tablet. Simply tap on the “connect to a smartphone” icon.
STEP 5: Proceed by choosing “Camera access point mode” as your preferred connection method. On the subsequent page, you’ll be prompted to configure your network settings. Opt for “Easy connection” and tap “OK.”
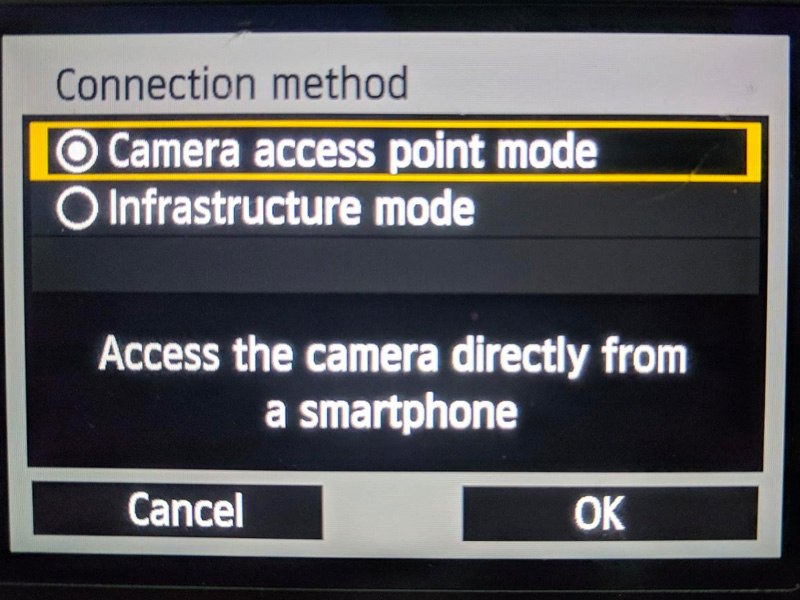
STEP 6: At this point, your DSLR will effectively generate a Wi-Fi hotspot and furnish you with an encryption key, serving as the password for the hotspot.
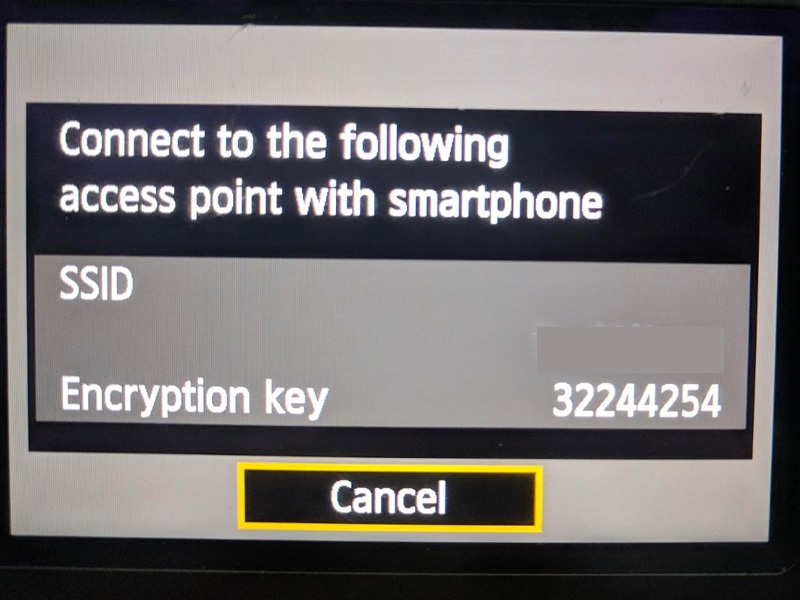
Important Note: Do not leave the encryption key page on your DSLR until the connection with your smartphone or tablet has been established.
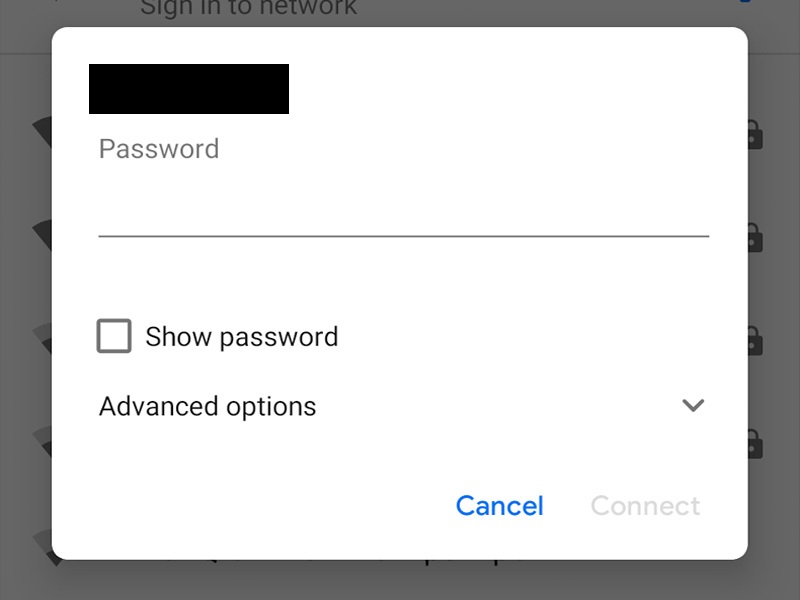
STEP 7: Navigate to your Android or iOS device. Access the “WiFi” section within the Settings menu, and connect to the WiFi hotspot generated by your DSLR. When prompted for the WiFi password, enter the encryption key provided on the DSLR screen.
That’s all there is to it. When you open the Canon Camera Connect app, it will automatically recognize your DSLR and inquire whether you’d like to preview your DSLR screen on your Android tablet or iPad. Simply confirm this, and you’re all set to go.
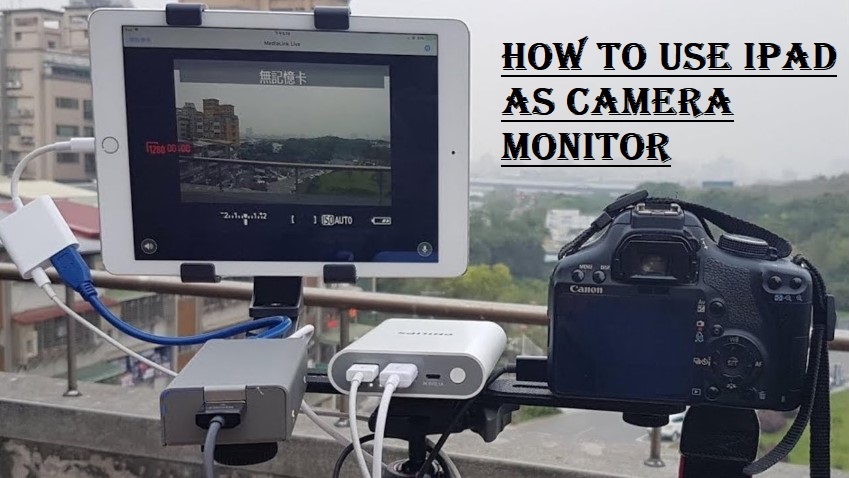
Using a USB Cable for an External Camera Monitor
If you want to watch videos captured by your Camera and preview them on an external monitor like an iPad, Android tablet, or smartphone, you can do so with the help of a USB cable. Follow these steps:
- Begin by connecting your smartphone or iPad to your DSLR using the cable that comes with your DSLR. The cable that comes with your DSLR is typically intended for data transfer between your camera and a computer, so you’ll need an additional USB to OTG or USB to Type C adapter to link your smartphone to the USB cable.
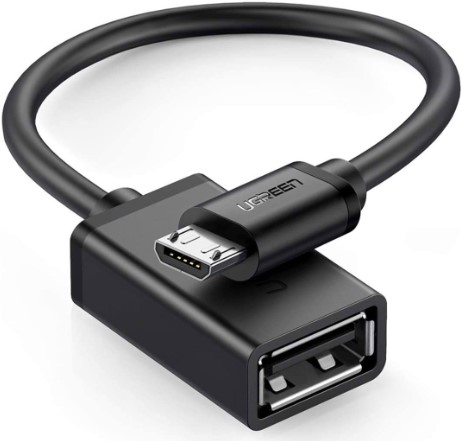
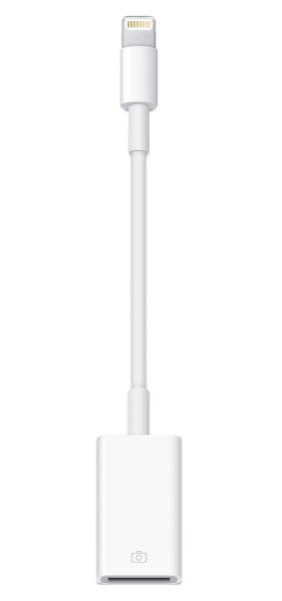
One end of the cable will be inserted into the camera, and the other end will be inserted into your monitoring device. However, for the sake of connectivity with an iPad, you will need a lightning-to-USB adapter for smooth connectivity.
Moreover, the USB cable included with VenusLiv is 10ft (3 meters) long, allowing you to set the camera and your iPad (monitor in this case) up to several feet of distance.
- Next, head over to the Google Play Store and download the DSLR remote control app. Unfortunately, for iPhone users, this process may require jailbreaking your device and following the instructions in a separate guide.

- After the app is installed, open it. Click on “live preview,” and that’s all you need to do. You can now view the live feed from your DSLR’s viewfinder on your smartphone or tablet. Since the DSLR and smartphone are physically connected via a cable, you won’t need to configure any Wi-Fi settings. However, it’s important to note that the length of your cable will determine the distance you can operate from your camera.
If you’re seeking an alternative to using an iPad as a camera monitor, I recommend considering the Hollyland Mars M1 Enhanced. This wireless video transmission system offers several advantages for monitoring your camera wirelessly:
- High-Quality Transmission: The Hollyland Mars M1 Enhanced supports 1080p60 video transmission with both HDMI input and output.
- Low Latency: It provides a low-latency transmission range of up to 300 feet, ensuring real-time monitoring without delays.
- OLED Screen: The built-in OLED screen allows for clear visibility even in challenging lighting conditions.
- 3-in-1 Switch Menu: With its intuitive 3-in-1 switch menu, you can easily navigate settings and customize your monitoring experience.
- Built-in LUT Support: The Hollyland Mars M1 Enhanced also features built-in LUT support, enabling precise color adjustments.
Whether you’re a professional filmmaker, live event producer, or content creator, the Hollyland Mars M1 Enhanced is an excellent choice for wireless camera monitoring. Say goodbye to tangled cables and enjoy the freedom of wireless monitoring.
Conclusion
In the dynamic realm of photography and videography, achieving perfection demands a dependable camera monitor. We’ve introduced a versatile solution: your iPad as a camera monitor. This guide carefully walks you through setup, opening doors to creativity. With advantages like a larger screen for improved visibility, touchscreen convenience, and real-time preview, your photography and videography are transformed. The iPad’s wireless connectivity enhances your field mobility.
But the innovation doesn’t stop there. We’ve also explored the intriguing realm of using your iPad as an iPhone camera monitor, offering you creative control and flexibility through third-party apps and AirPlay or Reflector 4. Additionally, we’ve shown you how to transfer iPhone camera files to your iPad, creating a convenient monitoring experience.
In summary, your iPad isn’t merely a tablet; it’s a gateway to superior photography and videography. With the techniques and tools presented here, you’re ready to transcend the boundaries of your creative vision. Your camera monitor is now as vast and dynamic as your imagination.
We highly value your feedback and reviews. Your insights can assist us in enhancing our content and providing you with even better information in the future. Have you tried using your iPad as a camera monitor? What challenges did you face, and what worked exceptionally well for you? Share your experiences, tips, and any questions you may have in the comments section below. Your input matters to us, and we eagerly await your contributions!
Frequently Asked Questions
Can I turn my iPad into a monitor?
Yes, you can use your iPad as a monitor. To do this, plug a USB-C Display AV Adapter or USB-C VGA Multi-port Adapter into the charging port on your iPad. Then, connect an HDMI or VGA cable to the adapter and the other end to the display, TV, or projector.
Can I use my iPad as a baby monitor?
Indeed, you can use your iPad as a baby monitor. Apps like Cloud Baby Monitor are available, allowing you to turn your Apple and Android devices into video baby monitors. One device, placed near your baby, captures video and audio, making it a reliable choice.
Can you use your iPad as a third monitor?
While Windows doesn’t natively support using your iPad as an extra display, there are third-party apps that offer a workaround. One free option is Splashtop Wired XDisplay, though the setup is more involved compared to using a Mac computer.
Can I extend my iPad screen to a monitor?
Unfortunately, you can’t extend your iPad’s screen to a second monitor in the same way you would on a desktop. You can mirror your iPad’s display or use AirPlay, but the iPad lacks the GPU power for true extended desktop functionality.
Can I connect a Sony camera to my iPad?
Yes, you can transfer photos taken with a Sony camera to your iPhone or iPad using the Wi-Fi function and the Imaging Edge Mobile app.
How can I turn my phone into a camera monitor?
You can use an Android phone to monitor your camera screen. To do this, you’ll need a capture card and an HDMI cable. Ensure your phone’s USB port supports the desired resolution and frame rate, such as USB 3.0 for 1080p at 60fps or higher.
How do I turn my tablet into a monitor?
To turn your tablet into a monitor for your PC, use a USB cable to connect the tablet to your computer. Open the appropriate app on both devices and select the option to “Extend desktop to this display.” Finally, establish the connection by selecting “Connect” on your Android tablet. This will allow your tablet to function as an extended display for your PC.
What are the advantages of using an iPad as a camera monitor?
Using an iPad as a camera monitor offers benefits like enhanced visibility, touchscreen control, real-time previews, and wireless connectivity. It provides a larger, more intuitive screen for composing shots and adjusting settings.
Can I use any iPad model as a camera monitor, or are there specific requirements?
Most iPad models are suitable for use as a camera monitor. However, ensure your iPad has a compatible port for connecting to your camera or that you have the necessary adapters for the connection.
Are there any recommended apps for using an iPad as a camera monitor?
Some popular apps for using your iPad as a camera monitor include Camera Plus, AirPlay, Reflector 4, and FoneTool. Each app offers unique features, so choose the one that best fits your needs.
What is the range for using an iPad as a camera monitor, and can I use it outdoors?
The range for using an iPad as a camera monitor depends on the connectivity method used. Wi-Fi and Bluetooth-based solutions typically have a range of around 30 feet, making them suitable for outdoor use within that range.
Can I use my iPad as a camera monitor for DSLRs and mirrorless cameras from different manufacturers?
Yes, you can use your iPad as a camera monitor for various DSLRs and mirrorless cameras, regardless of the manufacturer. The key is to ensure you have the right adapters and compatible apps for the connection.
Can I use my iPad as a camera monitor while recording video, or is it limited to photography?
You can use your iPad as a camera monitor for both photography and video recording. Many apps and cameras support live video previews on the iPad screen, allowing you to monitor your video recording in real time.
What are some potential challenges I may encounter when using my iPad as a camera monitor?
Challenges can include maintaining a stable wireless connection, ensuring compatibility between your camera and the iPad, and managing battery life on both devices during extended use. Additionally, using your iPad outdoors in bright sunlight may present visibility issues.
Are there alternatives to using an iPad as a camera monitor if I don’t have one available?
Yes, alternatives include using a dedicated camera monitor or external field monitor. These devices are designed specifically for monitoring camera shots and often offer advanced features for professional use. However, they are typically more expensive than using an iPad as a camera monitor.