.png)
Without a second thought, RODE mics have a massive respect in the industry. Artists, singers, and creators have been utilizing various types and models of RODE to enhance their audio. However, many users, especially beginners, may find it challenging to use RODE microphones on their recording devices.
So, if you’re one of them, this guide covers the steps to set up RODE wireless, USB, and on-camera microphones on your Mac, Windows, and DSLR camera.
How to Use RODE Microphones: Step-by-Step
In this section, you will explore steps to use wireless, USB dynamic, and on-camera shotgun RODE mics with your Windows and Mac computers and DSLR cameras.
Part 1: RODE Wireless GO II with Computer (Windows/Mac)
Using the Wireless GO II on your PC or Mac is a pretty straightforward process:
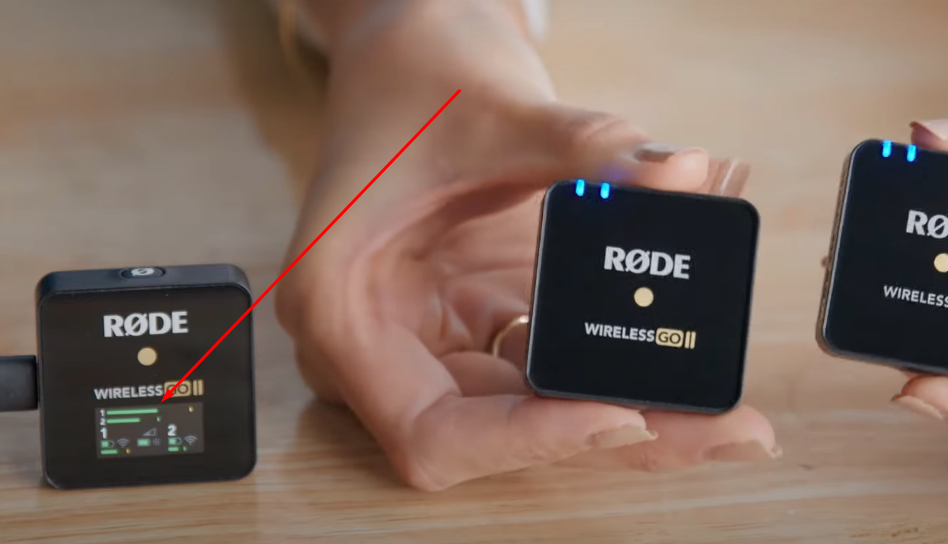
- Step 1: Unbox the RODE wireless Go II’s box and take out the transmitters (TX) and receiver (RX) unit
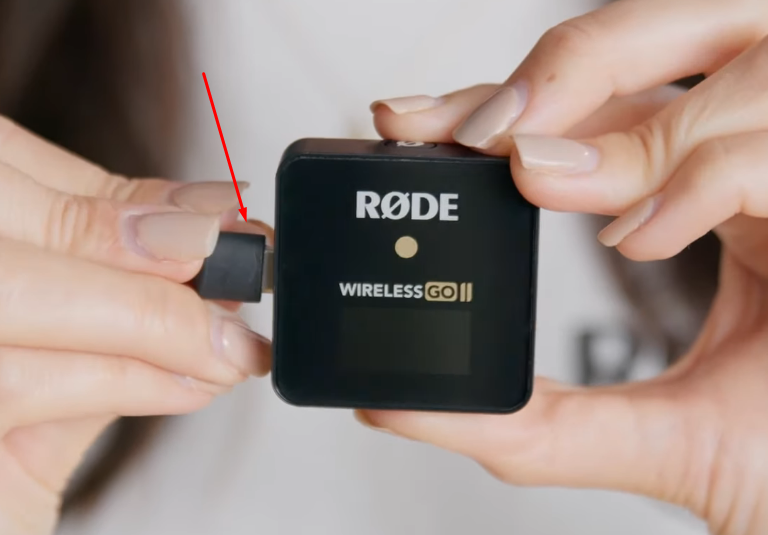
- Step 2: Grab the RX and look for the USB-C port
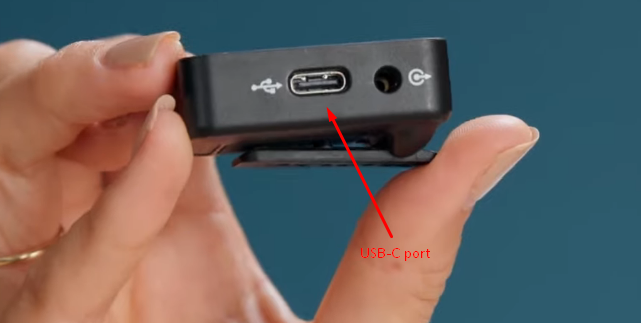
After locating it, insert the USB-C to USB-A cable (RODE SC20 Cable) into the RX and your Windows or Mac computer’s port. One end should be inserted into the RX and the other into your laptop/PC.
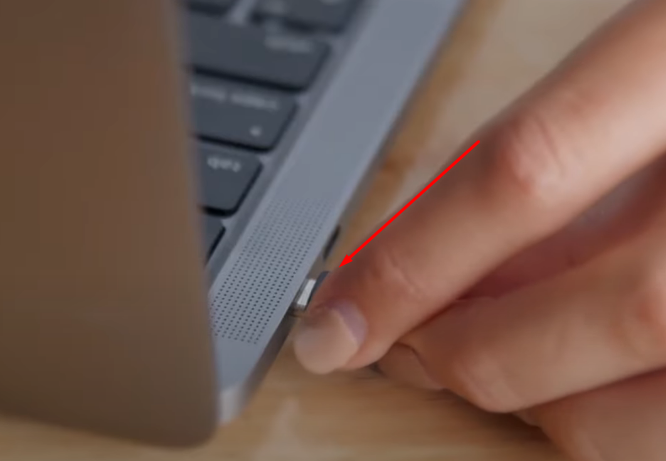
NOTE: You may also connect it using a 3.5 mm port using a different cable. However, for this demonstration, we have used the USB-C to USB-A connectivity. Additionally, if your computer has a USB-C port, you may need to use the RODE SC16 cable (or a USB-C to USB-C cable).
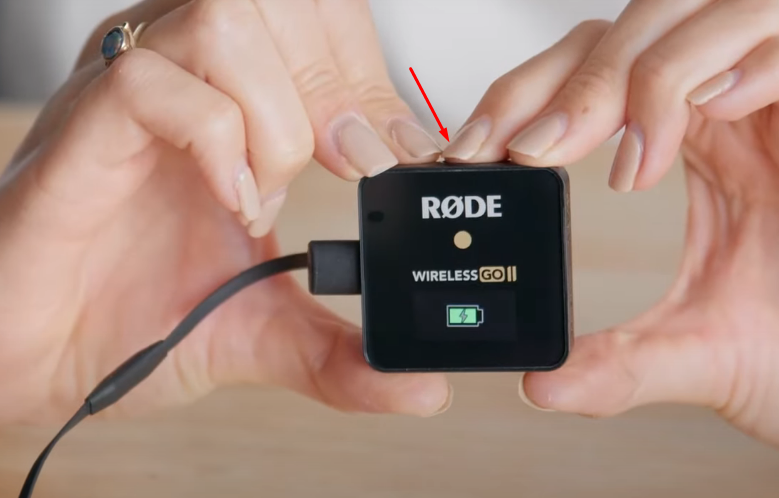
- Step 3: After connecting the RX, turn it on by pressing the power button at the top of the unit
- Step 4: On the other hand, turn on the TX units by pressing the power button
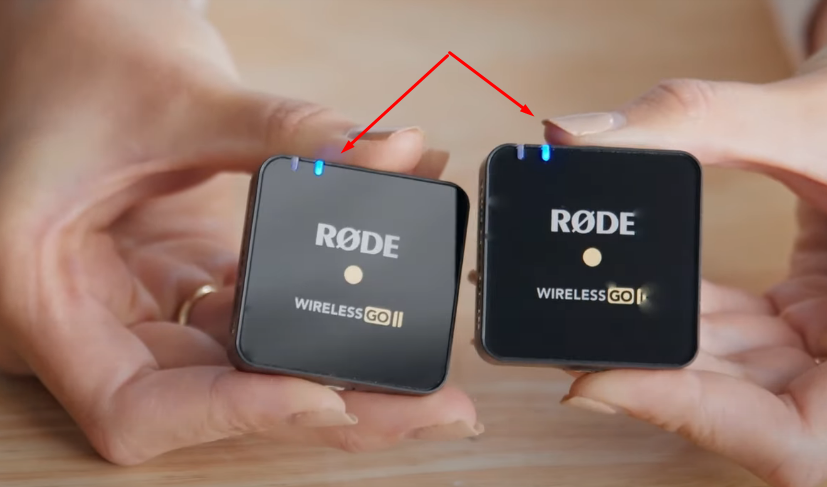
Once all units are powered, the RX unit should show both transmitters as channels on the display. The volume bars should move as you speak.
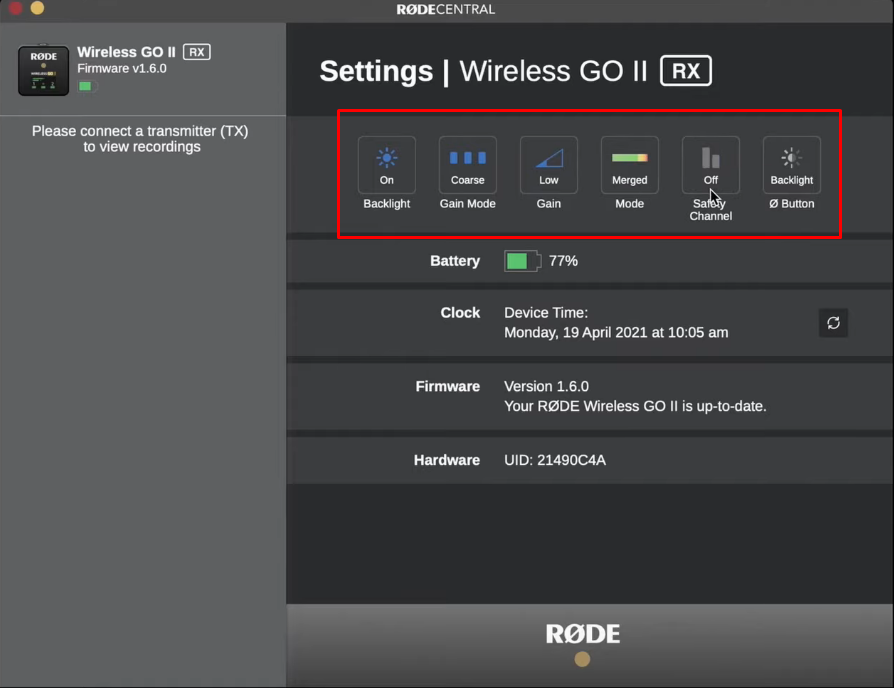
You can also download the RODE Central app to control features, such as the “Merged Mode” when using a single transmitter.
NOTE: While this microphone pairs automatically, you may need to press the pairing button on the RX unit in case the transmitters aren’t paired or the volume bars don’t move.
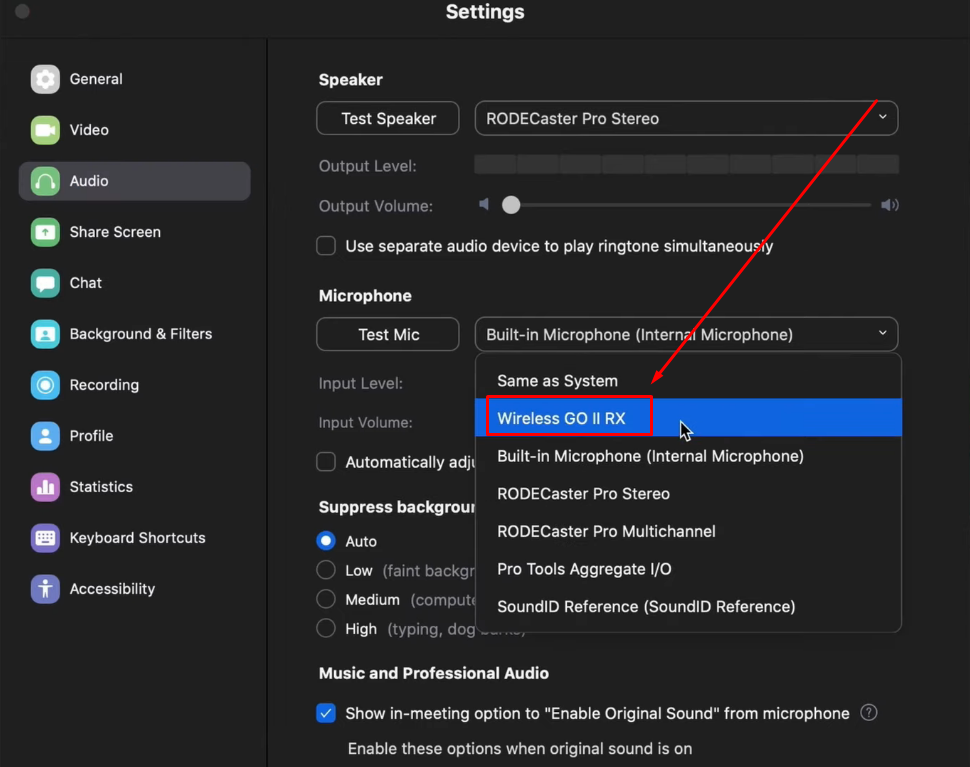
- Step 5: Next, you must configure the RX unit on your Mac or Windows computer so that the system can recognize the incoming audio
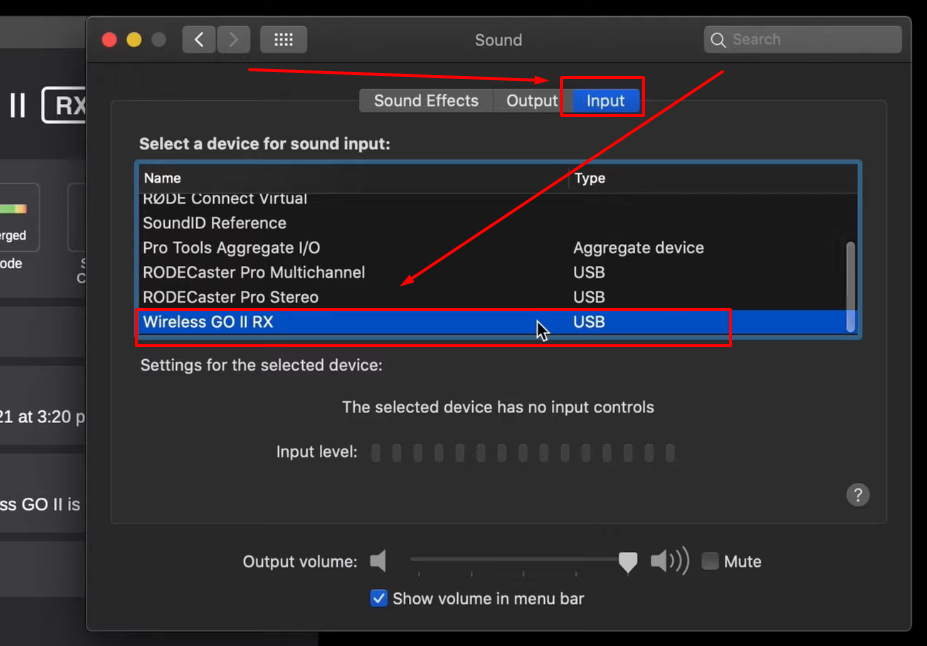
So, if you’re a Mac user:
- Go to your System Preferences (or System Settings)
- Choose Sound settings, and click on the “Input” tab
- Select “Wireless GO II RX” as your audio input device
On Windows:
- Go to Sound settings
- Choose the “Audio” option from the left sidebar
- Select “Wireless GO II RX” option from the dropdown menu of the “Microphone” section
- Step 6: Now, attach the transmitters to your shirt (or hold them in your hand). Make sure they are 6 to 8 inches away from your mouth for capturing clean audio
That’s all!
Also Read: How to Connect the RODE Microphone to an iPhone?
Part 2: RODE Podcaster USB Dynamic Microphone with Computer (Mac/Windows)
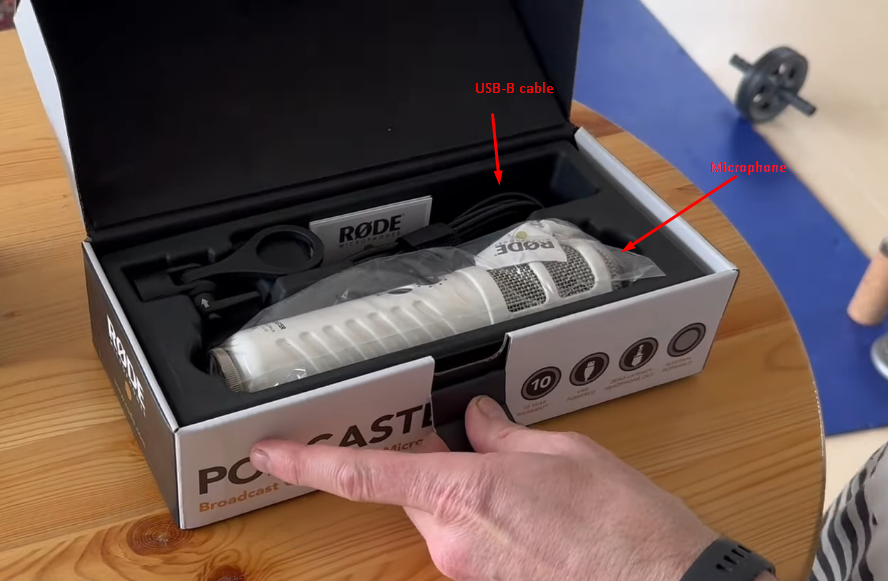
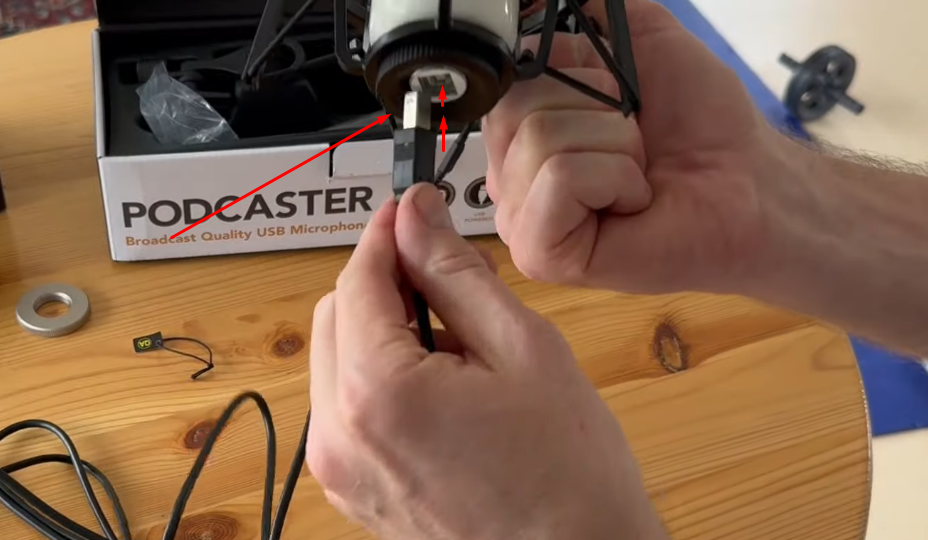
- Step 1: Unbox the package. Inside it, you will find the main microphone, a USB-B to USB-A cable, and a PSM1 shockmount
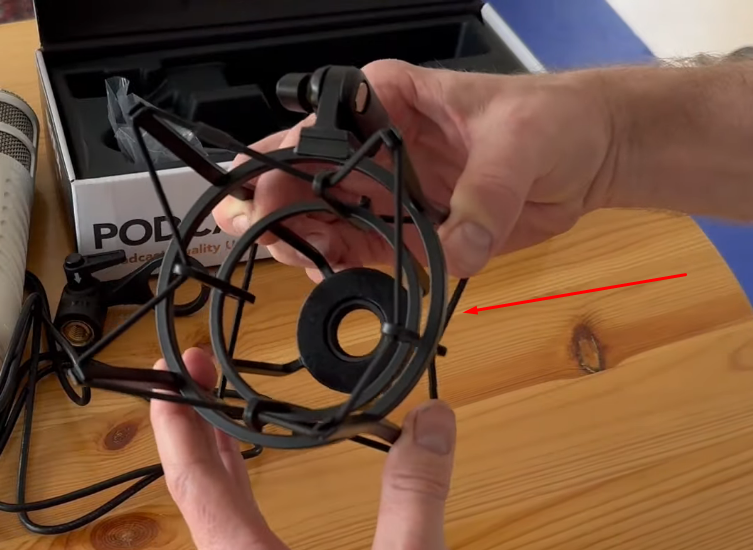
- Step 2: Carefully hold the mic out of the box, and unscrew the bottom part

- Step 3: Now, pick the shockmount, place the microphone inside it, and rotate it to fix it in the shockmount
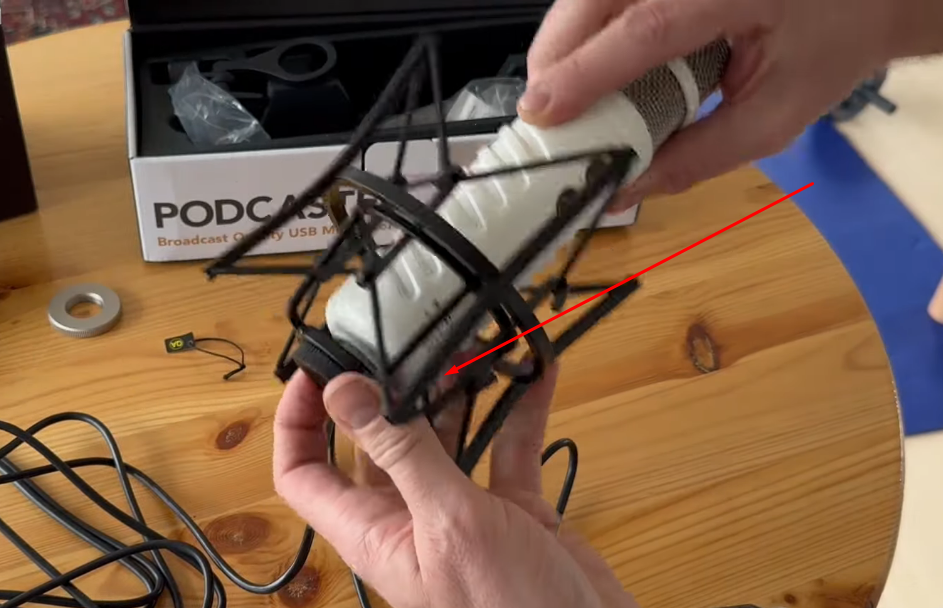
If you have done it correctly, it should look like this: (
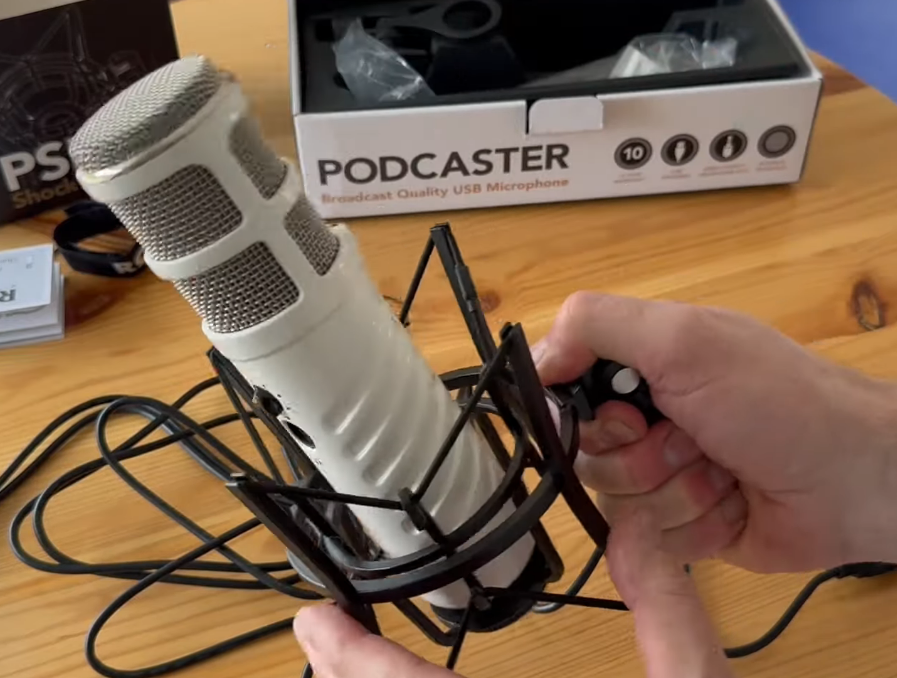
- Step 4: Then, insert the USB-B connector into the microphone port at the bottom while it is attached to the shockmount
- Step 5: Once done, it is time to attach the mic, along with the shockmount, to the boom arm. Any standard boom arm (desk mic stand) should work if it’s rigid enough to carry the mic’s weight.
To do that, hold the boom arm in one hand. Use the other hand to invert the microphone in a way that the shockmount’s threaded connector is clearly visible.
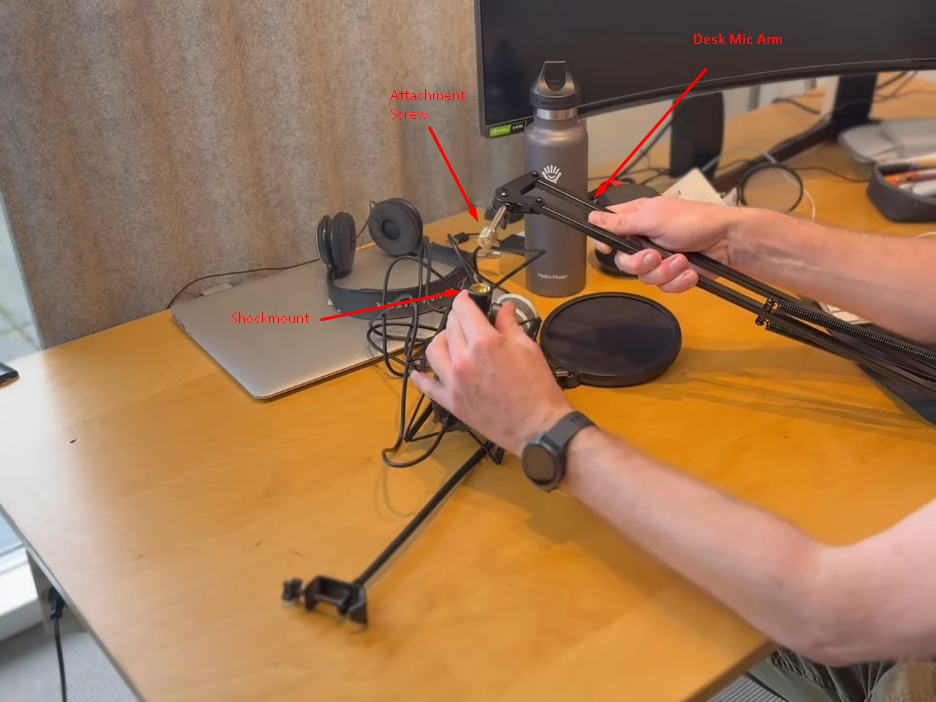
Next, insert and fix the the boom arm thread (attachment screw) into the threaded connector.
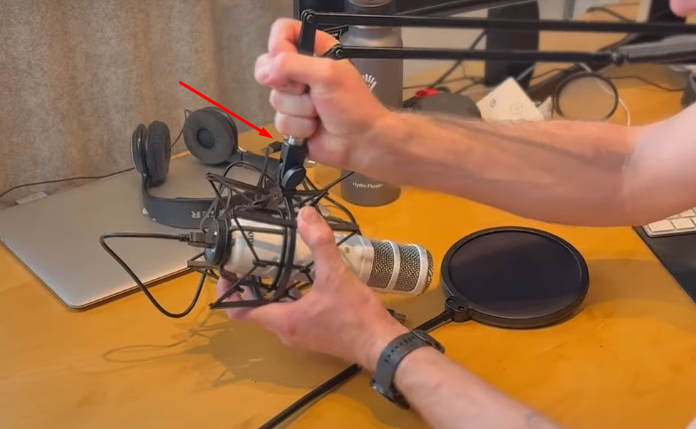
After that, use the clamp to position the boom arm and adjust the position of the mic.
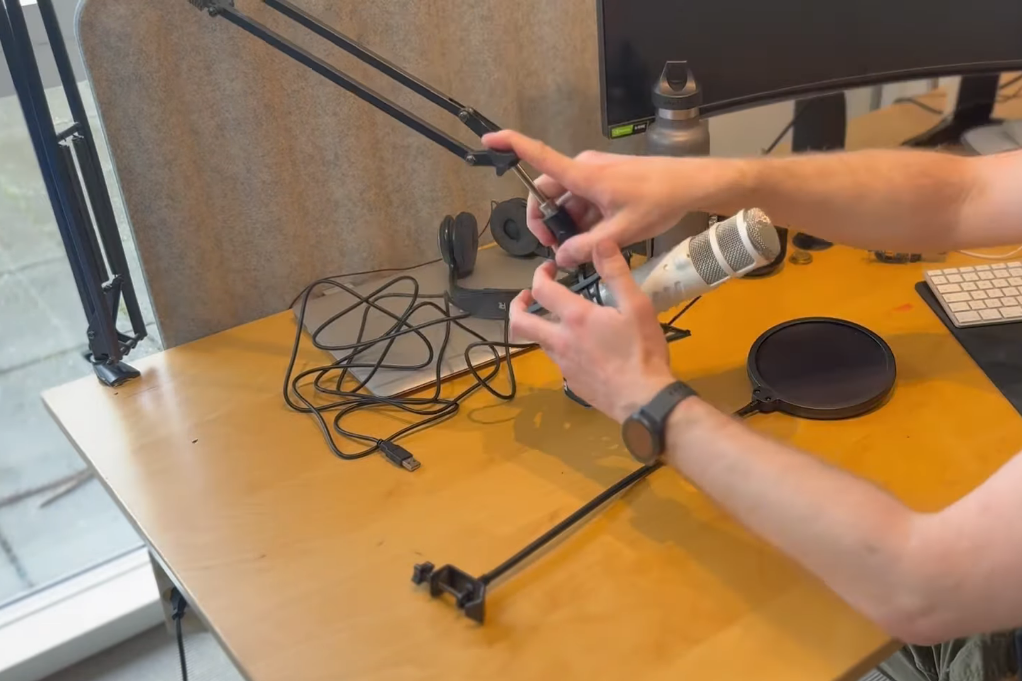
- Step 6: Insert the other end of the USB cable into your computer’s USB-A port
- Step 7: Configure the microphone from your Windows/Mac’s audio settings (See Step 5 of Part 1)
- Step 8: Adjust the position of the mic by keeping a 2 to 6-inch distance from your mouth. Also, consider using a pop filter to ensure plosive sounds don’t disrupt your audio quality
And you’re all set to use your RODE Podcaster microphone
Part 3: RODE VideoMic Pro On-Camera Shotgun Microphone with a DSLR
To use a RODE shotgun mic like the VideoMic Pro, first, you should understand how its functions work.
Behind the camera, you will find two options, each with a dedicated selectable button/mode. The first function lets you:
- Turn off the mic
- Turn on the mic
- Activate the mic on the high-pass filter
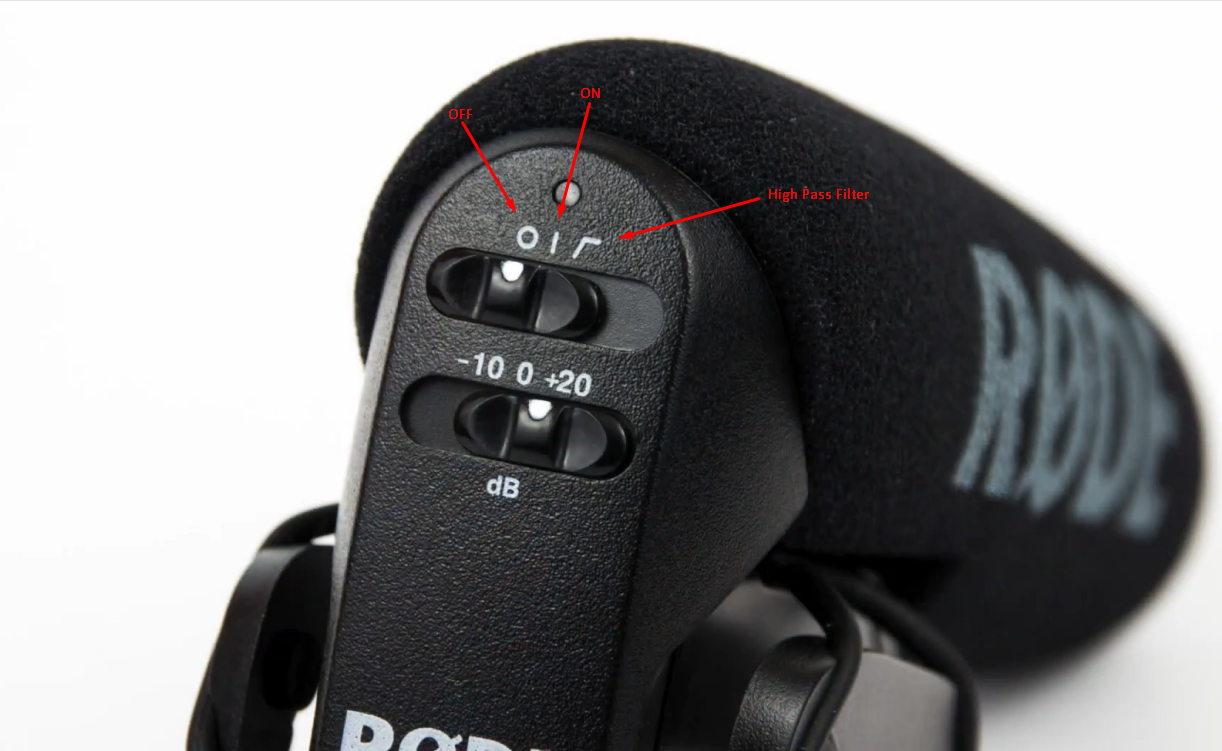
Using the mic in the high-pass filter mode will suppress noises from the surroundings. For instance, if you’re recording in an industrial environment.
The second function allows you to set gains (pre-gains):
- -10 dB
- 0 dB
- +20 dB
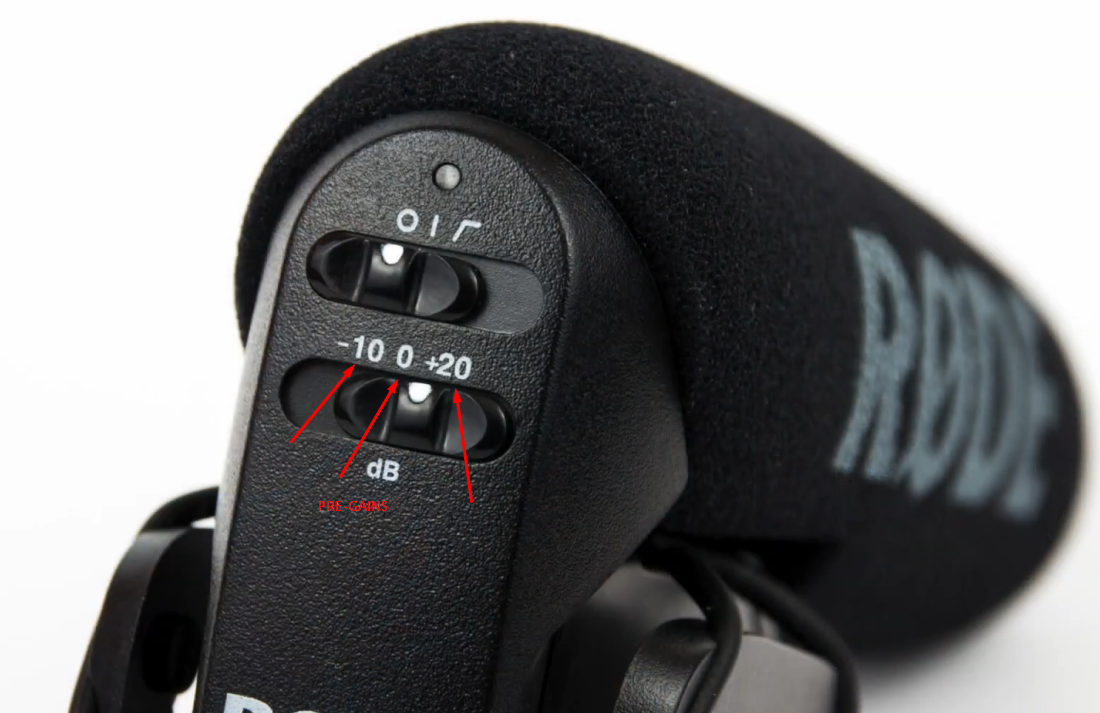
The -10 dB should be used to record clean vocals in places, such as concerts, where there is a high level of noise. The +20 dB mode is ideal for picking up clear and rich audio from the speaker in quiet environments.
Now, keeping all this information in mind, let’s learn how to use this RODE microphone.
NOTE: A Canon DSLR is used for the demonstration of this section. You may have different camera functions, depending on the brand and model. Nevertheless, the basic steps should be similar.
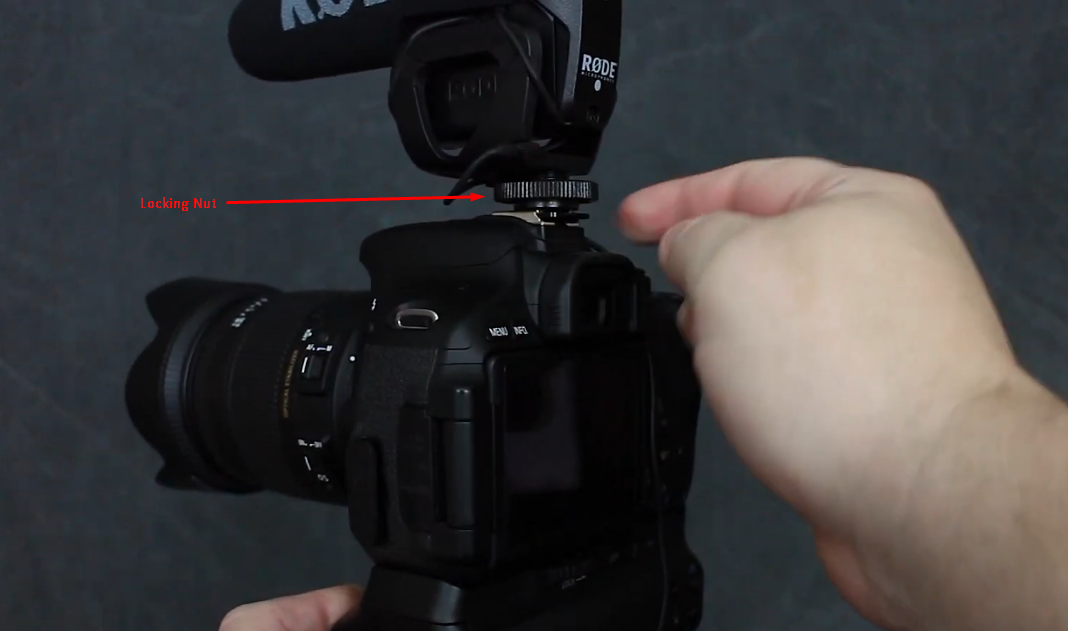
- Step 1: Place the mic on the camera by sliding it into the hotshoe
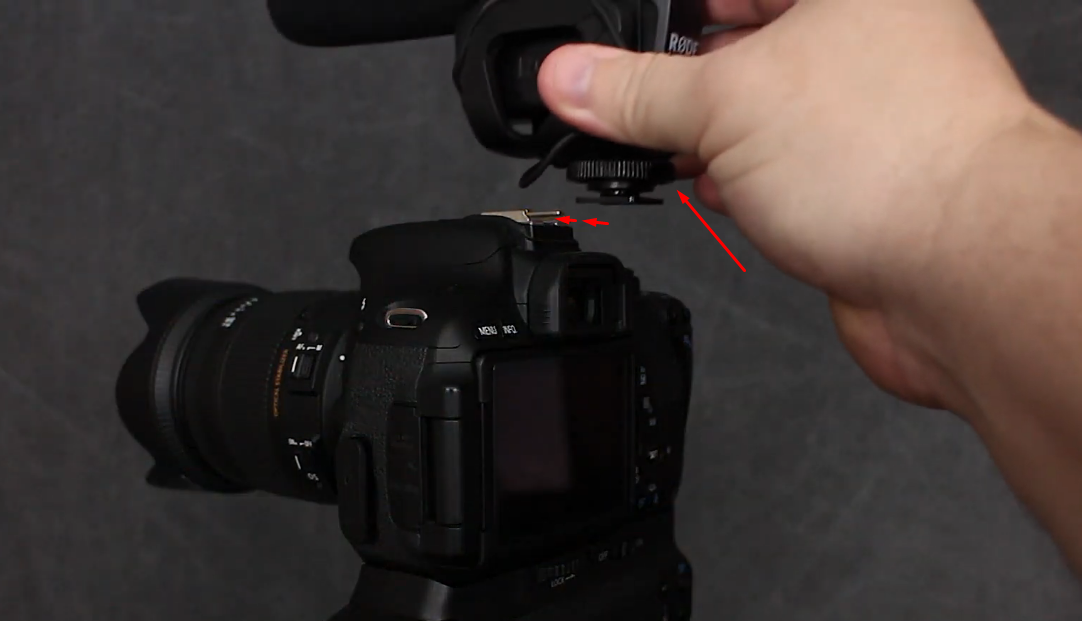
- Step 2: Then, tighten the screw so that the camera stays firm in its position and doesn’t fall during movement
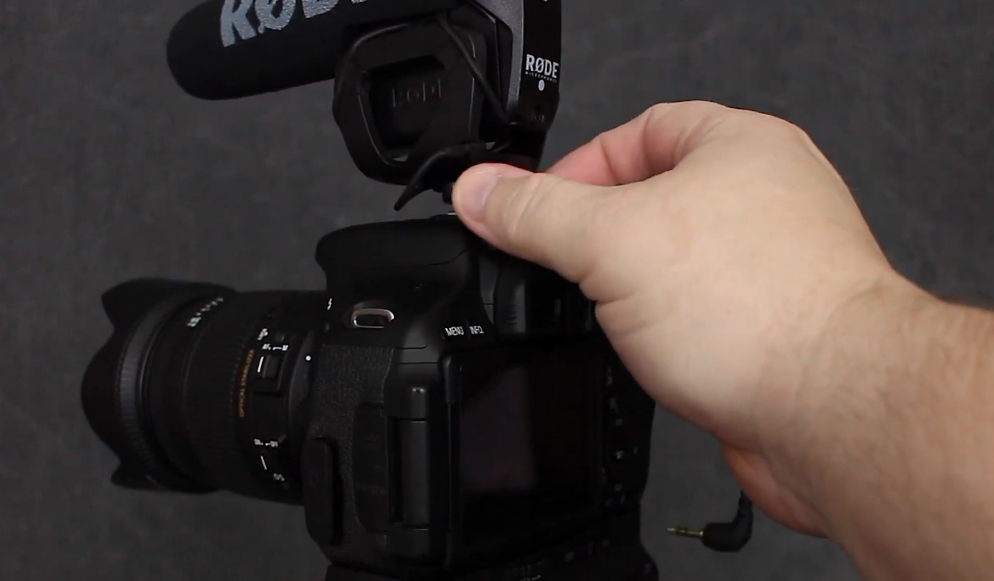
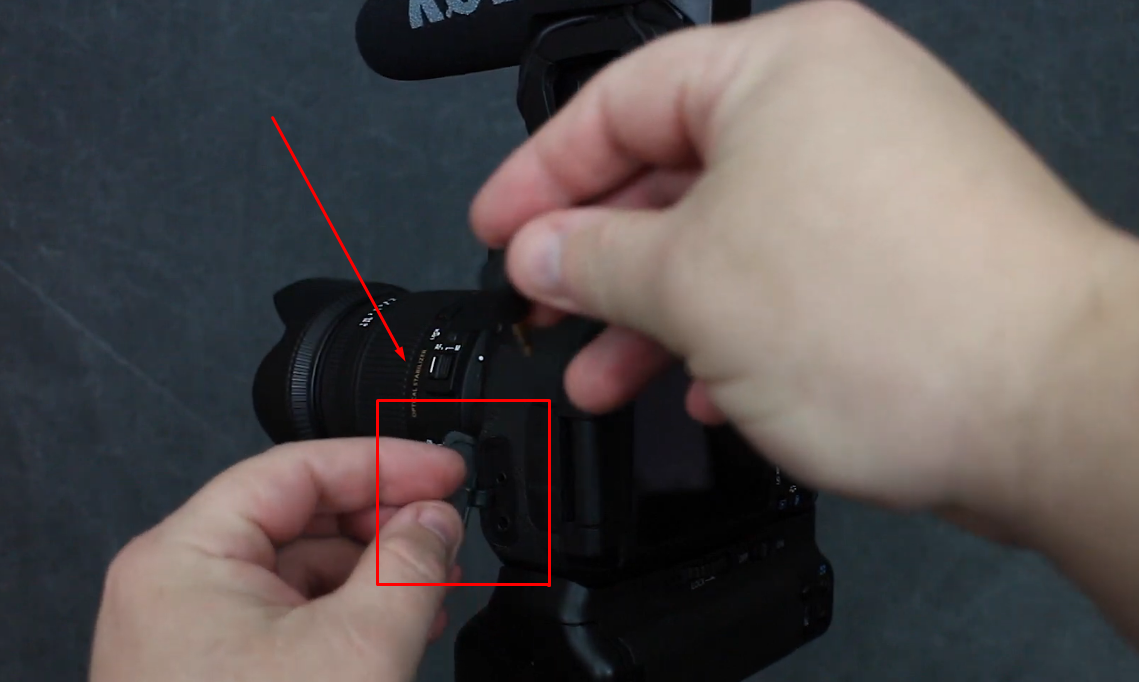
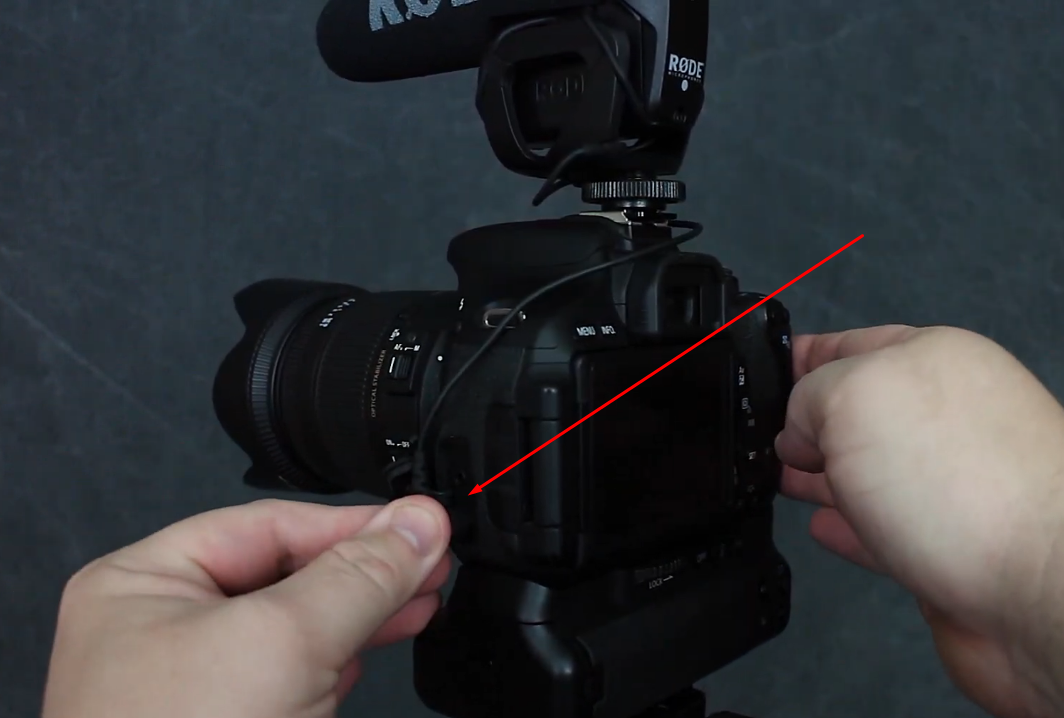
- Step 3: The mic should have the 3.5 mm cable attached to it. So, insert the other end into the camera’s audio port
- Step 4: Next, turn on the camera and go to the menu by pressing the “MENU” button

Also, make sure that you have selected the video recording mode to view related options in the menu.
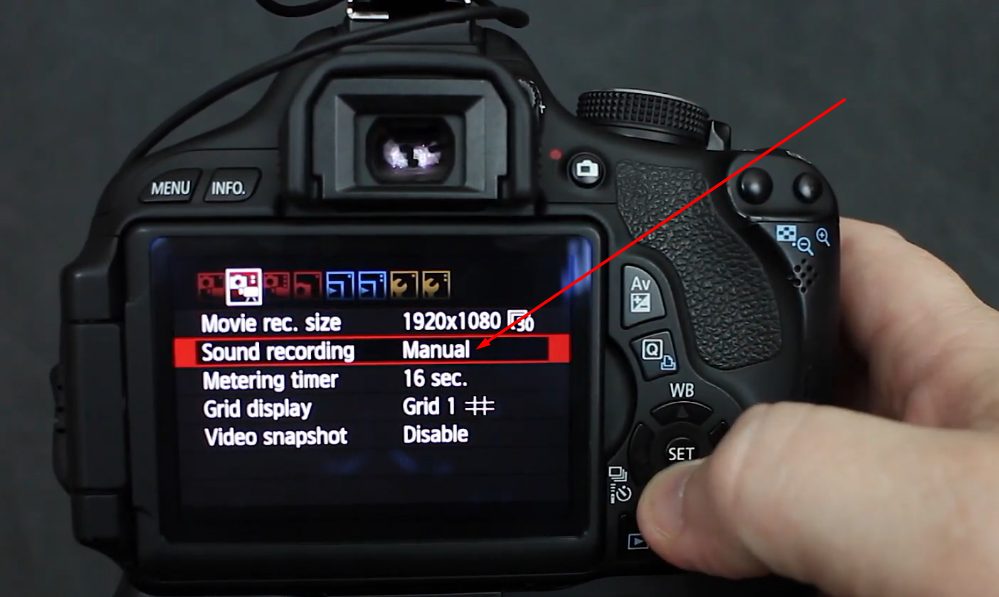
- Step 5: Now, go to the sound recording option and select “Manual”
- Step 6: Once done, locate the recording level (Rec. level) option and adjust the levels to 3 to 4 stops high from the beginning
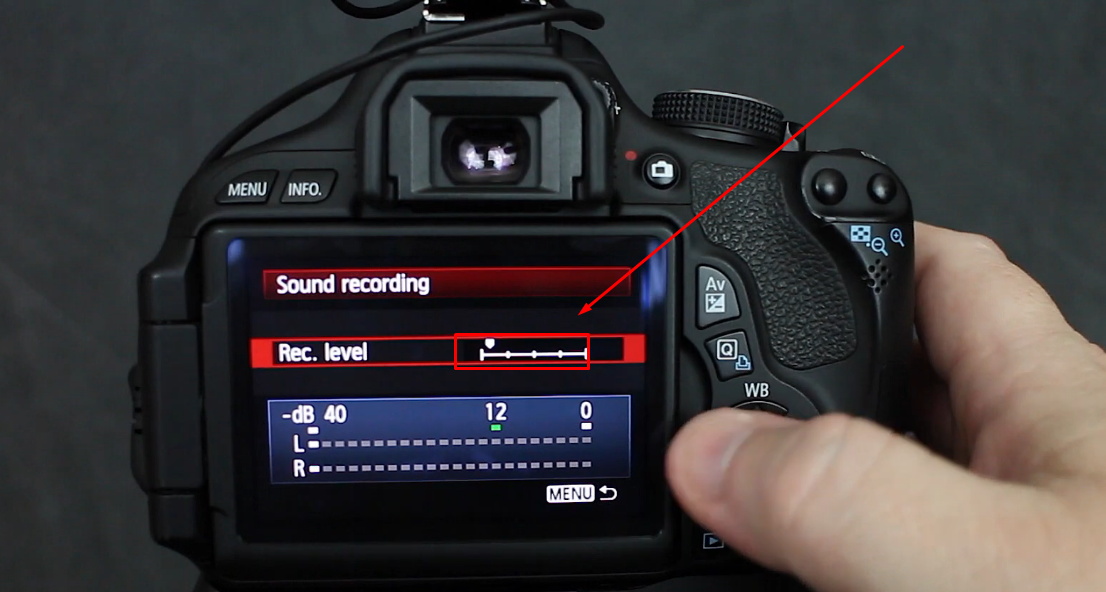
NOTE: If the recording level is set in the middle or selected to full, you may experience a lot of hissing sound in your recordings.
- Step 7: Then, turn on the camera and set the gain to +20 dB since it is a standard format most videographers use
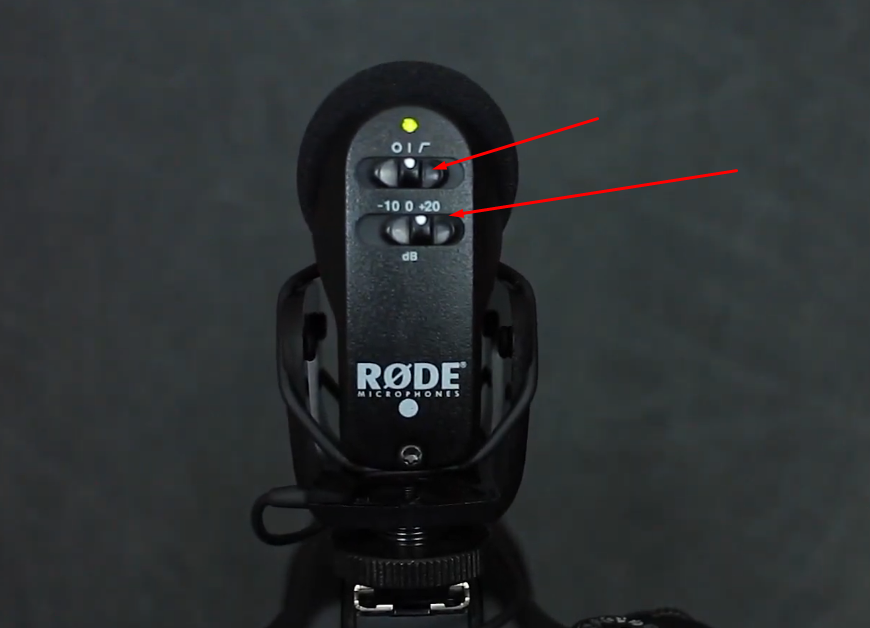
However, you can always set it as per your recording environment and preference.
Now, you are ready to use the RODE VideoMic Pro with your DSLR.
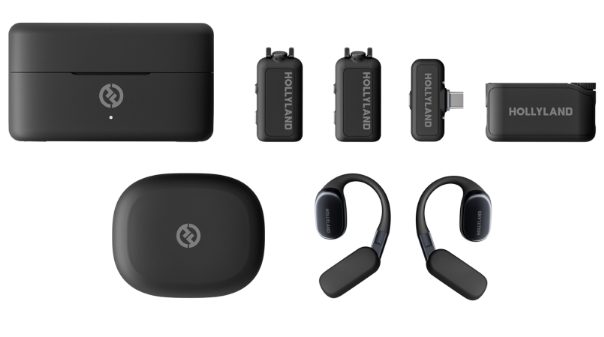
Pro Tip: Not all mic may work smoothly with your recording devices. That’s why creators seek an all-in-one microphone that offers universal compatibility and the latest features, just like the Hollyland Lark M2S.

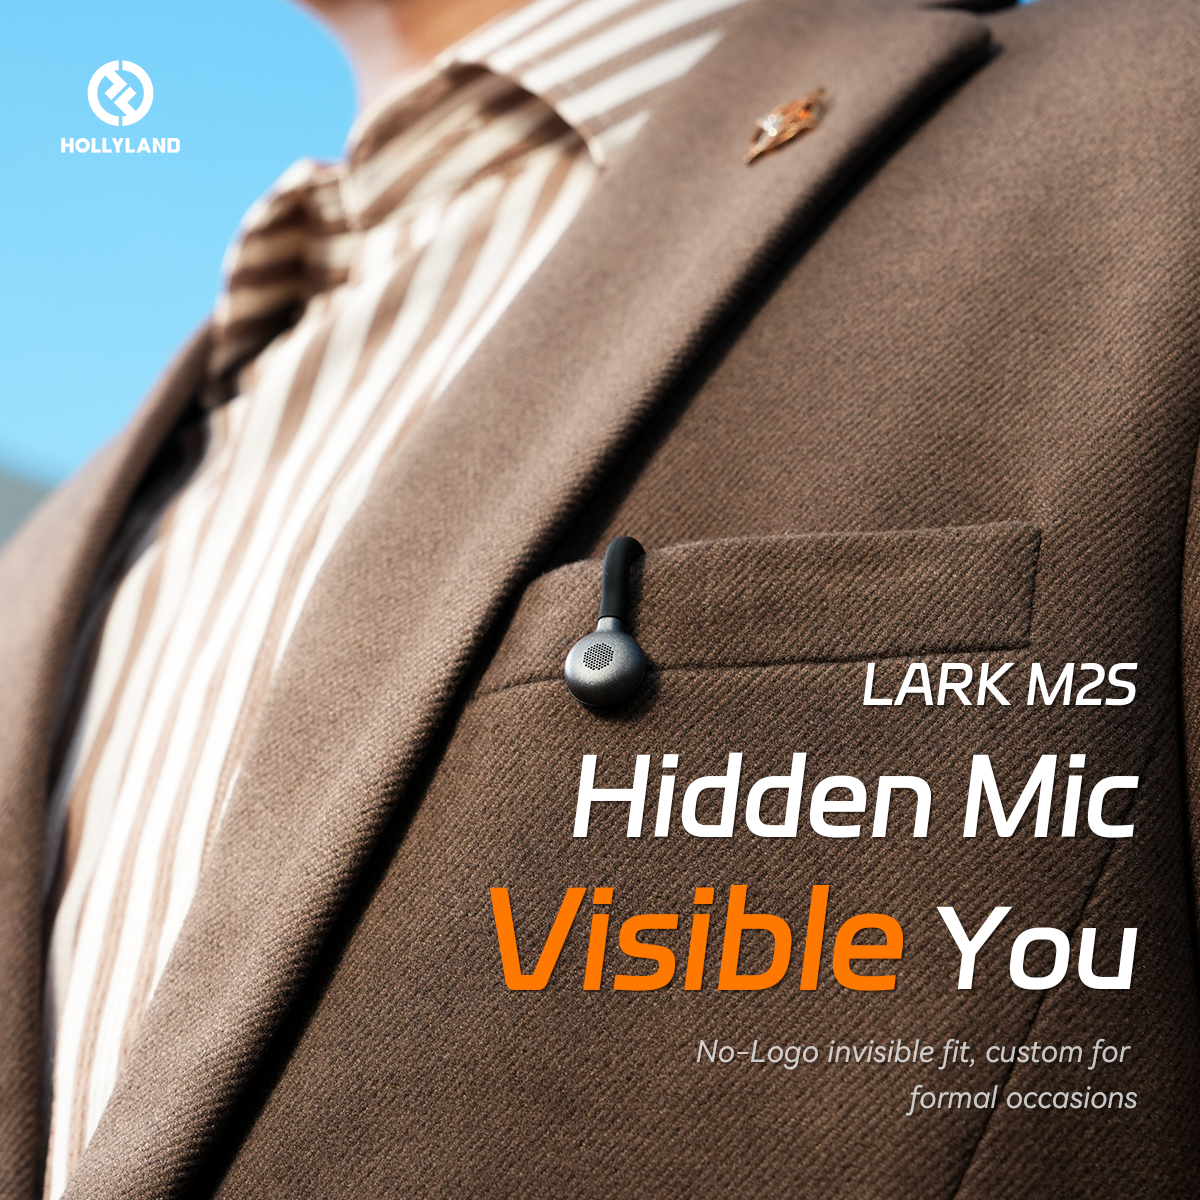
Lark M2S is a favorite wireless lavalier microphone kit of many vloggers, YouTubers, streamers, and content creators. Its logo-free design and tiny size make it go unnoticed on every occasion. Additionally, the titanium clip-on provides a secure grip when attached to any fabric. This discreet mic lets you record high-quality audio wirelessly up to 1000ft. But that’s not everything! It offers brilliant features, including wide compatibility, Environmental Noise Cancellation (ENC), and 9 hours of battery life.
Conclusion
Knowing how to use RODE microphones with your computer, camera, or any other recording device can help you improve the audio quality of your recordings. While this article has focused on setting up and operating Wireless GO II, Podcaster USB mic, or the VideoMic Pro on-camera mics, the steps mentioned for all these microphones should also help you use other RODE models without a sweat.
Frequently Asked Questions about Using RODE Microphones
Q1. How do you record music at home using a RODE USB mic?
Using a RODE USB mic at home is honestly easy. You don’t need any fancy gear. No audio interface, nothing extra. Just plug the mic into your computer’s USB port. That’s it. Wait a second or two, and your computer should recognize it. Then open your music app or recorder, choose the mic as your input, and hit record. There’s no need to stress over setup. It works well for beginners and even folks who’ve done this before.
Q2. What exactly is the RODE Connect software for?
RODE Connect is a user-friendly app made for podcasts and livestreams. It lets you link up to four people with certain RODE mics. You can control audio levels, apply effects, and record everything from one spot. The layout feels easy to use and is inspired by the RODECaster Pro. Whether you’re chatting live or recording episodes, the software makes everything feel more organized. It’s a solid tool for producing clean and professional-sounding audio.
Q3. Do you have to pay for RODE Connect?
Nope, RODE Connect doesn’t cost a thing. It’s a totally free software that helps with podcasts and streaming. You can download it without needing a subscription or payment. Just install it, connect your compatible mic, and you’re all set to record. It’s designed to make things simpler without adding extra expenses. Great for beginners and experienced creators who want good control over their audio setup.
Q4. How to check if your RODE Wireless GO II mic is recording?
To see if your RODE Wireless GO II is actually recording, take a look at the receiver. There should be a red REC icon just above the transmitter’s channel. That little red light means your audio is being saved. If it’s not showing up, make sure the transmitter is on and linked properly. A quick glance at the receiver screen can help you avoid missing any important recordings.
Q5. What to do if a RODE mic stops working?
If your RODE mic isn’t picking up sound, check the basics first. Confirm that the cables are plugged in right and try a different port. Sometimes, a faulty cable or outdated driver can cause problems. If it’s an XLR mic, test the interface as well. Restart the system and see if the mic shows up again. If nothing works, it might be time to reach out to RODE support for help.