.png)
There’s nothing more frustrating than recording a great video only to find the audio is a mess. Whether it’s background noise, distortion, or sound that just feels off, poor audio quality can ruin the entire experience. That’s why capturing clean sound from the start is so important.
A wireless mic like the Hollyland LARK MAX 2 can make a big difference. With 32-bit float recording, you have more room to adjust levels without compromising quality. And with OWS Bluetooth monitoring, you can listen in real time and catch issues before they slip through.


But if you’re already stuck with bad audio, here’s how to fix it.
Identify the Audio Issue
Before you can fix bad audio, you need to figure out what went wrong. Is it the file? The recording? The playback? Every issue has a unique solution, so identifying the root cause is the first step.
Check for Codec Compatibility
Some audio issues are caused by codec problems. Codecs are tools that compress and decompress audio. If your video player does not support the codec used in the file, the sound might not play properly or at all. Try opening the file in another media player or converting it using a reliable tool.
Look for File Corruption
Audio problems can also happen when a video file becomes damaged. This can occur due to bugs in camera software, sudden shutdowns, or storage errors. You might hear distorted audio or notice that the sound is missing or out of sync. Re-downloading, repairing, or converting the file can sometimes help.
Revisit Your Recording Setup
Poor audio often starts with poor recording practices. A microphone placed too close to a fan or air conditioning unit can ruin your audio with a steady hum. Not monitoring the sound in real time can also lead to problems you do not notice until it’s too late.
Fix 1: Try Another Media Player
Sometimes, the easiest fix is also the most effective. If your video has sound issues, don’t jump straight into editing software. First, test the file in a different media player. Different players use different audio codecs, so switching might solve the problem instantly.
Here’s how to do it:
- Try using a reliable media player like VLC Media Player, KMPlayer, or PotPlayer. These are popular choices because they support a wide range of audio and video formats.
- If you don’t have these players already, visit their official websites to download the latest version.
- Play the video from the beginning. Listen for issues like missing sound, strange distortion, or audio that doesn’t sync with the visuals.


- If the issue is still there, open the same video in a different media player. This helps confirm if the problem is with your original player and not the video file itself..
Fix 2: Reformat your Video to a Different Format
If switching media players didn’t fix your audio issue, the next step is to reformat the video. This is a great method for dealing with bigger problems in the video file. Sometimes, simply changing the file type can fix sound issues like distortion or audio that goes out of sync.
Here’s how you can do it using CloudConvert, a free and reliable online tool:
- Open your browser and visit the CloudConvert website. It works directly in your browser, so you don’t need to install anything.
- Click the Select File button. You can choose a file from your computer, Google Drive, Dropbox, or even paste a URL if your video is online.

- In the Convert to menu, select a format like MP4. It’s widely supported and works well across most devices and players.

- CloudConvert allows you to tweak extra options. You can change things like resolution, codec, or audio bitrate if needed.

- Click the Convert button. The process may take a few minutes, depending on your file size.

- When the conversion is complete, download your file. Test the new video to check if the audio problem is gone.

Fix 3: Remove Background Noise
Background noise can ruin even the best video. A low hum or buzz might sneak in from a power cable or a faulty connection. This often happens when power cords cross over mic cables or when the cables aren’t grounded properly. Thankfully, most editing tools now offer easy ways to clean up these unwanted sounds.
The steps vary with each editing software, but here’s how you can remove background noise using Descript:
- Sign up for Descript and start a fresh project. Drag and drop your video file into the window. Descript will begin transcribing your video automatically, which helps in spotting and editing audio issues quickly.

- Go to the Underlord section and select Sound Good tools. These are built to detect and clean background noise like low hums, air conditioner sounds, or buzzing.
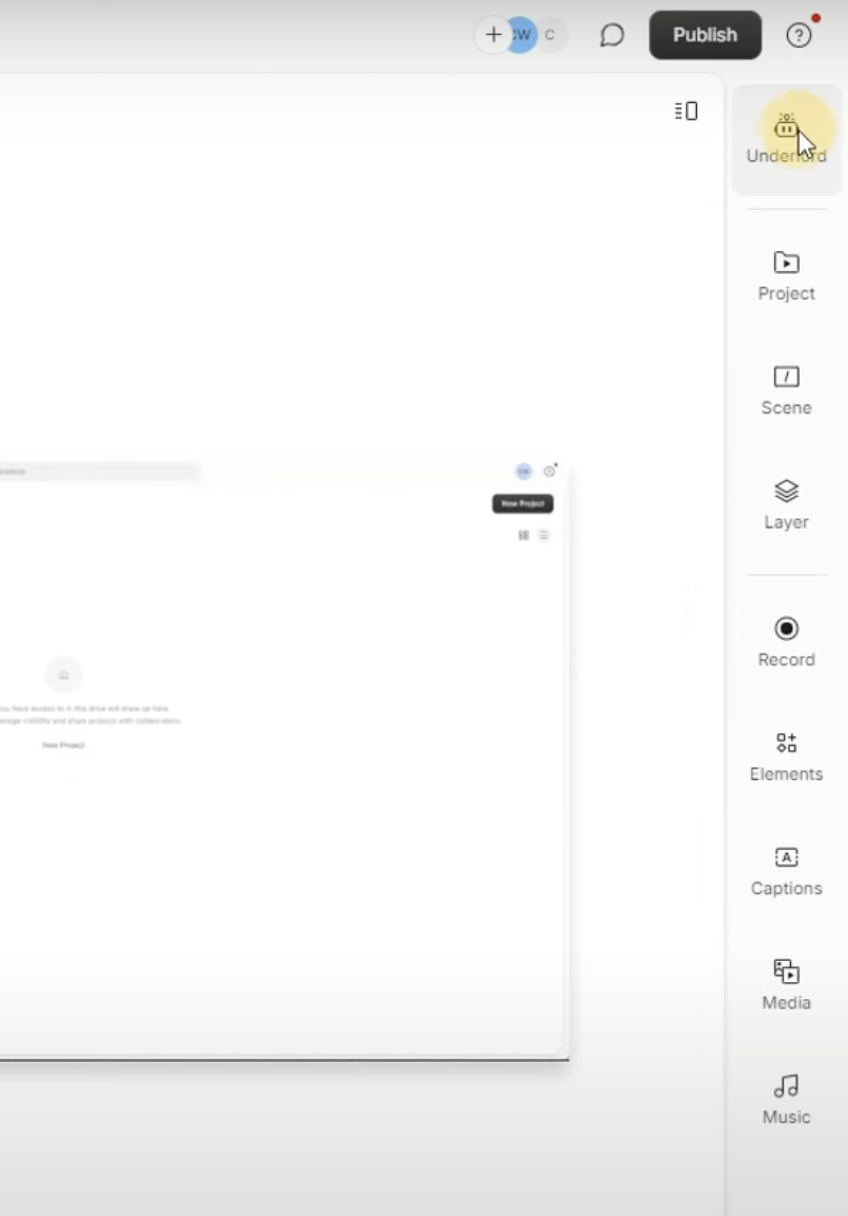
- Choose Studio Sound to make your audio cleaner and clearer.

- Once you’re happy with the results, click Publish and head to the Export tab. Pick your preferred file type, adjust your settings, and click Export to save the clean version of your video.
Fix 4: Trim Clips for Better Audio Flow
Sometimes, all your audio needs is a little cleanup. Trimming clips can enhance the sound and feel of your video. It helps remove unwanted sounds, long pauses, or distracting bits that interrupt the flow. Clean, well-timed audio keeps your audience engaged and focused.
Here’s how you can trim clips using Canva’s video editor:
- Open Canva and create a new video design. Upload your video file. Canva supports various formats, including MP4, MOV, MKV, and more.
- Click the video in the timeline. Hover over the beginning or end until a double arrow appears. Drag to shorten the clip. You can also use the Trim tool (scissor icon) to set an exact length.


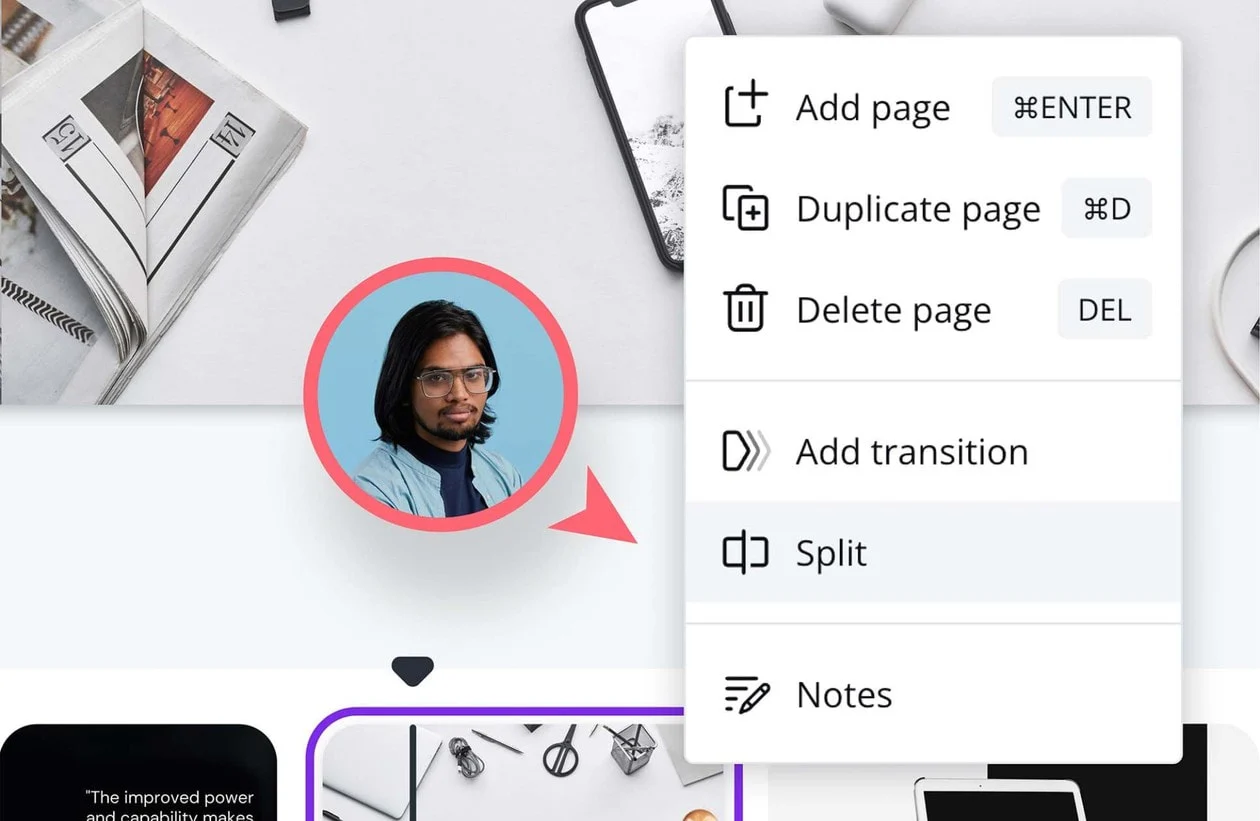
- If you want to cut out a section in the middle, right-click on the timeline and select Split. You can remove, move, or adjust the audio flow without breaking the rhythm.
- Add text, adjust volume, or blend clips together with smooth transitions. You can even create loops or turn clips into GIFs.
- Export the final result as a high-quality MP4 or share it directly to your social platforms.
Fix 5: Add Music
If your voiceover or on-camera audio has a faint hiss or feels too thin, adding background music can help smooth it out. A gentle music track gives the ear something else to focus on. It draws attention away from small audio flaws and adds energy to your video. The key is to blend the music in carefully so it supports the voice without overwhelming it.
Here’s how you can add music using Clideo’s Music Adder:
- Go to Clideo’s Music Adder and click Choose file to upload your video. You can also upload from Dropbox or Google Drive if needed.

- Click Add audio in the editor panel. Choose a track from your device. If the music is shorter than your video, it will loop automatically, but you can turn that off if you want.

- Drag the audio timeline or enter a timestamp to decide when the music should start. Use the Trim audio tool to choose a specific section of the track.
- Set the music and video volume separately. Lower the music when someone is speaking, then bring it back up after. This way, the voice stays clear and the music adds depth without getting in the way.
- Choose your output format. MP4 is selected by default. Click Export, then watch a preview. If everything sounds good, download the final video or save it to Google Drive or Dropbox.


Conclusion
Fixing audio in a video might seem tricky, but it becomes easier when you know where to start. Whether it’s switching media players, trimming clips, or cleaning up background noise, each step helps bring your sound back to life. Remember that good sound matters. Take the time to fix it, and your video will instantly feel more professional.
FAQs
How to improve old recordings?
Start by using EQ to clean up muddy frequencies or boost clarity. Then apply compression to even out volume spikes and bring a more balanced feel to the audio. Adjust the tonal balance to add warmth and presence without making it sound artificial. Finally, use an audio leveling plug-in to smooth everything out and create a consistent, polished sound.
How to fix distortion in audio?
Distorted audio can quickly ruin an otherwise great recording. One common cause is peaking, where the sound gets too loud and clips. To fix this, try using a compressor. A compressor reduces the dynamic range, which helps control the loudest parts without affecting the softer ones. This creates a smoother, cleaner sound and minimizes harsh, unwanted spikes.
How to fix crackling audio recording?
Crackling audio is often caused by input levels that are too high. Try lowering the recording level in your system settings or software. If you’re using a microphone or external device, reduce its volume as well.