.png)
Audio issues on Windows 11 can pop up out of nowhere. One moment, everything’s fine, and the next, your sound is completely gone or oddly distorted. Whether you’re in a meeting, editing a video, or just trying to enjoy music, it’s incredibly frustrating.
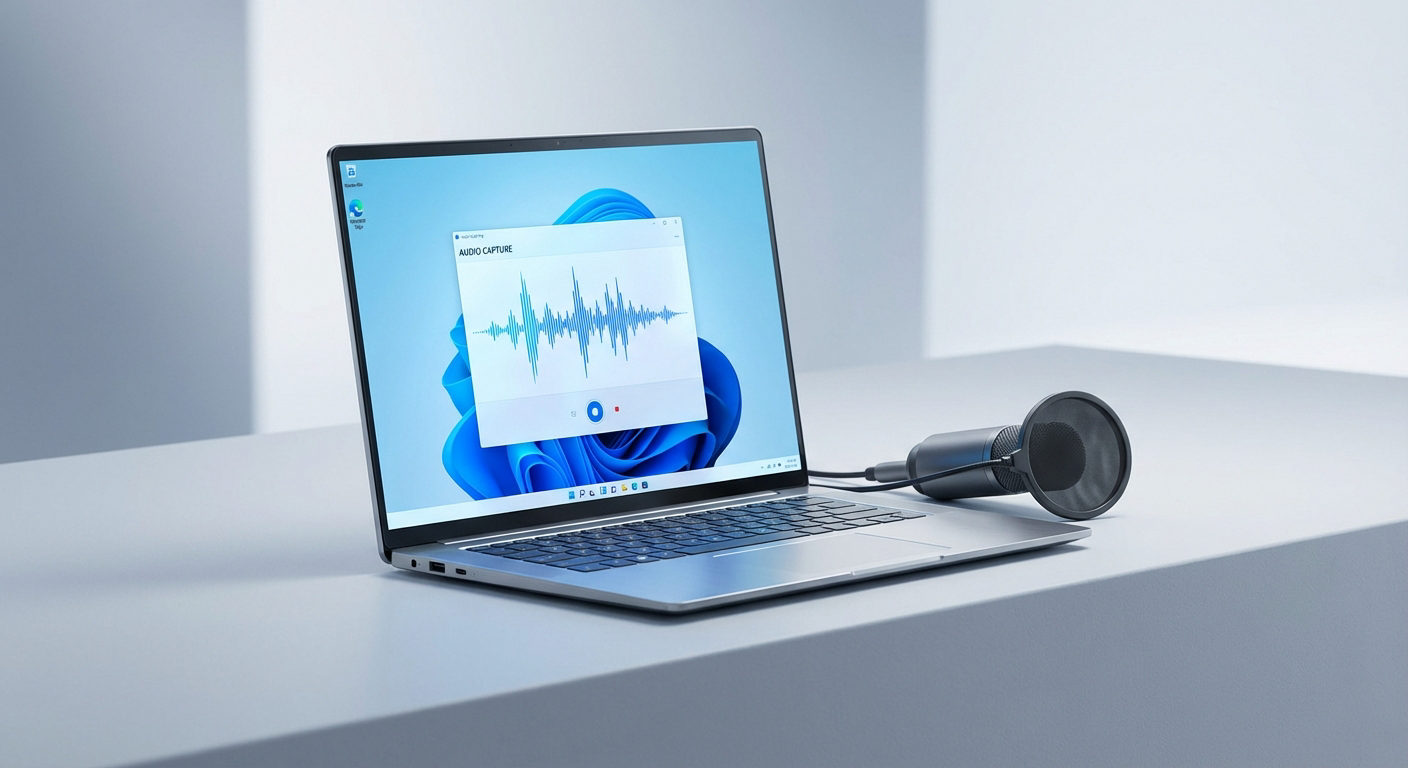
If you’re using a wireless microphone like the Hollyland LARK MAX 2, you’ll immediately notice how much clarity matters. With its 32-bit float recording, your audio stays clean even with sudden volume shifts, and the OWS Bluetooth monitoring helps you catch issues in real time. But if you’re still facing issues, here are the most effective ways to fix audio on Windows 11.

Hollyland LARK MAX 2 - Premium Wireless Microphone System
A premium wireless microphone for videographers, podcasters, and content creators to capture broadcast-quality sound.
Key Features: Wireless Audio Monitoring | 32-bit Float | Timecode
Run the Windows Audio Troubleshooter
The Windows Audio Troubleshooter is simple to use and can fix many common issues on its own. It scans your system, finds problems, and applies quick fixes automatically.
Here’s how to run it:
- Click the Start button and open Settings.

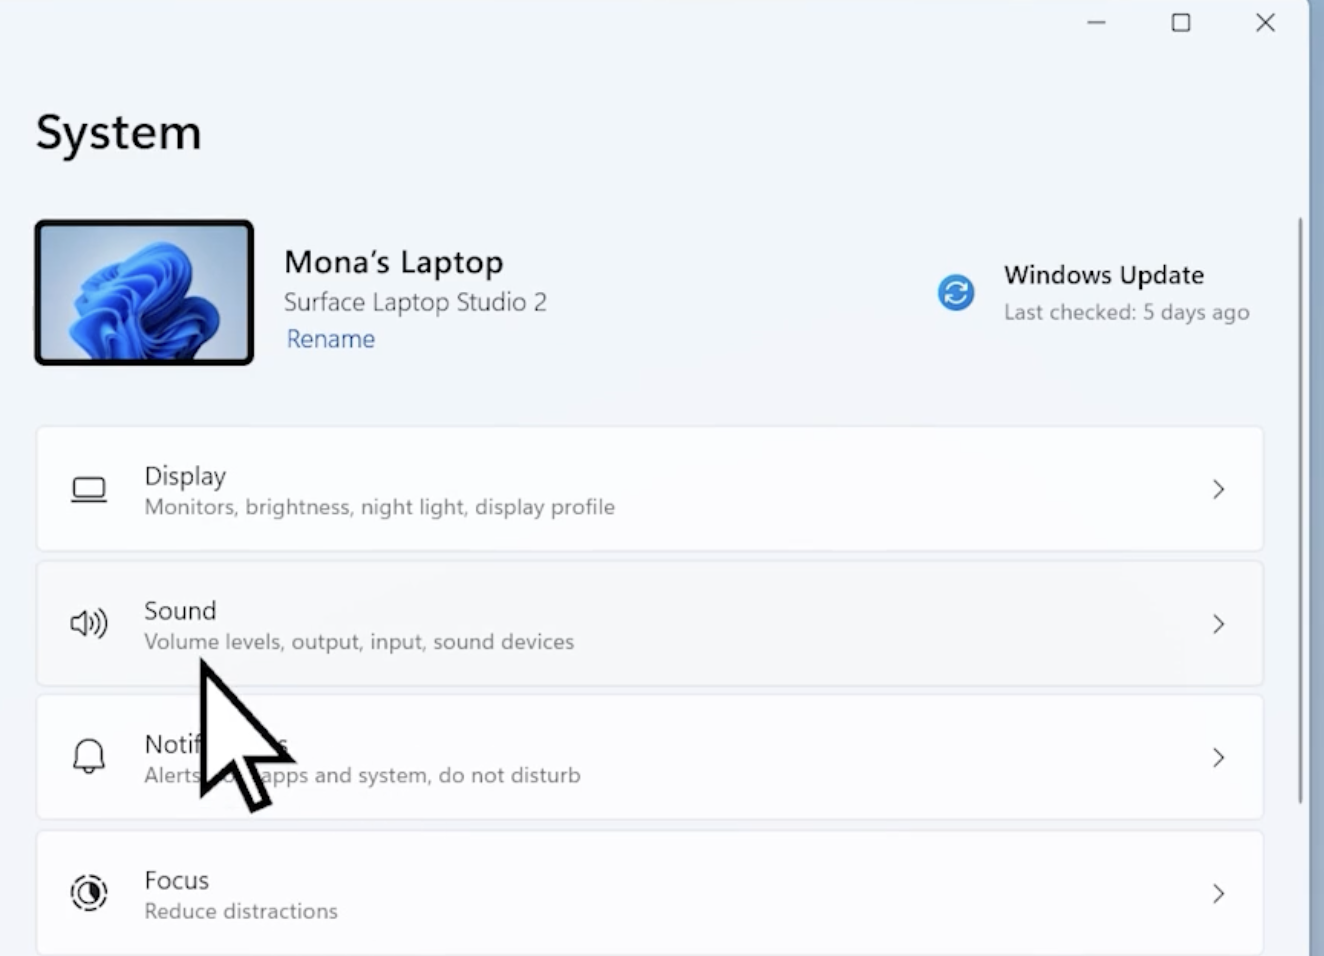
- Go to the System section.
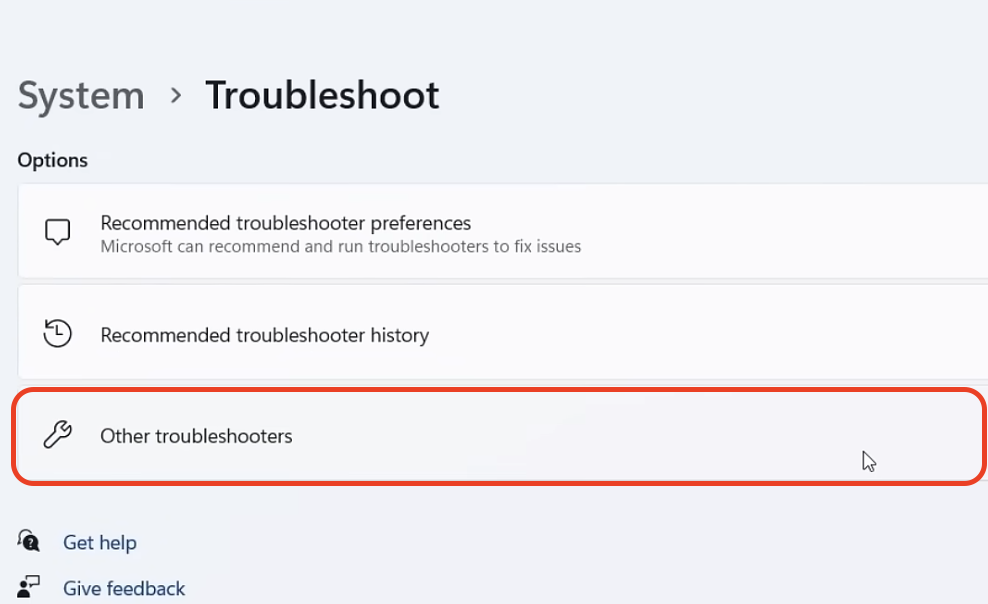
- Scroll down and click on Troubleshoot.

- Select Other troubleshooters.
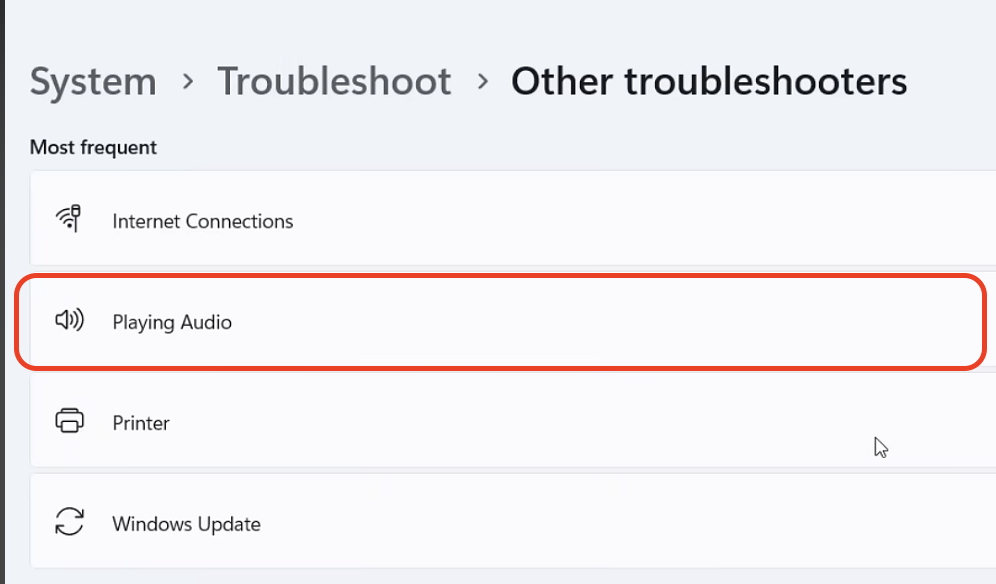
- Find the Audio section.
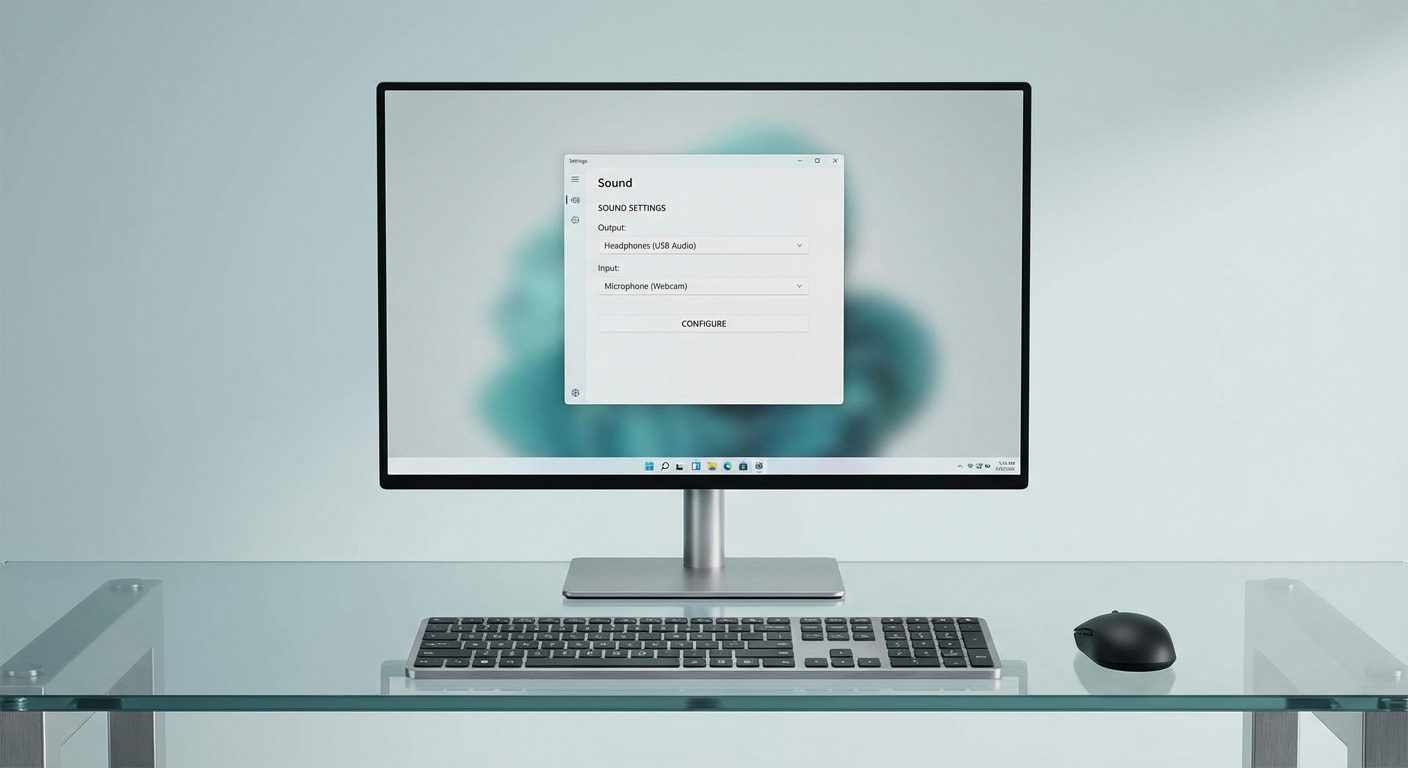
Check Speaker Output
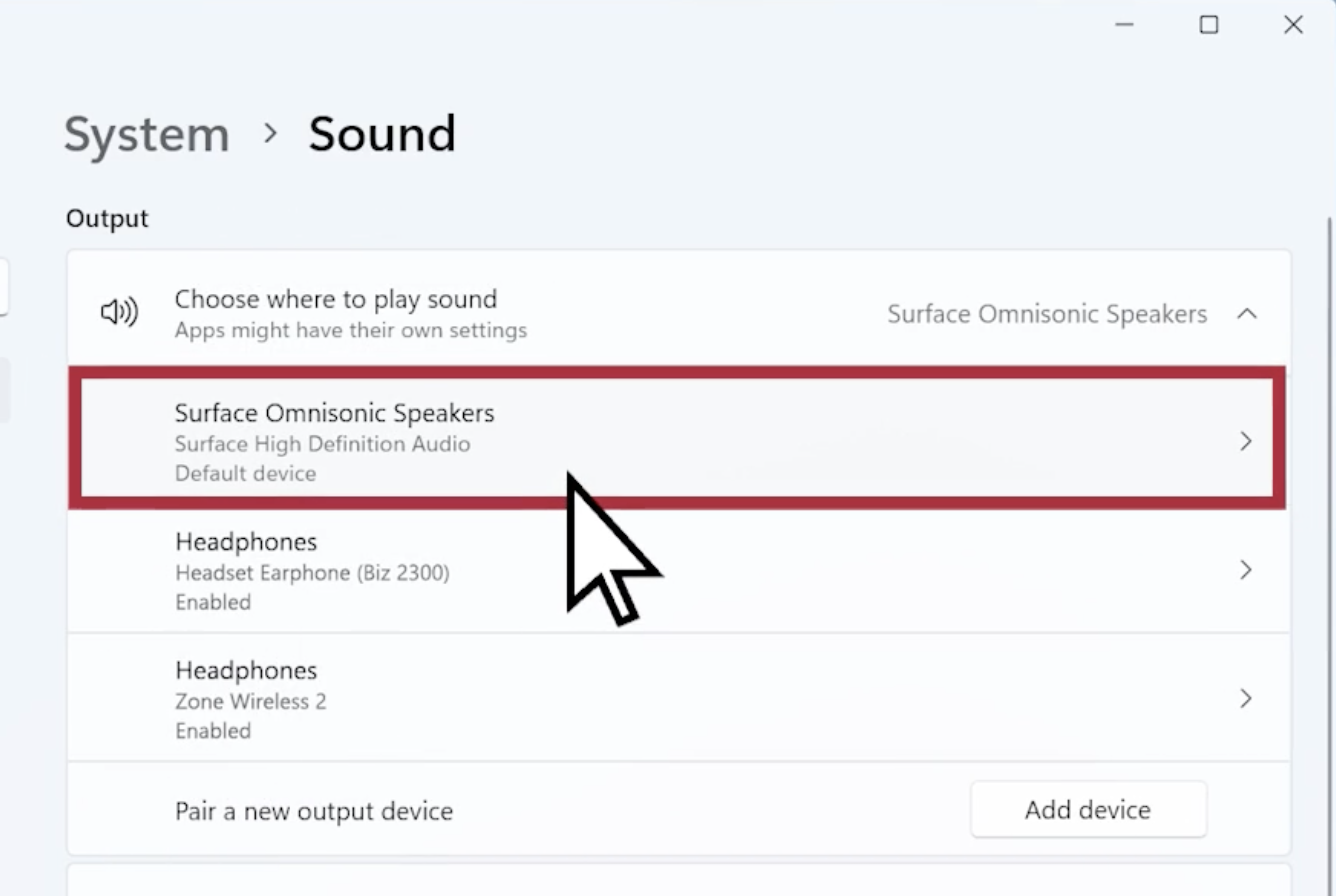
If your sound isn’t coming through, it might be going to the wrong device. Windows 11 can connect to multiple audio outputs, and sometimes it defaults to the incorrect one. You need to make sure the right speaker or headphone is chosen:
- Click the Speakers icon on the taskbar.

- Look for the small arrow next to the volume slider and click it.
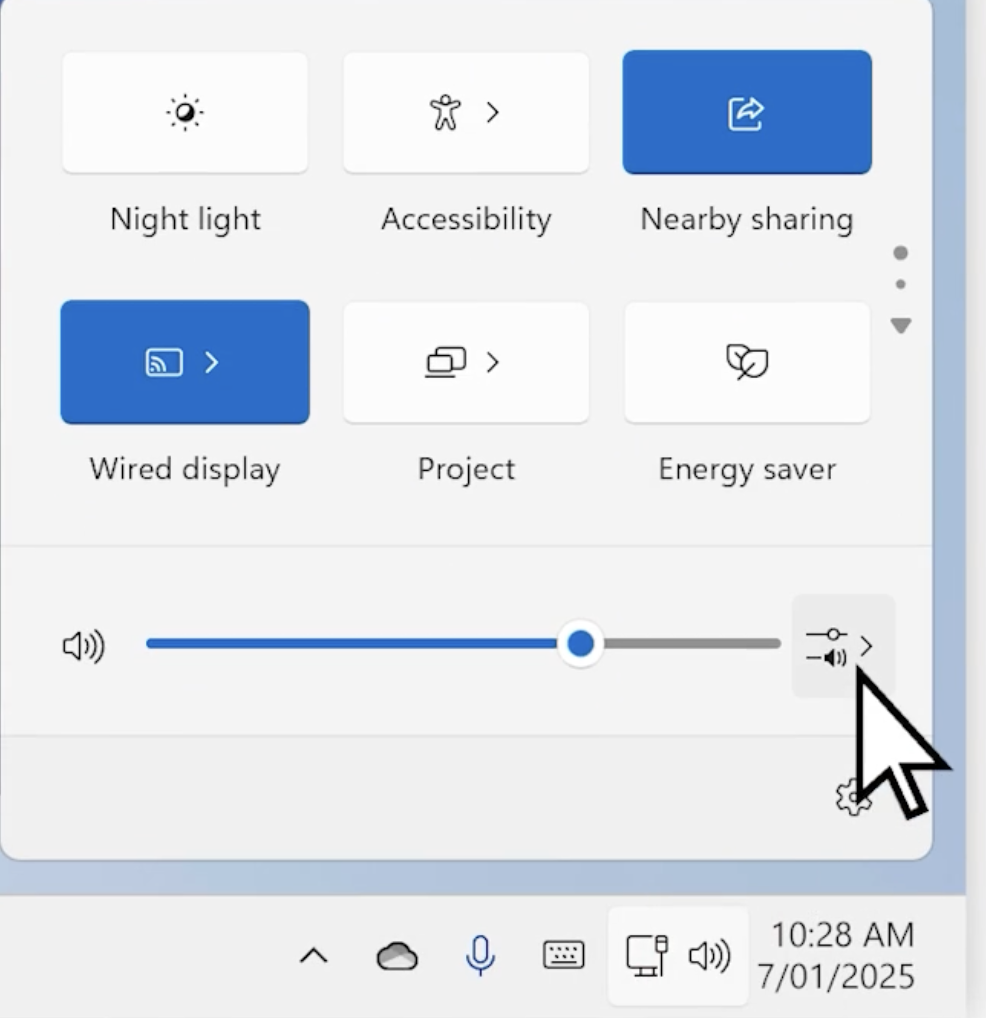
- A list of connected audio devices will appear.
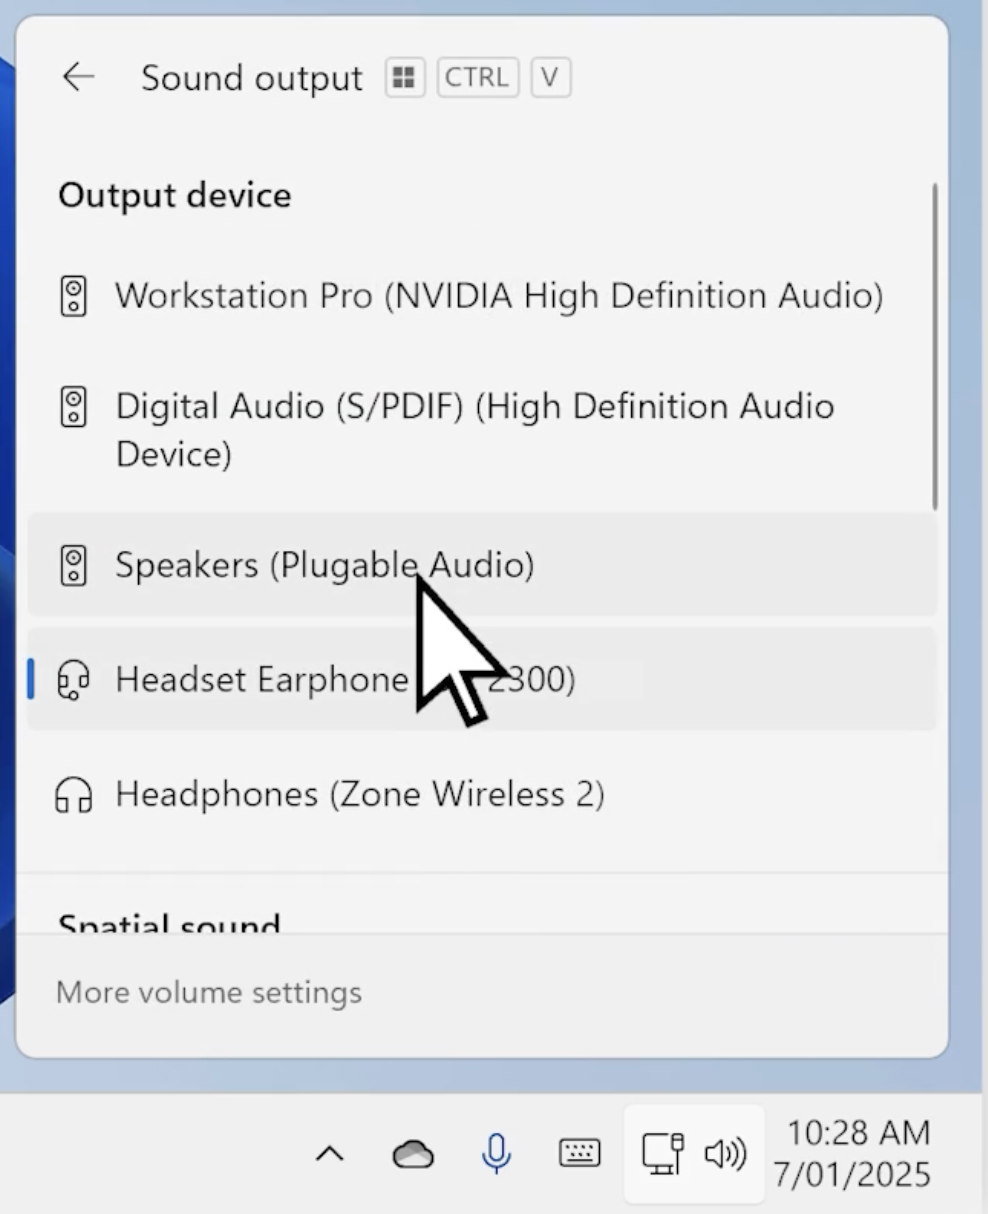
- Choose the device you want to use for audio, like your headphones or external speakers.
Restart Audio Services
If the sound still isn’t working, restarting the audio services can help. These services manage how sound works on your system. Sometimes they stop or run into problems, and a quick restart can bring them back to normal:
- Click the Search box on your taskbar and type services.
- Select the Services app from the search results.
- In the list, locate ‘Windows Audio’.
- Right-click it and choose Restart.
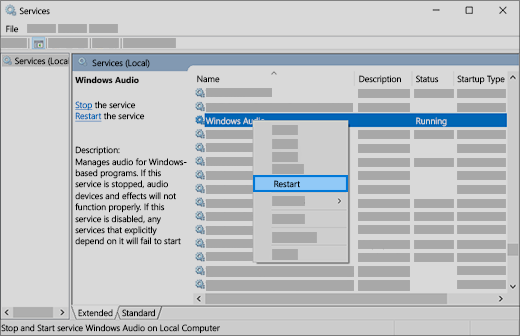
- Do the same for Windows Audio Endpoint Builder.
- Also, restart Remote Procedure Call (RPC).
Fix Audio Drivers
Audio issues may also be caused by your audio drivers. These drivers enable Windows to communicate with your sound hardware. If they’re outdated or not working properly, your audio can stop completely. Luckily, you can fix this by updating, uninstalling, or switching the driver.
Here’s how to update your audio driver:
- Click the Search box on your taskbar and type Device Manager.
- Open Device Manager from the results.

- Click the arrow next to Sound, video and game controllers.
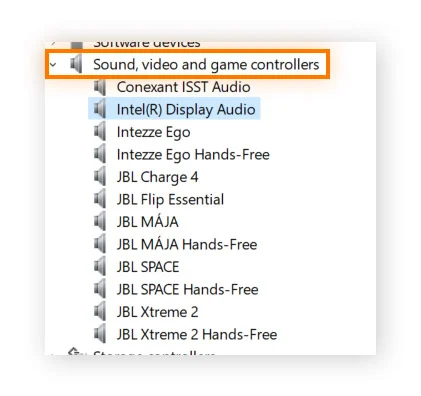
- Right-click your sound device, such as your speakers or headphones.
- Select Update driver.
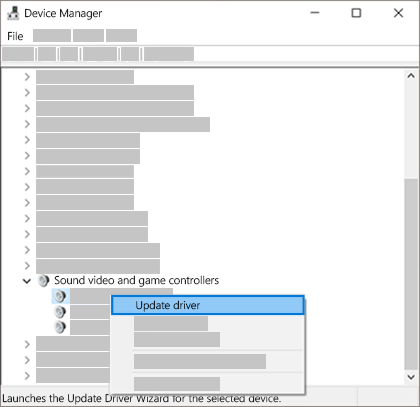
- Choose Search automatically for drivers and follow the steps.
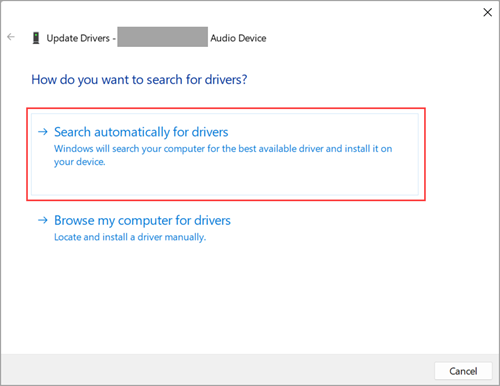
If Windows cannot find a new driver, check the manufacturer’s website and install the latest version from there.
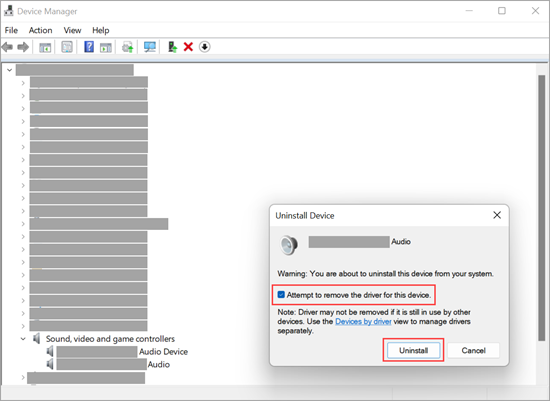
To uninstall your audio driver:
- Open Device Manager again.
- Select Sound, video and game controllers.
- Right-click your audio device and choose Uninstall device.
- Check the box that says Attempt to remove the driver for this device.
- Click Uninstall, then restart your computer.
You can also try the built-in generic driver that comes with Windows:
- Open Device Manager.
- Select Sound, video and game controllers.
- Right-click your audio device and select the Update driver option.
- Navigate to Browse my computer for drivers.

- Select the option that allows you to choose from a list of drivers already available on your computer.
- Select the default Windows driver and follow the prompts.
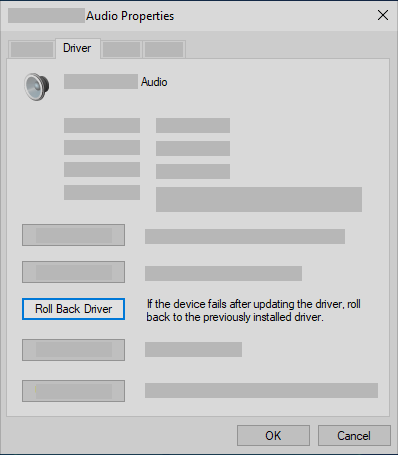
If your sound stopped after a Windows update, you can try rolling back the driver:
- Open Device Manager.
- Navigate to the Sound, video and game controllers option.
- Right-click your audio device and choose Properties.
- Go to the Driver tab.
- Select Roll Back Driver and follow the instructions.
If none of these work, you can also try using a system restore point. This will restore your computer to a previous state when the audio was functioning properly.
Disable Audio Enhancements
Audio enhancements are designed to improve sound quality, but they can also cause issues such as crackling or complete silence. Turning them off is a quick fix that often works:
- Click Start and open Settings.
- Select Sound from the menu.
- Under the Output section, click on the device you are using. This could be your headphones or speakers.
- Scroll down to Advanced settings.

- Find the Audio enhancements option and set it to Off using the dropdown menu.

Check Sound Settings
If you still can’t hear any sound, your device settings might be the problem. Sometimes the volume is muted, or the device is disabled without you noticing. It’s a good idea to check everything manually:
- Right-click the Speakers icon on the taskbar.
- Click the arrow next to the volume slider to see all connected audio devices.
- Hover over the arrow, and it should say Select a sound output.
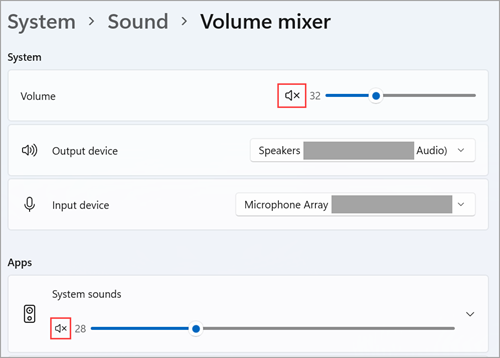
- Click the settings icon next to the volume mixer. This should say More mixer settings when you hover over it.
- You will see volume controls for each device and app. Look for an X next to any control. This means it is muted.
- To fix it, either drag the volume slider up or click the Unmute icon.
Now check if the device itself is enabled:
- Go to Start and open Settings.
- Click System, then select Sound.
- Scroll down and choose More sound settings.
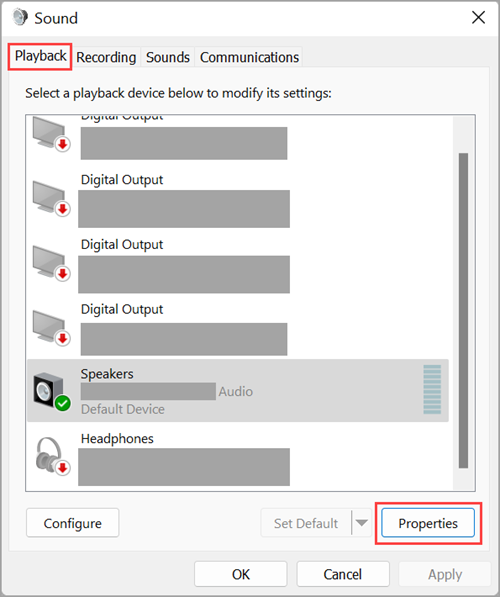
- Click on the Playback or Recording tab, depending on the issue.
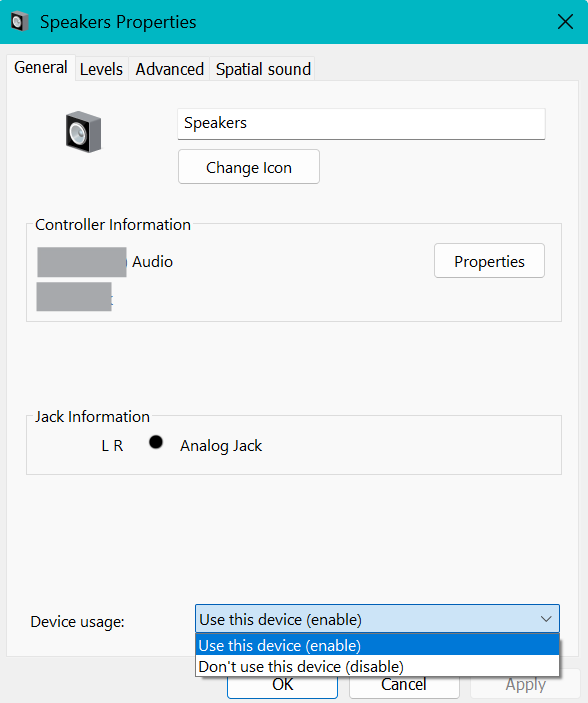
- Select your device and click Properties.
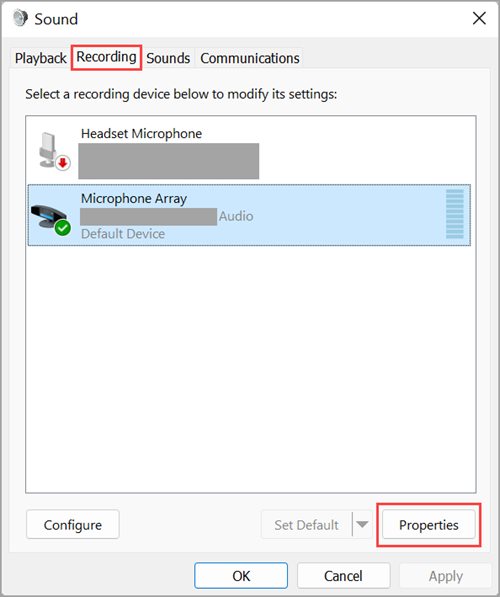
- Under Device usage, make sure it says Use this device (enable).
Set your Audio Device as the Default Device
If you’re using headphones, speakers, or an external monitor, your PC might not be sending sound to the right device. This often happens when you connect something using USB or HDMI. Windows might pick the wrong output by default. If your monitor has no built-in speakers and it’s selected as the default, you won’t be able to hear anything.
Here’s how to set the correct audio device:
- Click Start and open Settings.
- Go to System, then select Sound.

- Under the Output section, click on the device you want to use.

- Once selected, it becomes your default audio device.
Check for Windows Updates
Sometimes audio problems are caused by missing system updates. Windows often releases fixes that improve the performance of your sound devices. Installing the latest updates can solve problems you didn’t know were related:
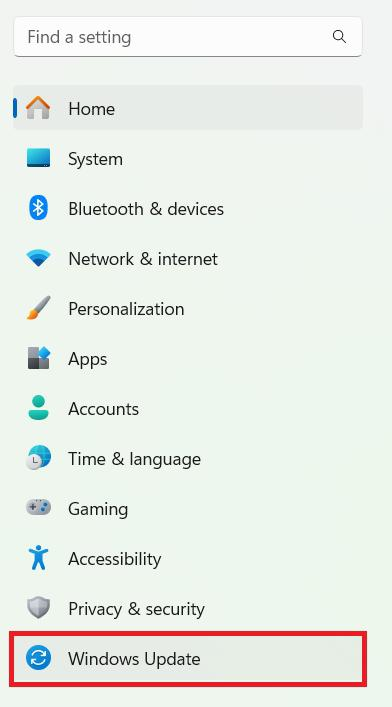
- Click Start and open Settings.
- Select Windows Update from the menu.
- Click Check for updates.
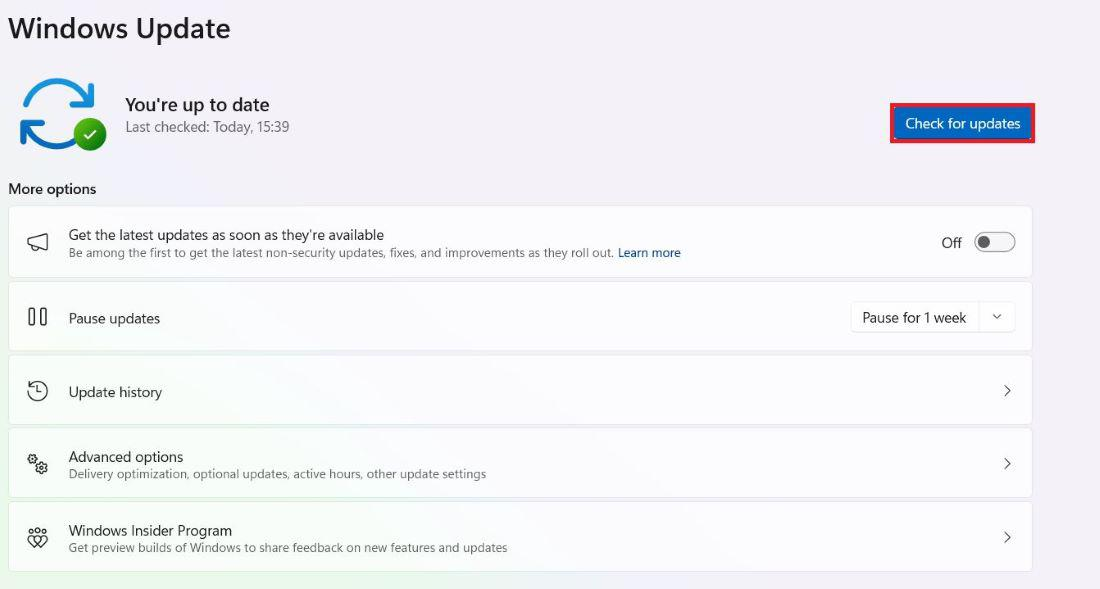
- If you see You’re up to date, move on to the next method.
- If updates are available, click Install now.

- Choose the updates you want and then click Install.
- Once the updates are done, restart your PC.
Try a Different Audio Format
- Type Control Panel in the search box on your taskbar and open it.
- Click Hardware and Sound, then select Sound.
- In the Playback tab, right-click your default audio device.
- Select Properties.
- Go to the Advanced tab.
- Under Default Format, choose a different option from the list.
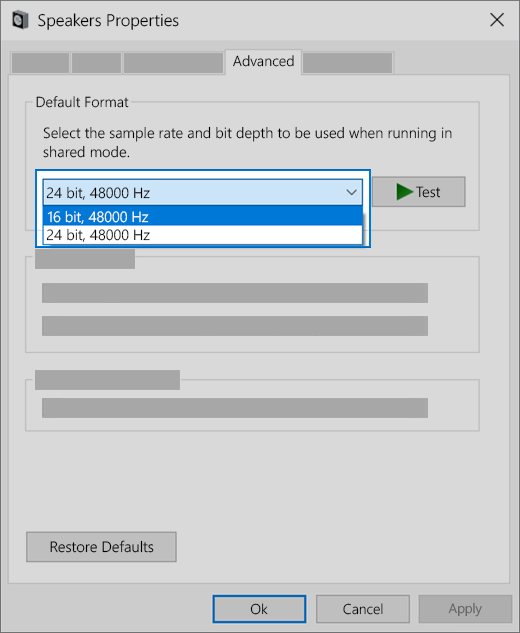
- Click OK, then test your sound.
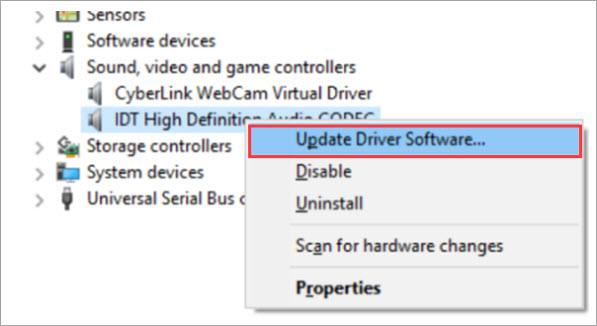
Check for IDT HD Audio CODEC
Some audio issues on Windows 11 can be linked to the IDT High Definition Audio CODEC. If your system uses this driver, manually switching it can resolve sound problems. This method doesn’t apply to every device, but it’s worth checking:
- Type Device Manager in the search box on your taskbar and open it.
- Click the arrow next to Sound, video and game controllers.
- Look for IDT High Definition Audio CODEC in the list.
- If it appears, right-click it and choose the Update driver option.
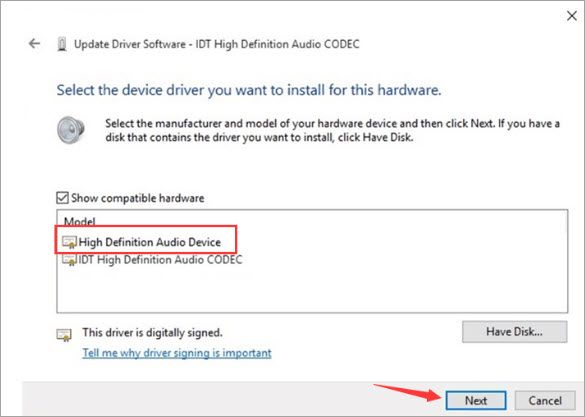
- Navigate to Browse my computer for drivers.

- Select the option that allows you to choose from a list of drivers already available on your computer.

- From the list, select High Definition Audio Device, then click Next.
Conclusion
Audio issues on Windows 11 can be frustrating, but most of them are easy to fix. From checking your output device to updating drivers, each step brings you closer to clear sound. Try the methods one by one and test after each change. Stay patient, follow the steps, and your audio should be back in no time.
FAQs
How to fix Realtek audio having no sound in Windows 11?
Update the Realtek driver, turn off audio enhancements, and restart the Windows Audio service. You can also disable the Microsoft UAA Bus Driver or change the default sound format.
How to reset audio in Windows 11?
Right-click the sound icon near the clock and choose Sound settings. Scroll down to the Advanced section and select Volume mixer. At the bottom of the screen, click the Reset button.
How to install an audio driver in Windows 11?
To install an audio driver in Windows 11, open Device Manager. You can search for drivers automatically or install one you downloaded. If that fails, get the latest driver from the manufacturer’s website and install it manually. This often fixes sound issues quickly.