.png)
Audacity changed the way creators make audio. It stands as the industry-standard Digital Audio Workstation (DAW) for a reason: it is open-source, universally compatible, and completely free. For millions of podcasters, voiceover artists, and YouTubers, it is the engine room of their creative workflow.
However, there is a big difference between having the tool and knowing how to use it. Software cannot fix a broken source.
Many creators rely too heavily on post-production to fix mistakes. But the reality is simple: if your recording is clipped, tinny, or plagued by echo, no amount of noise reduction will make it sound professional. This concept is often called “Garbage In, Garbage Out.”
You can have professional software, but if your input signal is bad, your output will be bad.
If you want to learn how to master audio recording in Audacity, you must treat the software as the final step in a chain. That chain begins with your hardware and input settings. This guide will walk you through a workflow that prioritizes a clean, high-quality input, ensuring your raw recordings are pristine before you ever apply a single effect.
Step 1: Essential Hardware Prep & Input Settings
Before you even launch Audacity, you need to make sure your physical setup is ready. Audacity is a powerful editor, but it can’t perform miracles. It cannot fully fix a recording that is distorted, faint, or filled with electrical hum at the source.
Choosing the Right Microphone
For most users—whether you are podcasting, narrating, or recording interviews—USB microphones are the most efficient route. They bypass the need for expensive XLR audio interfaces and complex cables.
However, standard USB mics often suffer from a critical flaw: Input Clipping. If you laugh too loudly or get too excited during a recording, the audio “peaks” (hits the digital ceiling), resulting in harsh distortion that ruins the take.
The Professional Solution: Hollyland LARK MAX 2

Hollyland LARK MAX 2 - Premium Wireless Microphone System
A premium wireless microphone for videographers, podcasters, and content creators to capture broadcast-quality sound.
Key Features: Wireless Audio Monitoring | 32-bit Float | Timecode
For creators who need studio reliability without the studio footprint, the Hollyland LARK MAX 2 is the ideal input companion for Audacity. It solves the two biggest hardware struggles creators face:
- 32-bit Float Recording: This is a massive advantage for Audacity users. The LARK MAX 2 features internal 32-bit float recording, which captures such a huge dynamic range that it is virtually impossible to clip. If you scream into the mic and the waveform looks like a solid block, you can simply lower the volume in post-production. The audio will remain crystal clear—no distortion.
- Studio-Grade Specs: It records at 48kHz/24-bit, which perfectly matches the industry-standard project settings used in video production. This ensures you aren’t losing quality when transferring data from hardware to software.
Connecting Your Gear
Once you have your hardware, you need to ensure your computer recognizes it as the primary audio source before opening Audacity. If you open the software first, it may not detect the new device until you restart the program.
How to Connect (Windows/Mac):
- Physical Connection: Connect your microphone (or the LARK MAX 2 receiver) directly to your computer. For the LARK MAX 2, use the provided USB-C cable. It acts as its own high-quality audio interfacehigh-quality audio interface
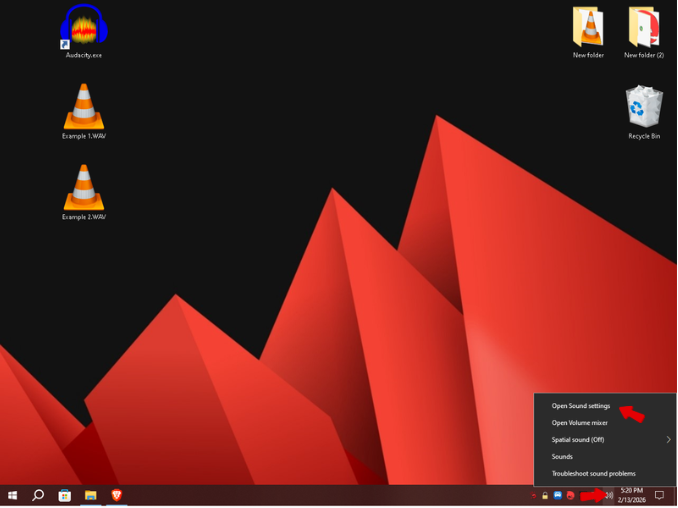
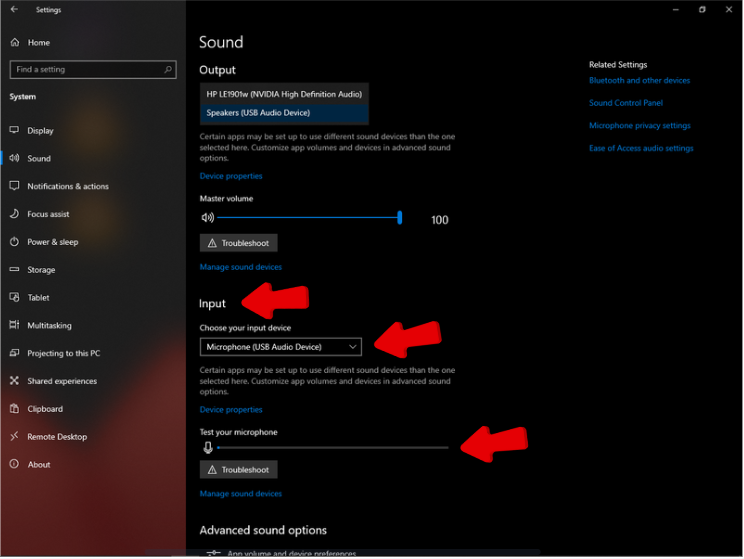
- System Configuration (Windows):
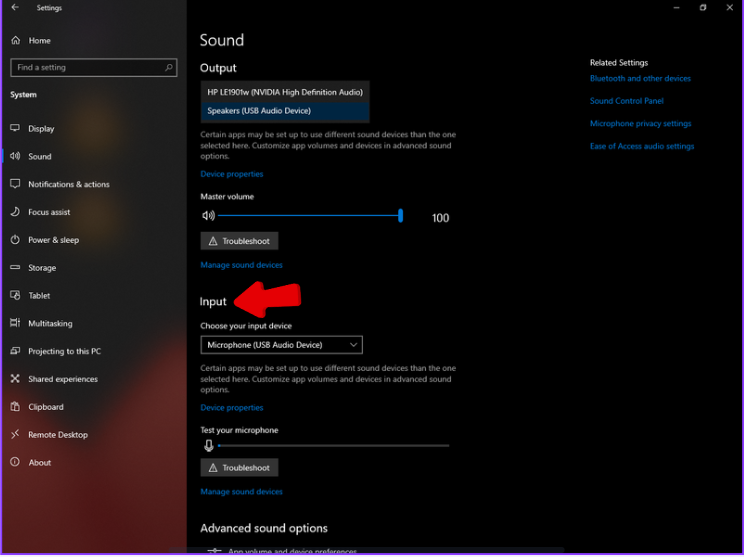
- Right-click the Speaker icon in your taskbar and select Sound Settings.
- Scroll down to Input.
- In the dropdown menu, select your microphone (e.g., “Hollyland LARK MAX 2”).
- Tip: Watch the “Test your microphone” bar while speaking. It should move. If it stays flat, check your cable.
- System Configuration (Mac):
- Open System Settings > Sound.
- Click the Input tab.
- Select your device from the list.
- Adjust the Input Volume slider so that your normal speaking voice hits about 75% of the meter.
By setting this at the system level first, you ensure that Audacity defaults to the correct high-quality device rather than your laptop’s inferior built-in microphone.
Step 2: Configuring Audacity for High-Fidelity
Now that your hardware is set, it’s time to open the software. You must tell Audacity exactly how to interpret the signal coming from your mic. Default settings often rely on low-quality system drivers or the wrong input device (like a webcam mic), which will ruin your recording regardless of how good your external microphone is.
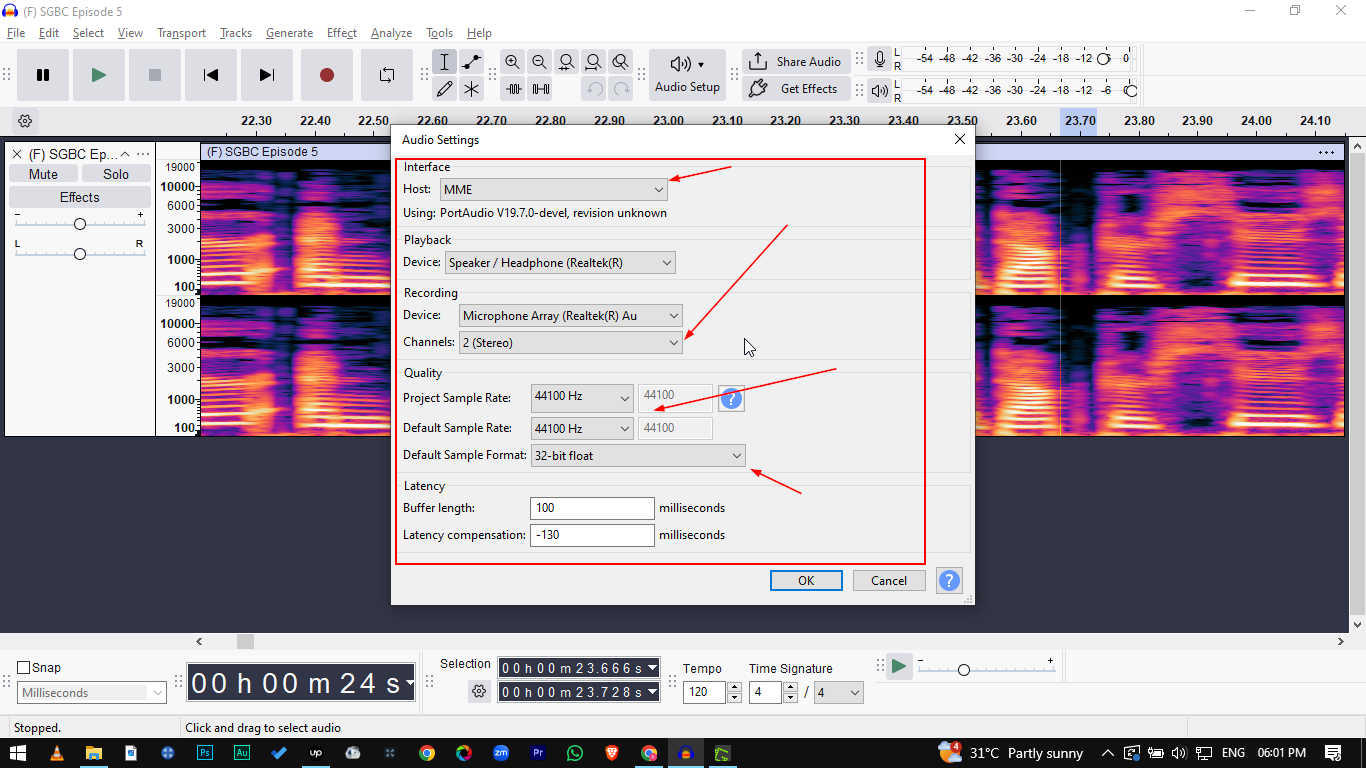
Locate the Audio Setup toolbar at the top of the interface (or the dropdown menus in older versions) and configure these four settings:

- Audio Host: This determines how Audacity communicates with your sound card.
- Windows: Select MME. It is the most compatible driver and works with almost all audio devices. If you experience lag, you can try Windows WASAPI, but MME is the safest bet for stability.
- Mac: Select Core Audio.
- Recording Device: This is the most common point of failure. Ensure you select your specific external interface or USB microphone (e.g., “Microphone (Hollyland LARK MAX 2)”). Do not leave this on “Microsoft Sound Mapper” or “Primary Sound Capture Driver.”
- Recording Channels:
- Choose 1 (Mono) Recording Channel for standard voiceovers, podcasts, or interviews. This ensures your voice is centered.
- Choose 2 (Stereo) Recording Channels only if you are recording music or ASMR where left/right separation matters.
- Project Rate (Hz): Locate the “Project Rate” dropdown in the bottom-left corner of the window. Set this to 48000Hz. While 44100Hz is the standard for CDs, 48000Hz (48kHz) is the standard for video and modern digital content.

Pro Tip: Avoid the “Robot Voice” Glitch
Always match your hardware’s sample rate to Audacity’s Project Rate. If your microphone is set to 44.1kHz in your computer’s system settings but Audacity is recording at 48kHz, you may experience “sync drift” (audio desyncing from video) or pitch artifacts. Check your OS sound settings to ensure both are set to 48000Hz.
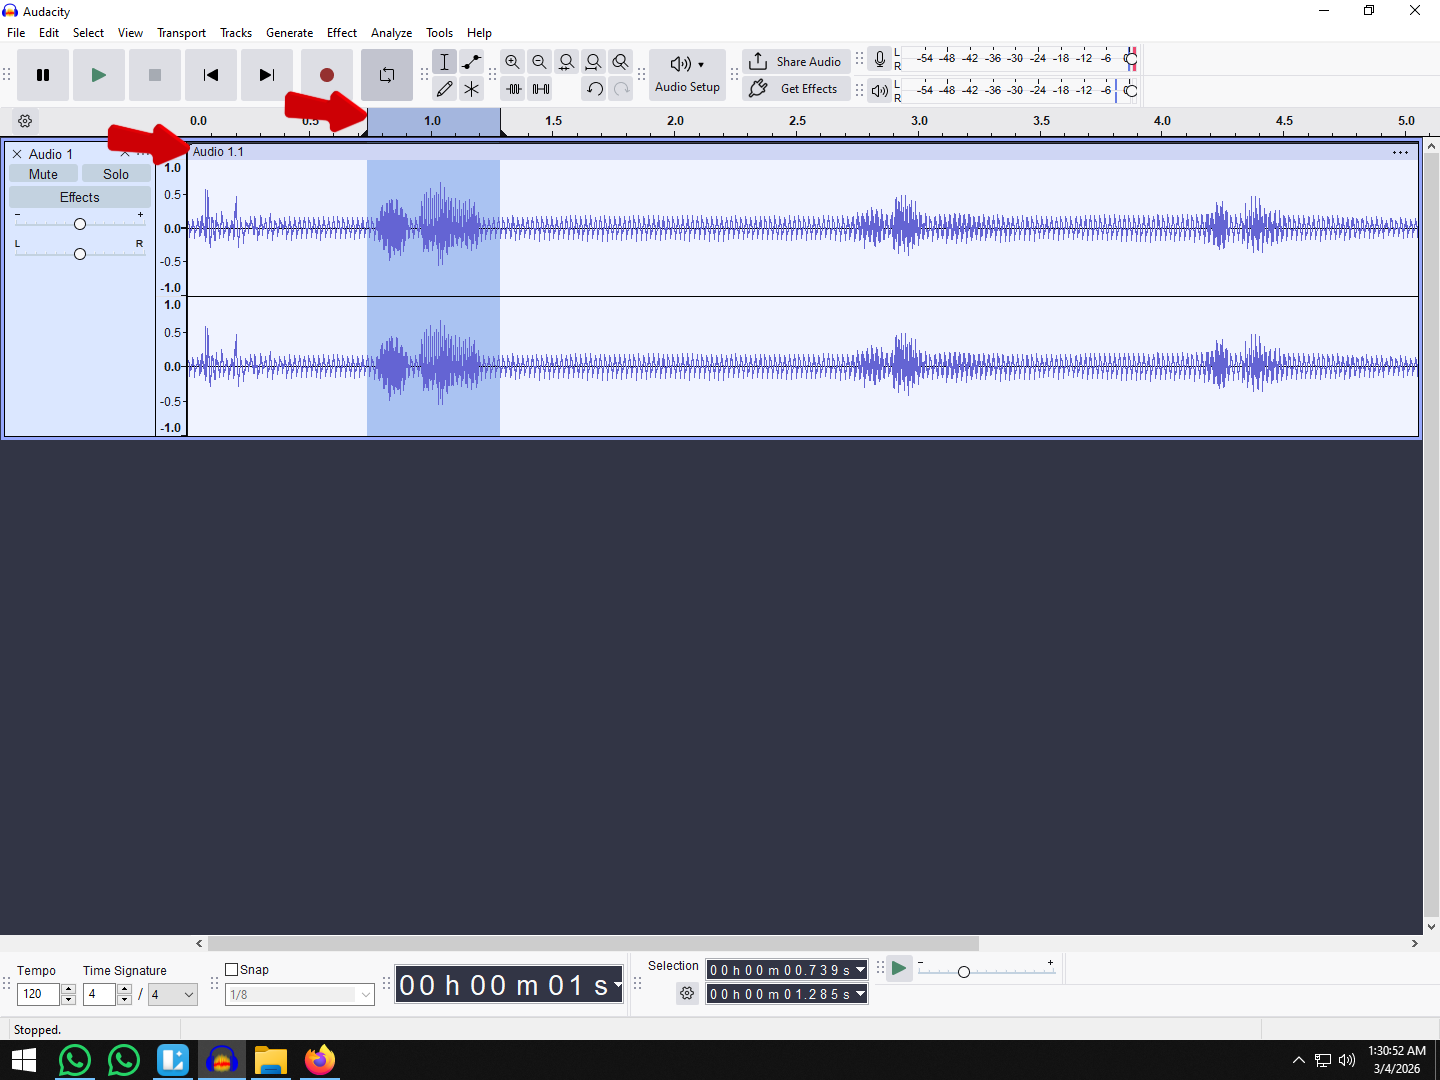
Step 3: The Recording Workflow (Best Practices)
Clicking the red “Record” button is the easy part. To ensure your raw audio is usable before you even start editing, follow this strict workflow. This prevents the nightmare of finishing a 30-minute take only to realize it’s distorted.
1. The “Room Tone” Sound Check
Before you deliver your first line, capture the sound of your environment. This is critical for post-production.
- Hit Record.
- Stay completely silent for 10 seconds. Do not move, breathe heavily, or type.
- Why this matters: This captures your “Room Tone.” Later, you will feed this segment into Audacity’s Noise Reduction effect. The software analyzes this silence to identify background hum (like fans or AC) and removes it from the rest of your audio.

- After the silence, record 10 seconds of casual speaking to check your levels.

2. Gain Staging: Hitting the Sweet Spot
Gain staging is the process of setting your input volume so it is loud enough to be clear, but not so loud that it distorts.
- Watch the Recording Meter: Look at the colored bars at the top of the Audacity interface.
- The Target Zone: Your voice should peak between -12dB and -6dB.

- If you hit 0dB (Red Zone): You are “clipping.” The audio wave is cut off, causing permanent distortion. Lower the microphone slider.
- If you are below -18dB: The signal is too weak. Boosting it later will also boost the background hiss. Raise the microphone slider.
3. Real-Time Monitoring (Solving the Latency Lag)
One of the biggest frustrations in software recording is latency. If you plug headphones into your computer to hear yourself, the audio has to travel into the computer, get processed by Audacity, and travel back out to your ears. This creates a distracting “echo” effect that makes it nearly impossible to speak naturally.
To fix this, use Direct Hardware Monitoring.
The Hardware Advantage: Hollyland LARK MAX 2
Instead of relying on Audacity’s delayed playback, professional creators bypass the computer entirely for monitoring. The Hollyland LARK MAX 2 is designed to solve this specific bottleneck.
- Zero-Latency Monitoring: By connecting the LARK MAX 2 receiver to your PC, you can use its Wireless Audio Monitoring feature via OWS (Open Wearable Stereo) earphones.
- The Result: You hear your voice exactly as the microphone hears it—in real-time—before it even reaches the software. This allows you to catch wind noise or harsh sounds instantly without the confusing delay of software playthrough.
Step 4: Basic Post-Processing (Making It Sound Pro)
Capturing a clean signal is crucial, but post-processing is where your audio transforms from “amateur recording” to “professional production.” Even with high-end hardware, raw audio often sounds flat or quiet.
Use this three-step workflow in Audacity to polish your tracks without over-processing them.
1. Noise Reduction (Cleaning the Signal)
This tool removes constant background hums, like computer fans. This is why you recorded 10 seconds of silence (room tone) in Step 3—Audacity needs a sample of the noise to know what to remove.
- Get Noise Profile: Highlight the section of your track where you aren’t speaking. Go to Effect > Noise Removal and Repair > Noise Reduction and click “Get Noise Profile.”
- Apply the Effect: Select your entire track (CtrClick OK.l+A / Cmd+A). Go back to the Noise Reduction menu.

- Settings: Start with mild settings to avoid making your voice sound robotic.
- Noise Reduction (dB): 6 to 12.
- Sensitivity: 6.00.
- Frequency Smoothing: 3.

2. Compressor (Balancing Dynamics)
Your voice naturally gets louder and softer as you speak. A compressor reduces the dynamic range, bringing the quiet parts up and keeping the loud parts in check. This makes your audio sound “thick” and consistent, like a radio broadcast.
- Select the entire track and go to Effect > Volume and Compression > Compressor.
- Threshold: Set this to around -12dB to -20dB. This tells Audacity to only compress sounds that go above this volume.

- Ratio: Set to 2:1 or 3:1 for spoken word. A 2:1 ratio means for every 2dB the volume goes over the threshold, it is reduced to 1dB.
- Leave “Make-up gain” checked to restore overall volume after compression.

3. Normalize & Limiter (Broadcast Standards)
Finally, you need to ensure your audio is loud enough for YouTube, Spotify, or other platforms without distorting.
- Normalize: Go to Effect > Volume and Compression > Normalize.
- Set “Normalize peak amplitude to” -1.0 dB.
- This ensures the loudest part of your audio is just below the distortion ceiling (0dB).
- Limiter (Optional but Recommended): If you still have random spikes, use the Limiter effect (set to Hard Limit at -1.0 dB) to shave off the peaks. This allows you to raise the overall volume of the track further without clipping.
Advanced Method: Recording System Audio (WASAPI Loopback)
Sometimes you don’t need to record your voice; you need to capture exactly what is playing through your computer speakers—whether that’s audio from a Zoom call, gameplay sound, or a snippet from a video.
In the past, this required messy cables. Today, Audacity handles this natively on Windows using the Windows WASAPI host. This feature creates a digital “loopback,” routing audio from your output directly back into the recording input without losing quality.
How to Configure Loopback Recording
- Change the Audio Host: In the Audio Setup toolbar, change the Host from MME/DirectSound to Windows WASAPI.
- Select the Loopback Device: Go to the Recording Device dropdown. You will see options labeled “loopback.” Select the device corresponding to your current playback output (e.g., Speakers (Realtek) (loopback) or Headphones (loopback)).
- Turn Off Software Playthrough: Navigate to Transport > Transport Options and ensure Software Playthrough is unchecked. If left on, this creates a feedback loop that can damage your speakers.
- Hit Record: Press the Record button, then start playing the audio source on your computer.
Note: Because this method captures everything playing through your device, remember to mute system notifications (email pings, Discord alerts) before recording.
Troubleshooting Common Audacity Recording Errors
Even with a professional setup, you may encounter technical glitches. Audacity is powerful, but it is also sensitive to system settings. Below are the most common issues creators face and how to fix them.
| Problem | Root Cause | The Fix |
|---|---|---|
| Flat Line (No Audio) | Audacity isn’t “hearing” your microphone, often due to privacy settings or wrong device selection. | 1. Ensure your specific mic (e.g., Hollyland LARK MAX 2) is selected in the Recording Device toolbar.2. Windows Users: Go to Settings > Privacy > Microphone and toggle “Allow desktop apps to access your microphone” to ON. |
| Echo / Latency | “Software Playthrough” is enabled, causing the computer to play your voice back with a slight delay. | 1. Go to Transport > Transport Options and uncheck Software Playthrough.2. Pro Solution: Do not monitor through the software. Use the Hollyland LARK MAX 2‘s direct monitoring feature to hear your voice in real-time with zero latency. |
| Crackling / Clicking | The computer is struggling to process the audio stream fast enough (Buffer Underrun) or sample rates are mismatched. | 1. Go to Edit > Preferences > Latency and increase the Buffer Length (try 100ms).2. Ensure your Project Rate (bottom left) matches your hardware settings (usually 48000Hz). |
| “Error Opening Sound Device“ | Another program is “hogging” the audio driver. | Close other apps using audio (Zoom, Discord, Spotify). If that fails, restart Audacity or choose a different Audio Host (try switching from MME to WASAPI). |
Frequently Asked Questions (FAQ)
How do I remove background noise in Audacity?
Removing static or room hiss is a two-step process using the Noise Reduction effect. First, highlight a silent section of your recording (room tone) and click “Get Noise Profile” in the effect menu. Then, select your entire track and click “OK” to apply the filter. Don’t overdo it—aggressive settings can make your voice sound robotic.
What is the best sample rate for recording vocals?
For most modern content creation—especially if you are syncing audio with video for YouTube or social media—48,000 Hz (48kHz) is the industry standard. Ensure both your Project Rate (bottom left in Audacity) and your hardware input settings match this number.
Why does my recording sound distorted?
Distortion usually happens because your Input Gain is set too high, causing the audio signal to “clip” or hit the ceiling of what digital audio can handle (0dB). To fix this, lower your recording volume so peaks sit between -12dB and -6dB. Alternatively, use a microphone with 32-bit float recording, like the Hollyland LARK MAX 2, which prevents clipping entirely by capturing a wider dynamic range.
Can I record multiple tracks at once in Audacity?
Yes, but it requires specific hardware. You cannot typically select two different USB microphones as separate input devices simultaneously within Audacity. To record multi-track audio, you need an audio interface with multiple XLR inputs or a mixer that supports multi-channel USB output.
Conclusion: The Perfect Blend of Software and Hardware
You can spend hours mastering every effect in Audacity, but post-production has its limits. The secret to professional-grade audio isn’t just about how well you can repair a track—it’s about not having to repair it in the first place.
True mastery of this workflow is 50% software knowledge and 50% hardware quality. Audacity provides the canvas and the tools, but your microphone provides the paint. If the source is thin, distorted, or noisy, no amount of normalization or compression will make it sound like a studio production.
Stop wasting time wrestling with “unfixable” bad audio. Start with a clean, reliable source using the Hollyland LARK MAX 2. By leveraging its 32-bit float recording, you eliminate the risk of clipping entirely, ensuring your raw files are perfect before they even hit the timeline. Combine that hardware safety net with Audacity’s editing precision, and you are ready to polish your masterpiece.