



































.png)
 简体中文
简体中文 
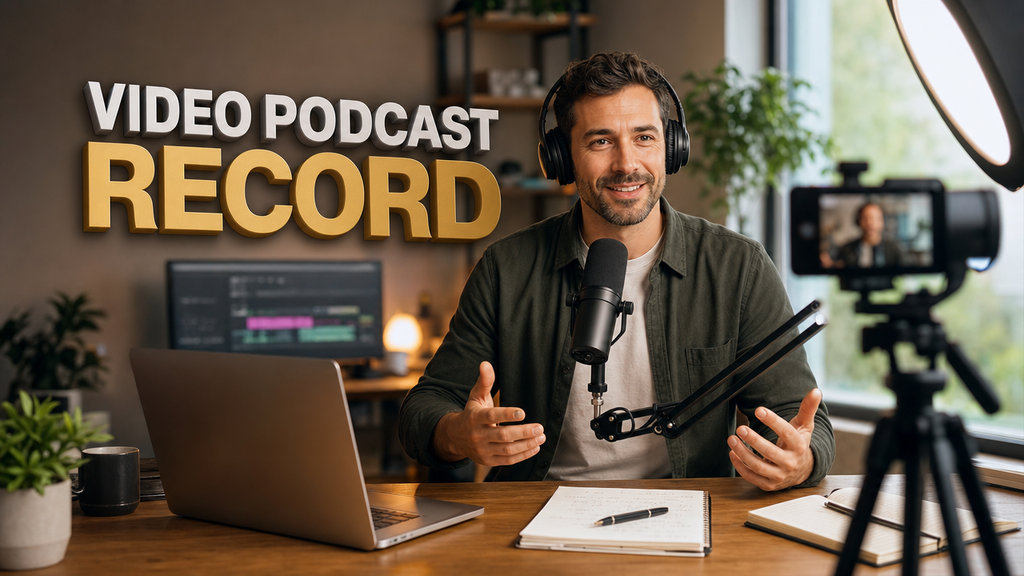
A video podcast gives viewers visuals while keeping professional audio clear. This format lets one episode reach several major platforms. You can publish it on YouTube and Spotify Video easily. It can also appear across popular podcast app directories. Yet, beginners often spend heavily on cameras first. They may treat audio as something to fix later. This guide covers everything needed for a smooth recording. You will learn about equipment, setup, software, recording, and publishing.
What You Need to Record a Video Podcast
Getting your gear list right first saves time and money. The table divides equipment into two practical tiers. The first covers minimum gear for acceptable results. The second shows recommended upgrades for professional output. You do not need every recommended item to start. Knowing which upgrades matter most helps you plan spending.
Note: Among all the variables in video podcasting, microphone quality and placement most directly determine whether a viewer completes your episode. Audiences tolerate a slightly soft image far longer than they tolerate echo, hiss, or clipped audio. Prioritize your audio budget before your camera budget.
| Category | Minimum Viable | Recommended Upgrade |
|---|---|---|
| Camera | 1080p webcam (Logitech C920 or equivalent) | Mirrorless or DSLR with clean HDMI output (Sony ZV-E10, Canon M50 Mark II) |
| Microphone | USB condenser mic (Blue Yeti) | Wireless lavalier system (Hollyland LARK MAX 2) |
| Audio Interface | Not required for USB or wireless mics | Focusrite Scarlett 2i2 Gen 4(required only with XLR microphones) |
| Headphones / Monitoring | Wired earbuds plugged into camera or receiver | Closed-back studio headphones (Sony MDR-7506) |
| Lighting | Single 18-inch ring light positioned in front | Two-point softbox setup (key light + fill light) |
| Background | Clean wall, bookshelf, or fabric backdrop | Dedicated set with soft-furnishing acoustic treatment nearby |
| Computer | Laptop with USB 3.0 and 8 GB RAM | Desktop or laptop with 16 GB RAM, dedicated GPU for multi-camera workflows |
| Recording Software | Zoom or OBS Studio (free) | Riverside.fm or Ecamm Live (separate local track recording per guest) |
Why the Hollyland LARK MAX 2 earns the recommended column: The transmitter clips to the host’s lapel and sends 48 kHz / 32-bit float audio wirelessly to a receiver that mounts directly on the camera’s cold shoe. This eliminates cable drag from the video frame, matches studio-level sample rates, and stores a full-quality internal backup recording on the transmitter as protection against camera input errors. The LARK MAX 2 serves as the reference unit in the audio setup section throughout this guide.
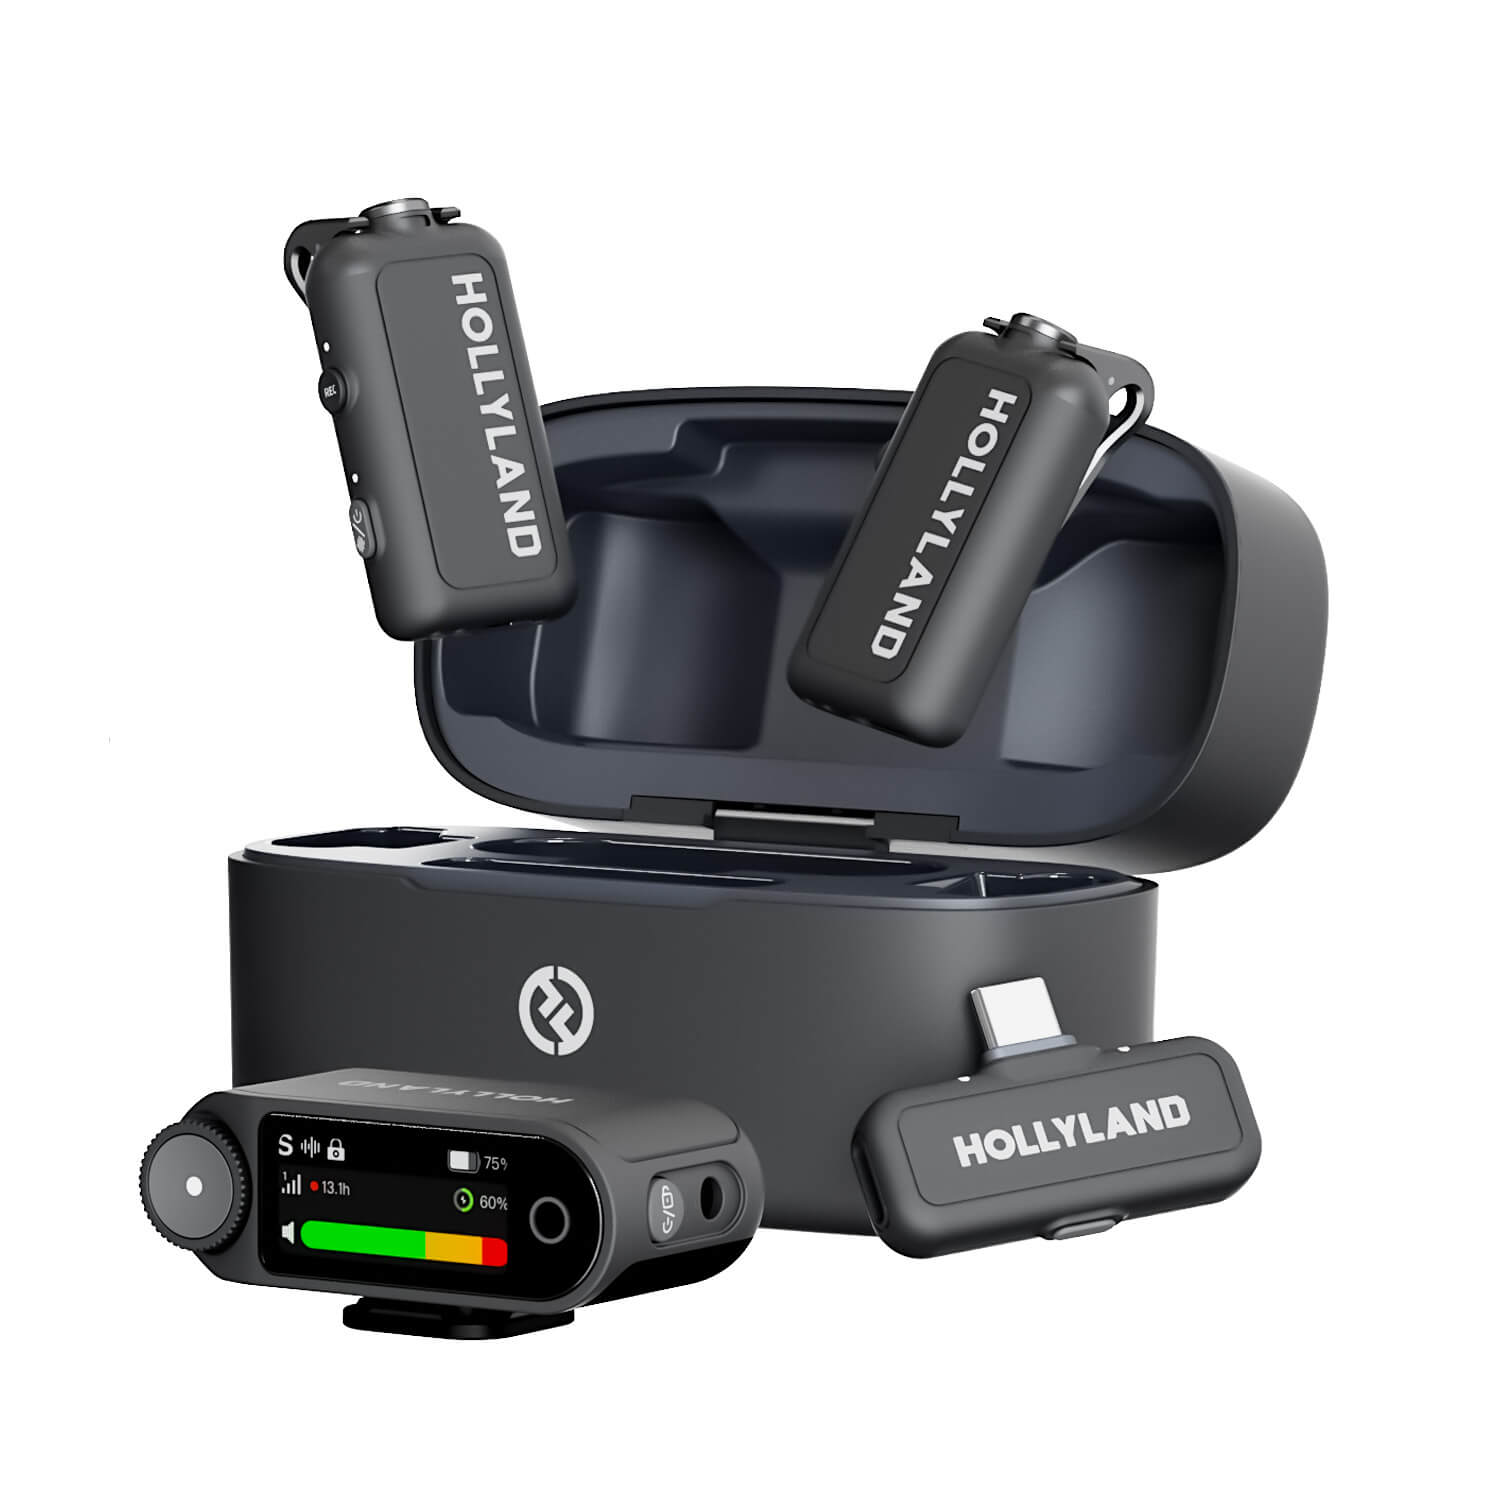
Hollyland LARK MAX 2 - Premium Wireless Microphone System
A premium wireless microphone for videographers, podcasters, and content creators to capture broadcast-quality sound.
Key Features: Wireless Audio Monitoring | 32-bit Float | Timecode
Decide on Your Recording Format
The right recording format depends on how many hosts you have, whether guests join in person or remotely, and how much technical complexity you want to manage per episode. Locking in your format before purchasing any additional equipment prevents costly rework later.

Solo Recording
Solo recording is the most simple way. One host, one camera, one microphone, and full control over every variable in the room. You can finalize lighting, framing, and audio settings at your own pace without coordinating schedules or managing a second person’s technical setup. The issue with this format is that monologue-driven content demands either tight scripting or strong conversational energy to hold viewer attention through a full episode.
Equipment requirements are minimal: a single microphone, one camera, basic lighting, and any recording software that accepts a single audio and video input. OBS Studio covers the minimum at no cost. If you want to add graphics, title cards, or live streaming capability to the solo format, Ecamm Live on Mac handles all of these in real time.
In-Person Multi-Guest Recording
In-person guest episodes generate natural conversational energy and eliminate the latency complications inherent in remote recording. The problem with this kind of format is that audio complexity scales with the number of people in the room. Each additional speaker ideally gets a dedicated microphone so individual levels can be adjusted independently in post-production. If two hosts share a single microphone, you lose all ability to correct one voice without affecting the other.
Key considerations for in-person multi-guest sessions:
- Assign one microphone per speaker. Two wireless transmitters feeding a single dual-channel receiver is one efficient approach; individual USB mics per seat is another.
- Leave enough physical separation between microphone positions to limit bleed between channels.
- Seat guests so they face slightly toward each other and both angle toward the camera, rather than sitting at 90 degrees to the lens.
- Plan for either a wide two-shot that covers both guests in a single frame, or a multi-camera setup with individual close-up angles as cut-to options.
Remote Guest Recording
Remote recording connects hosts and guests from separate locations over an internet connection. It is the most technically demanding format because you cannot physically control a guest’s audio or lighting environment. The critical technical requirement is using software that records each participant’s audio locally on their own device rather than capturing only the compressed internet stream. Recording only the compressed stream can seriously reduce audio quality. Low frequencies may sound muddy, and consonants can disappear. Compression artifacts may also appear throughout the recording. Post-processing cannot fully restore these lost details.
Dedicated platforms like Riverside (formerly Riverside.fm) and SquadCast handle local track recording automatically. Zoom can serve as a fallback, but its default audio compression settings produce noticeably lower quality results. Remote recording workflows and platform comparisons are covered in depth in our dedicated guide to recording a podcast remotely.
Set Up Your Audio
Audio setup is where most first-time video podcasters lose the most ground. An incorrectly configured gain stage, a microphone positioned too far from the mouth, or an untreated reverberant room all create problems that post-production tools cannot fully recover. Work through the steps below in order before starting any recording session.
Choose the Right Microphone Type for Video Podcasting
Three microphone categories cover most video podcast scenarios. Each has a different profile of strengths, physical requirements, and practical limitations in video recording.
USB condenser microphones connect directly to a computer via USB and deliver good audio quality with no extra hardware. The practical disadvantage for video recording specifically is physical placement: the microphone must be desk-mounted near the host, which means it either appears prominently in frame or requires a boom arm that intrudes into the shot. USB condensers also feature wide cardioid or omnidirectional pickup patterns that capture room reflections more readily than tighter dynamic designs.
Dynamic XLR microphones such as the Shure SM7dB or Electro-Voice RE20 represent the professional broadcast standard. Their tighter cardioid pickup patterns reject off-axis sound effectively, making them more forgiving in acoustically imperfect rooms. The limitation is that XLR microphones require an audio interface to connect to a computer, which adds both cost and an additional configuration step to the signal chain.
Wireless lavalier microphones clip directly to the host’s clothing, keep the video frame clean of visible hardware, and allow natural movement without cable drag. For video podcasting specifically, the lavalier delivers the most polished on-camera appearance of the three options. The receiver outputs audio to the camera via a standard 3.5mm TRS connection or to a computer via USB-C, meaning no audio interface is required for basic configurations.
For video podcasting, where looking professional on camera matters as much as sounding professional, a wireless lavalier is the format-native microphone choice. The steps below use the Hollyland LARK MAX 2 as the demonstration unit.
Pair and Configure Your Wireless Lavalier Microphone
The following steps walk through a complete LARK MAX 2 setup sequence, from physical attachment to confirmed backup recording activation. If your transmitter and receiver have already been paired in a previous session, the auto-pairing sequence handles steps 2 through 3 automatically.
- Attach the transmitter to your clothing. Use the built-in clothing clip to fasten the transmitter to your lapel, collar, or chest area. Position the external microphone capsule approximately 15 to 20 centimeters (6 to 8 inches) below your chin. This placement reduces plosive sounds on hard consonants while maintaining strong and consistent level capture as long as the host’s head stays relatively centered during the session.

- Power on the Camera receiver first. Press and hold the receiver’s power button for 3 seconds until the touchscreen display turns on.

- Power on the transmitter. Hold the transmitter’s power button for 3 seconds until its LED activates and begins flashing blue in the same searching pattern.

On previously paired LARK MAX 2 units, both LEDs should shift to a solid blue within a few seconds, confirming a successful wireless link.

If they do not auto-pair, consult the quick-start guide for the manual pairing button sequence, which typically involves holding a power button for 6 seconds on both units when they are in a power-off state until the LEDs synchronize and hold steady.
- Mount the receiver to the camera cold shoe. Slide the LARK MAX 2 receiver onto the hot/cold shoe at the top of the camera body. The integrated mounting bracket clips in without tools and positions the receiver antenna in direct line-of-sight with the transmitter, maximizing signal stability during recording.
- Connect the receiver’s audio output to the camera. Plug the included 3.5mm TRS cable from the receiver’s output port into the camera’s microphone input jack, typically labeled “MIC” or shown with a microphone symbol on the camera body.

In the camera’s audio menu, set the input source to “External Mic” if the camera does not detect the connection automatically. Disable Automatic Gain Control (AGC) in the camera menu at this point – AGC introduces audible noise-pumping artifacts during quiet passages between sentences.
- Connect monitoring earphones. Once you have connected the Camera RX to your camera.
- Wear the OWS wireless monitoring earphones.

- Press the control knob on the Camera RX.

- Rotate the wheel and select Monitoring.

- Choose Camera as your Monitoring Source.

- Choose “Wireless” in the Monitoring menu.

Alternatively, you can select the Wired monitoring option and connect wired earphones to the LARK MAX 2’s Camera RX 3.5mm port.
- Set the input gain on the Camera receiver.
- Press the Control Knob and cycle through the menu.
- Select Mic Settings > Mic Gain.

- Choose Custom or Auto Gain.

- Set the gain level as per your needs.

Speak at your loudest expected recording volume and watch the receiver’s level indicator – an LED bar or display readout depending on firmware version. Target a level where peaks fall clearly in the middle range of the indicator with visible headroom remaining at the top.

At the camera’s audio input, you are aiming for approximately -12 dBFS on peak speech. Walking back the gain until the indicator stops clipping on normal speech is always safer than pushing it higher.
- Activate AI Noise Cancellation if appropriate. If recording in a space with consistent background noise – HVAC systems, computer fan hum, or light street noise.
After pairing or during recording, press the transmitter power button once to activate noise cancellation. The TX LED indicator will turn solid green when noise-canceling is active.

In acoustically controlled rooms, leaving NC off preserves the most natural voice character and frequency response.
- Confirm internal backup recording is active. The LARK MAX 2 transmitter records audio to its internal storage at 32-bit float resolution throughout the session. This is the production safety net. If camera input gain was miscalibrated, the 3.5mm connection was accidentally loose, or levels clipped at any point during the recording, the transmitter file will contain a dynamically wide, undistorted version of the audio that can be fully corrected in post-production.
To start 32-bit Float internal recording, press the REC button on the transmitter. Once it turns red, it means the onboard recording has been started.

- Test the mute function. Press the power button on the transmitter twice to mute or unmute the unit. When the TX is muted, the LED will turn solid red.

Unmute before proceeding. Hosts who cannot reliably identify their own mute status will inevitably speak while muted at some point during a live session, losing unrepeatable content.
Pro Tip: Before beginning any session, record a 30-second test clip at full speaking volume and play it back through your monitoring earphones. This quick check catches gain problems, accidental mute states, 3.5mm cable connection issues, and room noise while everything is still correctable.
Check Your Levels and Monitor Throughout Recording
A single pre-recording level check is not enough. Audio levels shift naturally during conversation as guests lean toward microphones, raise their voices for emphasis, or adjust posture and unintentionally reposition the capsule.
- Keep Automatic Gain Control disabled in the camera’s audio menu. AGC compensates for volume changes by raising gain during quiet passages, which introduces audible hiss and pumping artifacts that are difficult to remove in post-production.
- Target -12 dBFS peaks for normal speech. This preserves about 12 dB of headroom for louder moments before the signal clips, while keeping quiet moments fully audible without noise-floor intrusion.
- Keep monitoring earphones in for the entire session. Distortion, connection dropout, or sudden level shifts become immediately detectable through live real-time monitoring. Catching a problem 30 seconds into the session is far better than discovering it while reviewing files in post-production.
- Glance at the camera’s audio level meter on the LCD display at natural pauses in conversation as a secondary visual reference. This is especially useful after a new remote guest joins and their speaking volume has not yet been verified against the pre-session test.
Set Up Your Video
A good video setup depends on three main things. These include camera placement, lighting, and your background. Adjust each one carefully and in the right order. This can create a professional look with different gear setups.

Camera Placement and Framing
- Set the camera height to exact eye level. When the host is seated in their recording position, the camera lens should be aligned directly with their eyes – not above, not below. Laptop webcams on a desk almost always sit well below eye level, creating the unflattering upward angle common in video calls. Raise the camera to the correct height using a tripod, monitor arm, or stable riser before adjusting any other video variable.
- Use a 50mm equivalent focal length or longer. Focal lengths shorter than about 35mm equivalent distort facial geometry at typical interview distances, widening the nose relative to the ears and creating an unrealistic appearance. Most mirrorless kit lenses can be set to 50mm. On APS-C cameras, a 35mm prime produces roughly a 50mm field of view due to the 1.5x crop factor. For webcam users: move farther back from the lens to reduce wide-angle distortion.
- Position the subject 1 to 2 meters from the lens. This
creates a naturaltalking-head frame and, on cameras with adjustable aperture, lets the background fall slightly out of focus, reducing visual distractions behind the subject. - Apply rule-of-thirds framing. The host’s eyes should fall on or just below the upper horizontal third line of the frame. Leave a small amount of headroom, roughly one-tenth of the total frame height, above the top of the head. Avoid centered framing, which reads as static and uncommitted.
- Audit the frame for distractions before recording. Check the live frame critically for visible cables, coffee mugs, stray papers, and background elements that fall within the shot. Minor distractions invisible to someone walking through the room become immediately prominent in a static recorded frame.
Lighting Your Video Podcast
- Position the key light at a 45-degree angle to the front face of the subject, slightly above eye level. The top edge of the light source should be approximately 30 centimeters above the host’s head at the shooting distance. This angle produces natural facial shadow that adds dimension without creating dramatically harsh contrast.
- Diffuse the key light source. A softbox, a ring light with a diffusion panel, or a light bounced off a matte white wall all produce wrapped, soft-edged shadows. Bare LED panels aimed directly at the subject create specular highlights and sharp shadow lines that flatten facial features unattractively.
- Eliminate backlit windows from the frame. Any window behind the subject that is brighter than the key light makes the camera expose for the bright background, rendering the host a silhouette. Reposition so windows are in front of or to the side of the subject, or block them entirely with curtains or blackout blinds.
- Standardize color temperature at 5600K daylight. Mixing a warm ambient lamp (2700 to 3200K) with a cool daylight LED (5600K) creates two-toned color casts on skin that post-production color grading can only partially correct. Set all active light sources to the same Kelvin value before recording.
- Use a second light for multi-guest setups. A single key light from one side can illuminate one guest adequately while casting the other in partial shadow. Add a fill light on the opposite side, or
reposition both lights into a symmetrical,front-facing setup that covers the full seat arrangement.
Note: An 18-inch ring light placed at eye level directly in front of the host is the minimum viable lighting configuration. It will not produce high-end commercial results, but it eliminates the most common problems, such as harsh shadows, dark eye sockets, and inconsistent color temperature, that make entry-level setups look noticeably amateurish.
Background and Acoustic Environment
- Choose a clean, uncluttered background behind the subject. A tidy bookshelf, neutral-painted wall, or simple fabric backdrop all convey basic production intentionality.
- Add soft furnishings to the recording space. Rugs, thick curtains, upholstered furniture, and bookshelves absorb sound reflections. A room that photographs well with bare hardwood floors, white walls, and large windows will often sound hollow on the microphone without additional absorption.
- Avoid recording in hard corners or rooms with low ceilings, which amplify low-frequency resonance and add a boxy, confined quality to voice recordings.
- Manage window brightness in the background with curtains or blinds to keep it from competing with the key light and causing the camera to underexpose the subject’s face.
Choose and Configure Your Recording Software
Recording software is the hub that connects audio and video inputs and routes them into captured output files. The wrong choice causes sync drift, compressed audio quality, incompatible file formats, or the loss of per-guest audio track separation. Choose before configuring your session – reconfiguring in the middle of a session is disruptive and error-prone.
Compare Video Podcast Recording Software
| Software | Best For | Remote Capable | Separate Tracks | Pricing |
|---|---|---|---|---|
| Riverside | Remote interviews, high-quality distributed recording | Yes | Yes (local track per guest) | Paid (free tier available) |
| Ecamm Live | Mac-based solo and in-person recording, live streaming | Limited | Yes | Paid subscription |
| OBS Studio | Solo or in-person recording, maximum flexibility | No native remote | Scene-dependent | Free |
| SquadCast | Remote audio-focused recording, reliable track separation | Yes | Yes | Paid |
| Zoom | Familiar remote tool, low friction for guests | Yes | Limited (cloud recording) | Free / Paid tiers |
Quick format-to-software match:
- Solo or in-person on Mac: Ecamm Live for best output quality and combined recording and streaming capability.
- Solo or in-person on Windows or cross-platform: OBS Studio at no cost, with higher initial configuration overhead.
- Remote guests where quality is the priority: Riverside.fm or SquadCast for automatic local track recording per participant.
- Remote guests where ease of access for guests matters most: Zoom with “Record to Computer” enabled and audio settings adjusted to maximum quality.
Configure Your Audio and Video Inputs
These steps apply broadly across recording platforms. Where behavior differs by software, notes are included in parentheses.
- Select the correct audio input device explicitly. Open the audio input settings in your software and choose either the camera body (if recording camera audio directly) or the LARK MAX 2 USB-C device if connected separately to your computer. Do not rely on the software’s default selection. “Built-in Microphone” appearing as the active input is the single most common first-session setup error.
- Select the correct video source. In OBS Studio, add a “Video Capture Device” source and select your camera from the dropdown. In Riverside.fm, grant browser camera permissions and select the correct device on the pre-call settings page.
- Set recording resolution to 1080p / 30fps minimum. 4K is useful if you plan to reframe or crop clips for short-form social content, but requires significantly more storage and processing time. 1080p/30fps is the current universal standard for YouTube consumption and podcast platform distribution.
- Enable separate audio track recording where the software supports it. In OBS Studio, configure this in Output settings by enabling multiple audio tracks and assigning each source to a discrete track. Riverside and SquadCast record separate tracks per participant automatically, with no additional configuration.
- Confirm the software sample rate matches the microphone output. Set the software audio sample rate to 48 kHz to match the LARK MAX 2’s native output. A mismatch between the microphone’s sample rate and the software’s configured rate causes gradual audio drift over long recordings, where audio and video fall progressively out of alignment in a way that is difficult to correct retroactively.
- Record a 30-second test clip and play it back completely. Before starting the actual session, verify: the correct audio device is capturing at the right level, video is in focus and correctly framed, no echo or hiss is audible in the audio, and audio and video are synchronized with no visible offset.
Run Your Video Podcast Recording Session
With equipment configured and software confirmed, the recording session follows a repeatable sequence. Using a pre-session checklist removes the probability of discovering setup errors after recording has started.

Pre-Recording Checklist
- LARK MAX 2 transmitter LED confirms paired and recording-ready state (solid, not searching or blinking)
- OWS monitoring earphones connected to receiver; audio audible at correct volume
- Transmitter confirmed not muted: LED shows active state, not mute indicator
- Camera set to eye level; subject framed; focus confirmed and locked on subject’s eyes
- Lighting powered on and positioned; no backlit window within the camera frame
- Camera audio level meter showing approximately -12 dBFS peaks on normal speech
- AGC disabled in camera audio menu
- Software audio input confirmed as correct device (not built-in microphone)
- Software video input confirmed as correct camera
- Separate audio track recording enabled in software where supported
- 32-bit float internal recording confirmed active on LARK MAX 2 transmitter
- 30-second test clip recorded and played back; audio and video both confirmed clean
- Remote sessions: guest confirmed on headphones, in a quiet room, with stable internet connection
In-Session Workflow
Slate the recording for sync. If you are working with a separate audio file alongside camera video, including the LARK MAX 2 transmitter backup as a secondary source, clap once clearly and visibly at the front of the camera at the start of the recording. The visible clap and its audio transient create a precise sync point for post-production alignment.
Keep recording through mistakes. Flubbed sentences, mispronounced names, and awkward pauses are all editable. Stopping and restarting creates multiple disjointed files and a sync challenge. Keep recording, pause naturally after the mistake, repeat from a sensible sentence start point, and continue. Continuous files are simpler to work with in every editing workflow.
Brief remote guests before pressing record. Walk each remote participant through three requirements: headphones or earphones in (not speakers, which cause echo and feedback), a quiet room with the door closed and phone on silent, and any notification-generating applications closed. Two minutes on this briefing eliminates the most common sources of guest-side audio problems.
Monitor audio actively throughout the session. Keep monitoring earphones in rather than removing them after the initial level check. Live monitoring detects transmitter battery warnings, connection dropouts, and a guest’s microphone cutting out in real time. Discovering the same problems during post-production review can mean unusable audio with no chance to fix it.
Verbally flag edit points. When a host or guest wants to redo a section, state it clearly before re-recording: “Let us take that again from the start of the question.” The verbal flag appears in both the transcript and the waveform as an obvious edit marker, saving time in the editing session.
Post-Session Steps
- Allow software upload and export to complete before closing the application. Riverside, SquadCast, and Ecamm all perform a file export or upload step at the end of the session. Do not force-close the application before this step finishes – interrupted exports produce corrupted or incomplete files.
- Retrieve the 32-bit float backup from the LARK MAX 2 transmitter. Connect the transmitter to your computer with a USB-C cable. The internal storage mounts as a drive. Copy the session’s .WAV files immediately to your project folder.
- Back up all session files to a secondary location – external drive or cloud storage – before beginning any editing work. Recovering a lost or corrupted session file after editing has started is not always possible.
Post-Production Basics
This section is a quick-reference overview. Detailed editing tutorials are covered in our full video podcast editing guide.
- Editing software: DaVinci Resolve (free, handles audio and video in one application) for independent podcasters; Adobe Premiere Pro for teams in the Adobe ecosystem.
- Sync separate audio to video: Import the LARK MAX 2 transmitter WAV backup and use DaVinci Resolve’s auto-sync function or manually align using the clap slate. Replace the camera audio track with the cleaner transmitter file.
- Noise reduction: Apply a light pass in DaVinci Fairlight or Adobe Audition before making level adjustments. Over-processing introduces metallic artifacts.
- Color grade: Correct white balance to match natural skin tones. A neutral grade is appropriate for standard talking-head podcast formats.
- Export: H.264 at 1080p for distribution to YouTube and podcast platforms; ProRes 422 or lossless for archival storage.
Publish and Distribute Your Video Podcast
- Upload the finished video to YouTube. Add a custom thumbnail, chapter timestamps in the description, and a full episode transcript for search indexing.
- Upload to a podcast host that supports video RSS. Buzzsprout, Riverside.fm, and Transistor all support video file uploads that generate an RSS feed for Spotify Video and Apple Podcasts distribution.
- Export a separate audio-only file (MP3 or AAC) for your audio RSS feed. Podcast listening apps cannot subscribe to a YouTube channel. RSS distribution is separate and required for podcast directories.
- Add complete episode metadata: Episode title, guest name, show notes, and chapter markers for each upload.
- Publish on a consistent schedule using a repeatable publishing checklist so each episode follows the same steps without relying on manual recall.
Frequently Asked Questions
Can I record a video podcast with just a smartphone?
Yes. Modern smartphones capture 1080p or 4K video at quality levels fully acceptable for podcast distribution. The main limitation is the built-in microphone, which is optimized for phone calls rather than broadcast-quality dialogue. Adding a wireless clip-on system like the Hollyland LARK MAX 2, which connects to smartphones via USB-C, immediately upgrades audio quality without changing the camera setup at all.
Do I need an audio interface for a video podcast?
Only if you are using an XLR microphone. USB condenser microphones and wireless lavalier receivers with USB-C or 3.5mm outputs connect directly to a computer or camera without an interface. The LARK MAX 2, for example, outputs to the camera via 3.5mm TRS and to a computer via USB-C, so you don’t need an audio interface in either configuration.
How do I record a remote guest in high quality?
Use a platform that records each participant’s audio locally on their own device and uploads the full-quality file after the session. Riverside and SquadCast both handle this automatically. Unlike standard video calls, local recording preserves full quality. Connection speed does not affect the locally recorded audio. Recording only the compressed internet stream creates poorer audio quality. The difference stays noticeable throughout the entire recording.
What is the best video resolution for a video podcast?
1080p/30fps is the practical standard for distribution. It is universally compatible across YouTube, Spotify Video, and podcast platforms, compresses efficiently, and requires manageable storage. Record in 4K only if you plan to digitally reframe or crop footage for short-form social clips. The extra file size and rendering overhead aren’t justified for a distribution-only workflow.
Why does my audio sound echoey even with a good microphone?
Echo is almost always a room acoustics problem, not a microphone problem. Hard parallel surfaces, like bare walls, hardwood floors, and large windows, reflect sound back into the capsule regardless of microphone quality. Add soft furnishings at primary reflection points: rugs, thick curtains, and bookshelves. Also confirm that AI Noise Cancellation is active on your microphone.
Conclusion
The difference between a video podcast that retains listeners and one that loses them in the first few minutes is almost always audio quality, not camera resolution. Once your format is chosen, your microphone is configured with reliable monitoring and backup recording active, camera gain is set correctly, and your software is routing the right inputs – the technical barrier to a polished episode is largely gone.
Some decisions largely influence your production quality. These include recording format, microphone type, and placement. Camera input gain, software choice, and audio monitoring matter as well. Keep these settings consistent across every recording session. Each episode then becomes quicker and easier to produce.
