



































.png)
 简体中文
简体中文 
Recording your voice on a MacBook can be surprisingly simple. The key is knowing which recording method suits your needs. Every current MacBook includes a built-in microphone array. macOS also provides several recording apps without extra downloads. You can even record without buying additional equipment. This guide covers four methods for different recording needs. Start with quick recordings or explore a wireless microphone setup.

How to Choose the Right Method for Your Needs
Each method below targets a different recording scenario. Scan the table to find the column that matches your use case, then jump directly to that section.
| Method | Best For | Audio Quality | Setup Required |
|---|---|---|---|
| Voice Memos | Quick notes, lecture capture | Good (built-in mic) | None |
| QuickTime Player | Simple recordings with input-source control | Good (built-in mic) | None |
| GarageBand | Editable, multi-take recordings with gain control | Good to Very Good | Minimal |
| LARK MAX 2 (External Mic) | Podcasting, interviews, vocal sessions | Professional | A few minutes |
Method 1: Record Voice Using Voice Memos on MacBook
Voice Memos is the fastest path to a finished audio file on macOS. It launches in seconds, auto-saves every recording to a searchable library, and exports to .m4a with a single click. But before recording, check which microphone macOS has selected. Voice Memos does not let you change that choice. The app records through whichever input macOS currently has selected. Open System Settings and choose your preferred microphone first. After that, launch Voice Memos to begin recording.
- Open Voice Memos from the Applications folder or press Command + Space and type “Voice Memos” in Spotlight.

- Click the red Record button in the lower-left corner.

- Click the Pause button (the same position as the Record button during an active recording) to pause without ending the session. Click it again to resume from the same take.

- Click Done to stop and save. macOS names the file by date and time. To rename it, double-click the title in the sidebar.

- Your voice recording will appear on the left side of the Voice Memos app. You can also drag the recording directly from the Voice Memos window to a Finder folder or your Desktop.

- If you need the raw file location, recorded .m4a files are stored at ~/Library/Group Containers/group.com.apple.VoiceMemos.shared/Recordings/.
Key limitation: Because Voice Memos cannot select an audio source internally, connecting an external microphone after the app is already open may not switch inputs automatically. Always verify the input in System Settings → Sound → Input before launching Voice Memos.


Method 2: Record Voice Using QuickTime Player
QuickTime gives you more control over your recording microphone. Unlike Voice Memos, it includes a source selection menu. This lets you pick the microphone needed for each session. That choice stays clearly visible before recording begins. It also connects simple recordings with external microphone setups. Everything happens inside macOS without installing another recording app.
- Open QuickTime Player from the Applications folder or Spotlight.
- From the menu bar, choose File → New Audio Recording.

- A compact recording panel appears. Before clicking Record, click the small dropdown arrow directly to the right of the Record button.

- Under Microphone, select your preferred audio source. The built-in microphone is selected by default. Any connected USB or Bluetooth audio input appears in this same list.
- Set Quality to High for everyday recordings or Maximum for archival captures at a higher bit depth. Maximum produces a larger .m4a file but preserves more dynamic range.
- Click the red Record button.

- Click the Stop button (the square icon) when finished.

- Go to File > Export As > Audio Only, choose a destination folder, and click Save. QuickTime saves the output as .m4a.
Method 3: Record Voice in GarageBand (Most Control)
GarageBand is the most capable free option on macOS for voice recording. It supports adjustable input gain, noise gate filtering, editable multi-take audio tracks, and direct export to .wav or .m4a. Use this method when your recording needs to be assembled from multiple takes, cleaned up, or delivered at a consistent professional level using the built-in microphone.
- Open GarageBand and choose New Project → Empty Project.

- When the track-type dialog appears, select Mic or Line (the microphone icon) and click Create.

- Go to the Audio MIDI settings and find the Input Device dropdown and select your audio source.

- Adjust the Input Gain slider until peaks in the channel strip meter land consistently between -12 dBFS and -6 dBFS. This range provides a healthy signal without risking digital clipping.
- Press R or click the red Record button in the transport bar to start. A waveform builds on the track in real time.

- Press Space to stop. GarageBand automatically creates a new take region if you record over an existing segment.
- To export, go to Share > Export Song to Disk, choose WAVE or AAC (or MP3/AIFF), set your desired quality, and click Export.

GarageBand is the best native choice for podcast episodes, narrated slideshows, and any project where you need to review and edit individual takes before final delivery.
Method 4: Use an External Wireless Microphone for Professional-Quality Voice Recording
The MacBook’s built-in microphone array works well for quick notes and video calls, but it has a hard ceiling. Omnidirectional pickup captures keyboard clicks, cooling fan noise, and room reflections alongside your voice. Recording quality also degrades quickly as you move further from the screen. When audio quality matters for your project, a dedicated external microphone is the right solution.

The Hollyland LARK MAX 2 is the wireless microphone system used throughout this method. It is a compact dual-channel wireless microphone system with a USB-C receiver that connects directly to any MacBook port. It records internally at 48 kHz / 32-bit Float and includes AI Noise Cancellation accessible through the HollyAudio app. macOS recognizes it as a standard USB audio input, so no driver installation is required.
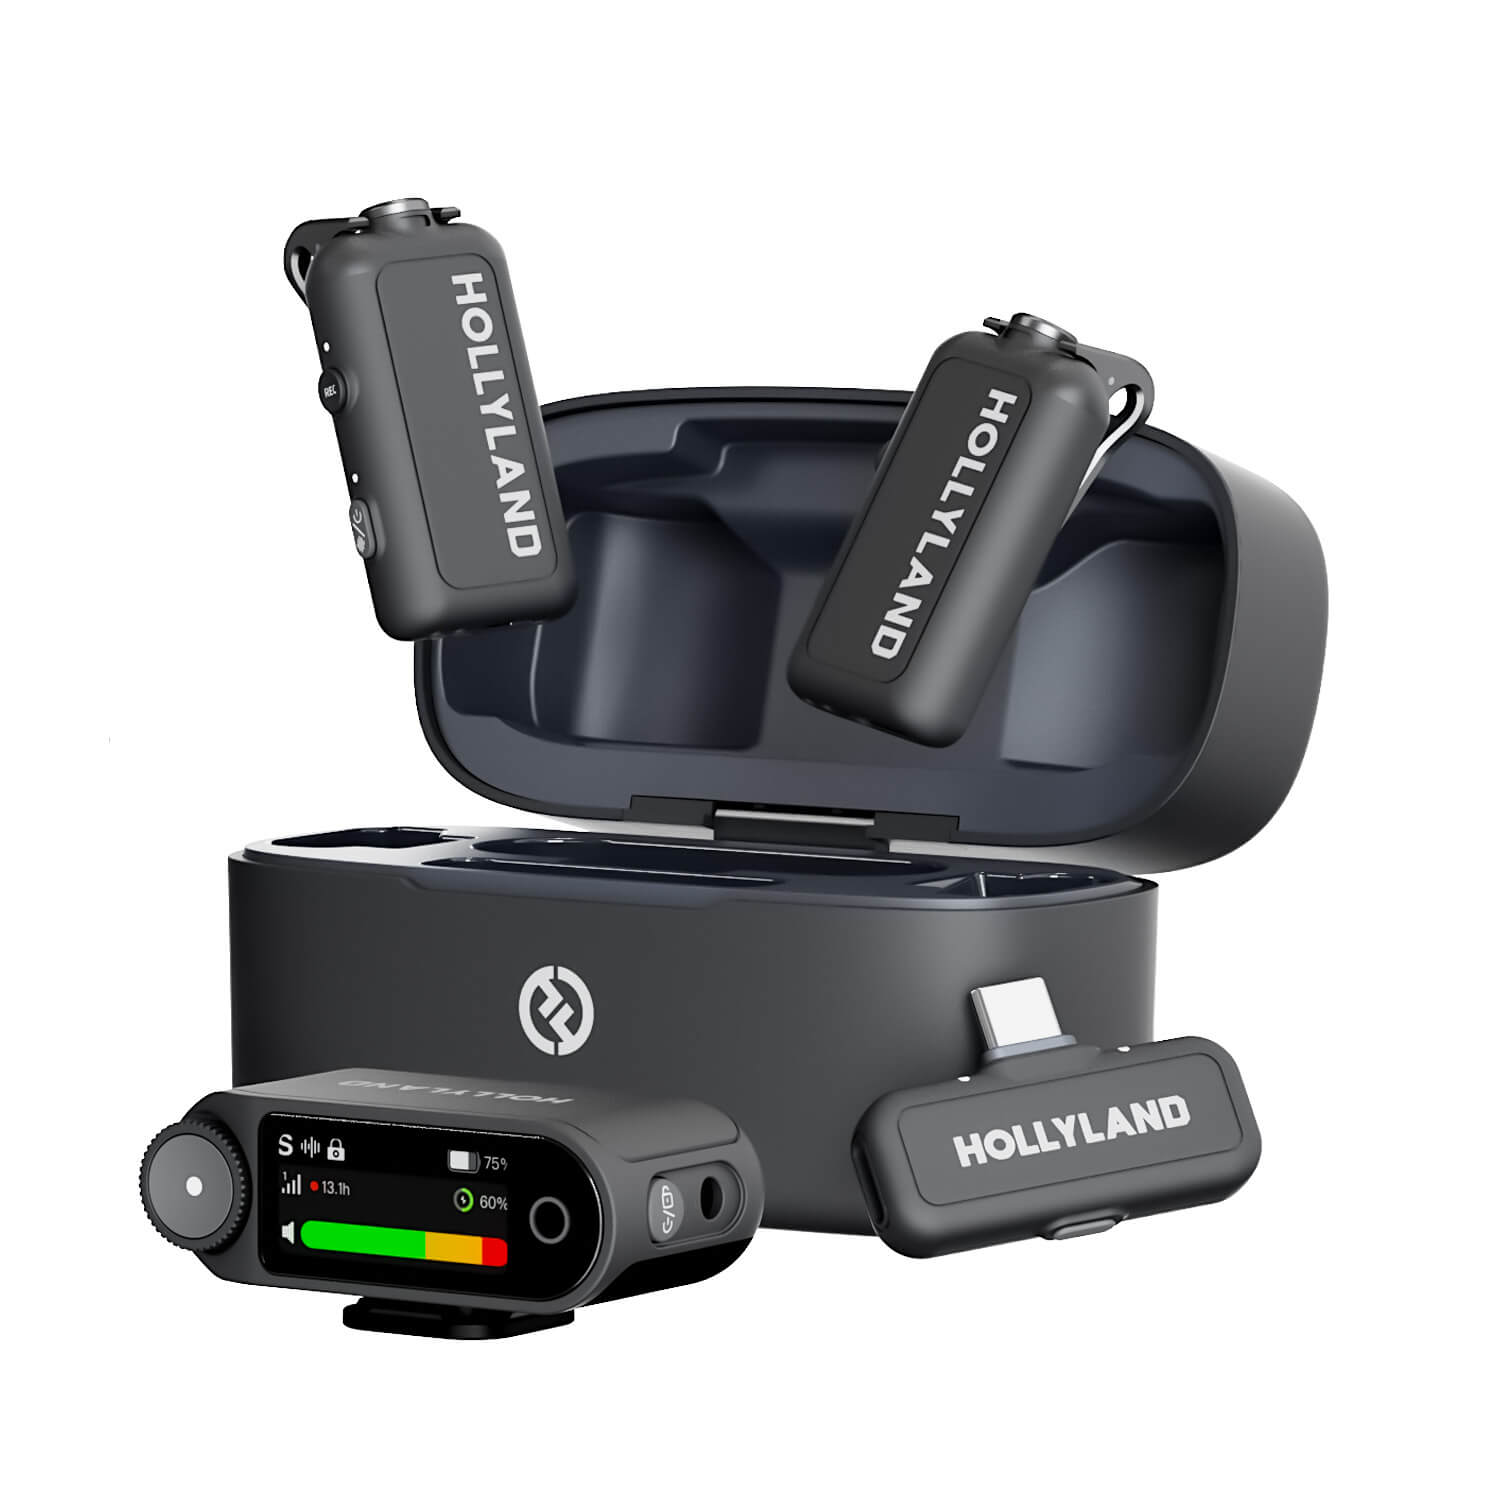
Hollyland LARK MAX 2 - Premium Wireless Microphone System
A premium wireless microphone for videographers, podcasters, and content creators to capture broadcast-quality sound.
Key Features: Wireless Audio Monitoring | 32-bit Float | Timecode
Step 1: Charge and Power On the LARK MAX 2
- Open the LARK MAX 2 charging case. A solid green LED on the case indicates a full charge; a pulsing green LED means charging is still in progress.
- Remove the transmitter(s) and receiver from the case.
- The transmitter auto-pairs when lifted from the case. The LED flashes blue while it boots and searches for the receiver.
- Once the transmitter and receiver locate each other, they pair automatically, since both units were stored in the same case. The LED on the transmitter transitions from flashing white to solid blue, confirming a stable paired connection.

- If the transmitter LED glows red, the battery is critically low. Return it to the case for a short charge before starting a session.
Note: If you are using both transmitters for a two-speaker recording, confirm that each unit shows a solid blue LED before proceeding.
Step 2: Connect the Receiver to MacBook and Select It as the Audio Input
- Locate the USB-C output port on the LARK MAX 2 Camera receiver.
- Use the included USB-C cable to plug the receiver into any USB-C or Thunderbolt port on your MacBook.
- macOS detects the receiver automatically as a new audio input device. No driver installation or system restart is needed.
- Open System Settings → Sound → Input.
- Select LARK MAX 2 from the input device list.
- Speak at a normal recording volume and watch the Input Level meter in System Settings. The meter should respond visibly to your voice, confirming that macOS is receiving audio from the paired transmitter.
The receiver’s front display shows signal strength bars, the current gain level in dB, and the battery percentage for each paired transmitter, giving you a real-time snapshot of the wireless link without opening any additional software.

Step 3: Set Gain and Enable AI Noise Cancellation
- Press the Control Knob on the LARK MAX 2’s Camera RX to view the menu.

- Rotate the wheel and tap the Mic Settings option.

- Select the Mic Gain icon and choose from Auto and Custom gain options.
- Select from the Custom and Auto gain choices.

- Adjust the gain level The current dB value updates on the receiver’s display in real time. Begin at 0 dB and adjust from there.

- Speak at your intended recording volume while watching the input level meter in System Settings. Target peaks that reach roughly -12 dBFS to -6 dBFS.
- Open the HollyAudio app on a paired iOS or Android device.
- Navigate to the Dynamic Gain section and use the on-screen slider to fine-tune the gain value if the hardware button increments feel too coarse for the level you need.

- Locate the AI Noise Cancellation (NC Level) toggle and switch it on. The LED indicator on the TX will turn solid green, confirming that the noise cancellation is active.


This filter suppresses broadband background noise such as HVAC hum, traffic, and ambient room noise in real time before the signal reaches your recording.
- Confirm that the transmitter is operating in 32-bit Float recording mode. This internal backup recording retains full dynamic range regardless of the gain setting, allowing level errors to be corrected in any audio editor after the session.
Step 4: Record
- Open your preferred recording app. In QuickTime, use the source dropdown to confirm LARK MAX 2 is selected. In GarageBand, check the Input dropdown in the Smart Controls pane. In Voice Memos, verify the input in System Settings before launching the app.
- Perform a 10-second test recording, then play it back and inspect the waveform for clean peaks and a low noise floor before committing to a full take.
- To silence the microphone between takes without stopping your recording app, double-press the power button on the transmitter to mute or unmute the mic. The transmitter LED turns red to signal the mute state.

- Record your session. When finished, stop the recording in your app and export using the steps from whichever method you selected.
Tips to Get a Cleaner Voice Recording on MacBook
These practices apply regardless of which method or microphone you use.

- Position yourself away from hard walls: Reflective surfaces cause room echo. Sitting at least one meter from bare walls, or facing a bookshelf, reduces reverb noticeably with no equipment cost.
- Keep the microphone 15 to 30 cm from your mouth: Too close causes proximity bass buildup and plosive bursts on words beginning with P and B. Too far increases room noise relative to your voice.
- Run a short test recording before every session: Listening back for 10 to 15 seconds costs almost nothing but can reveal feedback, clipping, or permission issues before an entire take is unusable.
- Enable Do Not Disturb before you press Record: Go to System Settings → Notifications and activate Focus mode to suppress alerts, banner sounds, and Siri interruptions during the session.
- Close unnecessary applications to reduce fan noise: Render-heavy or CPU-intensive apps raise MacBook fan speed. Closing them before recording lowers background fan noise, particularly when using the built-in microphone.
- Match file format to your delivery target: Use .m4a for voice notes, emails, and voice messages. Use .wav when sending audio to a video editor, podcast host, or client who needs uncompressed files.
- Combine 32-bit Float recording with AI Noise Cancellation for difficult environments. If you are recording in a noisy location using the LARK MAX 2, enabling AI Noise Cancellation in the HollyAudio app and relying on the internal 32-bit Float backup together provide both noise protection and level recovery in post.
Frequently Asked Questions
Does MacBook have a built-in microphone?
Yes. All current MacBook Air and MacBook Pro models include an internal multi-microphone array. The built-in mics are adequate for video calls and quick voice notes, but they also capture keyboard clicks, fan noise, and room ambience. For podcasting, interviews, or any content intended for an audience, an external microphone delivers substantially better results.
What is the best free app to record voice on MacBook?
Voice Memos is the best choice for quick, hassle-free recordings like lecture notes or verbal reminders. GarageBand is the stronger free option when you need input gain control, editable multi-take tracks, and the ability to export in .wav format. Both apps come pre-installed on macOS at no additional cost.
Can I use a wireless microphone with MacBook?
Yes. A wireless system like the Hollyland LARK MAX 2 connects via a USB-C receiver, and macOS registers it immediately as a standard USB audio input. No driver installation is required. You select it under System Settings → Sound → Input, and it appears as an available source in QuickTime Player, GarageBand, and Voice Memos.
Why is my microphone not showing up in macOS audio settings?
Start by checking System Settings → Privacy & Security → Microphone and confirming the recording app has permission. If you are using an external USB device, try a different USB-C port. If the device still does not appear, restart the macOS audio subsystem by opening Terminal and running sudo killall coreaudiod, then reconnect the device.
What file format does MacBook use for voice recordings?
Voice Memos normally saves recordings in M4A format. The exact audio type depends on your quality settings. QuickTime normally saves files as AIF with Maximum quality. Choosing High quality changes the output to M4A. GarageBand supports M4A, WAV, and AIFF exports. Your selected settings determine which format GarageBand creates. WAV remains the safest choice for editing software compatibility.
Conclusion
Voice Memos covers quick recordings with zero setup, QuickTime adds explicit input-source control, and GarageBand provides gain adjustment and multi-take editing, all using the MacBook’s built-in microphone. When audio quality is non-negotiable, the Hollyland LARK MAX 2 setup in Method 4 removes the built-in mic ceiling with a wireless, plug-and-play solution. For podcasting, interviews, or vocal recording where clarity matters, explore the LARK MAX 2 product page or a dedicated microphone selection guide to find the right fit for your workflow.
