.png)
If you are trying to figure out how to stop Audacity from automatically moving tracks when deleting, you have run into a very common editing hurdle.
When you highlight a section of audio in Audacity and press the standard Backspace or Delete key, the software performs a Ripple Delete. Instead of erasing the audio and leaving a blank space, Audacity pulls all the remaining audio on the right side over to the left to close the gap.
While this is helpful for single-track voiceovers, it completely ruins your timing and synchronization when working with multiple tracks.
To stop your tracks from shifting, use one of these three quick fixes:
- Use Split Delete: Highlight the audio you want to remove and navigate to Edit > Remove Special > Delete and leave gap, or press Ctrl + Alt + K (Windows) / Option + Cmd + K (Mac). This deletes the audio but leaves a perfect empty gap in its place.

- Use Silence Audio: Select the unwanted noise and press Ctrl + L (Windows) / Cmd + L (Mac). This instantly mutes the highlighted section without deleting the actual time block.
- Turn off Sync-Lock: Look for the clock icon in your top toolbar and uncheck it. This stops edits made on one track from automatically shifting the audio on your other tracks.
Method 1: Use “Split Delete” to Leave a Gap
As mentioned above, a standard delete yanks everything on the right over to fill the empty space. To remove a mistake without ruining the timing of your entire project, you need to use Split Delete.
This tool cuts out the audio but leaves a blank gap in its exact footprint, keeping your multi-track timeline perfectly synchronized.
Here is how to execute a Split Delete:
- Highlight the audio: Click and drag your mouse over the specific section of the waveform you want to remove.
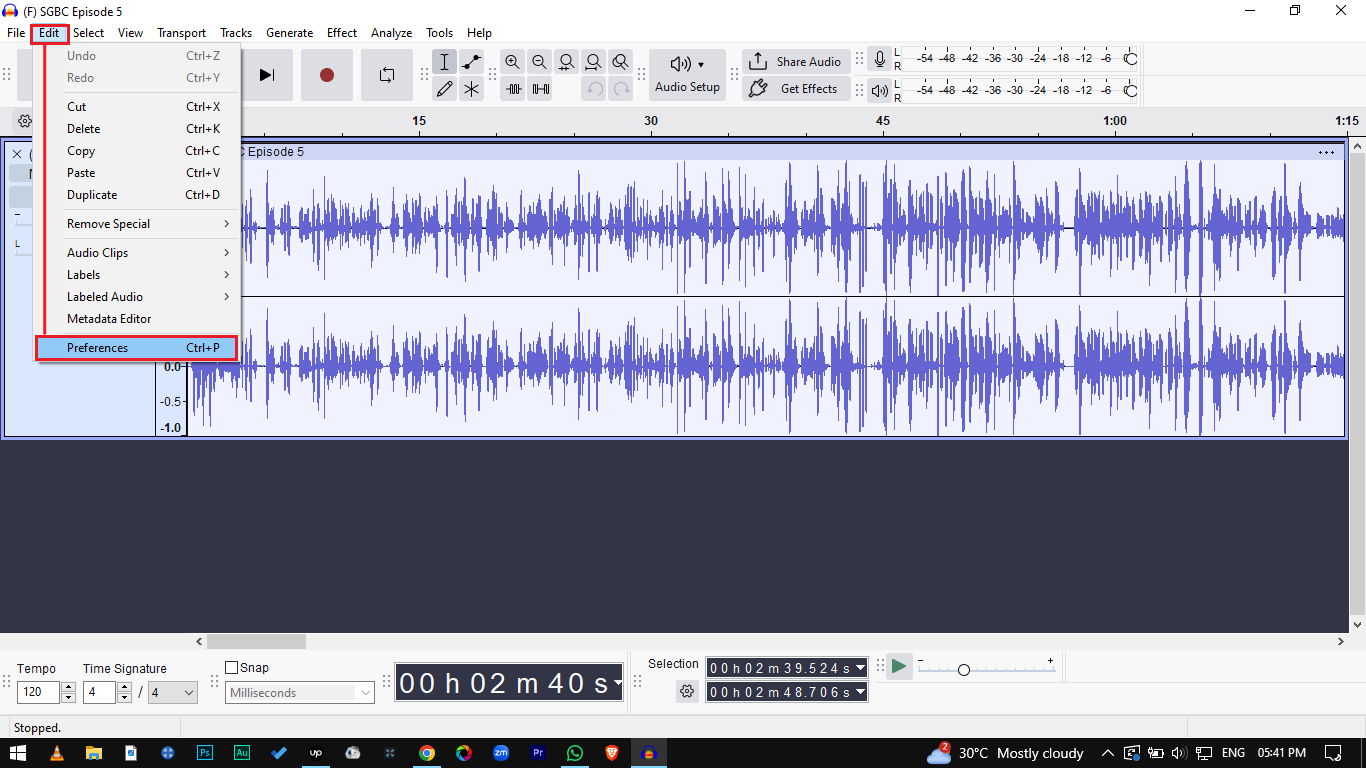
- Navigate the menu: Go to the top menu bar and select Edit > Remove Special > Delete and leave gap

- Use the shortcut (Recommended): To drastically speed up your workflow, use the keyboard shortcut Alt + Ctrl + K (Windows) or Option + Cmd + K (Mac).
[Visual Cue: Insert a Before/After screenshot here. The “Before” image should show a highlighted audio waveform, and the “After” image should show a completely empty gap in the track with the right-side audio untouched and in place.]
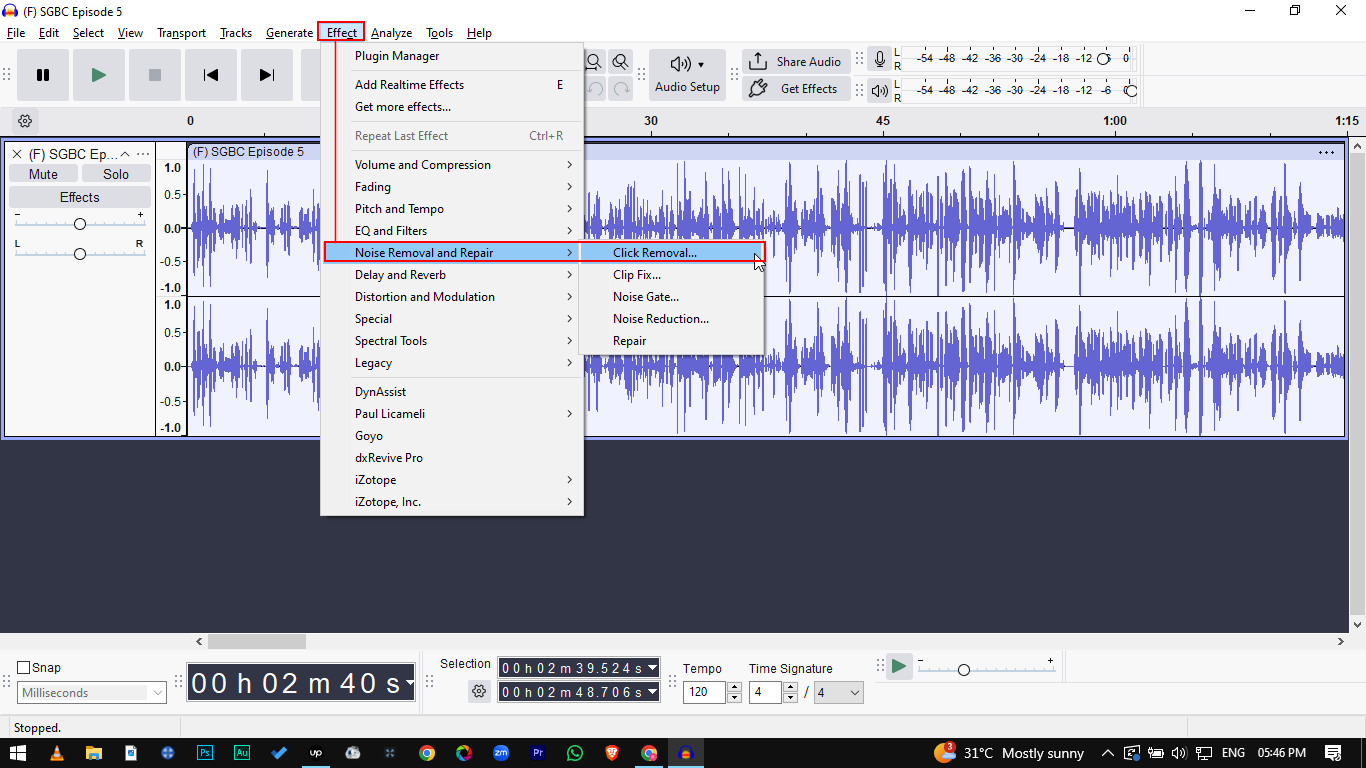
Method 2: The “Silence Audio” Tool (Best for Breaths and Background Noise)
Sometimes you don’t actually need to cut the audio block—you just need to mute a specific noise.
If you want to remove a loud breath, a cough, or a background thump without shifting your entire timeline, the Silence Audio tool is often cleaner than deleting the clip entirely. Instead of removing a chunk of time, this tool simply turns the volume of your selection to zero.
How to Silence Audio in Audacity:
- Highlight the specific section of audio containing the mistake.
- Press Ctrl + L (Windows) or Cmd + L (Mac).
- The audio waveform will instantly flatten into a straight line, muting the noise while leaving the surrounding audio exactly where it is.
Pros & Cons of the Silence Audio Tool:
- Pro: It keeps the clip intact as a single block. This is a foolproof way to scrub out unwanted noises while maintaining perfect multi-track synchronization.
- Con: It doesn’t actually cut the clip into separate, movable blocks. If your goal is to split the audio so you can drag the left or right sections independently, you need to use the Split Delete method instead.
Method 3: Disable “Sync-Lock Tracks” (For Multi-Track Issues)
If you delete a section of audio on Track 1 and notice that Tracks 2 and 3 shifted to the left right along with it, your tracks are currently tied together. This is a common multi-track editing issue caused by an active feature called Sync-Lock Tracks.
Audacity uses Sync-Lock to keep different audio layers perfectly aligned when you make standard ripple edits. While helpful for rearranging entire podcast segments at once, it is incredibly frustrating when you just want to remove a cough from a vocal track without ruining the timing of your background music.
When Sync-Lock is active, a patterned shading appears across your timeline. Any deletion removes that block of time across all synced tracks.
How to Turn Off Sync-Lock in Audacity
To separate your tracks and edit them independently, you need to toggle this feature off. You can do this in two ways:
- Use the Toolbar Icon: Look at your top toolbar for an icon resembling a clock with a chain link. If the button looks depressed or highlighted, Sync-Lock is on. Click the clock icon once to disable it.
- Use the Menu Bar: Navigate to the top menu and select Tracks. Look down the dropdown menu for Sync-Lock Tracks. If there is a checkmark next to it, click to uncheck and disable the setting.

Once disabled, the patterned shading in your timeline will disappear. You can now safely delete clips on a single track without forcing your other audio tracks to move automatically.
Pro Tip: Reduce Editing Headaches by Upgrading Your Source Audio
Why are you making so many cuts in Audacity in the first place? Endless deleting and re-syncing is usually a symptom of poor source audio—like cutting out distorted peaks, background hums, or loud breathing.
If you are constantly battling the timeline to remove bad takes, the best fix isn’t a keyboard shortcut; it’s better hardware. Enter the Hollyland LARK MAX 2, a smart workflow upgrade for podcasters, voiceover artists, and YouTubers.


By capturing pristine audio from the start, it stops editing headaches before you even open your software. Here is how upgrading your microphone streamlines your Audacity workflow:
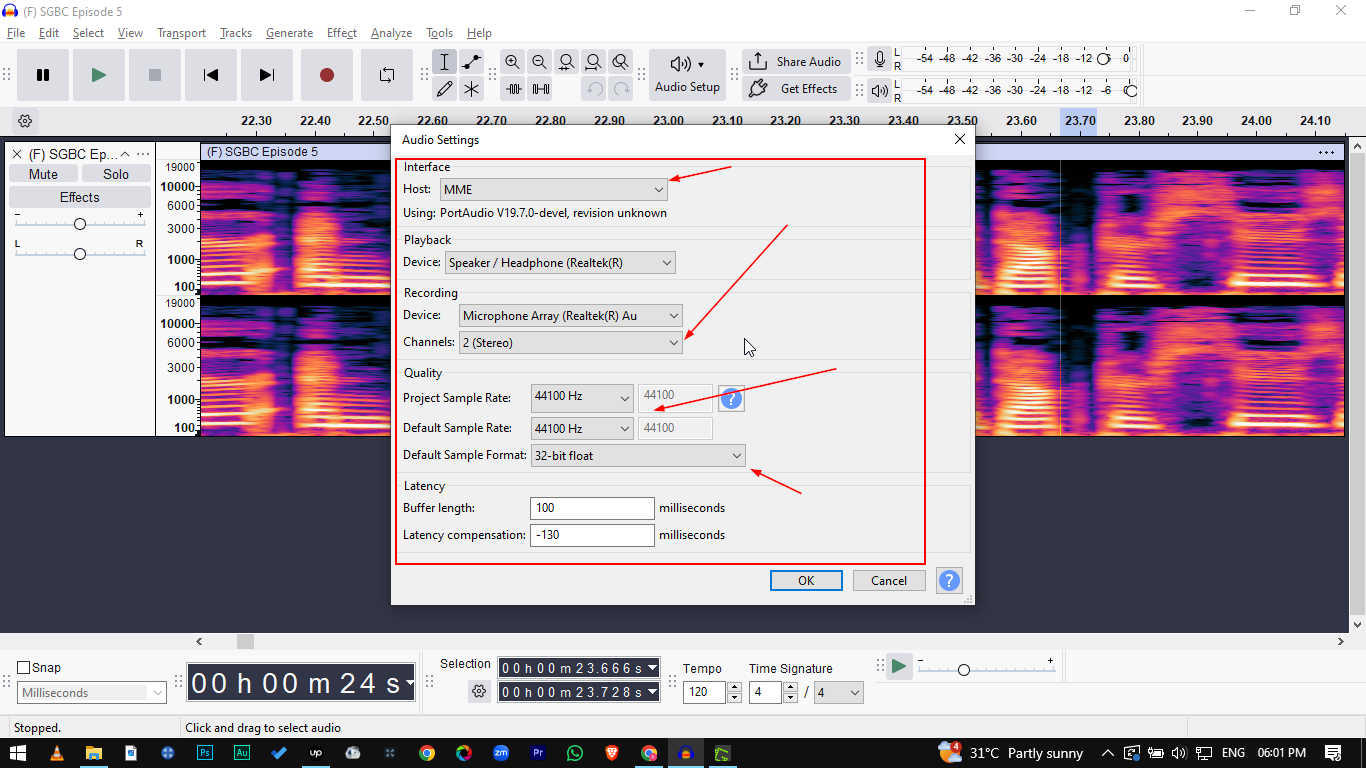
- 32-bit Float Recording: This feature is a massive time-saver. 32-bit float technology ensures your audio never distorts, even with screaming or sudden loud noises. You will never have to highlight and delete clipped, unusable audio peaks again.
- 48kHz/24-bit Studio Quality: Captures rich, broadcast-ready sound right out of the box. This drastically reduces the need for complex EQ tweaks or heavy compression in post-production.
- Professional ENC (Environmental Noise Cancellation): Automatically filters out unwanted background noise at the source. Instead of manually using Audacity’s “Silence Audio” tool to mute AC hums or room echo, the LARK MAX 2 ensures those gaps are already dead silent.
By capturing perfect, un-clippable audio from the second you hit record, you spend significantly less time chopping up tracks. Fewer cuts mean fewer multi-track shifting headaches, letting you finish your edit and export your project in record time.
Frequently Asked Questions (FAQ)
How do I move a track freely in Audacity?
In newer versions of Audacity (3.0 and later), the old Time Shift tool has been replaced. To move a track freely, hover your mouse over the top edge of the audio clip until you see a hand icon—this is the Clip Handle. Simply click and drag the Clip Handle left or right to reposition your audio anywhere on the timeline.
How do I delete empty space between tracks in Audacity?
If you have an unwanted gap between two audio clips on the same track, removing it takes just two clicks. Double-click the empty space to automatically highlight the exact duration of the gap. Once highlighted, press your standard Delete or Backspace key. This snaps the two audio clips seamlessly together.
Why is standard delete called “Ripple Delete”?
“Ripple delete” is a standard video and audio editing term. Instead of leaving a blank hole, a ripple delete automatically pulls all subsequent media to the left to close the gap. It creates a “ripple effect” down the rest of your track, altering the timing of everything that comes after the cut.
Conclusion & Call to Action
Mastering Audacity comes down to knowing exactly how your editing tools affect the overall timeline. Just remember this golden rule: use the standard Delete key when you want to close empty gaps, but rely on Split Delete (Alt + Ctrl + K) or Silence Audio (Ctrl + L) to remove mistakes while preserving perfect track synchronization.
Of course, the best way to speed up your editing workflow is to prevent those mistakes at the source. If you find yourself constantly highlighting and deleting distorted audio, loud breaths, or clipping issues, it is time to upgrade your hardware.
The Hollyland LARK MAX 2 is engineered to streamline your recording process before your files ever touch Audacity. Featuring 32-bit Float Recording, it guarantees your audio will never clip or distort—no matter how loud things get. By capturing pristine, studio-quality sound right out of the gate, you drastically reduce the need for heavy editing, gap-filling, and tedious multi-track syncing.
Stop fixing bad audio and start creating great content. Check out the Hollyland LARK MAX 2 today to bulletproof your recording workflow.