Often used to protect data in the form of images and videos, Google Drive can also used to store audio files. So, if you have loads of audio files that you are afraid to lose, Google Drive has got you covered.
You can upload all your essential audio files to Google Drive and access them anytime you want. Also, it helps you protect information when you change your device.
In this article, let us learn how to add audio to Google Drive step-by-step.
Part 1: Preparing Your Audio File
Google Drive does not support all formats of audio. Therefore, you have to prepare the audio files before uploading them.
Supported Audio Formats for Google Drive
Google Drive supports the following formats of audio files,
- MP3
- MPEG
- WAV
- .ogg
- .opus
Converting Your Audio File to a Supported Format
Note that you might be able to store files of different formats in Google Drive, but you will not be able to play formats not supported by Drive. So, it is best to store the files in supported formats.
If you have audio files in formats not supported by Google Drive, there are 2 ways to change the format to Google Drive-supported files.
1. Software Tools for Audio Conversion

The easiest method to convert audio files is to use software tools including Switch Sound File Converter, Free Make Audio Converter, Zamzar, Audioconvert.com, and more.
To use such tools, simply browse the tool on the internet, upload your file, select the format, let it process, and save the file.
2. Online Audio Conversion Services
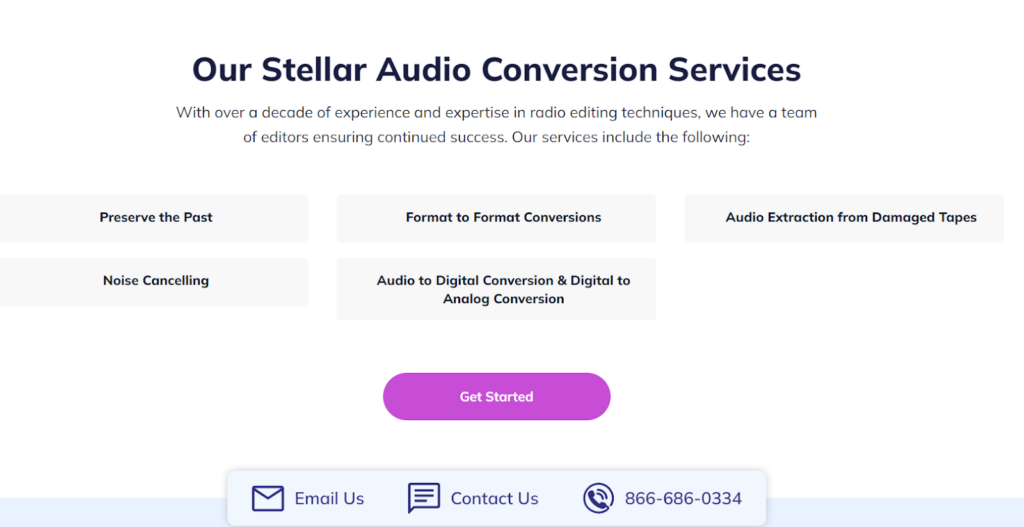
If your data is large or difficult to process, ask for help from online audio conversion services. Such services can be used for,
- Retrieving damaged audio files
- Editing the audio
- Changing the format
Part 2: Accessing Google Drive
After you have the file in the desired format, the next step is to access your Google Drive.
Signing In to Google Drive
The drive can be used on laptops and mobile phones. So, let us learn how to sign into Google Drive on both devices.
Using a Web Browser

On laptops, Google Drive works on the browser. There are two ways to sign into Drive using a web browser.
- Open a web browser, preferably Google Chrome
- Search for “Google.com”
- Click on the “Sign in” option given in the top right corner
- Enter your email address and password
- Open Google again
- Click on the “Apps” option in the top right corner given in form of small blocks
- Click on the “Drive” menu in the window that opens up
Using the Google Drive App on Mobile Devices

To use Google Drive on your mobile phone, here are the steps of log-in.
- Download and install “Google Drive” if your phone does not have it already
- Open the app
- Click on the “Sign in” option given at the bottom of the screen and click “Continue”
- Write your email and password
Navigating the Google Drive Interface
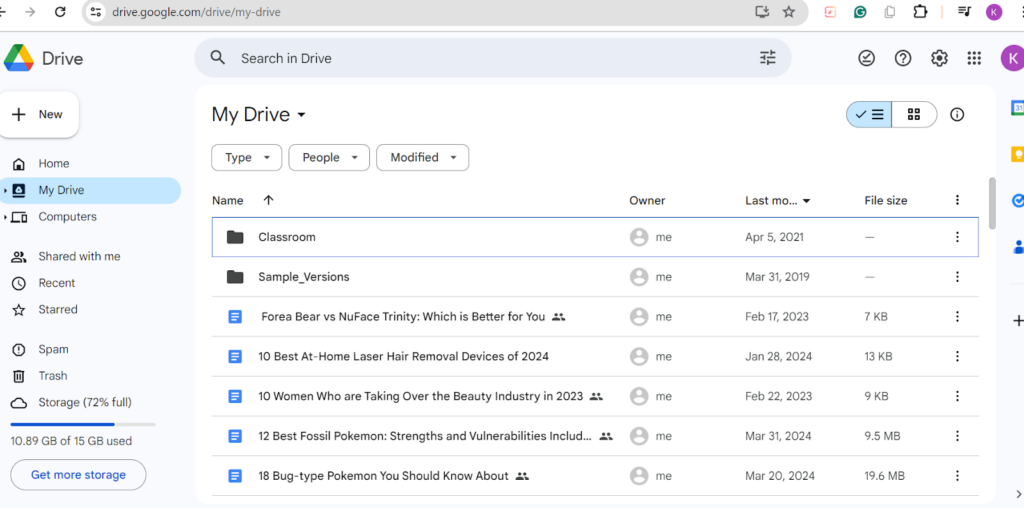
If you have never used Google Drive, let us help you understand it a little.
Overview of Main Areas
Once the Google Drive is open, some folders on the left side, a few features including settings, delete file, and add file option on the top, and quick access documents on the screen.
Understanding Folders and File Management
On the right side, there are the following folders,
- My Drive: It contains all the data you have.
- Shared With Me: Here you can see folders belonging to someone else that have been shared with you.
- Recent: it shows your recent activity.
- Computers: It represents syncing of Google Drive between different devices.
- Trash: Here is the deleted data kept for a few days.
- Upgrade Storage: Google Drive has 15 GB of built-in storage. You can buy more as well.
Part 3: Uploading Audio Files to Google Drive
As we are done with the prerequisites of uploading files to Google Drive, let us finally start uploading audio files to Google Drive.
Uploading from a Computer
You can upload audio files from a computer by 2 methods.
Using the “New” Button Method

For this method,
- Click on the “New” option given on the top left side of the screen
- Create a new folder by clicking on “+ Folder” and create a name for that folder
- Click on the “Drive”
- Click on the name you chose for the folder
- Go to “New” again
- Click on “File Upload” and upload a file from your computer storage
Drag and Drop Method

Here are the steps to drag and drop audio files on Google Drive,
- Arrange your desired audio files on the right side of your desktop
- Click and hold the audio file
- Drag and drop into your Drive’s screen, preferably in the new folder you created
Uploading from Mobile Devices
There are two ways to use mobile to upload files as well.
Using the Google Drive App

After logging in to your Google Drive,
- Open the Drive mobile app
- Click on the “Plus” sign given on the right bottom of the screen
- Create and name a new folder by clicking on the “Folder” option
- Click on the “Plus” sign again
- Click on “Upload” and then “Audio” options
- Select the audio files you want to upload
Sharing from Other Apps to Google Drive
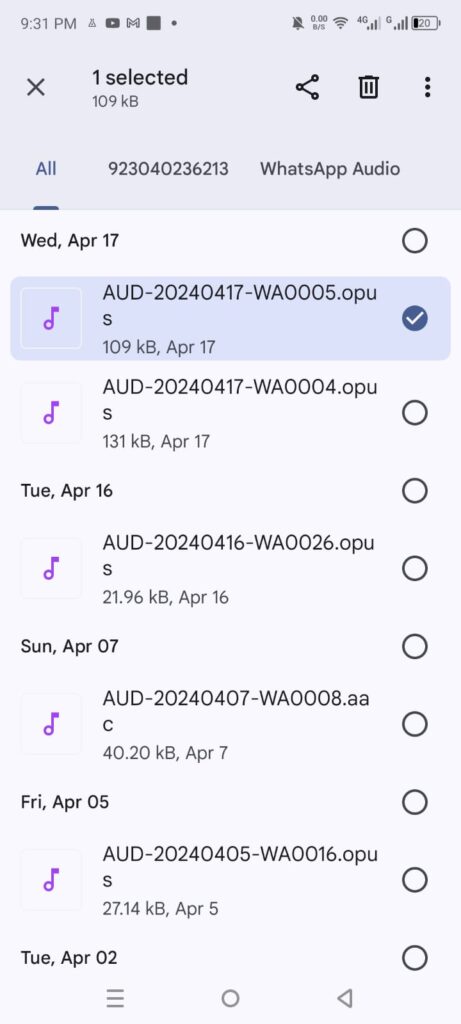
In this case, you can upload files directly from your documents.
- Go to “Files” on your device
- Click on the audio files you want to save
- Click on the “Share” option given on your screen
- Select “Drive” on the menu that opens
- Hit “Upload”
Part 4: Organizing Your Audio Files in Google Drive
Uploading a large number of files in Google Drive makes it difficult to find a particular file. So, here are some tips to arrange audio files in Google.
Creating Folders for Audio Files

Always create a separate folder for uploading audio files and rename the folder in a way that you can remember which files are stored there.
To create a folder,
- Click on the “New” option
- Click on “Folder”
- Name and create the folder
Renaming Audio Files

Another way to organize audio files is by changing their names. For this,
- Right-click on the audio file you want to rename
- Click on the “Rename” option in the menu
- Write the name
- Click “OK”
Moving Audio Files to Different Folders
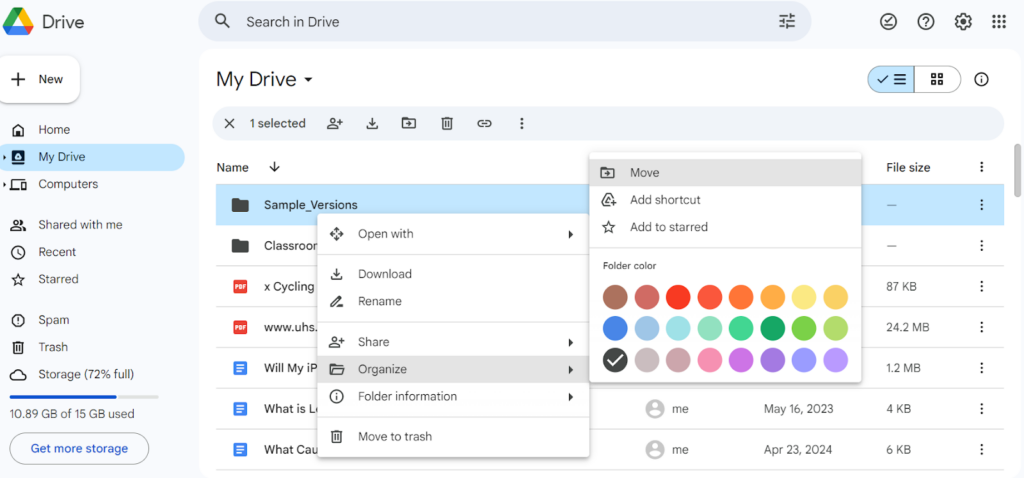
If you have accidentally stored files in the wrong folder. This is how to move them,
- Right-click on the file you want to move
- Go to the “Move” option given in “Organize” in the menu
- Choose the folder you want to move it in
- Click “Move”
Part 5: Sharing Audio Files from Google Drive
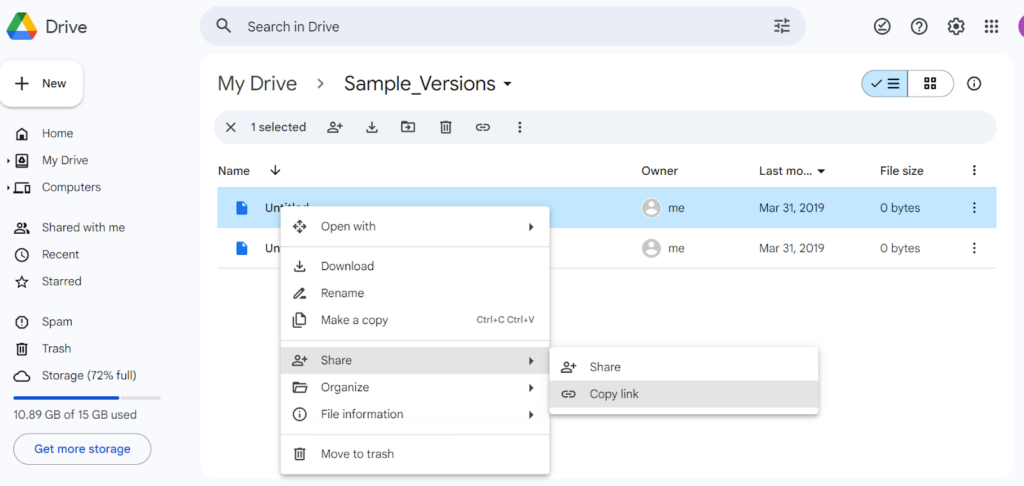
One of the benefits of Drive is that you can share data easily with a single link. So, let us talk about sharing files in Google Drive.
Setting Sharing Permissions
Before sharing your Drive link, set the permissions. For this,
- Right-click on the folder you want to share
- Click on the “Share” option
- Choose permissions
Private/ Public
You can share the folder with public or private contacts with a link
Specific People
Write the email addresses of specific people you want to share the folder with.
Sharing via Link
Here is how to share the Google Drive folder via the link.
Generating the Shareable Link
- Click on the “Share” option in the folder
- Click “Copy Link”
Customizing Access Levels for the Link
- Click on the “Share” Option”
- You will see the “General Access” option
- Select “Restricted/Anyone with the link”
- Manage Access level
Sharing Directly with Google Drive Users
Here is how can share audio files with other Google Drive users.
Sharing with Individual Users
You can share Drive files with individual users by,
- Sending them by email
- Sharing a link
Sharing with Google Groups

To share your files with a specific group, you need to create one.
- Go to “contacts.google.com”
- Click on the “Group” option on the left side
- Name the group
- Add your contacts to it
- The other steps are the same as sharing files with individual users, only name the group instead of the person
Part 6: Playing Audio Files Directly from Google Drive

Supported Audio Player Features
You can play audio files directly on Google Drive through,
- Drive Tunes
- Music Player for Google Drive
- Music-playing software tools like Cloud Converter
While using music from Drive, you can change audio, repeat it, increase/decrease volume, and do much more. Therefore, audio in Google Drive can work as your desktop music.
Limitations of Google Drive’s Built-in Audio Player
Some limitations of Google Drive’s audio player are given as,
- It only supports a few audio formats as mentioned above
- There is a storage limitation on audio files you can upload
- You need a stable internet connection to access the audio player
Part 7: Best Practices for Managing Audio Files on Google Drive
Lastly, we want to share some tips for managing your audio files on Google Drive.
Regularly Updating File Names and Folders
First of all, it is great if you create folders before uploading files. If not, create folders and update the files you want to store in them. Also, name and arrange files in the order you like.
In addition, update the names of the folders/files whenever you add new data to them.
Using Descriptive Titles for Easy Searching
Instead of using short names, start using a complete name with title, time, date, and even key points in the audio. This will make your search for a particular audio a piece of cake.
Keeping a Backup of Important Audio Files
There is a risk of losing a folder with important audio files. Therefore, always keep a backup in a separate folder on the same drive or another drive.
When uploading audio to Google Drive, getting crisp and clear recordings is essential. Using a wireless lavalier microphone can significantly enhance your audio’s clarity and quality, making your resulting files professional and easy to share.
FAQs
1. What is the Maximum File Size for Audio Uploads to Google Drive?
Although the maximum file limit for uploading audio files is 5 TB. This size equals 1 million files of 1 MB. There is no chance of having an audio file that big, right? Therefore, there is no maximum file size limit for audio uploads.
2. Can I Edit Audio Files Directly in Google Drive?
No, you cannot edit audio files directly in Google Drive. Rather, you will have to use another audio editor to make changes to your file.
3. How do I Download Audio Files from Google Drive to my Device?
You can download audio files from Google Drive to your device by right click on the file > Download.
4. Is it Possible to Play Audio Files in Google Drive Offline?
Yes, it is possible. However, you will have to enable “offline access” to the file beforehand.


.png)


