.png)
.png) Français
Français .png) Deutsch
Deutsch .png) Italiano
Italiano .png) 日本語
日本語 .png) Português
Português  Español
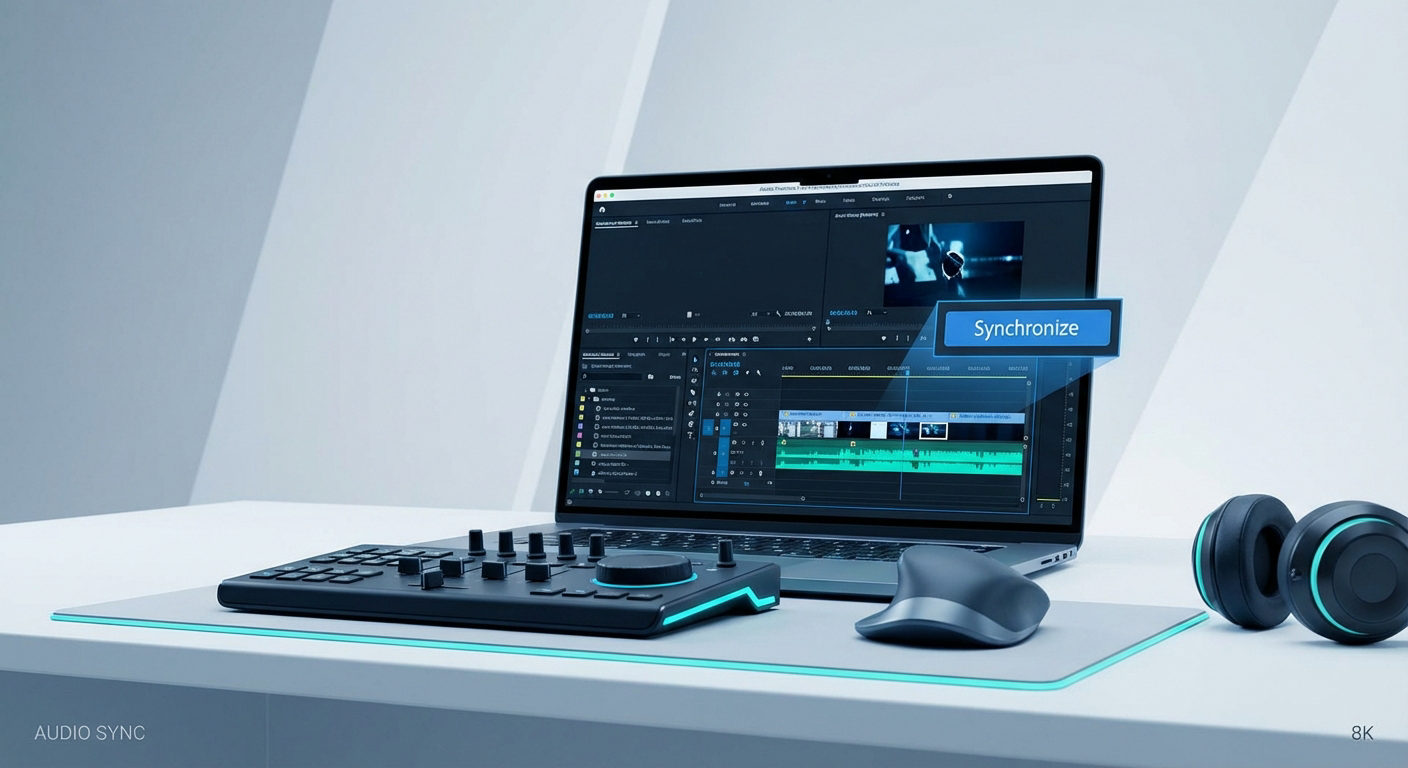
 Synchronization is vital in video editing when working on a project with multiple audio and video files. It perfectly aligns audio and video tracks to ensure they match in time and quality. DaVinci Resolve provides several methods for seamless audiovisual syncing to enhance the project quality and save time.
From automatic to manual methods, this guide will provide detailed steps to sync audio and video for a smooth rhythm experience.
How to sync audio and video in DaVinci Resolve?
The Resolve has a built-in feature to synchronize special effects to craft captivating videos that have a lasting impact. It ensures smooth workflow and enhances engagement by improving the viewing experience. So, here are the best ways to sync audio and video in DaVinci Resolve to ensure project creativity.
Import Media Files
- Ensure you use the updated DaVinci Resolve version for smooth audio and video track syncing.
- Open Project
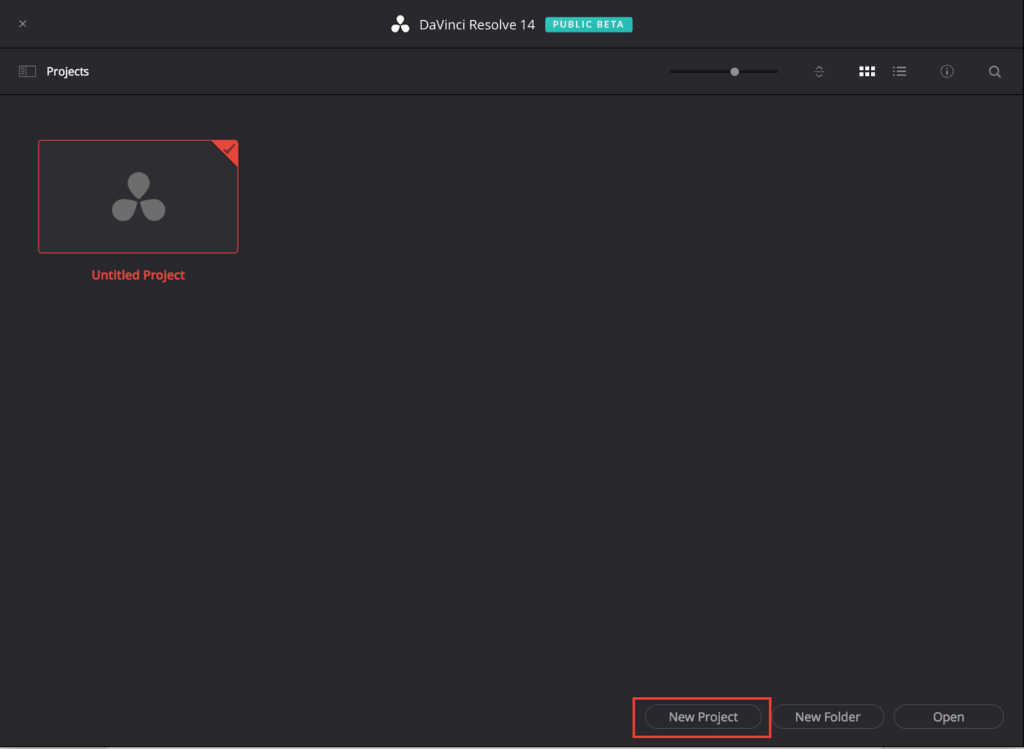
- Open DaVinci Resolve, click the existing project, or select “New Project.”
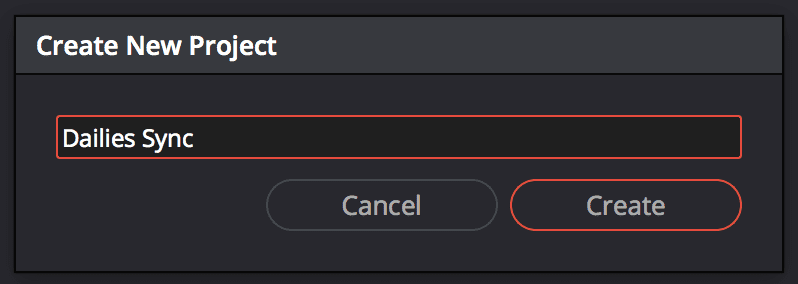
- Name your project and Click “Create” to create the project.
- Open the project and go to the “Media” tab from the bottom menu bar.
- Import the Media
- The “Media Storage” column will show available drives on your computer and browse to locate your desired files.
- Select all the media files you want to import, right-click, and choose “Add to Media Pool.”
- Alternatively, select the media and drag the files to the media pool.
- Frame Adjustment
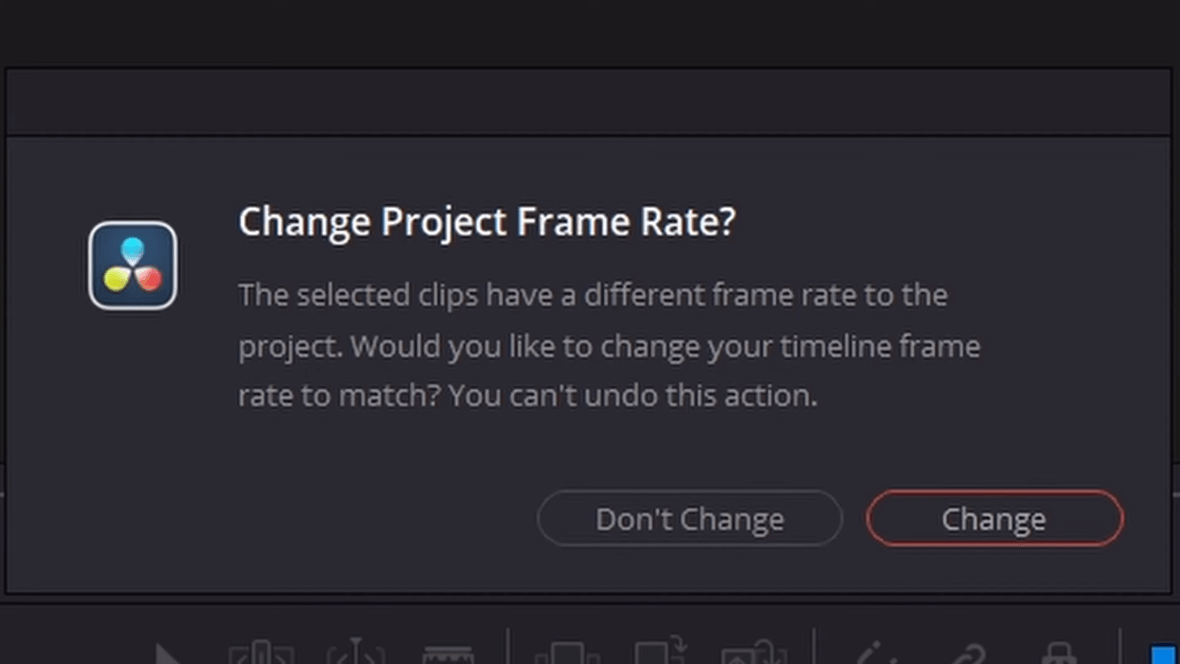
- If you haven’t adjusted the settings, a window will pop up when importing the media saying “Different Frame Rate than the Project Setting.”
- Select “Change” if you want to adjust and match the frame rate of the incoming media to your settings.
Manual Syncing Methods
Method 1- Using Media Pool to Sync the Audio and Video
Step 1- Open in the Viewer
- Go to the “Media” tab and import the video and audio clips from the bottom menu.
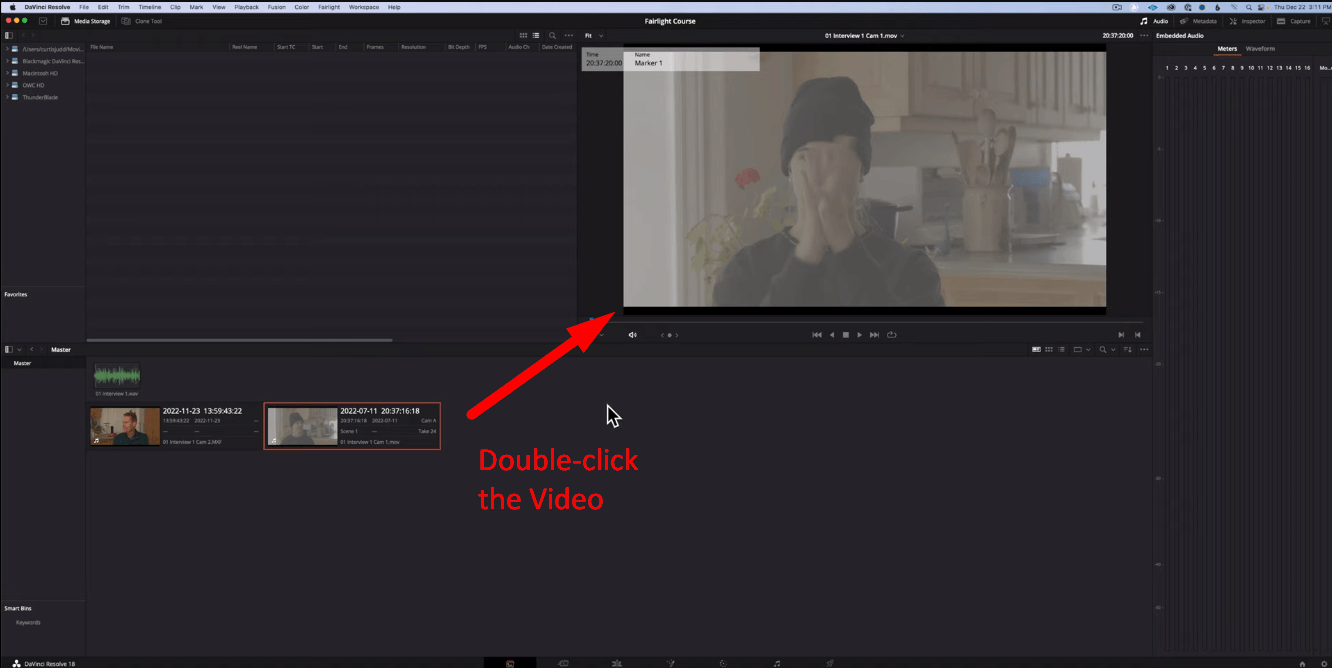
- First, double-click the video clip to open it in the “Viewer” window.
Step 2- Visual Cue
- Once your video clip is in the Viewer, move your playhead to the “visual cue” or “sync point.”
- Place the playhead in the exact frames before the sync point.
Step 3- Select Audio Sync Point
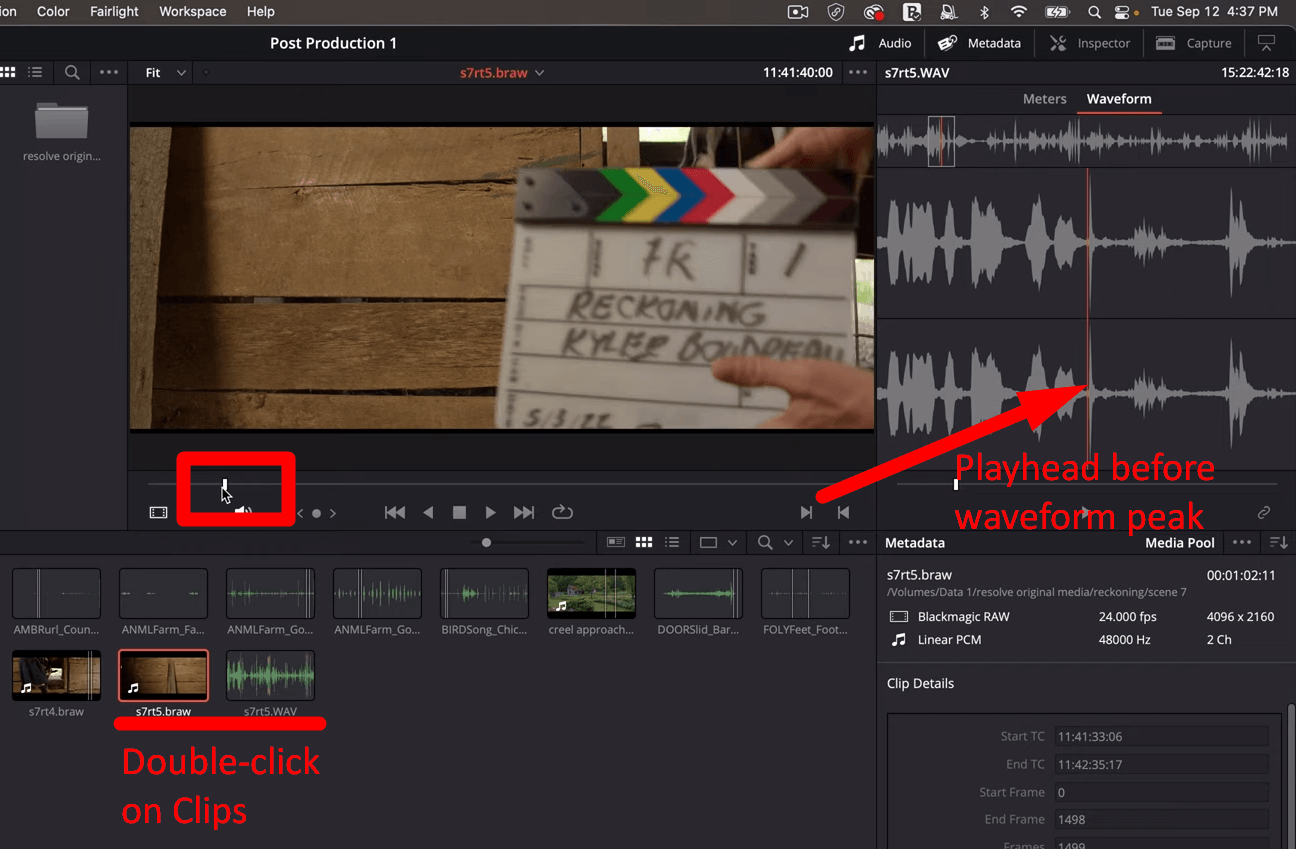
- Then, double-click the new audio clip and select “Waveform” from the top-right corner to view the waveform analysis of the audio.
- Move the playhead to “Waveform Peaks,” like clap Slate or “Sync Point” from the waveform display.
- Use the “Comma and Period key” to move the video or audio clip playhead back or forward by a single frame.
Step 4- Link Clips

- Once satisfied with the playhead placement, click the “Link Selection” icon in the top-right corner under the waveform.
- It will sync the clips based on where the playbacks were located.
Step 5- Clip Attributes
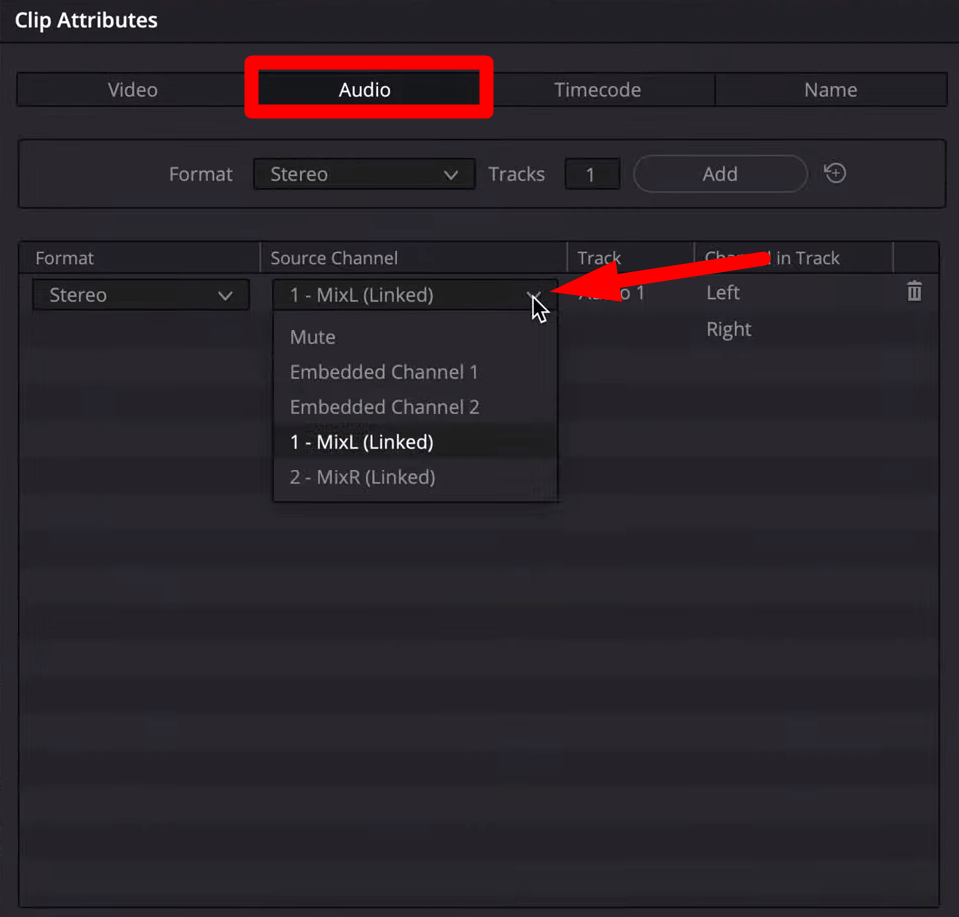
- To check, right-click the synced clip and choose “Clip Attributes” from the pop-up window.
- Go to the audio tab, and it will show audio from an external audio clip.
Note: Place the slate or clapboard at the center frame and record up to five seconds of silence before and after the board’s drop. It will provide clear waveform spikes and visual cues when syncing manually.
- Syncing Multiple Video Clips with Audio
Step 1- Place “Marker” on the Video Playhead
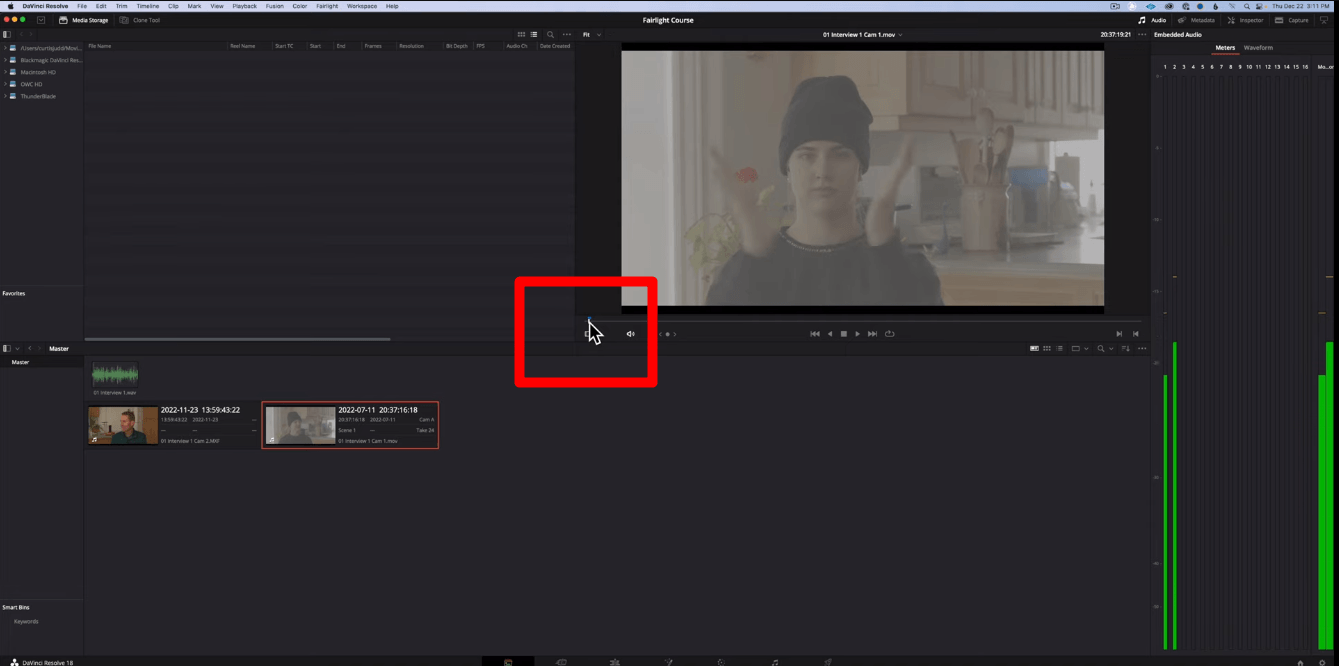
- Double-click the video clip to open in “Viewer” and navigate the playhead to the “Clap Slate” or sync point.
- Then press “M” from the keyboard to put a “Marker” on the playhead position.
Step 2- Marker on Audio Playhead
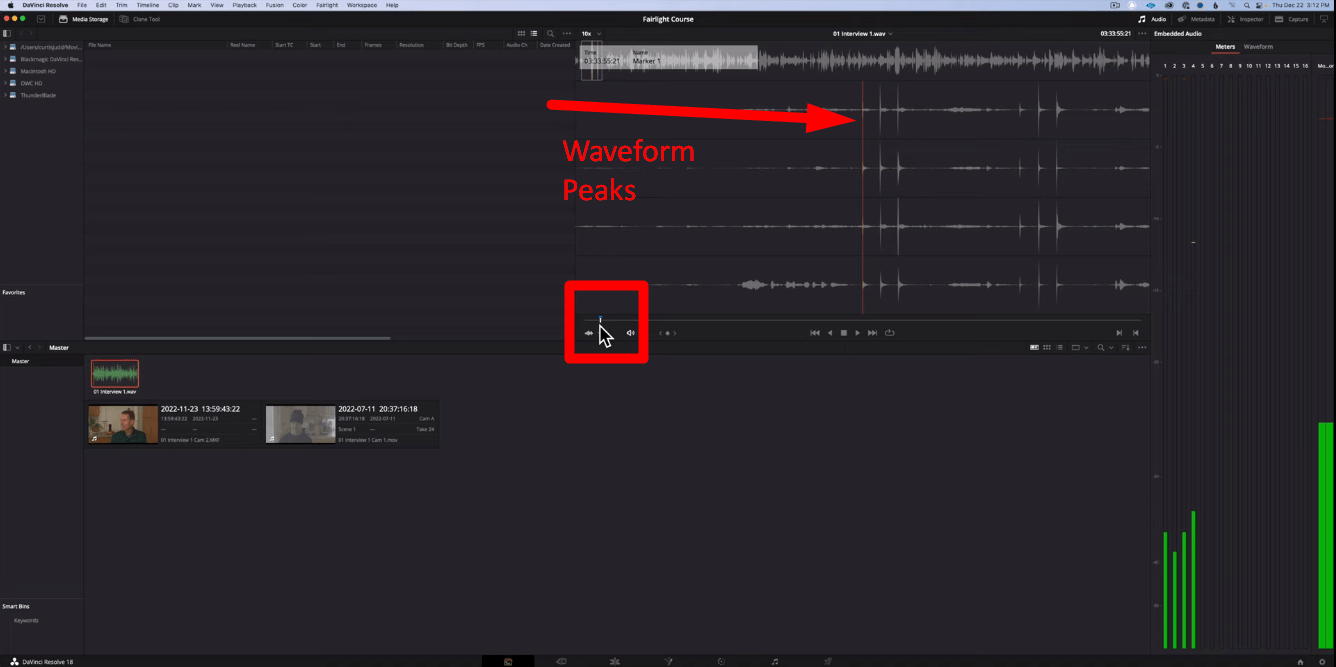
- Double-click on the audio and a waveform will appear in the Viewer.
- Move the playhead to sudden peaks in the waves to create a sync point and “Press M” to leave a “Marker.”
Step 3- Create a new Multicam
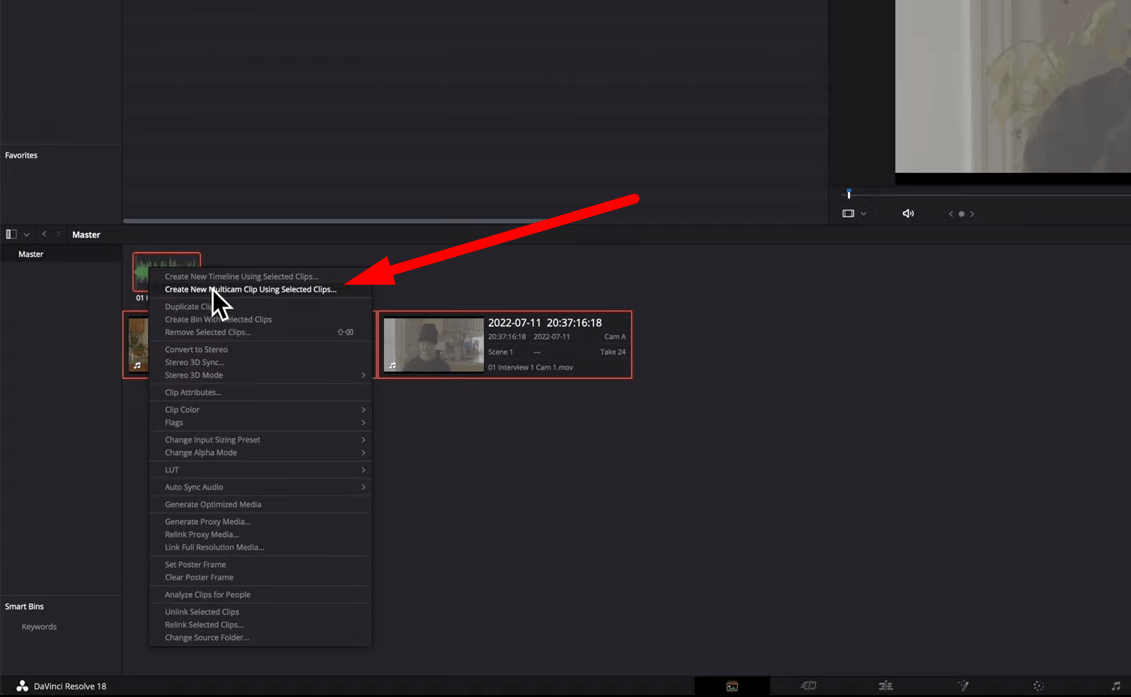
- After adjusting the playhead positions, select all the clips, and right-click to choose “Create new Multicam clip using selected clips.”
Step 4- Align Sync
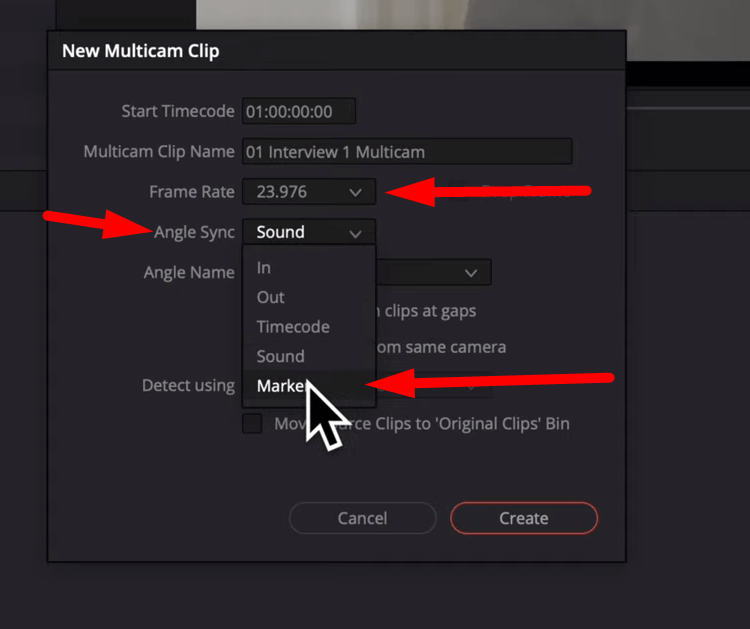
- Then, name the “Multicam clip” and choose the frame rate.
- Click “Align Sync” and choose “Marker.”
- Select “Create” to align them and create a new Multicam clip based on the marker.
- Syncing Multiple Channels Audio
If the audio clip has multiple audio channels, then after aligning the Multicam, it will not show the total channels in the Timeline.
Step 1- Create a new Multicam
- First, select all the video clips, then right-click and choose “Create new Multicam clip using selected clips.”
- Name the Multicam and choose the align sync to marker.
Step 2- Open in Timeline
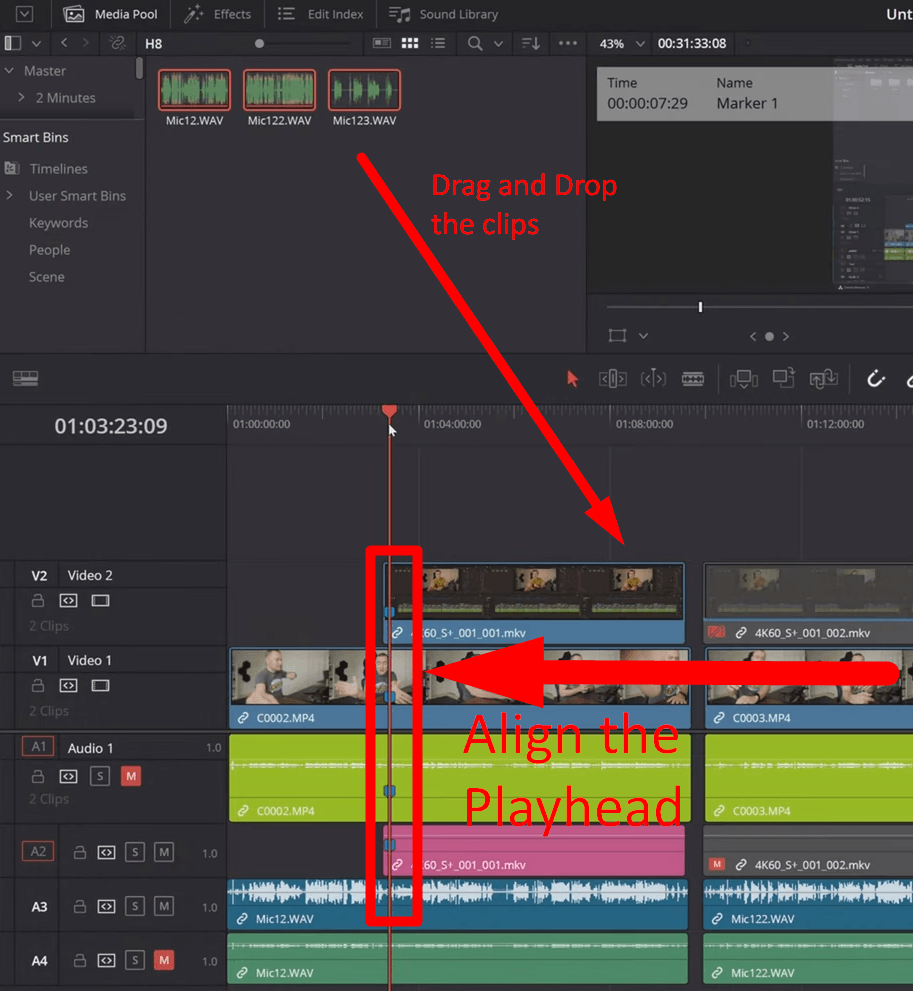
- Go to the “Edit” page from the bottom menu and drag the synced video clips to the Timeline.
- Then, drag the audio track with multiple channels to the Timeline.
Step 3- Sync Clips with Sync Point

- Move the video and audio clips to align with each other by navigating the clap slate waveforms in the audio tracks.
Step 4- Link Clips

- If you are satisfied with the syncing, select all the clips, right-click, and choose “Link Clips.”
- Then mute the camera audio and other microphone audio you don’t want to hear. After setting it, you can edit or fine-tune the audio further.
Method 2- Using Timeline to Sync Manually
Step 1- Drag clips in the Timeline
- Go to the “Edit” tab and drag the video and audio clips to the Timeline.
- Expand the clips to view the tracks better and navigate to the waveform spikes in the audio tracks.
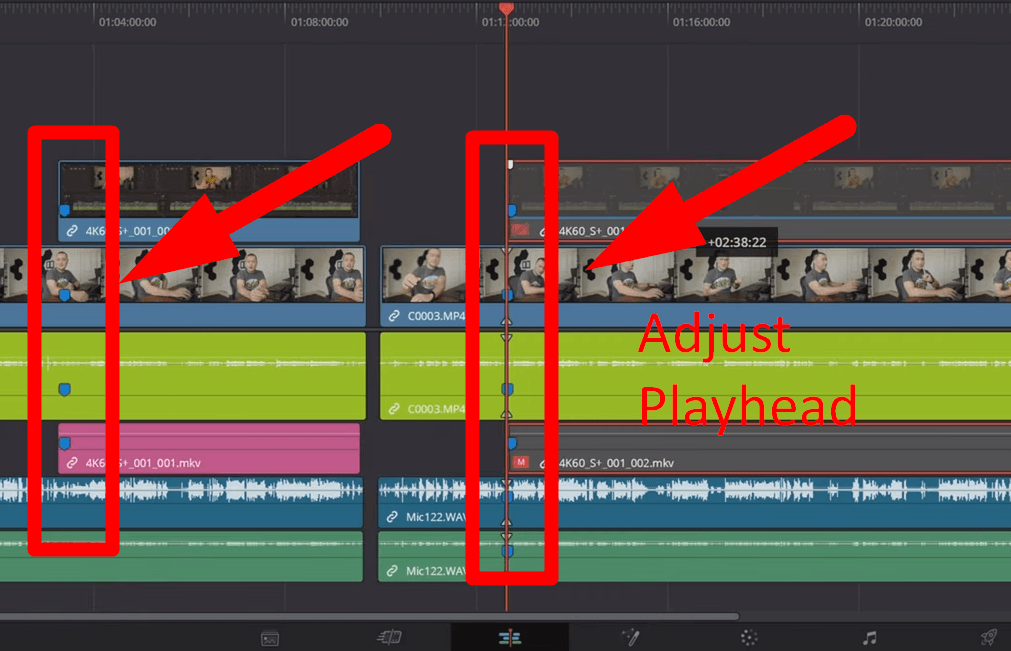
Step 2- Navigate the Sync Point
- Move the playhead on the video clip to the visual cue, such as clap Slate.
- Press the “Comma and Period Key” to move the playhead forward or backward one frame to achieve a uniform sync.
Step 3- Select the Audio
- Select your primary audio and ensure that the playhead is moved before the gradual peaks in waveform.
Step 4- Link the Clips
- Then press “Ctrl + Alt + L” on Windows or “Cmd + Alt + L” on Mac to link the clips or click the “Link Selection” icon from the Timeline.
- Alternatively, right-click on the clip and select “Link Clips” to link them together ideally. So, if you move one clip, other clips move along accordingly.
- Syncing multiple clips in the Timeline
Step 1- Place the Marker
- If you have two or more video files, import the clips in the Timeline.
- Select the first clip, move the playhead to the visual cue, and then “Press M” to put a Marker on that point.
Step 2- Aligning with First Clip
- Then, select other video files and carefully align their sync point to the marker point of the first clip.
- Once the videos are synced, click to play the clips to analyze if they are aligned seamlessly.
Step 3- Link Selection
- Tap the “Link Selection” icon in the Timeline to link the clips at the marker.
- It’s necessary to have cues or sync points on your audio and video clips when syncing them up manually for smooth performance.
Automatic Syncing Methods
Method 1- Timeline Sync
Step 1- Open clips in the Timeline
- After importing into the media pool, select the video and audio clips.
- Right-click on the clip and choose “Open in Timeline.”
- Alternatively, go to the “Edit” tab, then drag and drop the clips into the Timeline.
Step 2- Based on Waveform
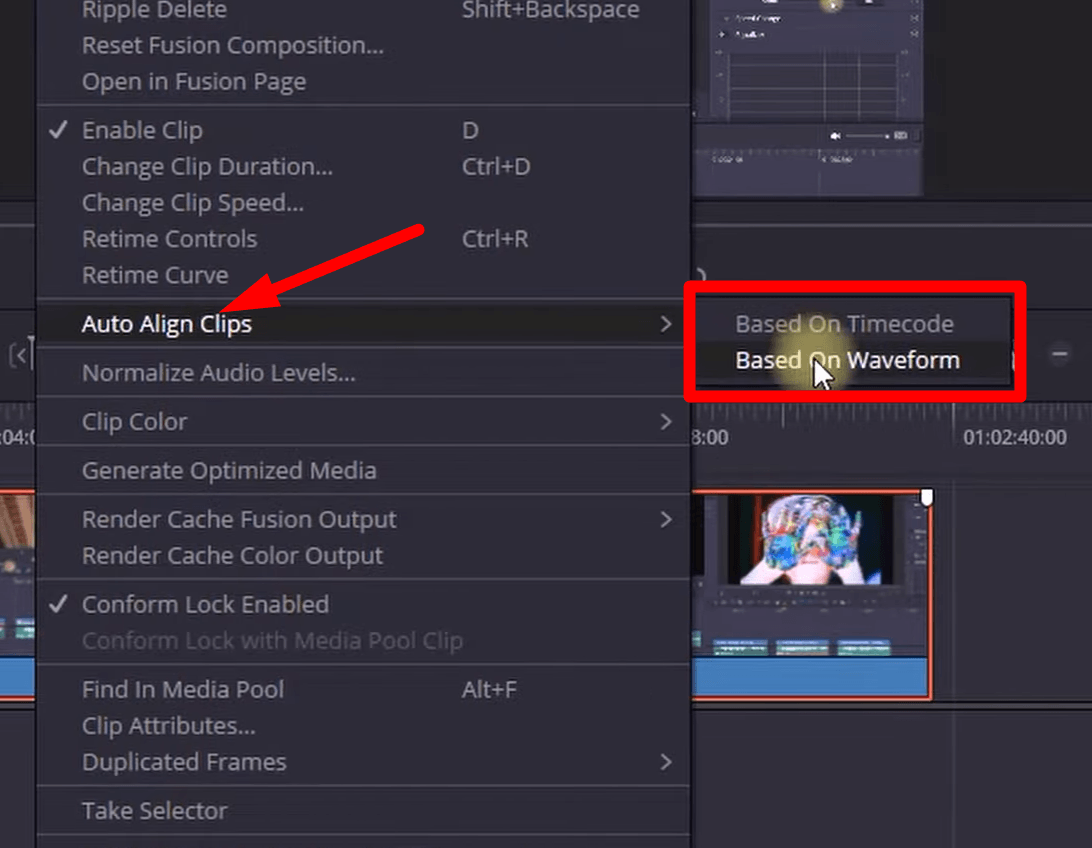
- Select the clips, right-click, and choose “Auto Align Clip” from the next window.
- Choose “Based on Waveform,” which will align the files based on waveforms in audio tracks.
Step 3- Analyze the Audio
- Once the synchronization is complete, click to play the clip to analyze if the audio is synchronized perfectly.
Waveform analysis uses sudden waveform peaks in the audio tracks and visual cues from video tracks to perfectly sync the media.
Based on Waveform: It analyzes the waveform from your video or camera files and audio clips and matches them up.
Based on Timecode: It means your devices have the same time reference that runs at the same speed. Professional broadcast cameras use it to introduce a timecode signal.
Note: If multiple audio and video clips are in the Timeline, “Auto Align Clips” will be unavailable.
Method 2- Media Pool Sync
Step 1- Import Clips in Media Pool
- Go to the “Media Pool” from the “edit” page and import video and audio clips that need to be synced.
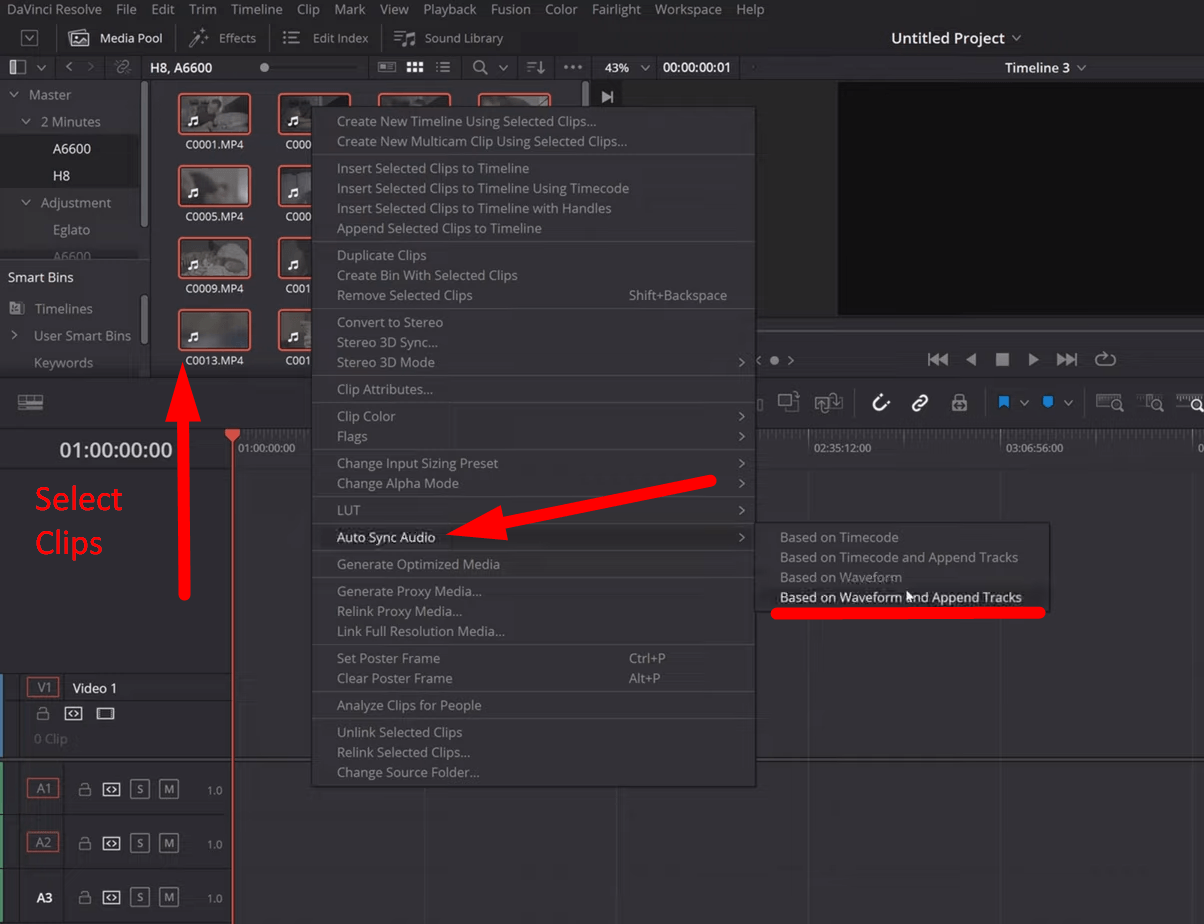
- Select both the footage and audio clips and right-click on them.
Step 2- Auto Sync Audio
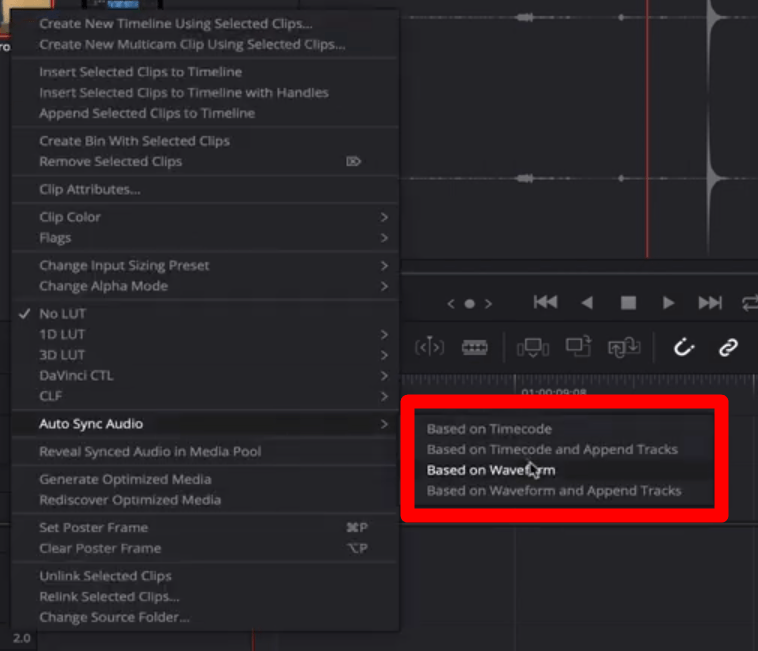
- Go to “Auto Sync Audio” and choose one of the four options: “Based on Timecode, Based on Timecode and Append Tracks, Based on Waveform, Based on Waveform and Append Tracks.”
Step 3- Clip Attributes
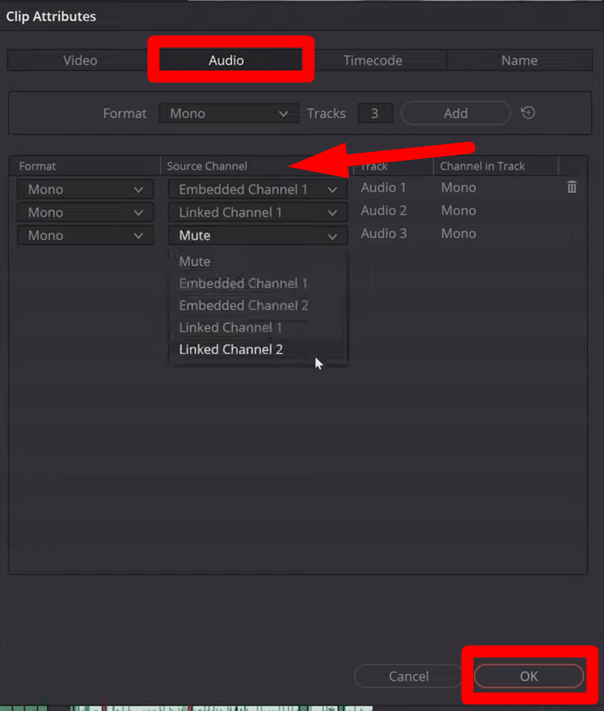
- Now, go to the “Clip Attributes” from the synced clip, which shows the audio from the footage and the external audio clip.
- From there, you can set your primary and safety audio tracks. Also, right-click the camera audio to delete the audio tracks.
Step 4- Adding to the Timeline
- Drag the synced clip to the Timeline and play the video to analyze if it is appropriately aligned.
- You can mute or unmute the audio tracks during this time to view the difference.
There are two additional options: Based on Waveform and Append Tracks and Based on Timecode and Append Tracks. In both cases, the Resolve will keep the original audio and append the new audio tracks to the original.
Note: The Resolve can sync multiple clips by analyzing the waveform from your camera files and audio clips and matching them up. So, keep your audio loud enough during production so the Resolve can analyze and sync them perfectly. If the audio from your camera is not loud enough, then Resolve will be unable to read and sync them.
Method 3- Multicam Sync
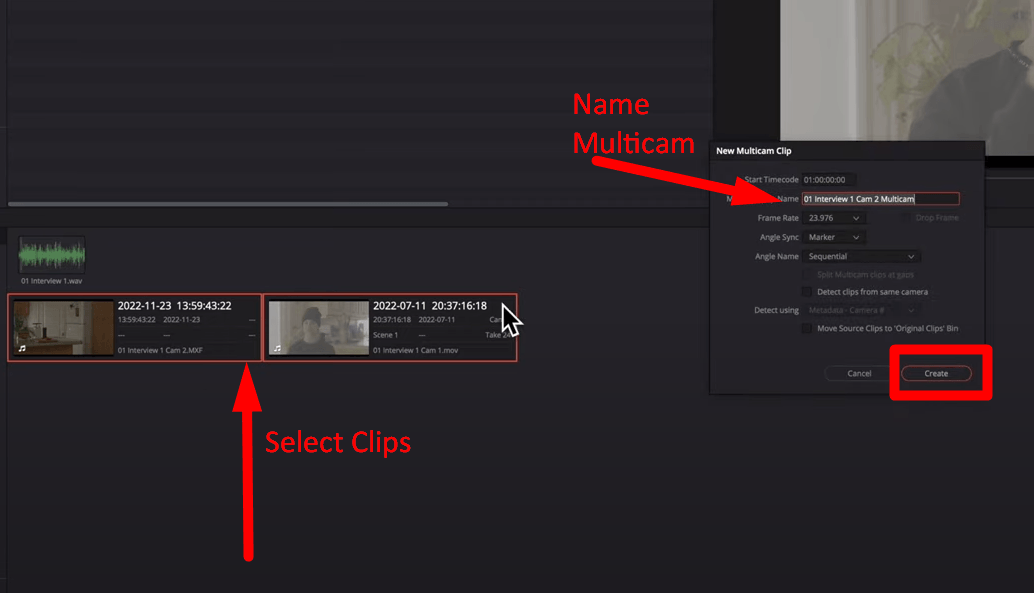
Step 1- Select Clips
- Go to the “Edit” tab from the bottom menu and select all the clips you want to sync in the media pool.
Step 2- Create a new Multicam Clip
- Right-click on clips and choose “Create new Multicam clip using selected clips.”
- Name the Multicam and choose the frame rate for your added clips.
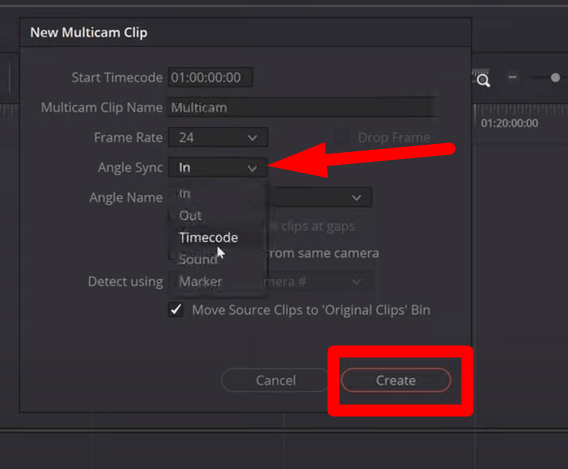
- Click the “Angle Sync” section and choose the sync option for your clips. For instance, choose “Timecode” to sync clips based on timecode reference.
- Uncheck “Move source clips to ‘original clips’ Bin” if you don’t want your clips to move to a new bin after syncing and select “Create.”
Step 3- Open in Timeline
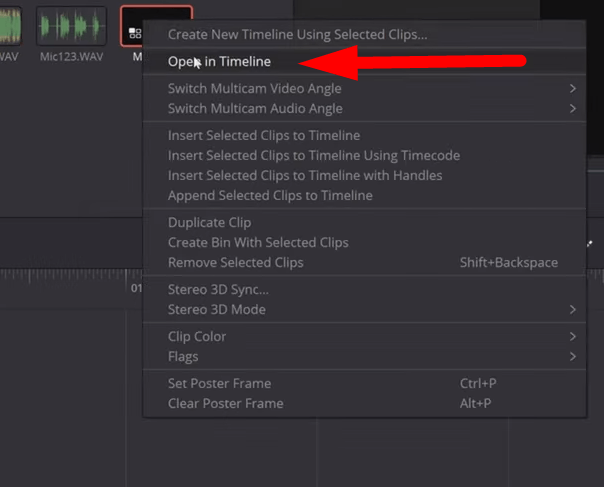
- Once synced, a new “Multicam” clip will be added to the media pool.
- Right-click the Multicam clip and select “Open in the Timeline.”
- Alternatively, go to the “Edit” tab and drag the clip to the Timeline.
Step 4- Analyze the Audio
- Mute the other audio clips and play the added clip.
- You will notice that the clips are perfectly aligned and ready for editing.
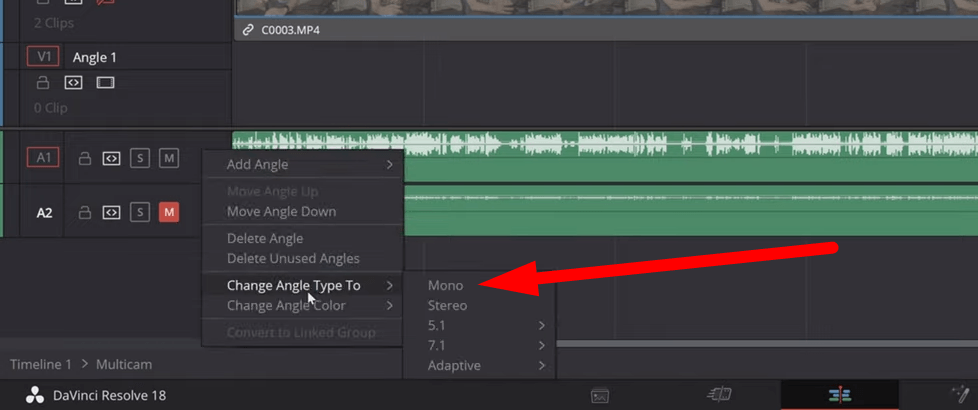
- If the audio is in “Stereo” mode, right-click on it and change it to “Mono Mode.”
Step 5- Removing the Original Audio
- If you are satisfied with the added audio, then select and right-click the original audio.
- Press to uncheck the “Link Clip” from the pop-up window.
- Then click “Cut” or press the “Ctrl + X” shortcut key, and the original audio track will be removed.
Export the Files
Once the files are synced, export the clips to ensure they are aligned and combined in a single clip. So, go to the “File” from the top menu and choose “Quick Export” to quickly render the video without selecting the specific settings. For advanced export options, follow the process:
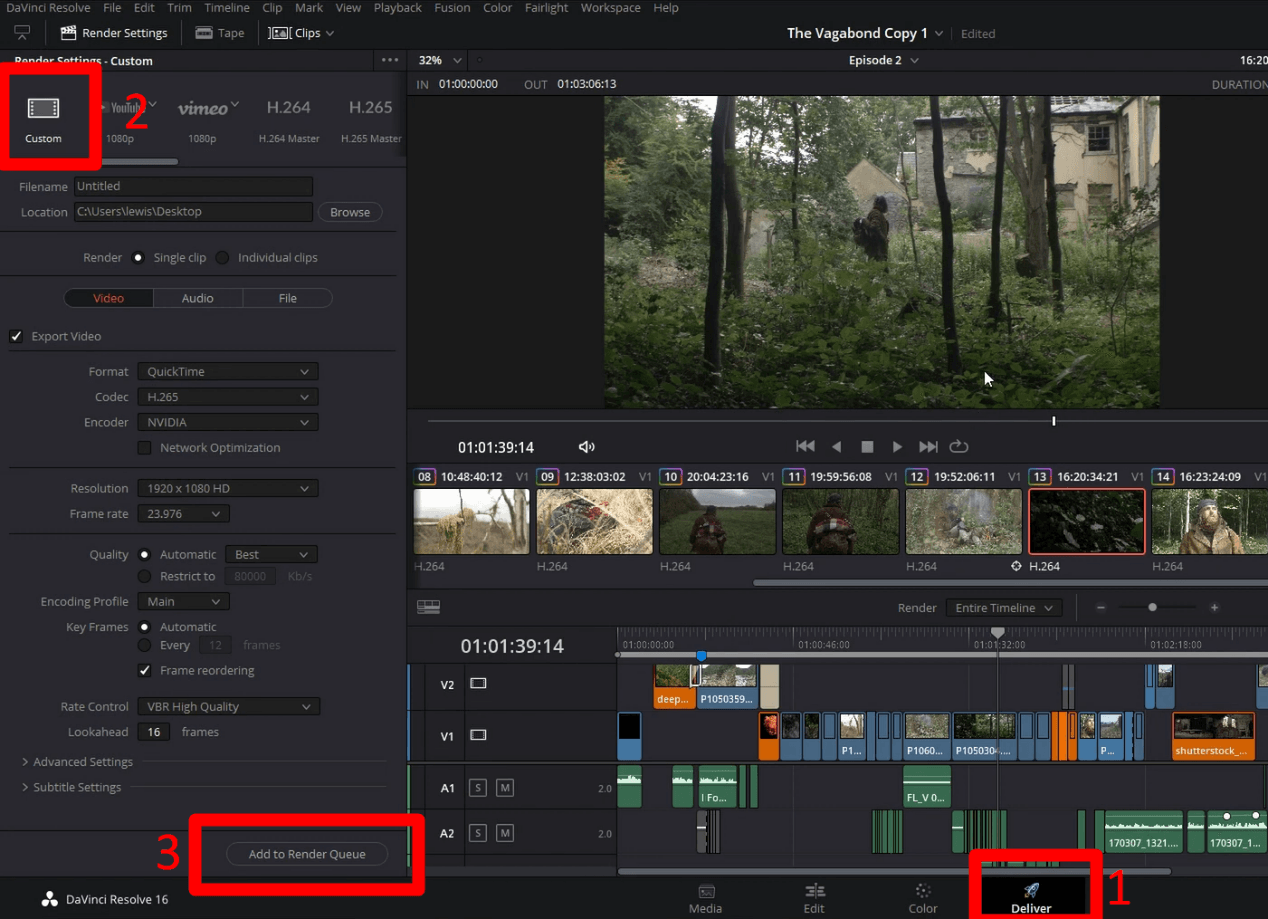
- Go to the “Deliver” page from the bottom of the screen.
- Choose “Custom Export” from the top left corner.
- Select appropriate settings for the video clips and ensure you choose high-quality resolution and codec.
- Then press “Add to Render Queue” and click “Render All” to export and save the files.
Tips to Troubleshoot Audio Sync Issues
Even after syncing the clips in DaVinci Resolve, the audio gets out of sync during editing, or clips may not sync automatically. Understanding and addressing these issues is essential to perfectly aligning the media. So, here are the troubleshooting steps to remove the problem and improve the smooth syncing.
- Audio out of sync after Syncing
Sometimes, the audio would go out of sync even after syncing the clips, or you may experience a different pitch. The issue arises when there is a slight difference between the clip and timeline frames or sample rate. So, the video will play faster than the audio clip.
To fix the issue, go to the “Project Settings” and adjust “Timeline Frames” and “Playback Frames.” Then select clips and open “Clip Attributes” to change the clip frames. Additionally, pitch and speed controls from the “Inspector Panel” will be used to adjust the audio duration.
- Auto Align Clips is Unavailable
The auto-align clips feature becomes unavailable after importing multiple clips in the Timeline. Also, if there is no space between the added clips, it will be difficult for Resolve to sync them in the Timeline. So, it’s best to sync the clips in the “Media” tab and then import the synced clip in the Timeline.
- Keep the Audio Loud
It’s necessary to use loud audio for smooth auto-syncing “Based on Waveform.” If the audio from your camera is not loud enough, then the Resolve will be unable to read them. DaVinci Resolve analyzes the waveform from your video or camera files and audio clips and matches them up. So, during production, keep your audio loud enough so Resolve can effectively analyze and sync the clips.
- Sync Clips Manually
Aligning your clips is time-consuming, but it ensures smooth syncing of the clips. Sometimes, the auto-sync feature does not provide a uniform alignment, so it’s necessary to sync using waveform manually. Also, minimize the background noise because it hinders sync point analysis.
- Update the Software
In DaVinci Resolve, some features become unavailable after updating for various reasons. The update might introduce new bugs or compatibility issues with audio and video clips during syncing. So, carefully analyze the feedback before updating, revert to the previous version, or update again to the better version.
Conclusion
DaVinci Resolves’ user-friendly interface and powerful features make it essential software for audio and video synchronization. It simplifies the syncing process with its “auto-syncing” feature, saving time and providing high-quality clips. It also enables you to sync multiple clips for a smooth experience manually.
So, along with syncing, understanding the tips and tricks is essential to enhance the quality and seamless synchronization of the clips.
Capturing perfectly synced audio starts from the filming stage itself – using a reliable wireless lavalier microphone makes this process much simpler. With clear, high-quality audio recorded directly into your video footage, syncing in DaVinci Resolve becomes quicker and effortless.
FAQs
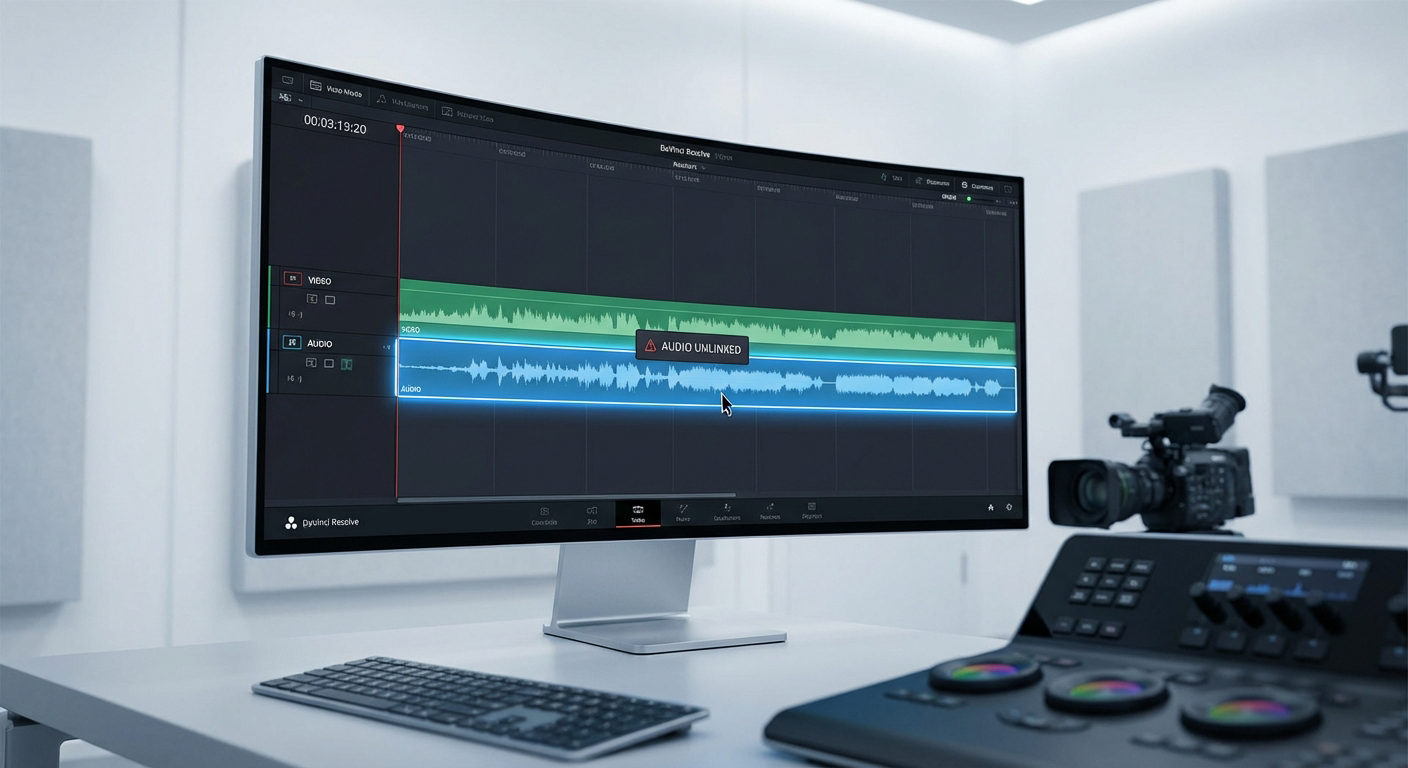
Can I un-sync external audio from video clips?
There are a few workarounds that you can implement to un-sync the external audio from video clips. Select the clips in the Timeline, open the clip attributes after right-clicking, and choose your primary audio. Right-click the clips in the Timeline and click “Link Selection” to unlink clips and then delete the audio track.
Is there a way to sync multiple audio files to a single video clip?
You can manually sync multiple audio tracks to a single or multiple video clips in the Timeline. Select the video and audio clips, then drag and drop them in the Timeline. Then, move the playhead to navigate the sync point of the tracks and align them properly. Once the clips are synced, link them to the “Link Selection” icon in the Timeline.
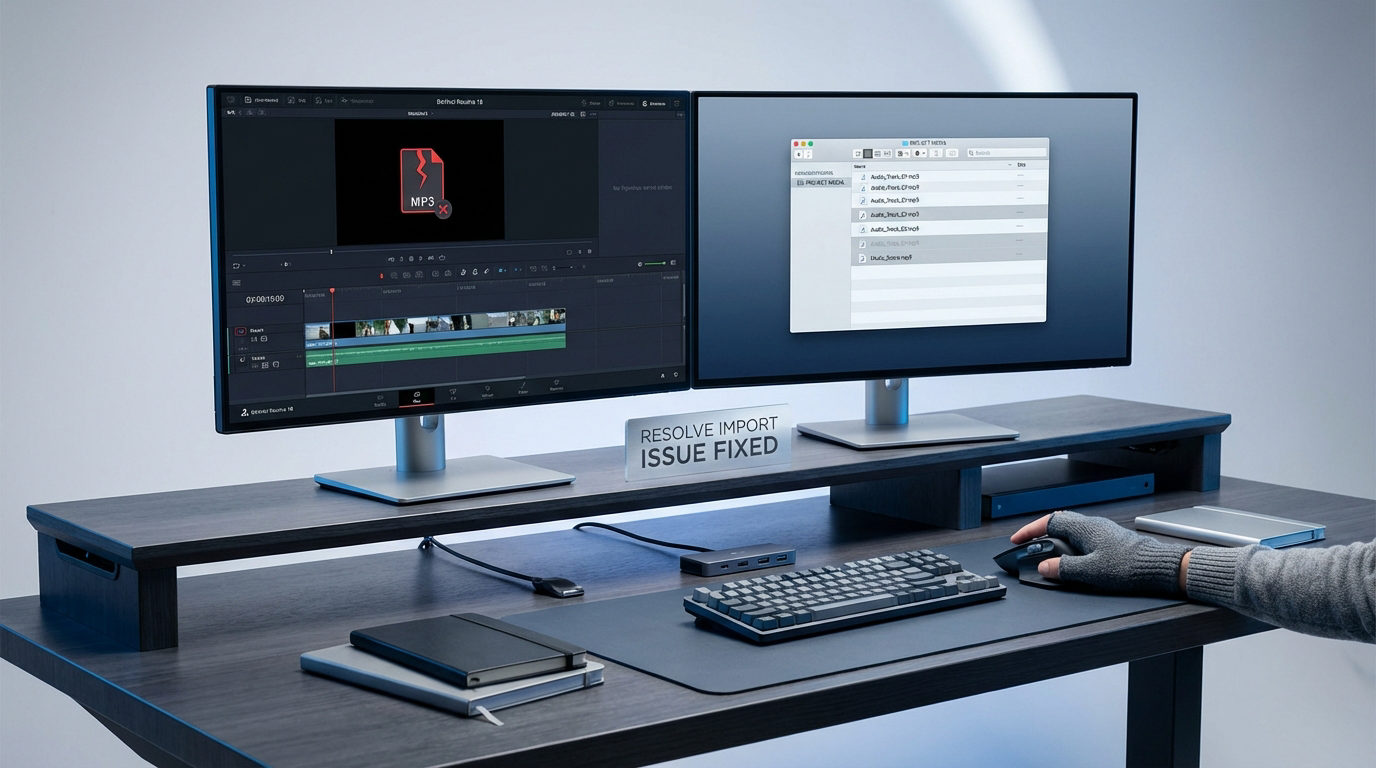
Why are audio and video clips not synchronized in DaVinci Resolve?
DaVinci Resolve cannot handle footage with a variable frame rate because it cannot transcode media to a fixed frame rate. So, after importing the synced media in Resolve, the audio will go out of sync.
To solve this, import the clips and adjust the timeline and clip frames from the project settings. Then, open clip attributes or use “Multicam” to sync with the required frame rate.
How to synchronize audio and video clips in DaVinci Resolve?
- Go to the “Media Pool” and import the video and audio clips.
- Then, click to select all the clips you want to sync and right-click on them.
- Choose “Auto Sync Audio” from the next window, then select “Based on Waveform.”
- It will sync the files based on the waveform, so having a sync point for them is essential.
Can I sync clips from different cameras in DaVinci Resolve?
In DaVinci Resolve, a feature called “Multicam Editing” allows seamless syncing of different camera clips. It’s necessary to ensure that the clips have the same timecode and waveform spikes to align them accordingly. So, set the clips to the same frame rate and timecode to minimize syncing issues.