


.png)
Turning your favorite video into a portable audio file transforms the way you enjoy content on the go. Whether it is a memorable speech, a podcast episode, or a piece of music, extracting the audio from a video opens up a world of possibilities. But achieving high-quality audio requires good source material, and that is where tools like Hollyland microphones come in.

Audio extraction, or converting video to audio, allows you to isolate the sound from a video file and save it as a separate audio file. Using high-quality audio sources, like a Hollyland microphone, can significantly improve the quality of the audio extracted from videos. By starting with clear, crisp sound, you ensure that the converted audio file retains its quality.
When converting video to audio, you can choose from different formats: MP3, which is best for general use due to its small file size and wide compatibility; WAV, perfect for high-quality audio and professional applications but requiring larger file sizes; and AAC, a balanced option with better audio quality than MP3 and a smaller size, commonly used for streaming and Apple devices.
Here’s what you need to know about turning video into audio, including the basics of audio extraction, the most common file formats, and tips to make the process as smooth as possible.
Preparing for Audio Extraction
The first step in preparing to extract audio from a video, is to choose the right video file and software.
Choosing the Right Video File
You have to choose the right video file to ensure that your video file is in a supported format and meets the quality standards you need. Among the most commonly used video formats for extraction such as MP4, AVI, and FLV, MP4 is widely supported and often has smaller file sizes, while AVI and FLV can be larger but maintain good quality.
You should go with MP4 for a smoother conversion experience and to minimize compatibility issues with your software or online service. If your video source is in a different format, consider converting it to MP4 first to ensure a seamless process.
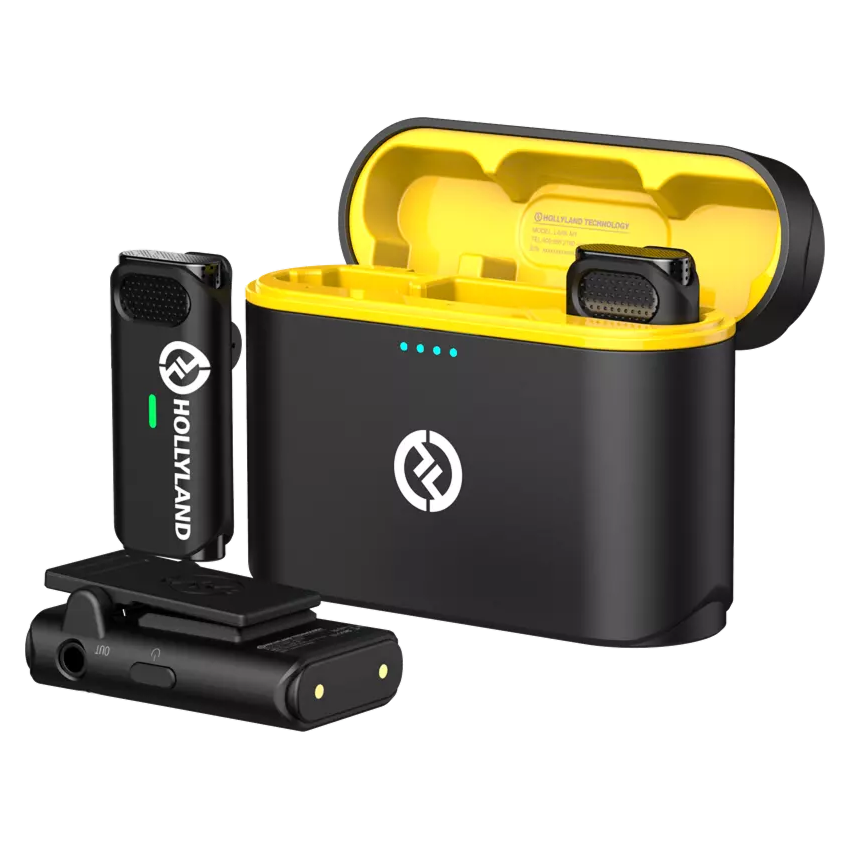
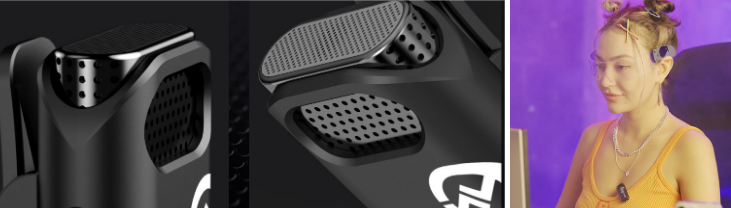
Then you consider the quality of your source video. Beware of choosing a poor quality source video as this can affect the clarity and detail of the extracted audio. To get the best results, choose a video file with clear audio, minimal background noise, and a consistent sound level. If the video was recorded with a high-quality microphone or sound system, such as the Hollyland LARK M1—which is known for its portability, wireless technology, and noise reduction—you can expect better audio quality during extraction, leading to clearer and more refined audio results.

Selecting the Right Software or Online Service
Now that you have selected a suitable video file, you need to find the appropriate software or online service for the conversion.
Software video converter
Desktop software like Audacity and VLC Media Player is installed on your computer, providing greater control, advanced editing features, and batch processing, making it suitable for complex audio work and large-scale conversions.
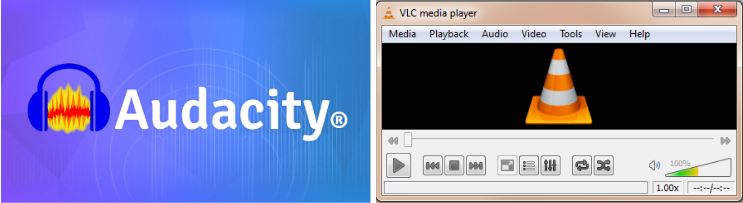
Audacity is a free, open-source audio editing software that can extract audio from various video formats. It offers advanced editing features and is suitable for more complex audio work. VLC Media Player also has robust conversion capabilities, allowing you to extract audio and save it in formats like MP3, WAV, and AAC.
Online video converters
Online services such as Clideo, Descript, Convertio and OnlineConvert are web-based tools that do not require installation, making them ideal for quick conversions and smaller tasks, though they often have file size limitations and require a stable internet connection.
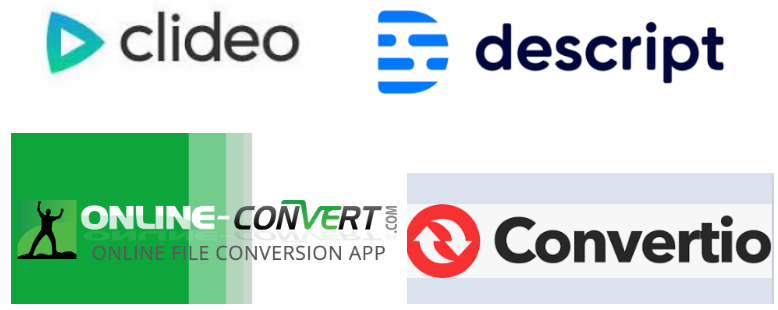
There is no definitive “best” among these online services because each has its strengths and ideal use cases. For instance, if you are seeking a straightforward tool for quick conversions, Clideo and Convertio are good options. Descript is recommended if you need more advanced features like transcription or video editing. OnlineConvert is suitable for multi-purpose conversions when you require various types of media conversions in one platform.
Making a decision to use software or online services for the video conversion depends on the task or project you have at hand. If you are working on more extensive projects or need offline functionality, desktop software is recommended. However, if you need a simple conversion without downloading software, online services are a convenient choice.
Converting Video to Audio
Desktop software converters provide more control and online services converters offer convenience. Let’s explore the two main approaches.
Using Desktop Software
Converting video to audio using Audacity
To use Audacity, download the software from the official website. After installation, you can follow the steps outlined below to convert your video into an audio file:
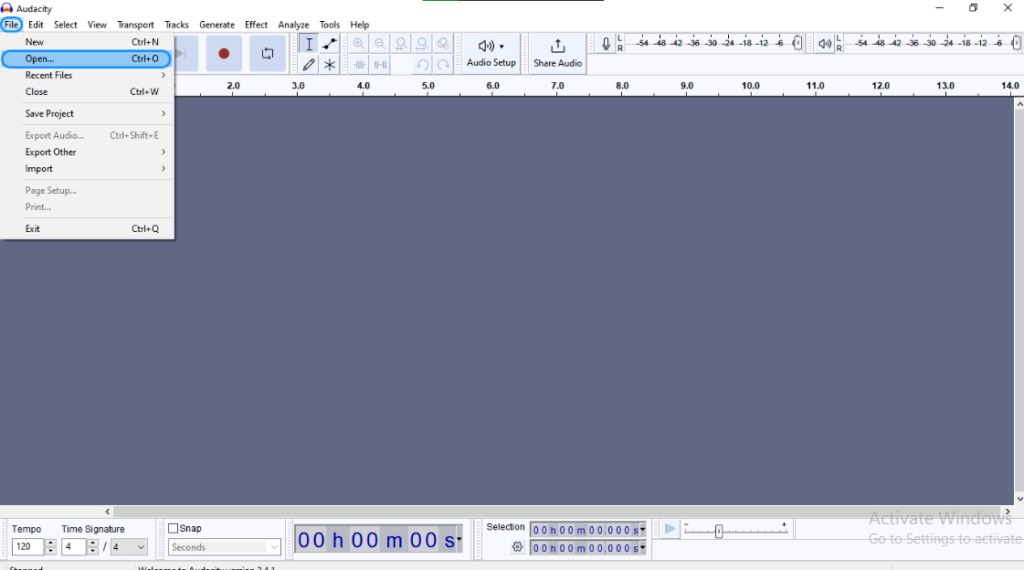
- Launch Audacity on your computer. Navigate to File > Open and select the video file you want to convert. This will import the video into Audacity.
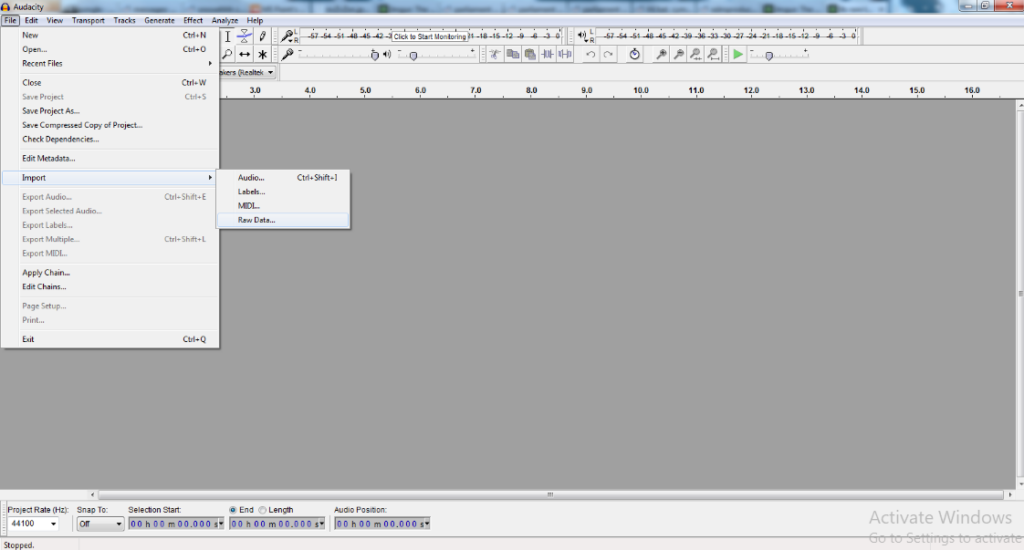
- Import your Video: Open Audacity and go to File > Import > Audio to select your video file. Although primarily an audio editing software, Audacity can import certain video formats to extract audio.
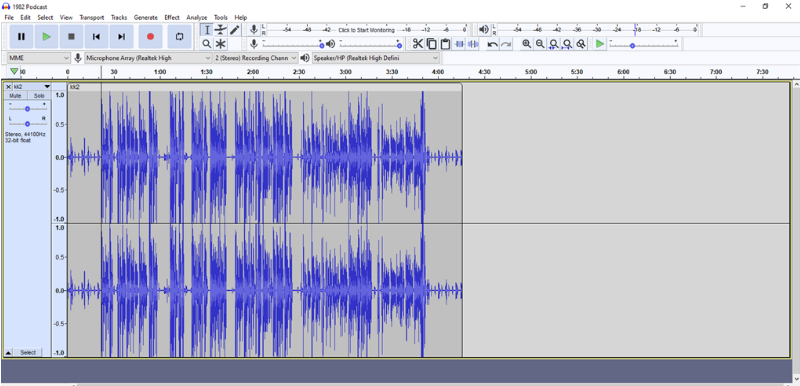
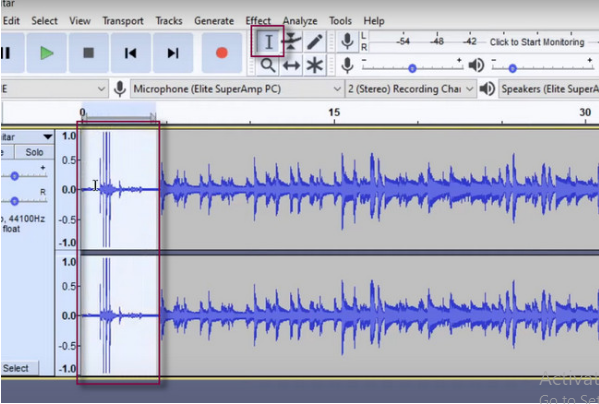
- After importing your video file into Audacity, you will see its waveforms displayed, representing the audio data for both the left and right channels.This visualization helps you identify and edit specific sections of audio, offering a clear view of the stereo sound content.
However, if the Hollyland LARK M1 microphone was used for the video recording, it would provide a high-quality audio source that would give clear waveforms and minimize the need for extensive editing or noise reduction, thus leading to better results after the conversion.
To ensure the file has been imported successfully, click the play (green) button in Audacity and listen to the audio for a couple of seconds. This quick check will confirm that the audio is playing correctly and both channels are working as expected. If you hear any distortion, glitches, or silence, it might indicate a problem with the import process or the file itself.
- Also, after importing, you can edit or trim the audio as needed.To trim an audio segment in Audacity, follow these steps:
- Locate the Segment to Trim:
- Start playing the audio by clicking the Play button. As you listen, watch the Play Head moving across the waveform to identify where you want to trim.
- When you find the desired point, click the Pause button. This will mark the location where you want to start or end the trim.
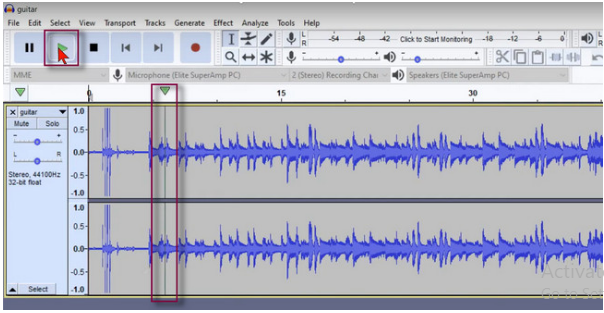
- Select the Trim Area:
- Click the Selection Tool from the toolbar at the top of the Audacity interface.
- Click and drag across the waveform to highlight the portion you want to remove. The selected area will be shaded.
Once you have selected the segment to remove, press the Delete key on your keyboard. This action deletes the highlighted section, closing the gap and adjusting the audio to fill the space.
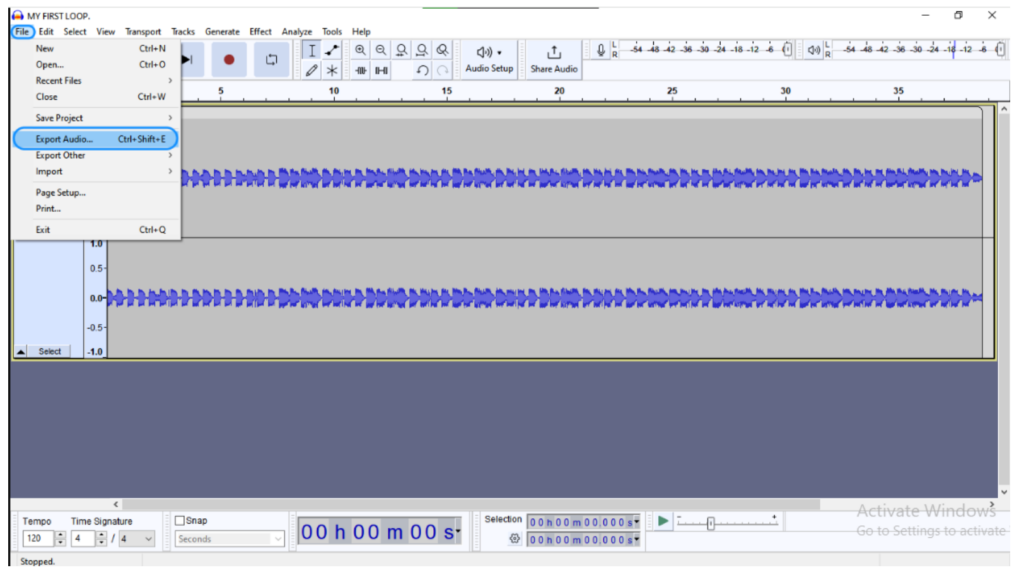
- After trimming you can now convert the file to a desired format. To achieve this, go to File > Export and then choose the desired format (e.g., MP3, WAV, or AAC). Follow the prompts to complete the export process.
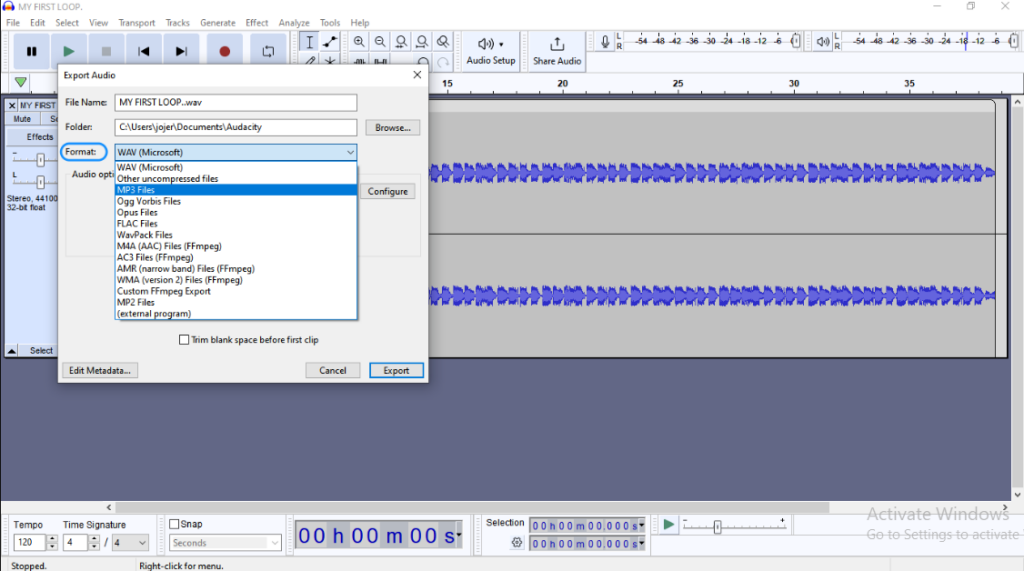
The choice of file type depends on your specific needs and intended use for the audio.
Converting video to audio using VLC Media Player
Step 1: Download and install VLC Media Player if you do not have it already.
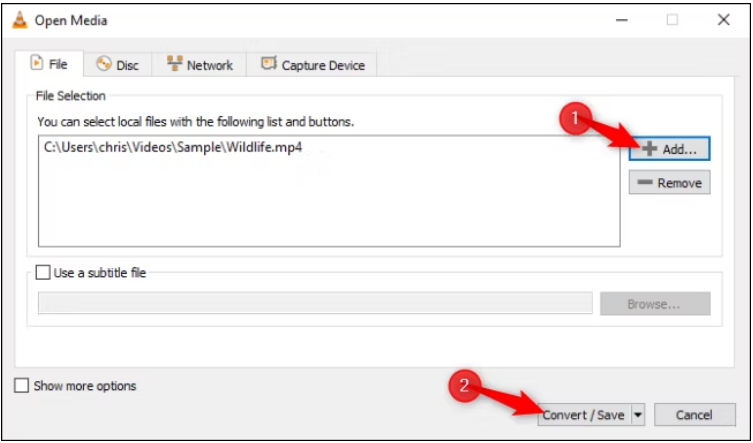
Step 2: Open VLC, then go to Media > Convert/Save.
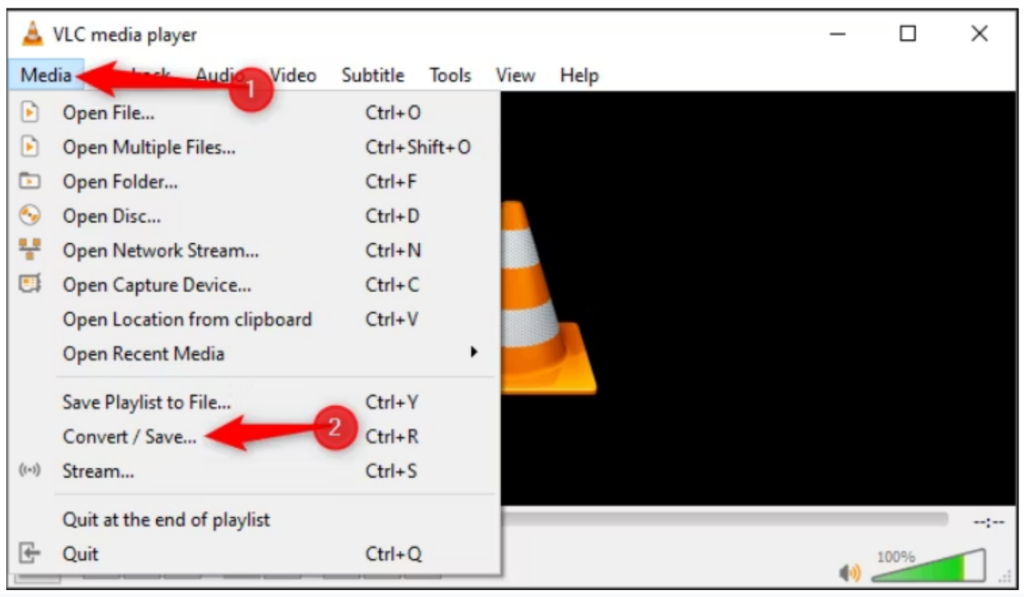
Step 3: Click “Add” to select the video file. Then, click “Convert/Save” and choose “Convert.”
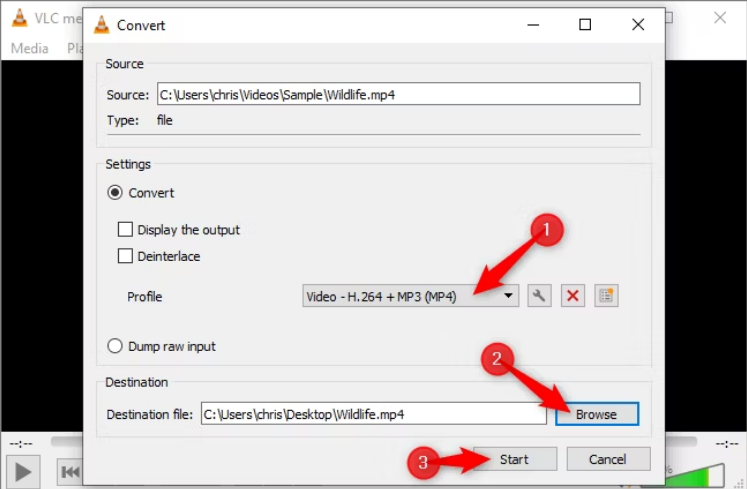
In the Convert window, choose an audio format (like MP3 or WAV) from the profile list. This step guides you through the final stage of the conversion process. After you have selected a destination folder and chosen the appropriate conversion profile, click the “Start” button to initiate the conversion. This process will convert the video into your chosen format, and the output will be saved to the specified folder.
B. Using Online Services
Although each online service such as Clideo, Descript, Convertio and OnlineConvert has its own user interface, the general process for converting video to audio is similar. An example is shown using Clideo
Clideo is an online tool that simplifies converting video to audio, offering flexibility and a user-friendly interface.
Here’s how to use Clideo’s Audio Cutter to extract audio from your video files:
Step 1: Open Clideo and Upload Your Video
Start by opening your web browser and navigating to Clideo’s Audio Cutter. Click the large blue “Choose file” button to upload your video file.
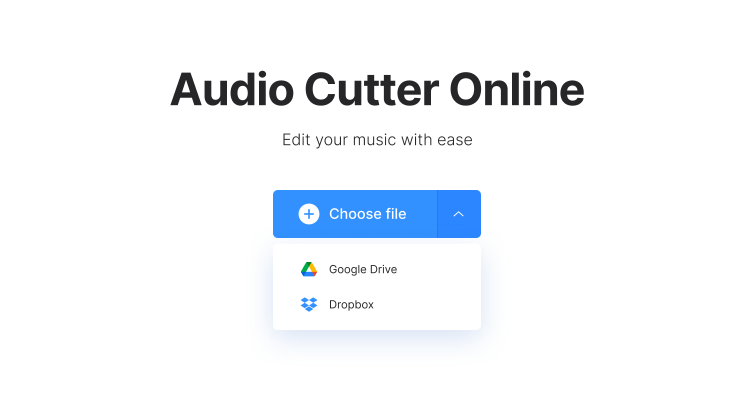
Clideo supports a variety of popular file types, including MP4, AVI, MOV, and WMV. You can also upload files from Google Drive or Dropbox.
Step 2: Process and Edit Your Audio
Once the video is uploaded and processed, you will see the extracted audio track displayed as a timeline. Use the yellow handles to select the portion of the audio you want to extract or delete. You can also enter specific times in the “Cut from” section to define the exact start and end points.
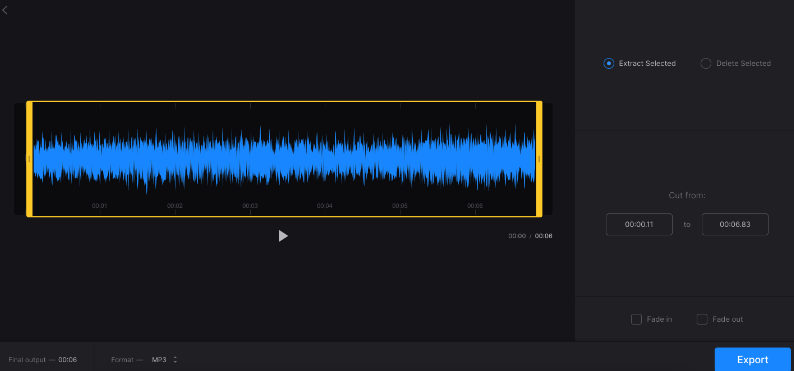
- Applying Fade Effects: To create a smooth transition, you can check the “Fade-in” or “Fade-out” boxes or crossfade effects accordingly. This can add a professional touch to your audio.
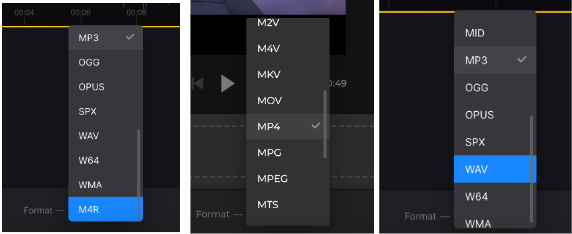
- Choosing the Output Format: At the bottom of the interface, you can view information about the track duration and its current format. Use the drop-down menu to select the output format you prefer, such as MP3, WAV, or AAC.
Step 3: Export and Save Your Audio
Once you are satisfied with your edits, click the “Export” button to convert the video to audio.
After processing, you will be able to download the new audio file to your device or save it to cloud storage. Replay the audio to ensure it meets your expectations.
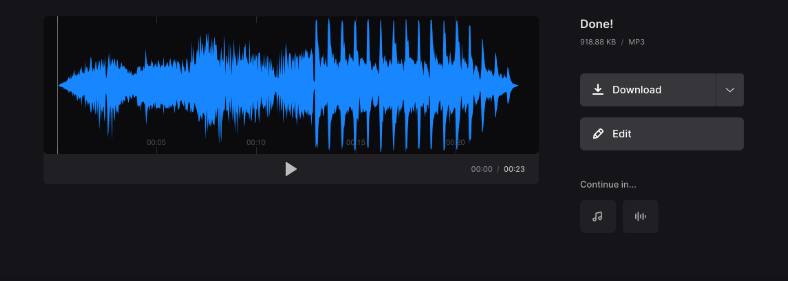
- Making Further Edits: If you need to make changes, click the “Edit” button to return to the audio cutter and adjust as needed.
That’s it! You’ve successfully converted a video to audio using Clideo’s online tool.
With these tools and techniques, you now have a comprehensive guide to effortlessly convert videos to high-quality audio, allowing you to extract, edit, and save your favorite sounds for a variety of uses.
When capturing videos you’ll later convert into audio, clarity during recording is crucial – and it all begins with a quality microphone. A wireless lavalier microphone ensures superior audio pickup with convenience, allowing you to easily achieve professional-quality sound for your final audio files.
