.png)
.png) Français
Français .png) Deutsch
Deutsch .png) Italiano
Italiano .png) 日本語
日本語 .png) Português
Português  Español
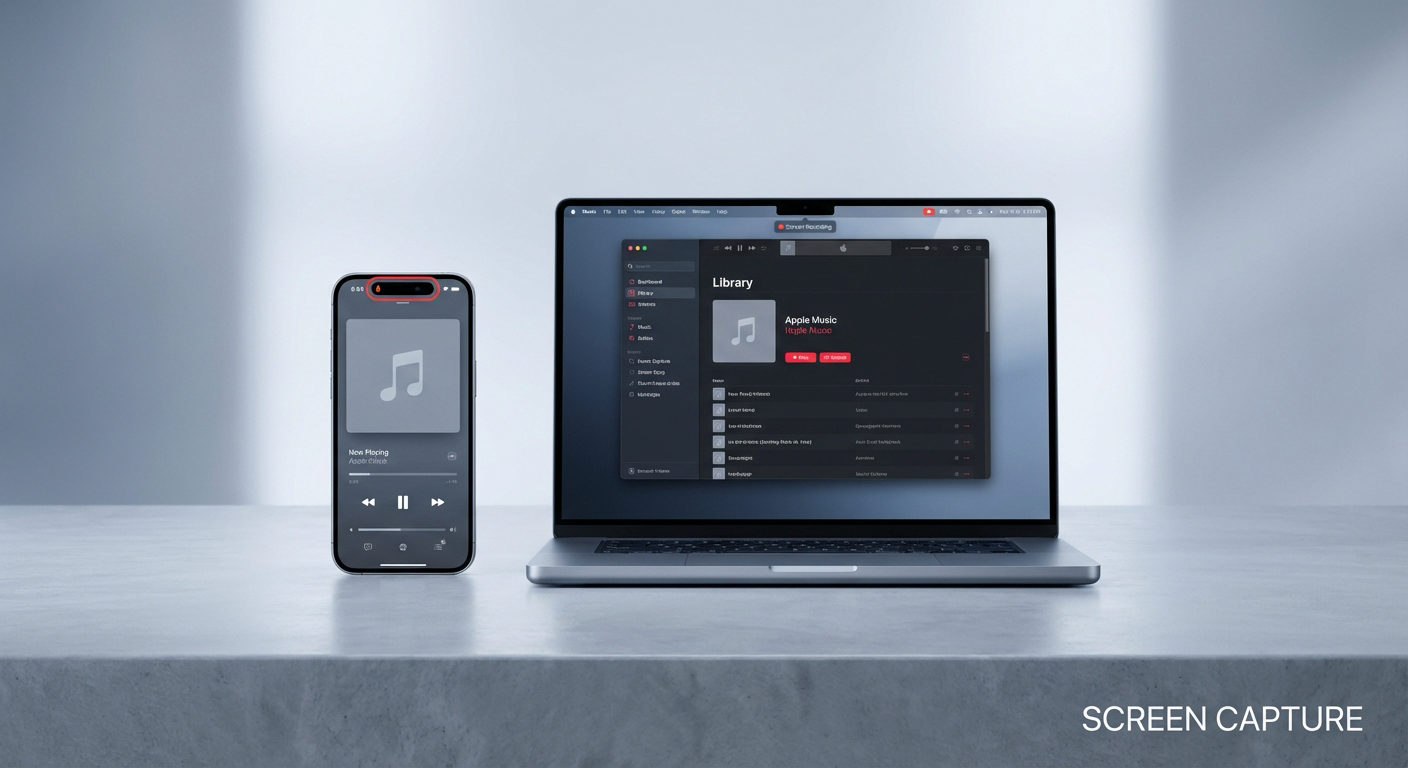
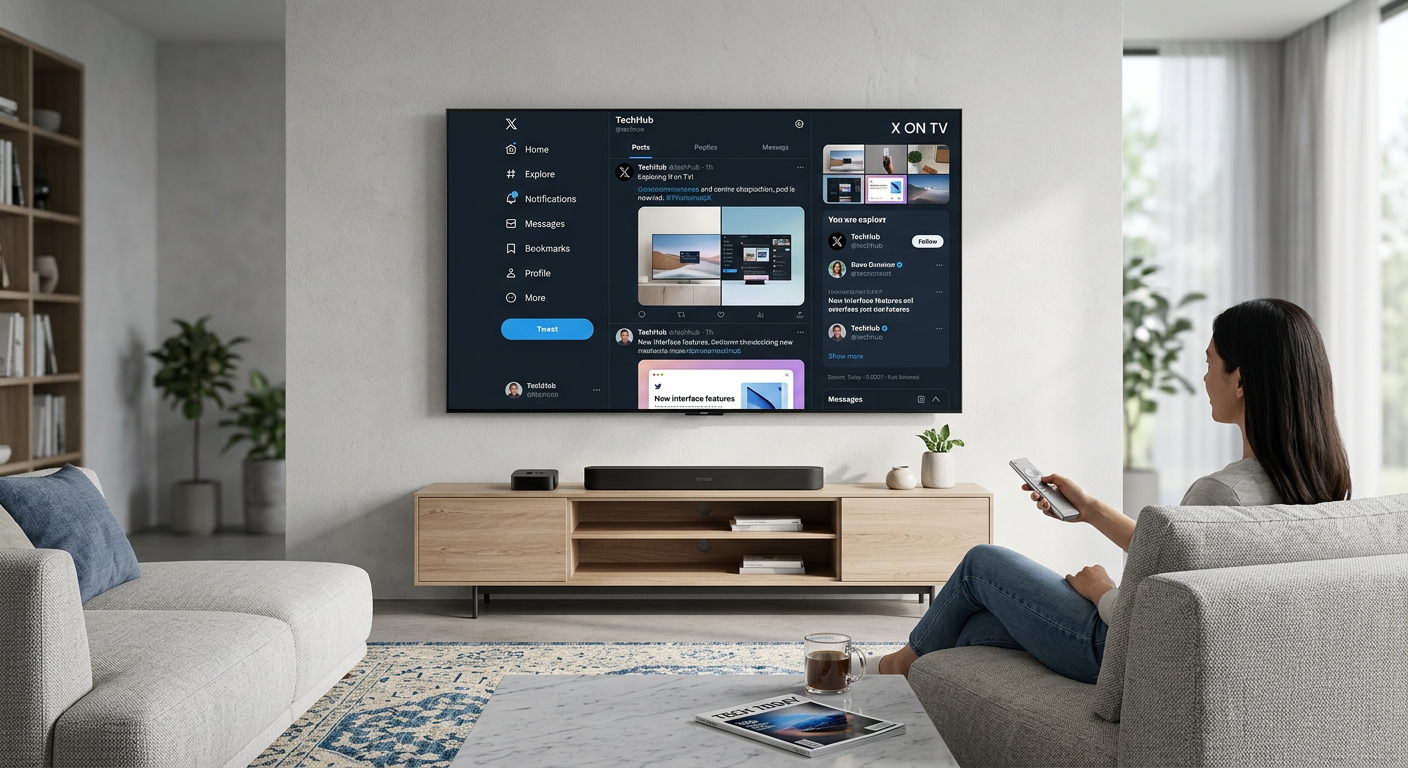
 Movie lovers usually like to watch their favorite films on TV displays rather than on small mobile screens. For this purpose, they can utilize the AirPlay feature to mirror their iPhone screen to the AirPlay-compatible receiver.
However, you can face an issue where only audio plays without video while trying to watch movies on the big screen. Therefore, this article will help you eliminate this frustrating problem with the best fixes.
Fix 1. Check Your Network Connection
Before trying any other method, you must ensure that the receiving and sending devices are connected to the same network. You have to provide the connection of both devices to the same Wi-Fi network to ensure the smooth working of the AirPlay feature. Follow the steps given below to check the network settings on all the devices involved in establishing a connection to make AirPlay work.
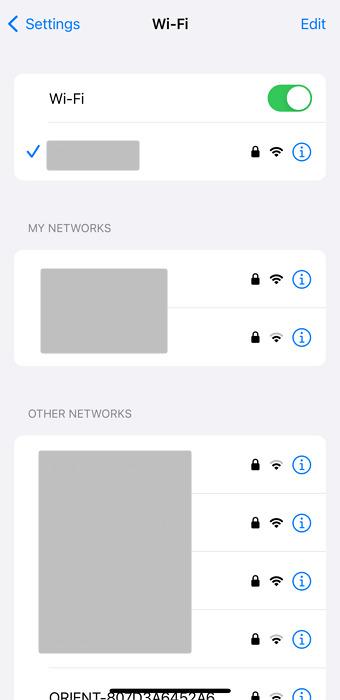
For iPhone
Instructions: Start the process by entering the “Settings” application on your device. Then, open the “Wi-Fi” option to enter the network settings and optimize them for smooth AirPlay working. Here, you can see to which network your iPhone device is connected before checking the settings on your Apple TV.
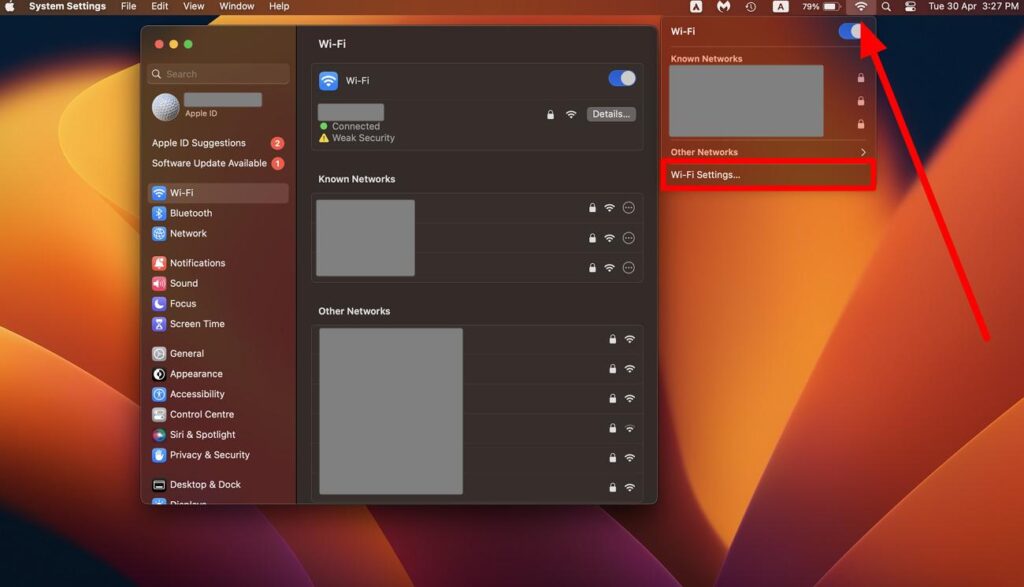
For MacBook
Instructions: To access the network settings, you need to click the “Wi-Fi” icon on the top toolbar of your Mac device. Next, press the “Wi-Fi Settings” option from the drop-down menu to enter the settings application window. From here, you can get information about the connected and other available networks.
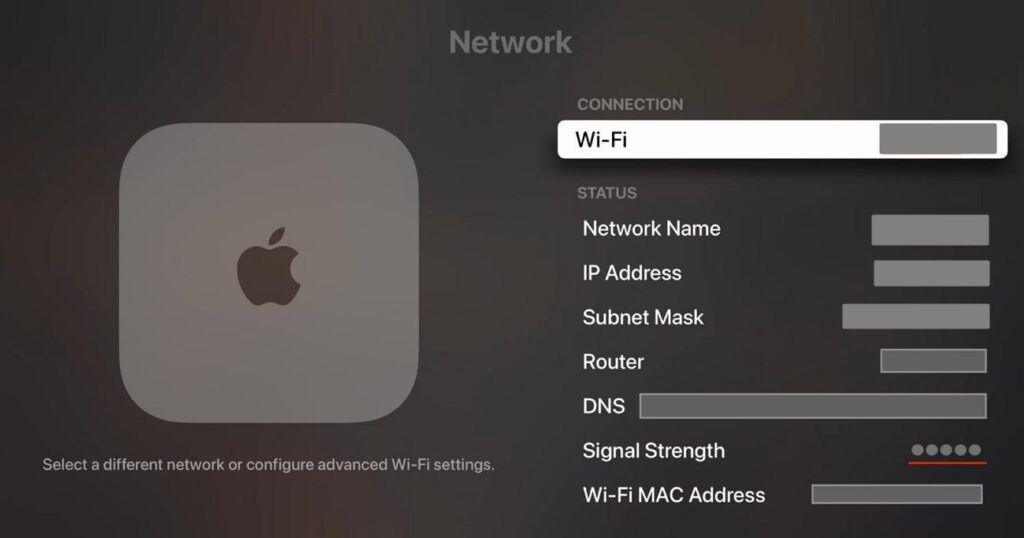
For Apple TV
Instructions: Begin by pressing and holding the “TV Button” on the remote to access the “Control Center” screen. Moving forward, go to the “Settings” tab and hit the “Wi-Fi” button to check the network settings and ensure your TV is connected to the same Wi-Fi as your other Apple device.
After connecting both devices to the same Wi-Fi network, you may still face network issues. Simply restarting your Wi-Fi router may resolve this connection problem and allow you to play your video through AirPlay without any issues.
Fix 2. Update All Your Devices
Upon recognizing the issue is not because of the network problem, you can choose to upgrade the version of all your devices. When you update both the receiving and sending devices to their latest versions, we hope your problem will be resolved. Take guidance from the steps below to update all your devices to see audio and video while using the AirPlay feature:
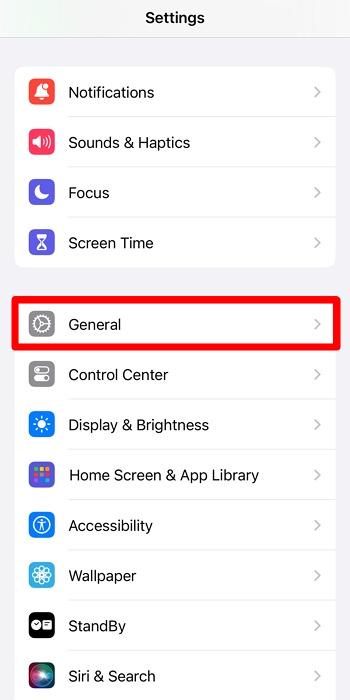
For iPhone
Step 1. Begin this iOS update process by entering the “Settings” app on your device through the home screen. Now, press the “General” option from the third section to enter other settings.
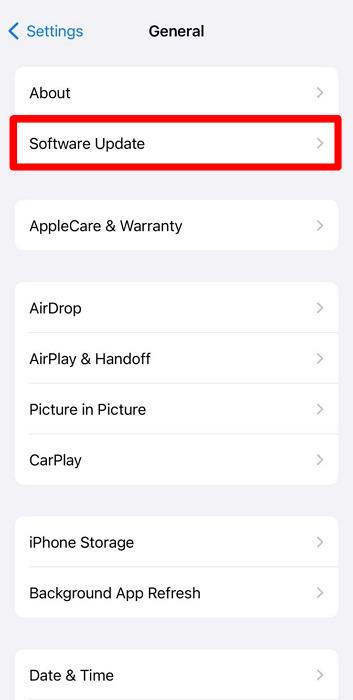
Step 2. Upon accessing the “General” settings, proceed to hit the “Software Update” button to start looking for the latest iOS version.
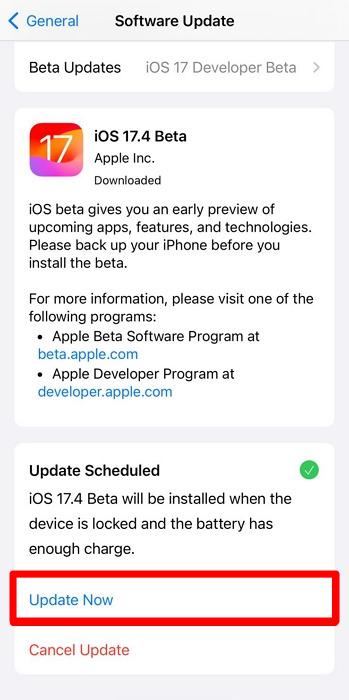
Step 3. Finally, you will reach a new screen with the available update information. On this screen, tap the “Update Now/Install Now” button to move to the latest iOS version to resolve the AirPlay issue.
For Mac
Step 1. First, you must click the “Apple” icon on the top-left of your screen to access a drop-down menu. From here, press the “System Settings” to reach a new window from where you need to access the “General” tab. Moving forward, hit the “Software Update” button to proceed with resolving AirPlay’s audio-only issue.

Step 2. Afterward, you will reach a new screen with all the information about the new available update. Next, click the “Upgrade Now” button to shift to the latest macOS version.

Update Your AirPlay Receiver’s Firmware
After updating the projecting device, users should also update the receiver to make the AirPlay work without interruptions. The following simple instructions will help you upgrade your Apple TV’s version in a few clicks.
Step 1. After accessing the “Settings” window on your TV, go to the “System” settings to get on with this process. Now, hit the “Software Update” option to see if any updates are available for your receiver device.
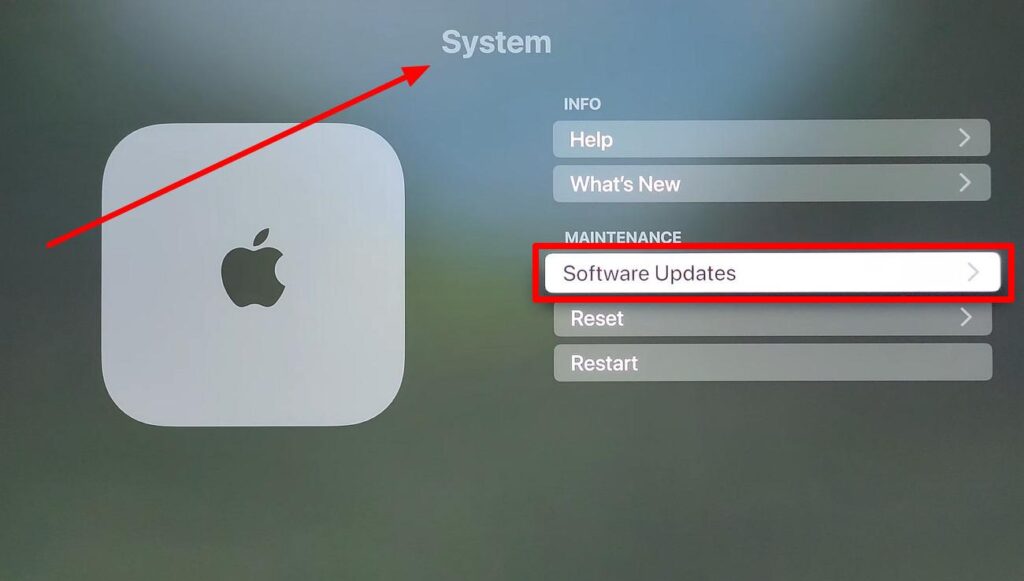
Step 2. In the new window, press the “Update Software” button to move to the latest version on your Apple TV successfully. Next, simply download and install the update on your device to fix the “AirPlay only playing audio” problem.

Fix 3. Check AirPlay Settings and Restrictions
Users facing difficulty in getting the desired output from the AirPlay functionality should optimize the settings on the receiver device. The first thing you need to do is ensure that AirPlay is turned on your desired TV. To do so, we recommend you follow the steps explained below to resolve the “AirPlay only playing audio” issue:
Step 1. Start the process by accessing the “Settings” window on your TV to reveal options. Now, tap the “AirPlay and HomeKit” option to reach a new screen with the relevant settings.

Step 2. Upon entering these settings, press the “AirPlay” button to turn it on to establish a connection for a smooth video-playing experience.

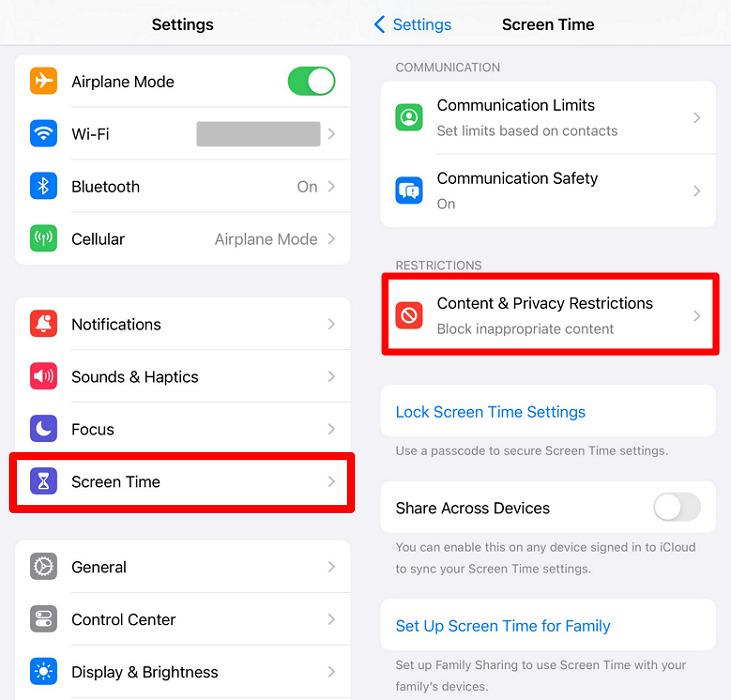
After enabling the AirPlay settings in the receiver, you should also check for any restrictions on screen mirroring and recording features in the sender. For this purpose, users can access the “Screen Time” settings on their iOS device to optimize these settings. Take guidance from the steps below to remove every restriction from the sending device for a better video-playing experience:
Step 1. After entering the “Settings” application, press the “Screen Time” option to manage the restrictions settings on your phone. Now, press the “Content & Privacy Restrictions” button under the “Restrictions” section to move forward.
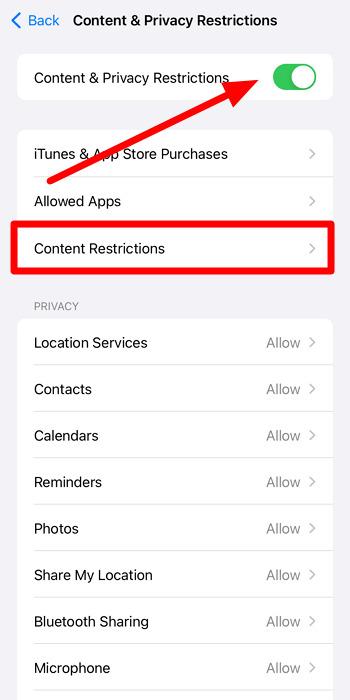
Step 2. Now, check if the “Content & Privacy Restrictions” toggle is enabled or disabled and proceed with the next instruction if it is turned on. Hit the “Content Restrictions” button to allow the permissions for AirPlay and Recording on the next screen.
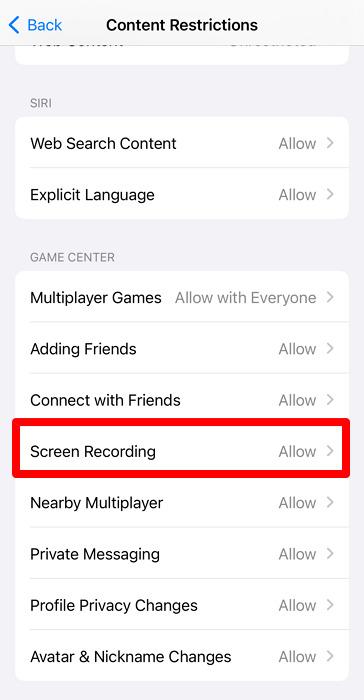
Step 3. Upon reaching this new settings window, tap the “Screen Recording” button and choose the “Allow” option to let your phone permit AirPlay and screen mirroring features.
Fix 4. Restart Devices
Restarting your device can sometimes remove the temporary glitches that cause the “AirPlay on playing audio” issue. You need to restart both the sender and receiver devices to fix the problems you face while playing video through AirPlay. The following simple instructions will allow you to restart different devices to solve this video-related issue.
For iPhone
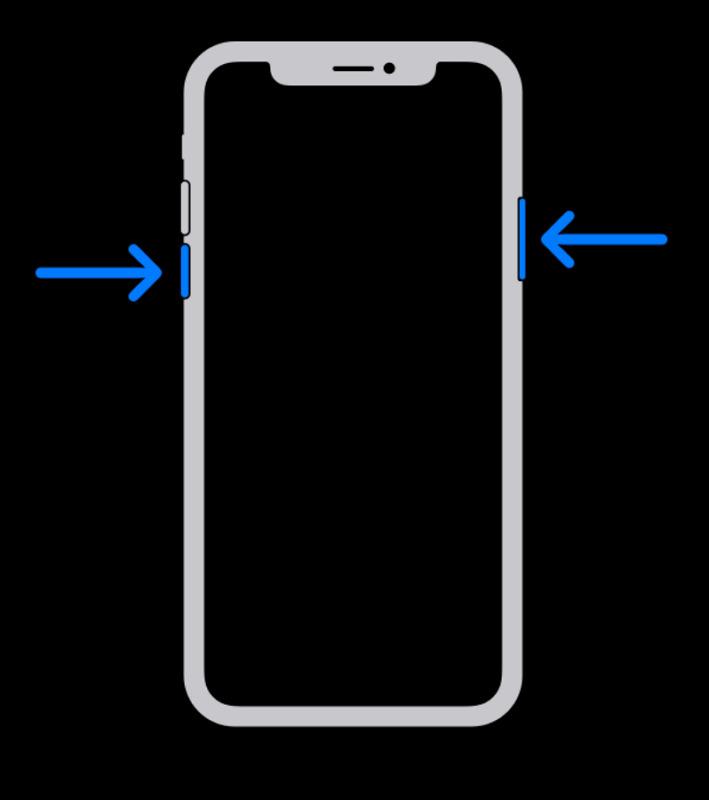
Step 1. Begin the process of restarting your iOS device by tapping and holding the “Volume Down” and “Side” buttons at the same time. You need to keep on holding these two buttons till the power off screen appears on your phone.
Step 2. Moving forward, simply shift the “Power Off” slider to the right of your screen to turn off your iDevice in an attempt to resolve the problem.

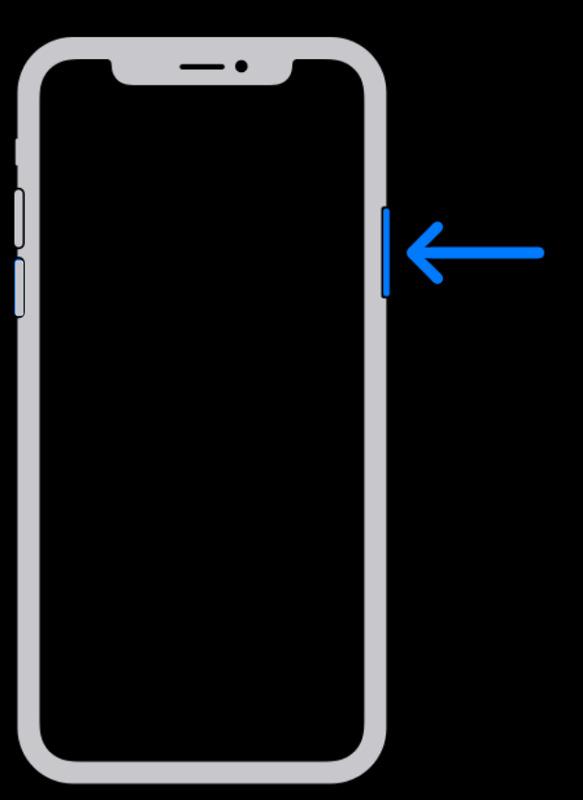
Step 3. Once the device is powered off, tap and hold the “Side” button on your mobile until the Apple logo appears on your screen. Now, you have successfully restarted your iPhone to remove the temporary glitches.
For Mac
Step 1. On your MacBook, press the “Apple” icon on the top-left of your screen to access the quick settings of your device. From here, click on the “Restart” option to enter a dialog box with further Mac reboot options.

Step 2. Moving forward, you will get the option to reopen the windows that are presently opened after rebooting the MacBook. We recommend you uncheck this option before hitting the “Restart” button to get rid of the glitches causing the issues with AirPlay.

For AirPlay Receiver
Users need to restart their receiver device to remove any temporary glitches and streamline the AirPlay output. With the help of the following easy-to-follow steps, you can reboot your Apple TV or any other AirPlay-compatible device.
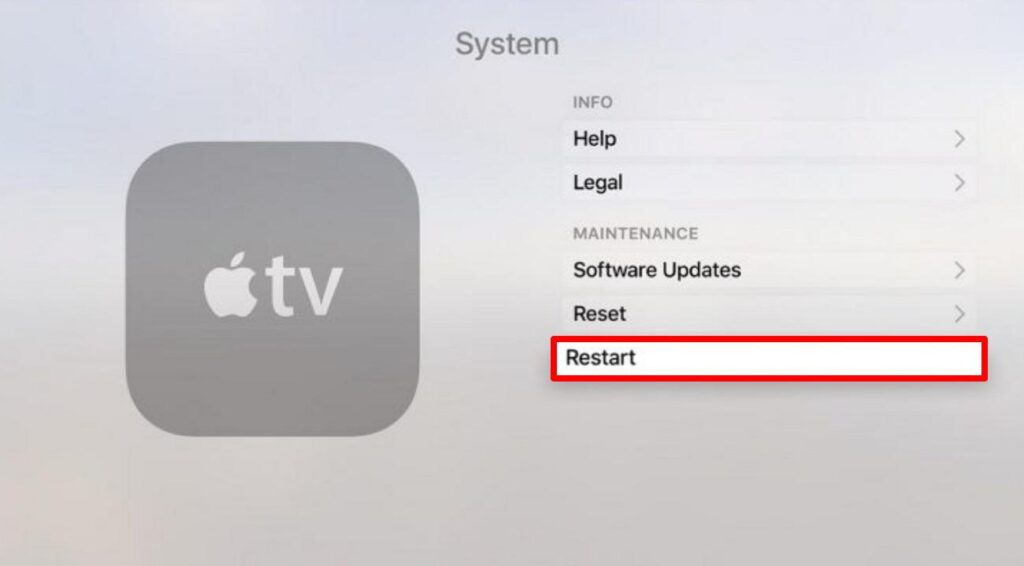
Instructions: First, open the “Settings” app on your Apple TV and access the “System” settings from the available options. Moving forward, press the “Restart” button from the “Maintenance” section to reboot your TV and enable the audio and video while using AirPlay.
Fix 5. Check the Video Source
When none of the above-mentioned solutions works, you need to shift your focus toward the video source to see if the problem lies here. Sometimes, content providers utilize DRM protection to prevent video content from being displayed via AirPlay. By doing so, they can avoid the unauthorized copying and distribution of their content.
Therefore, there is nothing you can do in this case, as these restrictions are permanently implemented by content providers. Other than that, there may be an issue with any specific app or video source you’re using for AirPlay streaming.
Try streaming from a different app or visual source to determine if the problem is due to the faulty video. If you’re able to successfully AirPlay content from a different source, you will get the confirmation that the issue is due to the original content.
Fix 6. Adjust TV Settings
Once you solve the problem with the video source, proceed to ensure a secure connection between your Apple TV device and your display screen. For this purpose, check that the HDMI cable is firmly plugged into the AirPlay receiver and your TV without any loose ends.
Sometimes, this faulty connection turns out to be the reason for irregular or no signal transmission. Once you’ve confirmed the HDMI connection, make sure your TV is set to the correct input source for your AirPlay receiver.
Most TV displays have multiple input sources, including HDMI 1, HDMI 2, and AV, for multiple connections. So, you have to ensure that you select the HDMI port to which your Apple TV device is connected. Users can quickly cycle through the input sources using your TV’s remote control or on-screen menu.
Fix 7. Use AirPlay Mirroring
Users can also utilize the screen mirroring feature to display the content of their iPhone on the Apple TV screen. It is one of the best fixes when you fail to get the video display to work through the AirPlay mode. The following steps will help you to screen mirror your mobile screen on the desired AirPlay-compatible device with a few clicks.
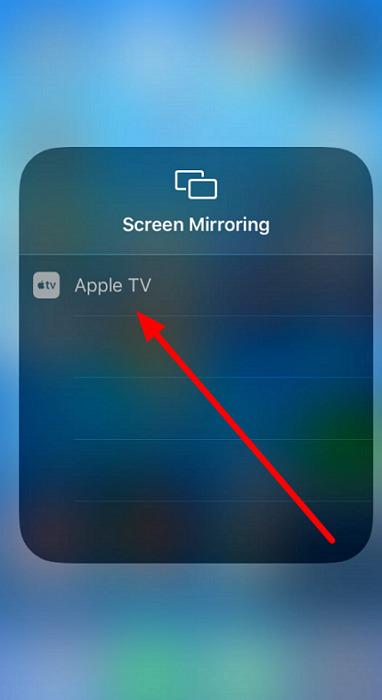
Step 1. After connecting your iOS device to the same network as your Apple TV, access the “Control Center” screen on your phone. For this purpose, you can choose to swipe down from the top-right corner of your latest phone. However, users need to swipe up from the bottom while using iPhone 8 or earlier devices. Next, press the “Screen Mirroring” button from the available option to proceed with this process.
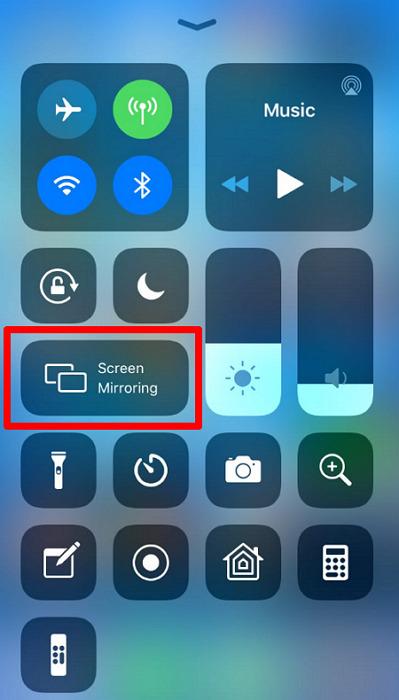
Step 2. Now, you will reach the “Screen Mirroring” dialog boxes with the list of devices available for connection. Finally, tap on your desired AirPlay-compatible receiver, such as Apple TV, to share your mobile screen through the mirroring feature.
Fix 8. Factory Reset Your Apple TV/AirPlay Receiver
Once you have tried all the methods to resolve the “AirPlay only playing audio” issue, consider factory resetting your Apple TV. However, all the present settings will be removed from your AirPlay-compatible receiver after this reset is performed. Let’s go through the steps to reset your Apple TV to remove any problematic settings causing the issue with the video output.
Step 1. Begin this factory reset process by accessing the “Settings” application on your Apple TV. Next, enter the “System” window from the available options to remove all the present settings.

Step 2. On this new screen, press the “Reset” button from the “Maintenance” section to access settings and reset your AirPlay-compatible receiver.

Step 3. Moving forward, you need to hit the “Reset and Update” button to move to the latest version after factory resetting your device. Once you press this button, a confirmation screen will appear before the actual reset process begins.

Bonus Part. Record Professional Level Audio with Hollyland Lark Max
After learning about all the fixes to solve the “AirPlay only playing audio” issue, let’s shift our discussion toward the best way to capture sound. Wireless microphones are preferred by most users due to their ability to record audio from large transmission ranges. One such mic is Hollyland Lark Max, which can capture studio-quality audio with its MaxTimbre technology.

Hollyland LARK MAX - Professional Wireless Microphone
A professional wireless microphone system featuring studio-quality audio with advanced noise cancellation.
Key Features: Studio-Quality Audio | Magnetic Attachment | 8GB Internal Recording

Other than that, streamers can take advantage of this wireless microphone due to its long battery time for endless audio content recording sessions. With the help of its two transmitter and receiver systems, you can record multiple persons at a time while shooting podcasts on your iPhone. Keeping all these features in view, we can say that Hollyland Lark Max is the best option out there to optimize the way you capture sound.
Conclusion
Throughout this article, we have familiarized you with the best methods to fix the “AirPlay only playing audio” problem. You can utilize any of these methods to resolve the issue and ensure high-quality video output while using AirPlay mirroring.
Moreover, you have learned about the most recommended wireless microphone to capture your audio for content creation. Hollyland Lark Max will deliver studio-quality output without any lag or distortion.
FAQs Related to AirPlay Only Playing Audio Problem
Q1. Why is my AirPlay not showing video?
Most users face this issue due to the network incompatibility between the sending and receiving devices. Moreover, it is possible that your iPhone or Apple TV device is not updated to the latest version to cause this issue. In addition, there can be a problem with the video source, which makes it impossible for AirPlay to stream the video.
Q2. Can DRM affect AirPlay video streaming?
Yes, videos restricted by the DRM settings will not be displayed on your Apple TV device using the AirPlay feature. Some content creators place these limitations on their videos to prevent others from copying their copyrighted videos. Furthermore, you cannot broadcast these DRM-restricted videos through any other device.
Q3. How do I update my AirPlay receiver’s firmware?
Users looking to update their AirPlay receiver, such as Apple TV, can do so by entering the “System” settings on the device. Moving forward, press the “Software Update” option to get access to the latest update available for the system. Afterward, hit the “Update Software” button to successfully install the new update on your device.
Q4. What to do if AirPlay mirroring is not working?
You can try various methods if you cannot utilize the AirPlay mirroring on your Apple TV or other receiver device. First, you must ensure that both the sender and receiver devices are connected to the same Wi-Fi network.
Next, try to update and restart both devices to solve this issue with the AirPlay mirroring feature. When none of the solutions works, you must factory reset the Apple TV or other AirPlay-compatible receiver.
Q5. How can I check if my TV supports AirPlay?
To check the compatibility of your TV with the AirPlay feature, go to the “Settings” menu and enter the “General” settings. You will see the “Apple AirPlay Settings” option within this newly appeared window if your TV supports this feature.
Q6. Is it possible to AirPlay to a non-Apple TV?
No, AirPlay is limited to Apple devices compatible with one another to act as sender and receiver. However, there are some ways to mirror your screen to non-Apple TV devices, including the use of HDMI to make a connection. Other than that, most smart TVs in the market utilize the Chromecast feature to display the content from their phone on their television.
Q7. Why does AirPlay keep disconnecting?
There are various reasons that are causing AirPlay to disconnect quite often. Poor Wi-Fi signal may be the biggest reason behind this issue, as a strong network is essential for a smooth working process. Users can also face this issue due to outdated software or firmware in both or one of the devices. In addition to these common causes, you will face this issue due to the low battery levels.
Q8. Can network settings affect AirPlay performance?
You will see the adverse effect on the AirPlay performance due to the bad network conditions. Insufficient bandwidth can slow down data transmission speed and cause delays while displaying videos through this screen mirroring functionality. Users can improve AirPlay performance by restarting their Wi-Fi router or disconnecting the VPN to make a proper connection.
Q9. How do I enable AirPlay on my iPhone?
When you want both the receiver and sender device to connect automatically for AirPlay transmission, go to the “Settings” application. Then, tap the “General” option and select the “AirPlay & Handoff” feature to access its settings. From here, choose the “Automatic” option after tapping the “Automatically AirPlay” button to complete this process.
Q10. What are the alternatives if I can’t resolve the AirPlay video issue?
Users who fail to fix the issue with the AirPlay feature can shift to Chromecast to project the content from their phone or computer to their TV. The best thing about this feature is that it is compatible with various streaming services and devices. You can also opt for a wired option, including an HDMI cable, to connect your device directly to your Apple TV.