.png)
Ever found yourself staring at a bunch of empty bars in MuseScore and thinking, Why are you still here? Whether you’re cleaning up a messy score or just removing extra space, learning how to delete measures in MuseScore is a must for anyone writing or editing sheet music. The good news? It’s easier than you think!
You will learn a step-by-step method to delete measures in MuseScore versions 3 and 4 through this guide. You’ll also get helpful tips, keyboard shortcuts, and answers to real questions that musicians like you often ask. Read on to learn more.
What is a Measure in MuseScore?
A measure (also called a bar) is a section of music that holds a fixed number of beats. It’s like a musical box where your notes live. These boxes are divided by vertical lines called barlines, and they help make your sheet music neat and organized.
A time signature determines the number of measures in MuseScore. Time signatures determine that a 4/4 measure contains 4 beats in each section. Deleting a measure means you’re removing this entire box—notes, rests, and all. Think of it as deleting a whole paragraph in a Word document instead of just a few words.
Why Might You Want to Delete Measures?
Good question. Deleting measures can be helpful in many situations:
- You added too many measures at the end of your score.
- You’re shortening a section to tighten the composition.
- You’re removing an unwanted section copied from another piece.
- You’re formatting the layout before printing or sharing.
- You’re simplifying a project for beginners or group arrangements.
- You just changed your mind about a musical idea. It happens!
Whatever your reason, getting rid of unwanted measures helps clean up your work and keeps your score tidy.
How to Delete Measures in MuseScore 4
MuseScore 4 brings a fresh, modern look and easier navigation. If you’re using this updated version, deleting measures is a breeze. Let’s walk through it step-by-step so you can keep your scores clean and polished.
Step 1: Switch to Selector Mode
First things first — you need to be in selector mode, not note input mode. What’s that, you ask?
Note input mode is the little blue pencil icon sitting at the top left of your screen. If the pencil is blue, it means you’re still in note-adding mode, and you can’t select full measures yet.
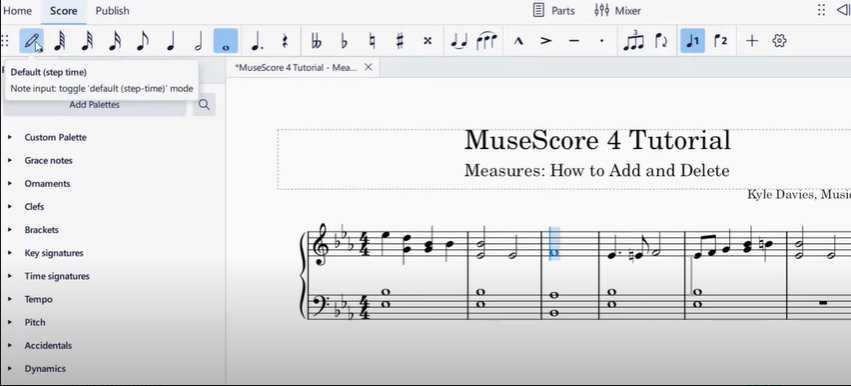
You should click the pencil button to disable the tool. You will enter selector mode after turning off the pencil to make your selection full measures instead of individual notes. The transition from working with little details resembles moving from small brush painting to using a large brush.
Pro Tip: You can also toggle note input mode quickly by pressing the shortcut key ‘N’ on your keyboard.
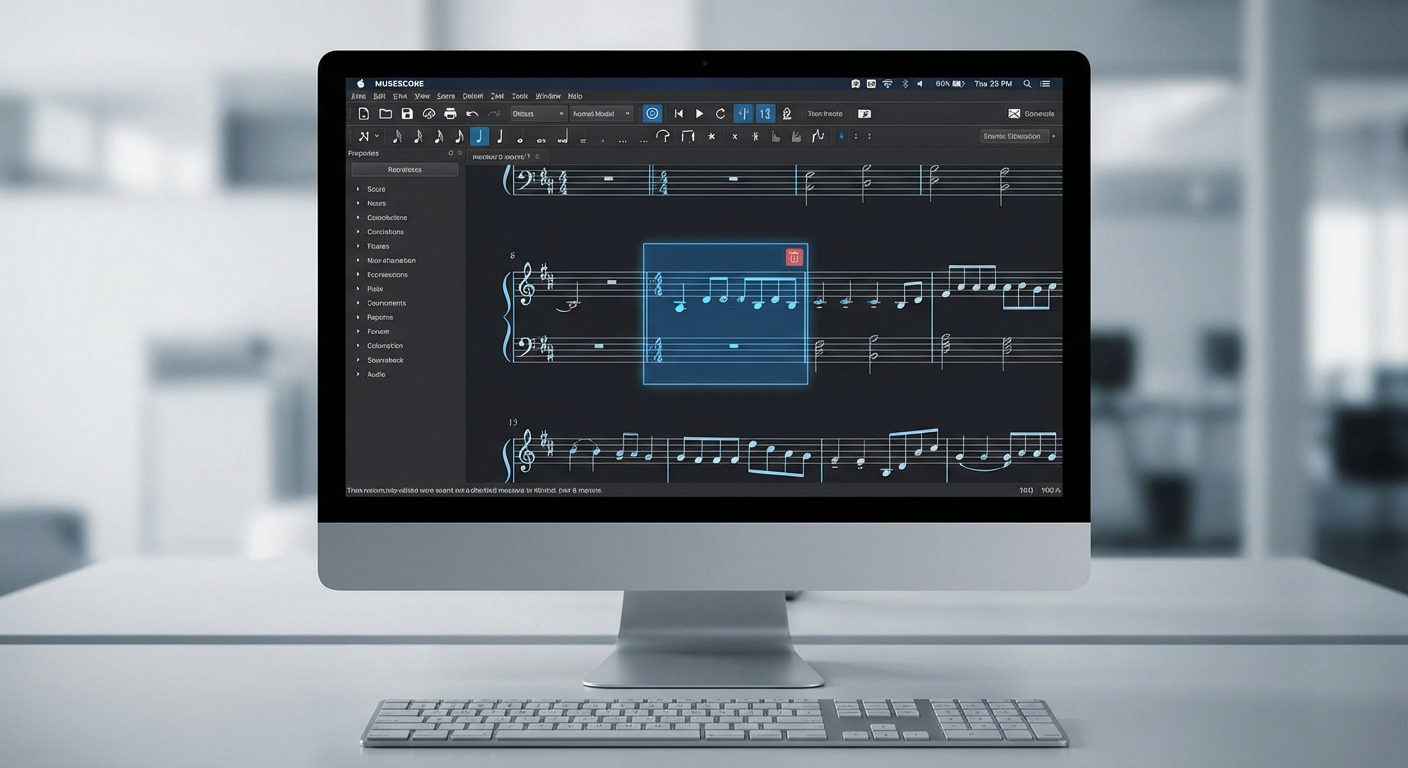
Step 2: Select the Measure(s)
Now it’s time to pick the measure you want to send packing.
Click anywhere inside the measure. You’ll notice a nice blue outline box pop up around it — that’s MuseScore’s way of saying, “Yep, we got it selected!”
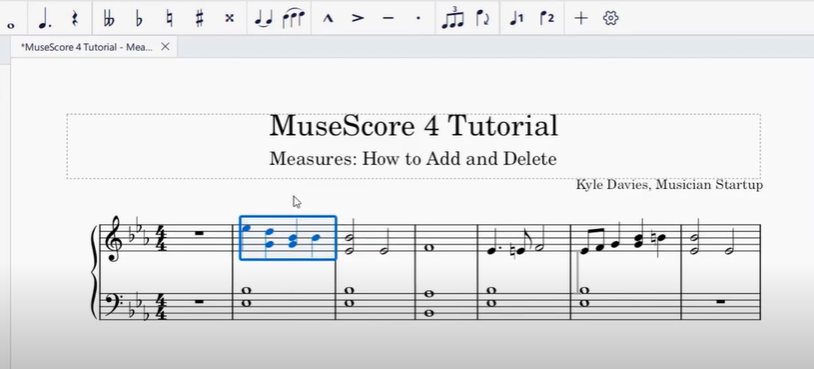
Want to delete multiple measures at once? No problem.
Here’s how:
- Click on the first measure you want to delete.
- Hold down the Shift key.
- Then click on the last measure in your range.
Everything between your first and last click will be selected like magic!
Note: All selected measures will display a blue border, making it easy to see what’s about to be removed.
Step 3: Use the Shortcut or the Menu
Here comes the fun part — deleting the measures!
You’ve got two easy options:
- Option 1: To perform a deletion, Windows users should press Ctrl + Delete while Mac users should execute Cmd + Delete.
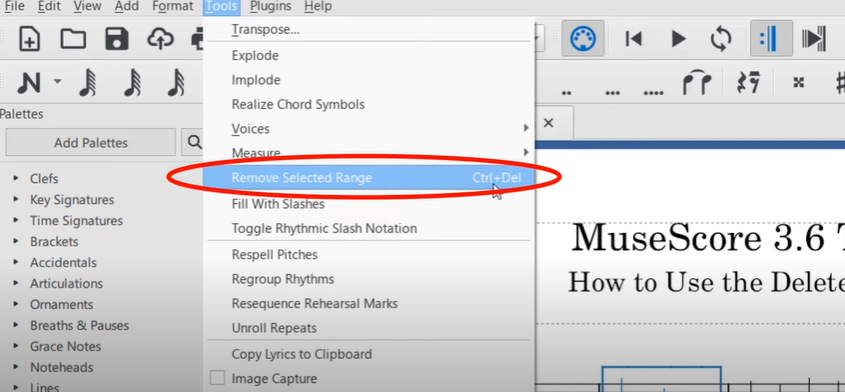
- Option 2: Go to the top menu, click on Tools > Remove Selected Range.
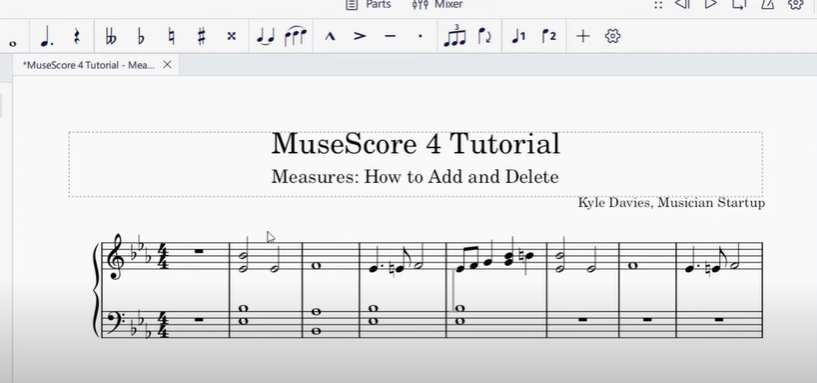
Both methods do the same thing: they completely remove the selected measures, shifting the rest of the music up to fill the gap. Clean and neat!
Pro Tip: Shortcuts save a lot of time, especially when working on longer pieces!
Method 2: Right-Click Magic
Maybe you’re more of a right-click kind of person. No worries — MuseScore’s got you covered!
- Right-click anywhere inside the selected measure(s).
- A menu will pop up. Choose Delete Measure(s) to remove them completely.
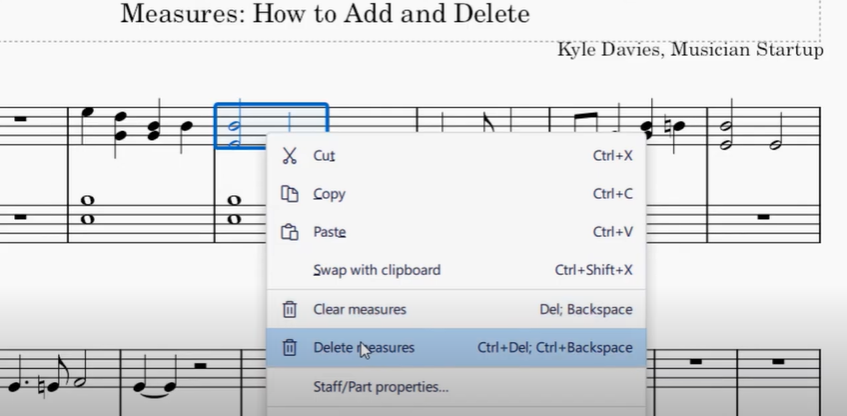
You should pick Clear Measure(s) when you need to remove notes without altering measures.
Heads up: Clearing keeps the space but wipes it clean — it’s like erasing words from a paragraph without deleting the paragraph itself.
Undoing a Mistake:
Oops, deleted something you didn’t mean to? Happens to the best of us!
MuseScore makes it super easy to undo your last action:
- Press Ctrl + Z (Windows) or Cmd + Z (Mac).
- Or, head up to the menu and click Edit > Undo.
Your measures will pop right back into place, like nothing ever happened.
How to Delete Measures in MuseScore 3
MuseScore 3 might not be the newest version on the block, but it’s still used by many musicians around the world. Whether you’re on an older machine or just prefer the classic look, MuseScore 3 gets the job done. And yes, deleting measures in this version is just as easy once you know the steps. Let’s walk through it together!
Step 1: Select the Measure
Click directly inside the measure you want to delete. You should see a blue rectangle pop up around it, showing that the measure is selected.
If you want to delete more than one, no problem:
- Click the first measure in the group.
- Hold down Shift, then click the last one.
- MuseScore will highlight all measures in between.
Heads up: If your cursor is blinking or you see a blue note input box, you’re in note entry mode. Just hit the ‘N’ key or click the pencil icon in the toolbar to exit and return to selector mode.
Step 2: Delete the Measure(s)
With your measure(s) selected, you now have a few options to remove them:
- Press Ctrl + Delete on Windows, or Cmd + Delete on a Mac.
This is the fastest way and works like a charm.

- Prefer menus? Go to the top bar and click on
Tools > Remove Selected Range.
This does exactly the same thing — just the slower, safer route.
Note: This deletes the entire measure box, not just the contents. The music to the right will automatically shift left to fill the space.
Method 2: Right-Click Option
Another way? Yep, MuseScore’s got your back with the trusty right-click method.
- Right-click the selected measure(s).
- From the dropdown, choose Measure > Delete.
If you only want to erase the notes but keep the measures, choose Measure > Clear instead. This keeps the structure while giving you a blank canvas.
Real-Life Example: Deleting Pickup Measures
Let’s say you imported a MIDI file, and it gave you a bunch of empty pickup bars at the start. You don’t need them. Follow the same method: click the first measure, hold Shift, click the last pickup measure, and hit Ctrl + Delete. In seconds, you’ll have a clean slate to start your arrangement.
Extra Tips and Troubleshooting
Want to become a MuseScore pro? Check out these power tips:
- Clear Notes Without Deleting the Measure: Click on a measure and press Delete (not Ctrl + Delete). This keeps the measure but wipes the notes and rests.
- Can’t Delete a Measure? Try this: Make sure you’re not in note input mode. Save your project and restart MuseScore. Double-check that you’re selecting the full measure (not just a note).
- Move Measures Instead of Deleting: Don’t want to delete, but want a new line? Use Breaks and Spacers from the Palettes tab. Drag a System Break to the end of a measure to move the next ones to a new system (like a new paragraph).
- Plan Ahead: Before you start deleting, consider whether other parts (linked parts, parts scores) will be affected. It’s best to delete in the full score first, then reformat parts as needed.
Keyboard Shortcuts Cheat Sheet
Here’s a quick shortcut list for managing measures like a boss:
| Action | Windows | Mac |
| Delete measure | Ctrl + Delete | Cmd + Delete |
| Clear measure (notes only) | Delete | Delete |
| Undo | Ctrl + Z | Cmd + Z |
| Insert before selection | Ctrl + Insert | Cmd + Insert |
| Add at end (MuseScore 4) | Alt + Shift + B | Cmd + B |
FAQs
Question 1: Can I delete several measures at once?
Answer: Yes! Use Shift + Click to select a range and then press Ctrl + Delete.
Question 2: What’s the difference between Delete and Clear?
Answer: Delete Measure(s) = removes the whole measure and its content.
Clear Measure(s) = removes only the content, not the measure box.
Question 3: My delete shortcut isn’t working. What now?
Answer: Make sure you’re out of note input mode. If it still doesn’t work, go to Tools > Remove Selected Range.
Conclusion:
Knowing how to delete measures in MuseScore will help music teachers, hobbyists and composers avoid both time drain and frustrations during their work. The process is simple: switch to selector mode, choose the measures you want to remove, and either use the shortcut (Ctrl/Cmd + Delete) or the menu option under Tools.
If you want to clear out the notes but keep the measure structure, use the Clear function instead. And if you’re not deleting but simply reorganizing your score layout, System Breaks are your best friend. Keeping your score clean and organized not only looks good, but it also makes your music easier to read, edit, and share. So go ahead—clean it up and let your composition shine bright!