.png)
CapCut has become a go-to editing tool for creators who want professional-quality results without a complicated learning curve. One of its most useful features is the ability to detach audio from video clips, giving users complete control over their soundtracks.

Whether you’re trying to swap background music, clean up dialogue, or create voiceovers, learning how to separate audio is essential.
In this step-by-step guide, you’ll learn how to detach audio in CapCut on both mobile and desktop, with clear instructions and images to help you follow along with ease—even if you’re a beginner.
Method 1 – Detach Audio in CapCut on Mobile
CapCut’s mobile app is designed to be fast and beginner-friendly. Detaching audio from a video clip on your phone takes just a few taps. Follow the steps below to separate and edit the audio from any video file easily.
Open Your Project – How to start a new or existing project

- Start by launching the CapCut app on your mobile device.
- From the home screen, tap on “New Project.”
- You’ll be taken to your phone’s gallery. Select the video you want to edit and tap “Add” at the bottom.
If you’ve already started a project before and want to continue editing it, simply scroll through the “Your Projects” section on the home screen, tap the one you want, and you’ll be taken back to the editing timeline.
Locate Audio Tools – Navigating to the detach option
Once you’re in the editing interface, tap on the video clip in the timeline to select it. This will activate a row of editing tools at the bottom of your screen.
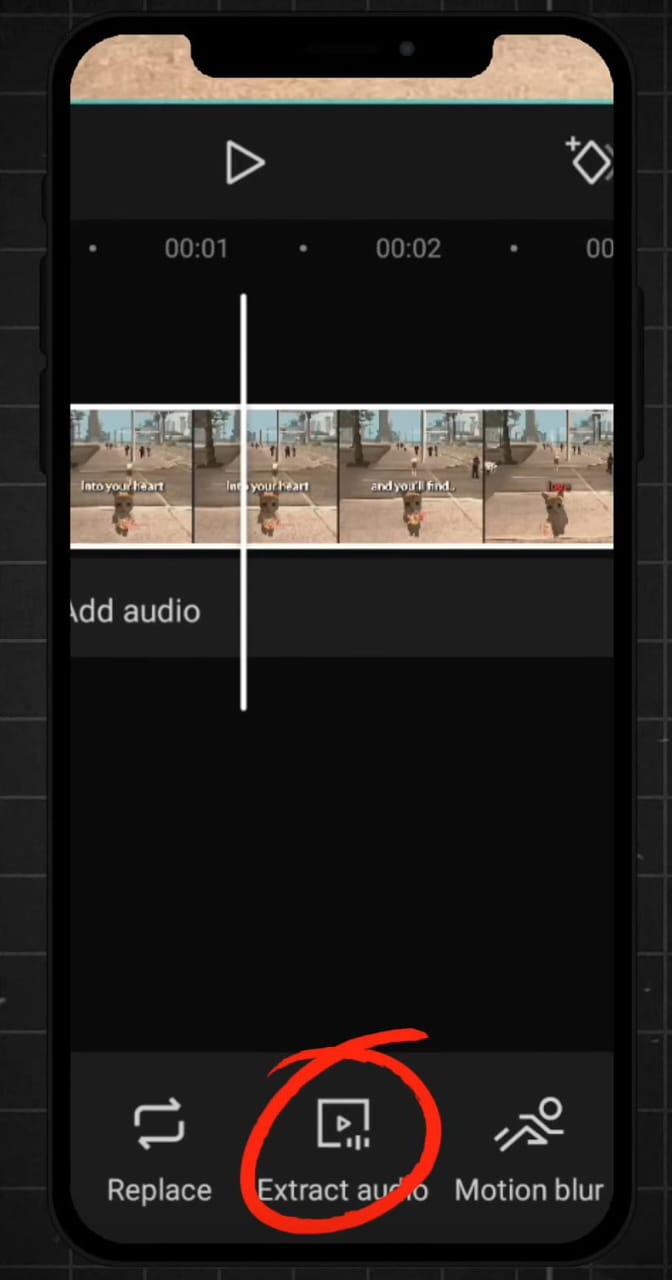
Swipe through this toolbar until you find the “Extract Audio” or “Detach Audio” button — the exact name may vary slightly depending on your CapCut version.

Tap on this option. CapCut will immediately separate the audio from the video and place it as a new waveform layer directly beneath the video clip in the timeline.
Detach and Edit Audio – Separate from video, delete, enhance, or replace it
Now that your audio is detached, you can edit it independently from the video.

Tap on the audio layer to select it. You’ll now see a set of new options for editing audio, such as:
- Delete – remove the original audio completely
- Volume – lower or boost audio levels
- Fade In/Out – apply smooth transitions
- Effects – add filters or voice effects
- Replace – delete and insert new audio like music or voiceovers
You can also move the audio clip along the timeline, adjust its length, or sync it precisely with other video content. This is especially helpful for fixing lip-sync issues or timing audio with on-screen actions.
Save and Export – Finalize edits and save project
Once you’ve completed your edits, tap the “Export” button in the top-right corner. CapCut will begin processing your project.
Before saving, you can select your resolution (e.g., 1080p or 720p) and frame rate to ensure optimal video quality. Once ready, tap “Done” and the final version will be saved to your phone’s gallery.
Your video is now complete—with the audio detached and fully under your control.
Method 2 – Detach Audio in CapCut on Desktop

CapCut’s desktop version provides more control and precision, making it a preferred choice for creators working on complex projects. If you’re editing on a Windows or Mac computer, the process of detaching audio is straightforward and offers plenty of flexibility. Here’s a step-by-step guide to help you get started.
Load the Video File – Import video into the desktop version
Start by launching the. Click “New Project” from the welcome screen to enter the editing workspace.
Next, either drag your video file into the media library or click the “Import” button on the left panel to upload it. Once added, drag the video into the timeline at the bottom of the screen.

This sets the stage for detaching and editing your audio.
Use Timeline Controls – Selecting and detaching an audio track
Click the video clip in the timeline to select it. Then, either right-click on the video track and select “Detach Audio”, or look for the “Detach Audio” button in the top toolbar (depending on your CapCut version).

Once selected, CapCut will immediately pull the audio from the video and create a separate audio layer below the video in the timeline.
This gives you full control over both audio and video tracks independently.
Edit Audio Independently – Adjust volume, add effects, or replace

Now that the audio is detached, click on the audio track to open the editing options. You can:
- Adjust the volume to make it louder or softer
- Add fade-in/out for smooth audio transitions
- Change speed to sync with video pacing
- Apply effects like reverb, EQ, or voice tuning
- Delete or replace with music, narration, or another voiceover

Move the audio track freely to match the video’s timing, or delete and replace it entirely based on your project goals.
Export the Project – Save the final edited video
Once you’re done editing, click the “Export” button in the top-right corner.
From here, choose your preferred resolution, file name, save location, and frame rate. Make sure to double-check settings if you’re planning to upload the video to social media platforms.
Click “Export” again to render the final video with your detached and edited audio.

You’ll now have a polished video with independently managed audio—ready to publish, share, or upload anywhere.
Using Professional Audio for Better Results
Clean audio is the foundation of any polished video. While CapCut gives you the tools to detach and edit audio easily, starting with high-quality sound can save you hours of post-production work. One way to achieve this is by recording with a wireless microphone system that captures professional-grade audio from the start.
The Hollyland LARK MAX 2 is a powerful solution for creators who want studio-level sound on the go. It features 32-bit float recording, which captures a wide dynamic range without distortion. Another standout feature is its OWS Bluetooth monitoring, which allows you to listen to recordings in real-time.

Hollyland LARK MAX 2 - Premium Wireless Microphone System
A premium wireless microphone for videographers, podcasters, and content creators to capture broadcast-quality sound.
Key Features: Wireless Audio Monitoring | 32-bit Float | Timecode
Conclusion
Mastering how to detach audio in CapCut opens up new creative possibilities—whether you’re replacing background music, enhancing dialogue, or syncing voiceovers. The process is simple on both mobile and desktop, and using high-quality audio gear from the start can reduce editing time significantly. Clean audio always leads to cleaner, more professional results in your final videos.
FAQs
Can I reattach audio in CapCut?
CapCut doesn’t have a direct “reattach” button. Still, you can manually sync the original or new audio file with the video by dragging it into the timeline and aligning it precisely.
Does detaching audio reduce video quality?
No, detaching audio only separates the sound from the video track. It doesn’t affect the video’s resolution, bitrate, or visual quality in any way.
Is the detach feature free on CapCut?
Yes, the detach or extract audio feature is available in the free version of CapCut on both mobile and desktop. You don’t need a Pro subscription to access it.
Can I detach audio from multiple clips at once?
CapCut does not currently support bulk audio detachment. You’ll need to detach audio from each clip individually, which helps maintain precise editing control over your timeline.