.png)
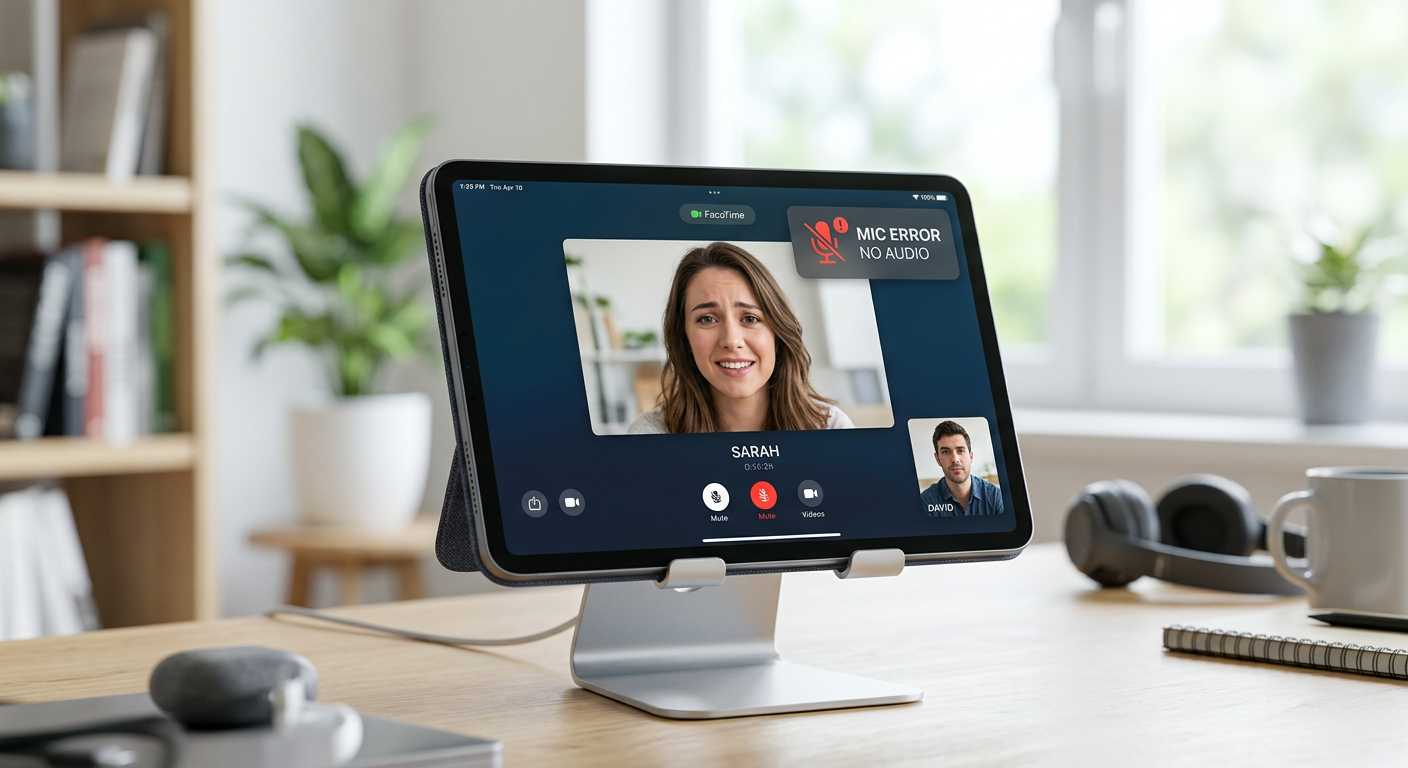
AirPods microphones are necessary for hands-free calls. Their failure leads to silence or unclear audio. Therefore, daily routines are disrupted. But you’re not alone if you are facing this issue.
So, in this article, we will give you 10 easy solutions that can fix the AirPods microphone. You will also explore some common reasons for these malfunctions. Initially, you will learn the basic connection checks. Then, you will learn to adjust the software settings. Finally, you will find out when you need to go for expert help.
10 Solutions to Fix Your AirPods Microphones
Before spending on another pair of AirPods because the mics on each piece aren’t working, try these 10 fixes.
Fix 1: Make Sure Your AirPods Have Enough Battery
Sometimes, if your AirPods and the charging case have a low battery, it may hinder the microphone from functioning correctly on your iPhone or iPad. So here’s what you need to do:
- Step 1: Make sure your AirPods are connected to your device, such as iPhone. Then, open the lid of the AirPods’ case

Now, look on your phone’s screen to see the battery level for both AirPods (combined) and the charging case.
As you can see in this screenshot, the AirPods are 100% charged, but the case is only 14%.
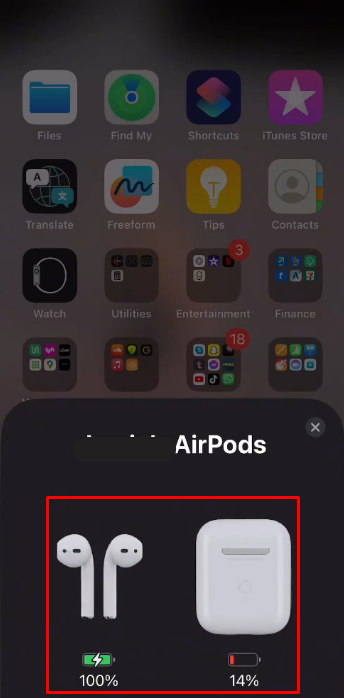
- Step 2: Now, remove both AirPods from the case to check the battery level of each individual piece

- Step 3: Charge the AirPods or case (whichever has a low battery level) and then use them on a test call or voice recording to check if the mics on both pieces are working
Fix 2: Quick Reset the AirPods
If the AirPods microphones are still not working, you can try the quick reset technique. This isn’t a technical reset with complicated steps. Here’s how it’s done.
- Step 1: Open the AirPods case and pull both AirPods out

- Step 2: Put both pieces back into the charging case, close the lid, and wait for 30 seconds
- Step 3: Now, take out both AirPods and try using them to check if the microphone is working now
Fix 3: Reconnect AirPods
AirPods use Bluetooth to connect to your iOS devices. Therefore, disconnecting and reconnecting them can make the microphone work again.
So, follow these steps.
- Step 1: Make sure your AirPods are connected
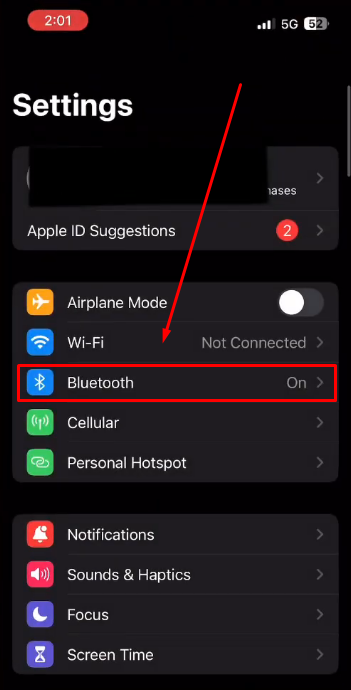
- Step 2: Then, go to your home screen menu on your iPhone, navigate to the “Settings” app and tap on it to view more options

- Step 3: Find the “Bluetooth” option and tap it
Since your AirPods are already connected, the Bluetooth toggle button should be enabled like this
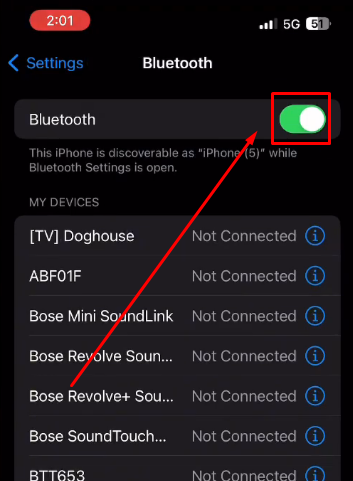
- Step 4: Tap on the toggle switch to turn off Bluetooth

- Step 5: Wait for 15 seconds and activate Bluetooth again by tapping the toggle button. The AirPods should automatically be connected. So, use them now to check if the microphone on each AirPod is working
NOTE: If your AirPods won’t connect automatically after you enable the Bluetooth function, search for your AirPods name under the “MY DEVICES” section and tap on it to manually connect them

Fix 4: Enable Automatic Ear Detection
The Automatic Ear Detection function on your iPhone doesn’t directly make the AirPods microphones work. However, it does affect how the microphone functions and audio playback are handled when you put or remove them from your ears.
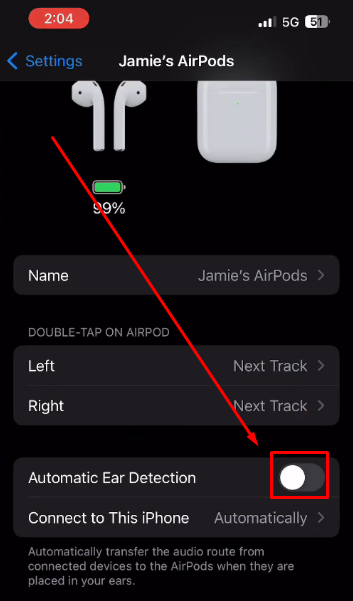
- Step 1: Open your iPhone’s “Settings” and tap on your “AirPods” name

You may notice that the “Automatic Ear Detection” option is already turned on

- Step 2: Tap on the toggle button to turn it off and then turn it back on after 15 seconds

- Step 3: Now, check if you are able to speak through your AirPods microphones
Fix 5: Switch AirPods Microphone Settings
Usually, the AirPods microphone is set to “Automatic.” However, switching to other options and then again configuring it to its default settings may make the microphones work. Here’s how you can modify settings.
- Step 1: Open the “Settings” app and choose your “AirPods” under the “Apple ID Suggestions” tab

- Step 2: Navigate to the “Microphone” option and tap on it

Inside the “Microphone” settings, you will find three options:
- Automatically Switch AirPods (which will be selected by default)
- Always Left AirPod
- Always Right AirPod
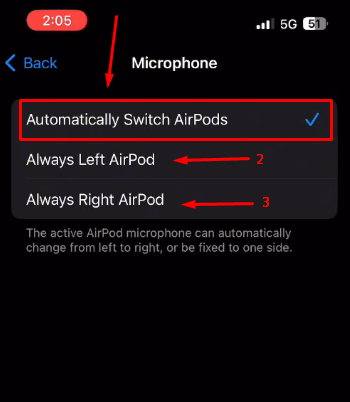
- Step 3: Tap on the “Always Left AirPod” option to select it and wait for 15 seconds
- Step 4: Then tap on the “Always Right AirPod” option and wait for another 15 minutes
- Step 5: Now, choose the “Automatically Switch AirPods” option and try using your AirPods microphone
Fix 6: Update Your iOS Software
If your AirPods microphones are not working, you may be running an older iOS version. Upgrading to the latest software may fix this issue.
To do that.
- Step 1: Go to your iPhone’s “Settings”

- Step 2: Tap on the “General” tab to view more options

- Step 3: Then select “Software Update”

If the software is up to date, you will see a screen like this:

On the other hand, if any software update is available, you will see the update option instead.
- Bonus Step 1: Also, make sure to turn on “Automatic Updates” for your iOS device. So, tap on the “Automatic Updates” tab

- Bonus Step 2: Turn on all the toggle buttons for “iOS Updates,” “Security Responses & System Files,” and “iOS Update.”

Fix 7: Update Your AirPods Firmware
Apple releases firmware updates for AirPods from time to time. If there’s any update available, it should automatically be installed once your AirPods are turned on and connected to your iPad or iPhone through Bluetooth.
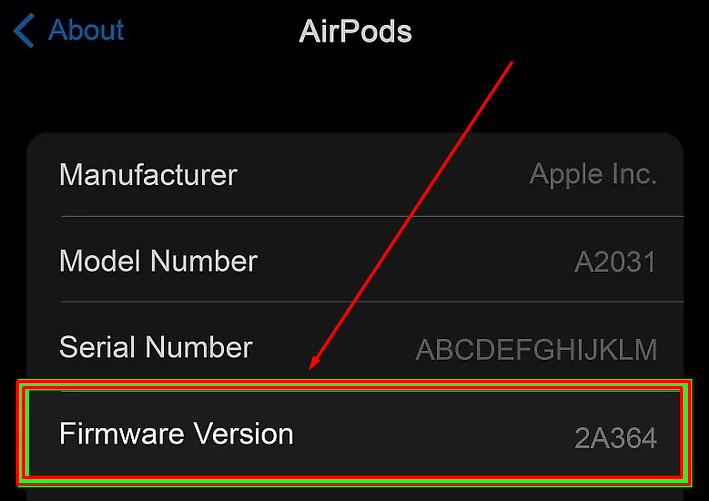
To check whether your AirPods have the latest firmware version.
- Step 1: Open “Settings” and tap on the “Bluetooth” option
- Step 2: Tap on the small “i” symbol next to your AirPods
- Step 3: Scroll down to the “Firmware Version” section to know the details
If the firmware is not updated, you may wait for the automatic update while trying other methods.
Fix 8: Clean Your AirPods Microphones
This fix is for users who experience muffled audio when they talk through their AirPods mics. If dirt and debris are blocking the AirPods microphones, your voice will sound distorted or suppressed during voice recordings or phone calls. In such scenarios, you should clean those areas gently by following these instructions.
- Step 1: Take a dry cotton swab and carefully clean the surface around the microphone
- Step 2: Use a dry and soft cloth to clean the AirPods case
NOTE: Never use wet, abrasive, or sharp materials to clean your AirPods. You can also go to the Apple store to have professionals help you clean them.
Fix 9: Forget AirPods and Pair them Again
Bluetooth problems can often be fixed simply by unpairing your AirPods and then connecting them again. This may indirectly help in fixing AirPods microphone issues. It erases any tweaks, such as distortion, static, or audio dropouts. Note that you will have to reset preferences, but it is often a good way to fix connectivity and audio quality issues.
- Step 1: Put the AirPods back into the case and close the lid. Then, go to “Settings” and select “Bluetooth” on your iPhone


- Step 2: Tap on the “i” icon next to the AirPods

- Step 3: On the next screen, you will see various options. So, look at the last one that says “Forget This Device” and tap on it

- Step 4: Confirm your decision by tapping on the “Forget Device” button

- Step 5: Now, open the AirPods case lid and press the pairing button


- Step 6: Then, inside the “Bluetooth” settings, look under the “OTHER DEVICES” section and wait for the AirPods to pair again automatically (you can also do it manually if the pairing is not done automatically)

- Step 7: Once done, record your voice or call a friend using AirPods to check if the microphones are working
Fix 10: Contact Apple Support
If all nine methods fail to make your AirPods microphones work, we recommend calling Apple Support and following their instructions. Or, you can stop by a local Apple Store where experts can find and fix your problem.
Reasons Why Your AirPods Microphones Malfunction
AirPods microphones may fail for many reasons. Problems range from minor glitches to hardware damage. Sometimes, the microphone simply stops working. Other times, the problem requires troubleshooting. Finding the cause helps solve the issue. This allows for effective repairs.
Software Glitches
Software bugs could be the reason why your AirPods mic isn’t working or sounding unclear. Plus, firmware or operating system conflicts can hinder communication. Therefore, restarting the AirPods often fixes issues. Likewise, software updates or resetting the connection can also resolve problems.
Battery Issues
Low battery levels impact microphone performance. Sound quality is reduced, or it fails entirely. Insufficient charge prevents proper audio transmission. Keeping AirPods charged prevents these problems. Optimal performance is ensured. Moreover, regular charging maintains overall functionality and ensures that the microphone works.
Physical Damage
Dropping or damaging AirPods causes internal problems. The microphone is affected since small cracks caused by damage can disrupt audio transmission. Therefore, you must take great care of the AirPods. Also, whenever storing them, make sure you keep them in their own case.
Interference from Other Devices
Nearby electronics disrupt AirPods microphone performance. Wi-Fi routers cause interference and Bluetooth devices can do the same too. Household appliances like microwaves interfere to a great extent. Therefore, moving to a less crowded area helps. Or, turning off devices may improve performance.
Bluetooth Connectivity Issues
A weak Bluetooth connection prevents microphone function. Poor connections cause microphone cutouts. In such scenarios, disconnecting and reconnecting AirPods may help. Resetting network settings can also resolve similar issues. Furthermore, trying another device helps diagnose problems and is also a great way to check whether there is a problem with the AirPods mic or the device.
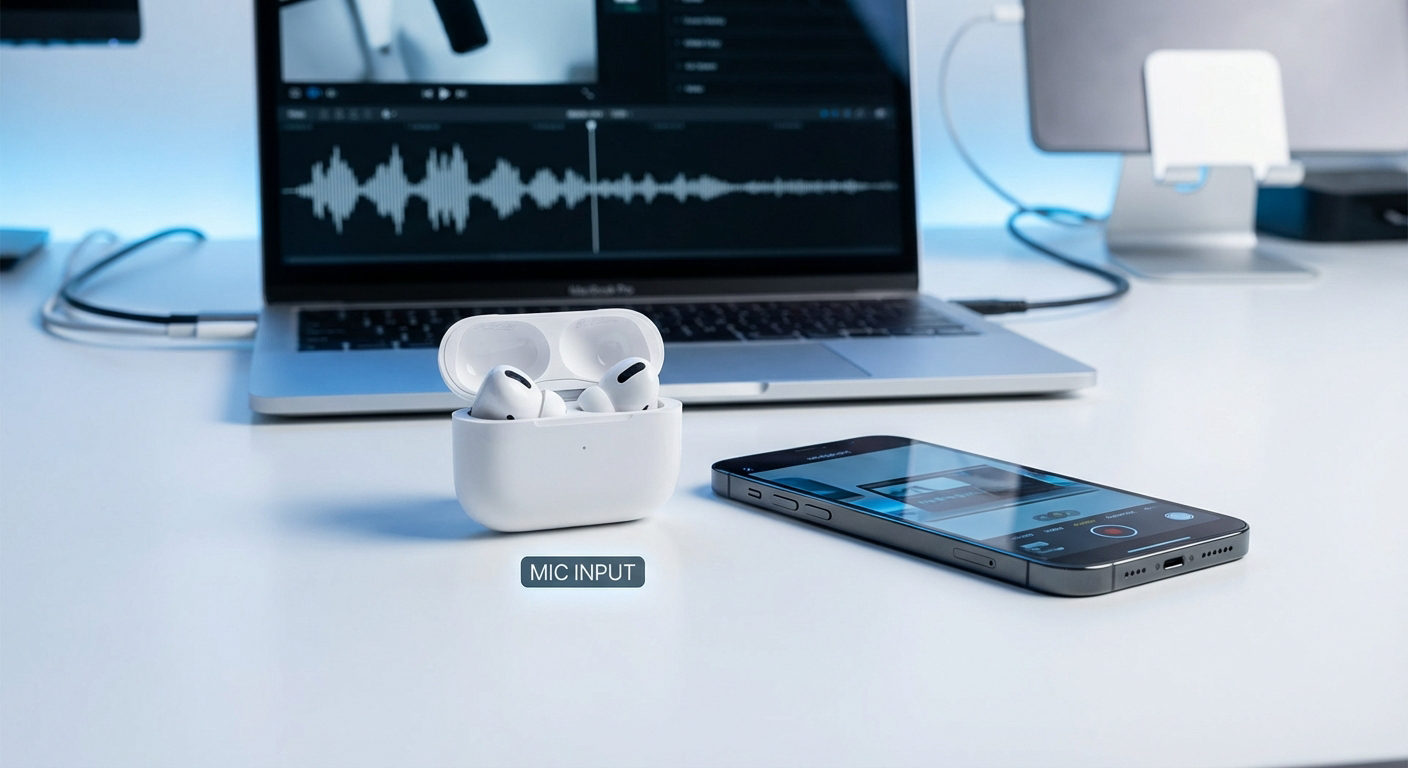
Pro Tip: If your sole purpose for using an AirPods microphone is communication, you can use external microphones for virtual calls, online meetings, streaming, and content creation. Wireless microphones like Hollyland Lark M2S provide an all-in-one solution for crystal-clear audio capturing, whether its on Zoom calls or for or inside your video recordings.

Hollyland LARK M2S - Wireless Hidden Microphone
An ultra-discreet wireless microphone featuring a clip-on transmitter for an “invisible” fit.
Key Features: No-Logo Fit | Ti+ Design | 48 kHz/24-bit
Cherry on the top, Lark M2S has a simple yet interesting logo-free design. Plus, its titanium clip-on ensures comfort and rigidity when you wear it on your clothing. But that’s not it! Lark M2S is the epitome of marvelous features, including Environmental Noise Cancellation, up to 1000ft wireless range, and much more! that you can imagine.
Water Damage and Dirt
Moisture damages the microphone, causing malfunctions. Sweat, rain, or liquid exposure causes issues. Dirt and earwax clog microphone openings. Sound is muffled or prevented. This is why regular cleaning maintains microphone performance. Keeping AirPods dry helps prevent problems. Water damage can be avoided.
Conclusion
AirPods mic glitches usually disappoint during the important calls. Therefore, you should know how to fix AirPods microphone issues. To begin, make sure that all your AirPods and the case are charged properly. As a next step, you can simply reset the connection. Similarly, it is also a very helpful thing to clean the mic areas. Furthermore, disconnecting and re-pairing with your iPhone or iPad can also resolve this issue. However, if these methods fail, it is always wise to talk to the customer support team at Apple.
If you’ve tried multiple solutions and your AirPods microphone still isn’t reliable, perhaps it’s time to consider a more professional audio alternative. A wireless lavalier microphone ensures enhanced sound clarity and uninterrupted audio quality – a perfect choice for calls, recordings, streaming, or online meetings.
Frequently Asked Questions about Fixing AirPods Microphones
Q1. What are the steps to unclog the AirPod mic?
The best choice for you is to take a clean brush with soft bristles. You should gently take the dust away from the microphonic areas. However, be careful lest you may accidentally push dirt into the holes. Additionally, a dry cotton swab can serve as a tool to remove debris from the microphones. This helps remove stubborn debris.
Q2. How do I fix my AirPod audio problem?
Begin by charging your AirPods and their case. Next, pair and unpair your AirPods. Adjust the audio balance between the left and right sides. Remove volume limits within settings. Your devices, like iPhone or iPad, should be updated. Disable the ear detection option and then turn it back on. If these solutions do not work, you may seek help from Apple Support. They will gladly assist you in further ways.
Q3. Is there a way to repair an AirPods mic?
Often, simply restarting the device can fix problems related to the microphone. Power off your phone. Place the AirPods back into their charging case. Turn the phone back on. This resets temporary software glitches. These glitches can cause microphone problems. Restarting can restore normal function. This is a quick first step.
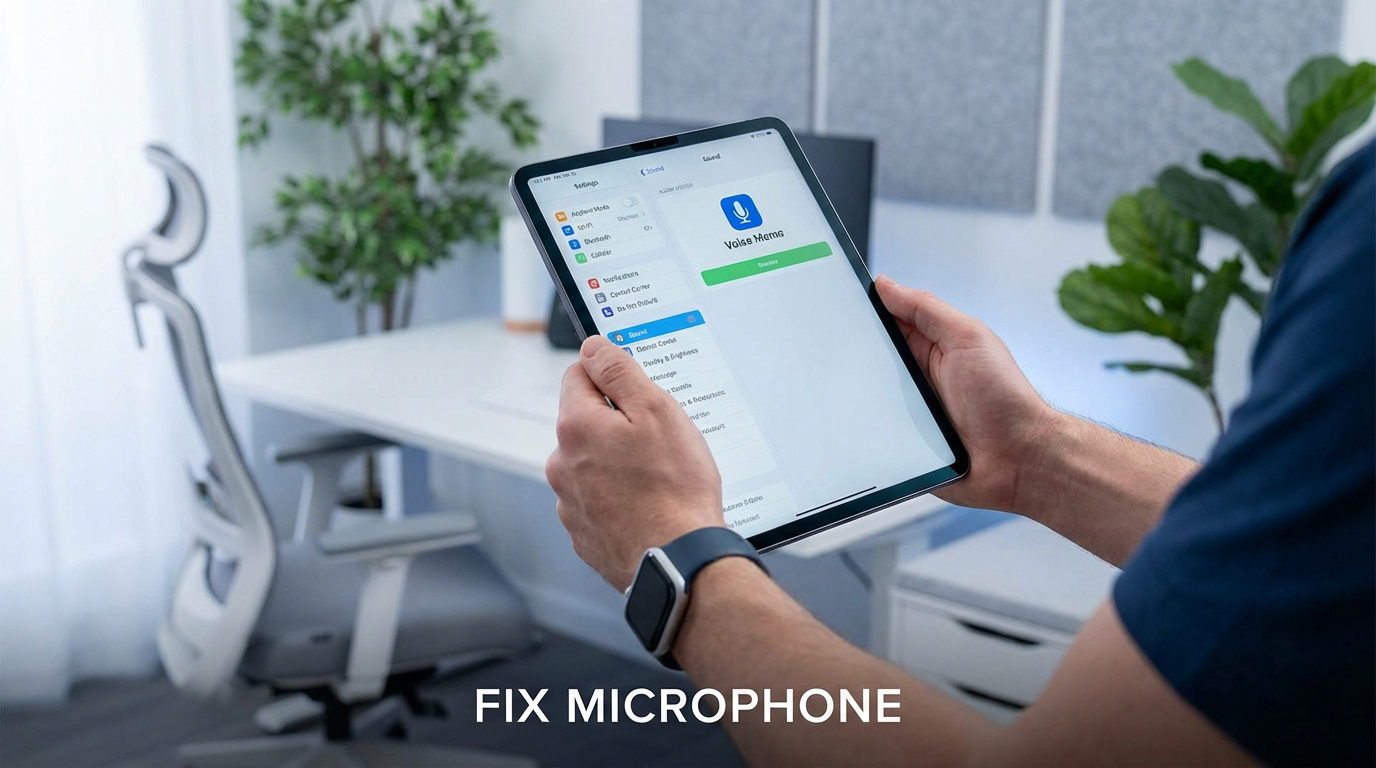
Q4. How to test AirPods mic?
Connect your AirPods to a device with recording abilities. Open a recording application, like Voice Memos. Speak into the microphone. Play back the recording. Listen for clear audio. This test confirms microphone functionality. Ensure your voice is heard without distortion. This verifies the microphone is working correctly.