.png)
Gone are the days when everyone had to spend hours organizing Polaroids in Traditional albums. Today, we have all revolutionized into digitizing Polaroids on our iPhones. This has been beneficial to preserve cherished memories, ensuring secure storage of our Polaroids, their easy accessibility, and quick dissemination of photos across online platforms like emails, Facebook, WhatsApp, etc.
Additionally, the need for more organized and effortless access to old and new Polaroids has made Polaroid digitalization essential. The increased versatility has opened creative possibilities from personal slideshows to digital scrapbooks and wallpapers.
You may be wondering how to scan polaroids on an iPhone. It is pretty easy and straightforward. To scan Polaroids on your iPhone in seconds, you just need to access the specific scanning apps e.g., Notes App on your iPhone, access the scanning feature and follow a few steps. Follow along to have a step-by-step grasp of all that you need to know.
Prerequisites
Several scanning processes have been developed and applied successfully to scan Polaroids on iPhone. The most basically used method is the Notes App. Other third-party apps include Polaroids, Photomyne and Photo Scan.
Polaroid App is only compatible with iOS 15 or later, while Photomyne is compatible with all iPhones with iOS 6/6S and up. Google Photo Scan and Notes Apps are compatible and available to all iOS users. It is also important to note that Photomyne requires a premium package to enjoy full scanning access.
Scanning Process
In this section we will discuss each of the four Scanning approaches in detail. Let’s get started;
Method 1: Notes app approach (The most basic method)
As the App is already preinstalled on your iPhone, you can get started with it without much hassle. Below are the steps to scan Polaroids on iPhone using the Notes App;
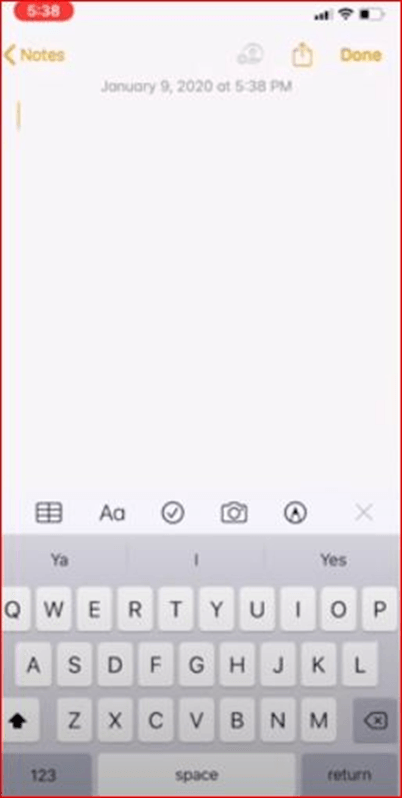
Step 1: Tap the Notes app icon on your iPhone home screen.
Step 2: Tap the ‘+’ button on the top right corner of your screen to create a new note.
Step 3: Next is to access the document scanner by tapping the camera icon above the keyboard.
Tap on the Camera icon above the keyboard
Step 4: Choose Scan documents from the three options on the screen.
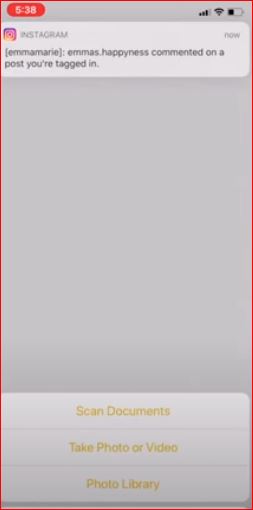
Choose Scan document option
On pressing Scan document, this should be the outcome
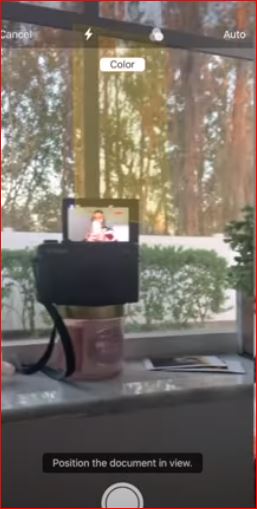
Step 5: Hold your iPhone steadily and position the entire Polaroid within the camera frame on the iPhone screen.

Hold the iPhone steadily to position the entire Polaroid
Step 6: To capture the Scan, tap on the Shutter button below. Make sure you do this when you are satisfied with the scan area.

To capture the Scan, tap on the Shutter button
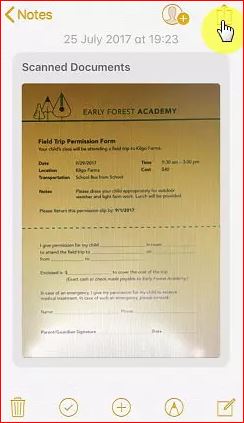
Step 7: To save the image you will have to take a screenshot of the scanned image.

Take a screenshot of the image to save it.
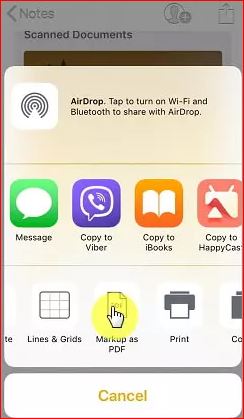
You could also save by tapping Save or Done at the top of your screen.

You can also tap on Done to save the image
Enhancing Scans (Optional)
Once you have your Polaroid on your iPhone, consider enhancing the scans to increase the quality of the image. The process is not a must though but you need to understand it. How do you go about it? Here are a few things to do to enhance your scans;
- Adjust brightness and contrast:
Sometimes, your Polaroids may be too dark or bright, making them a bit unappealing. What you need to do is adjust their brightness to the most optimum level. To adjust brightness and contrast, follow these simple steps;
Step 1: Open the Photos App on your iPhone, and tap the target Polaroid image to view it on full-screen.
Step 2: Next, tap on the Edit icon at the top right of the screen and swipe left to access features such as exposure, brilliance, and shadows.

Tap on Edit, then select desired features, and finally click on Done to save the changes.
Step 3: As shown above, tap the desired feature to make precise adjustments.
Step 4: Tap Done at the top of the screen to save the image.
- Crop the scanned image:
Cropping an image makes it more appealing. To Crop an image, tap the Crop icon at the bottom of the screen and select either Manual cropping or Cropping based on a specific standard ratio.

Tap on the Crop icon at the bottom of your screen and then Done to save the changes.
- Rotate the image
The image not appearing in the desired orientation may require a rotation to enhance its appearance. To rotate the image, Tap on the Rotation icon at the top left of your screen and select a desired rotation e.g.90 degrees.

Tap on the Rotation icon at the top left side of your screen and then tap Done to save the changes
Exporting Scans
Do you want to use your scanned Polaroids somewhere else or share them with friends and family? You don’t have to worry. The iPhone Notes app allows you to share your scanned image with other apps like Photos, email, or social media. Here are the simple steps to go about it;
Step 1: On opening the desired Polaroids, tap on the Export option icon at the right corner of your screen.
Tap on Export option icon
Step 2: A bunch of export options will pop up. Your job now is to choose the file destinations you wish.
A bunch of export options pop up. Choose the desired destination.
Some of the essential tips to observe when using this App include;
- Apply natural sunlight for better lighting.
- Try as much as possible to reduce reflections. This can be challenging, but avoiding it can really increase the quality of your images.
Pros and cons of Notes App
Advantages
- Simple and readily available.
- There is no need for additional apps to complete polaroid scans on iPhone
Disadvantages
- It is highly likely to produce photos with reflections.
- Photos are most likely to be fuzzy and grainy, making editing challenging.
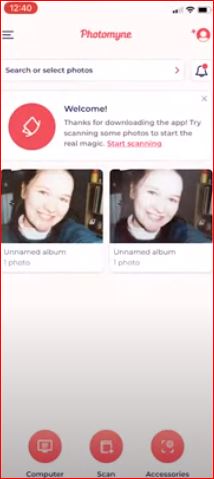
Method 2: Photomyne app
This is another useful application to scan Polaroids on an iPhone.

Photomyne app
Below are steps you should follow to scan Polaroids in a moment;
Step 1: Open the Photomyne App
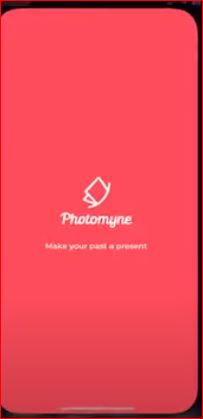
Open App
Step 2: On the three shown options at the bottom, select Scan.
Tap on Scan at the bottom of your screen.
Step 3: Place the Polaroid on a dark, stable, plain background and scan for three seconds.

Scan the Polaroid for 3 seconds
Step 4: Tap icon shown below to save the image on the Camera roll.
Tap the above shown icon to save the photo.
Step 5: Tap on Save in Good Quality and it will be saved.
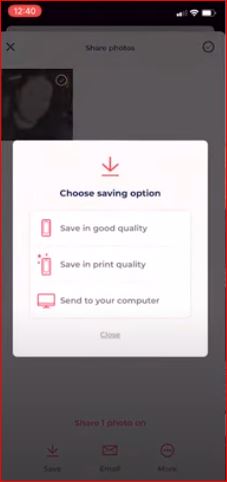
Tap on Save in Good Quality
Some of the basic tips to observe when using this App to scan photos include;
- Be sure to use a dark background.
- Reduce reflection by using direct sunlight.
Pros and cons of the method
Advantages
- Higher photo quality compared to Notes App.
- Better results compared to the Notes App.
Disadvantages
- Reflections remain a big issue with this App.
- The App has limited free scans. A premium package is required to access unlimited scans over a given time.
Method 3: Google Photo Scan App
To get started with this App, follow these simple steps keenly;
Step 1: Open the Google Photo Scan App.

Open the App
Step 2: Position the Polaroid in an appropriate position for capture.
Step 3: Capture the photo by tapping on the blue button.

Tap on the shutter button below the screen
Step 4: Next, the image will pop up with photo circles, align the four circles by placing the middle blank circle in each circle.


Align the four circles by aligning the middle blank circle to each circle.
Step 6: The scanned photo is automatically saved to your camera roll.
To accurately scan Polaroids with Google Photo Scan App, you need to use direct lighting.
Pros and cons
Advantages:
- Eliminates reflections and glares effectively.
- Combines four photos for optimal quality.
- Free and easy to use.
Downsides:
- It may produce a grainy photo, but retaking is quick and easy.
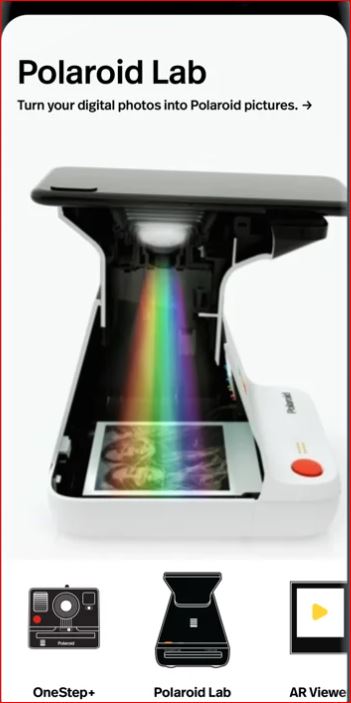
Method 4: Polaroid App
The 4th most commonly applied App to scan Polaroids is the Polaroid App. It is a third-party app you must download on the App Store to get started.
Polaroid App
Below are the steps to scan Polaroids with Polaroid App on iPhone;
Step 1: Download the app from the App store.
Step 2: Open the App and navigate to the Scanner feature.
Step 3: Place your Polaroid strategically, and the App automatically captures the photo.

The App automatically captures the photo
Step 4: Tap on Save to save the image on the camera roll. To access saved photos, go to your phone’s camera roll.

Tap on Save to save the image
Essential tips to observe include;
- Ensure steady hands to increase the accuracy of the photos.
- Capture in well-lit environments for better photo quality.
Pros and cons
Advantages
- Quick and easy to digitize Polaroids on your iPhone.
- Color variation increases the photo outputs of the Polaroids.
Disadvantages
- The quality of the image may be lower compared to other methods.
- Blurry images are more prevalent in this method than in other methods.
Remainder
Choose one that fits you based on the discussed pros and cons. Your choice should, of course, be based on personal preferences and the specific Polaroid you need to scan.
The best way to choose one that suits you best is to try all the methods and choose one that satisfies your needs most.
By understanding these methods, you can select the one that aligns with their preferences and provides the desired results for scanning Polaroids onto their phones.
Common Tips to observe for all the Scanning apps
- Utilize a flat-well-lit surface: You must place a Polaroid on a flat, well-lit surface to ensure a clear and well-focused scan. The flare-stable surface helps image capture with less distortion.
- Use a dark background: This minimizes glare and improves image clarity while scanning. As a result, the scanned image appears sharp and free from unwanted reflections.
- Consider trying other third-party apps to scan polaroids: Even though the Notes app provides a free and straightforward scanning solution, you should explore third-party apps for additional features such as batch scanning and document editing to enhance your scanning experience.
- Temperature management: Develop photos polaroid photos in temperatures between 55 and 82F to prevent distortions caused by overheating.
- Sunshine strategies: Capture Polaroids in optimum sunshine times and position them strategically to the sun. Midday shots are the best.
- Avoid shaking: Shaking when taking photos can damage their development and lead to low-quality photo development.
Frequently asked questions
1. Can I scan multiple Polaroids at once?
It is possible to scan multiple Polaroids at once using third-party apps like Photomyne. The Photoscan App by Photomyne allows you to scan multiple photographs in a single app. You can actually upload your entire photo album in minutes. It automatically detects picture boundaries, scans them, and converts them to digital photos.
2. How do I scan Polaroids with a textured surface?
Scanning Polaroids with a textured surface can be a hassle as the texture brings in unwanted reflections and distortions to the image being scanned. You can solve this by;
- Making sure the Polaroid surface is clean and free of dust.
- Use a flatbed scanner.
- Remove frames surrounding a Polaroid to reduce reflections and shadows surrounding the surface.
- Adjust scanner settings to reduce textured surfaces on the scanner software.
- Set your scanner to a high resolution to capture more details.
- Adopt post-scanning measures, e.g., editing to enhance the quality of the image further.
3. Can I edit the scanned Polaroids on my iPhone?
Yes. You can edit the scanned Polaroids on your iPhone through various photo editing apps such as YouCam Perfect, Canva, OldRoll – Vintage Film Camera, VNTG, and PhotoDirector. Simply download the preferred App, upload your scanned Polaroid photo, and explore the available editing tools and Polaroid filter templates to enhance and customize your image.
Final thoughts
Scanning Polaroids on your iPhone is now easy and straightforward with apps like Notes, Photomyne, Google Photo Scan, and Polaroid. Each method has pros and cons, so trying different options is advisable.
Be sure to observe common tips, such as using a well-lit surface and a dark background. This will enhance your scanning experience. Additionally, consider factors like image quality and ease of use when choosing a method. After scanning, adjust brightness and share your digitized memories easily.
In the digital age, preserving and sharing Polaroid memories is effortless, ensuring they remain accessible and organized for years to come.
While scanning Polaroids with your iPhone can produce decent results, leveraging a dedicated streaming camera can significantly enhance the clarity and professionalism of digitized images. With advanced optics and superior resolution, a streaming camera ensures your precious Polaroid memories stay vivid, sharp, and true-to-life.