.png)
.png) Français
Français .png) Deutsch
Deutsch .png) Italiano
Italiano .png) 日本語
日本語 .png) Português
Português  Español
 Have you tried to share your Nintendo Switch on Discord and got nothing? It’s frustrating, especially when everything else seems correctly plugged in.
Good news, there’s a straightforward setup to make it easy.
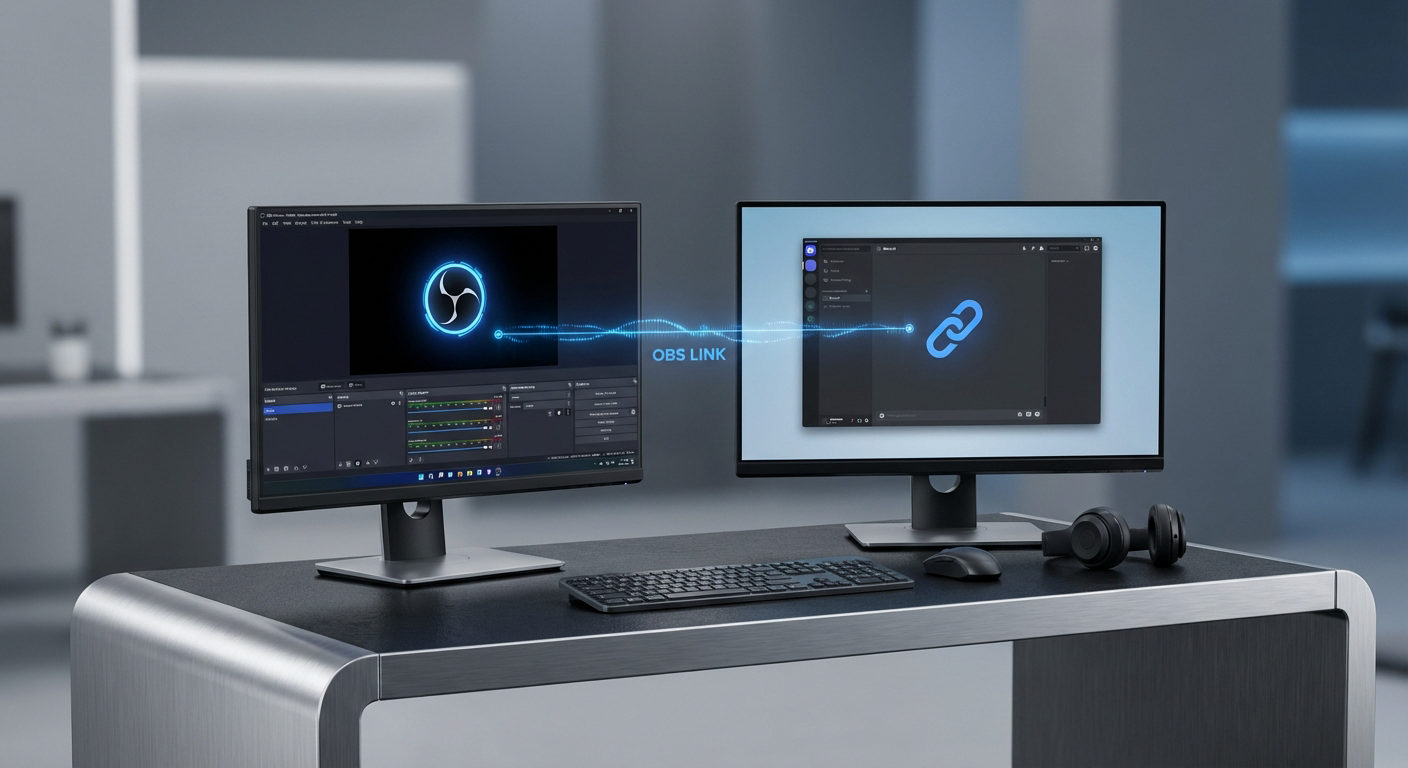
Here’s the solution that actually works: capture the Switch’s HDMI in OBS, then send that scene to Discord. In just a few minutes, you’ll have a clean video, synced game audio, and your mic, with a gamer‑friendly latency that feels natural to play. No weird hacks, no mystery settings.
This guide shows exactly the appropriate path to stream Switch on Discord, step by step.
Step 1 : Requirements and Wiring Overview
A tidy setup today saves hours of “why is this black/echoing” tomorrow. Lock down the hardware and cable flow first, and the software will feel easy after.
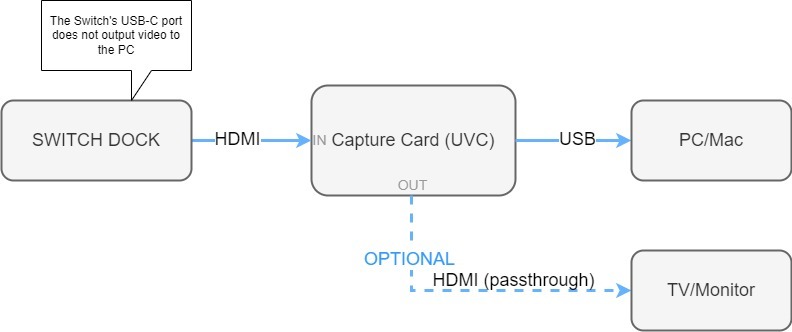
- Nintendo Switch + official dock, computer (Windows/macOS), OBS, and Discord. Dock the Switch, install OBS Studio and Discord, and OBS will be your control room for video, game audio, and mic.
- HDMI capture card (UVC) and HDMI cabling with optional pass-through to TV/monitor. Run HDMI from the dock to your capture card’s HDMI-IN. If your card has pass-through, send HDMI-OUT to a TV/monitor to play with near-zero latency, while the USB feeds your PC.
- Optional facecam for reactions (USB-C UVC webcam/camera). Want on-cam reactions without a complicated rig? You can use a USB-C UVC camera, which will appear in OBS like a standard webcam.
Wiring steps:
- Plug the capture card into a USB 3.0 port on your PC. Rear ports usually perform better than front hubs.
- Got a passthrough on your card? Send HDMI OUT to a TV or monitor and play there; OBS will grab the HDMI IN feed.
- One more thing: short HDMI (≤ 2 m) and no cheap adapters. That’s where HDCP handshakes go to die, and sync starts stuttering.
The scene is built in four quick moves: gameplay video → gameplay audio → facecam (optional) → Virtual Camera.
Step 2 : Add the capture card as a video source (resolution/fps for stability)
Before we bring in audio, let’s lock in the video feed. This takes under a minute and sets up everything else.
Let’s add your gameplay video in a few quick clicks:
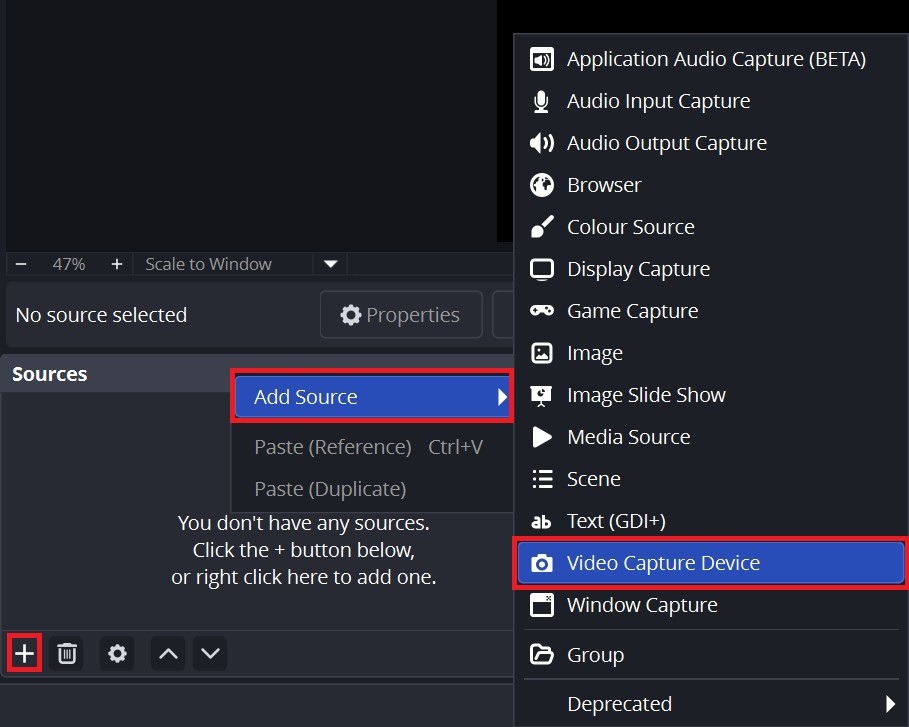
- Open OBS. In the bottom‑left Sources panel, click + and choose Video Capture Device.
- Configure a name for the source, then select your capture card from the Device dropdown.
- In the section Resolution/FPS Type, select Custom and set 1920×1080 at 60 fps. You can also use 1280×720 at 60 fps. Confirm to apply.
If the preview shows nothing:
- Reconnect the HDMI and USB cables, and try a different USB port.
- In Properties, switch the colour format between YUY2 and MJPEG.
- Power‑cycle the capture card and reassign camera permissions, then try again.

Step 3 : Bring in game audio from the capture card and enable monitoring without echo
Make sure the capture card’s audio device is enabled in OBS. Open Edit, go to Advanced Audio Properties, and set the capture card to Monitor and Output (or Monitor Only) so you can hear the game through your headphones.

In the Mixer, lower the game a little beneath your mic and watch the meters. Target clear, intelligible speech around -15 to -10 dB with occasional peaks below ‑6 dB. If the game drowns you out, trim it 3–6 dB. If your voice clips, lower the input gain or add a limiter. Always monitor on headphones to prevent echo.
Step 4 : Optional: add and position the facecam overlay (with simple framing/lighting)
Add Sources → + → Video Capture Device again, choose your camera, resize the window small, and park it in a corner that doesn’t cover HUD info. Light your face evenly + eye-level framing = instant upgrade.
If you want a facecam built for live, the Hollyland VenusLiv Air focuses on 24/7 streaming, so your feed stays up as long as you do.
Its AI tuning helps keep exposure and colour balanced on the fly, and you can output a clean 4K 30fps look while staying plug‑and‑play over USB‑C.

Step 5 : Start the OBS Virtual Camera so Discord can see the composed scene
In the OBS, go to Tools → Start Virtual Camera. Your entire OBS layout (gameplay + game audio + mic + facecam) now shows up to Discord as a standard camera device.

A small status indicator confirms it’s running. From here, you can switch scenes and sources in OBS without reconfiguring Discord each time.
If Discord doesn’t list “OBS Virtual Camera”, restart Discord and start the virtual camera before joining a call. Stop it from the same menu when you’re done.
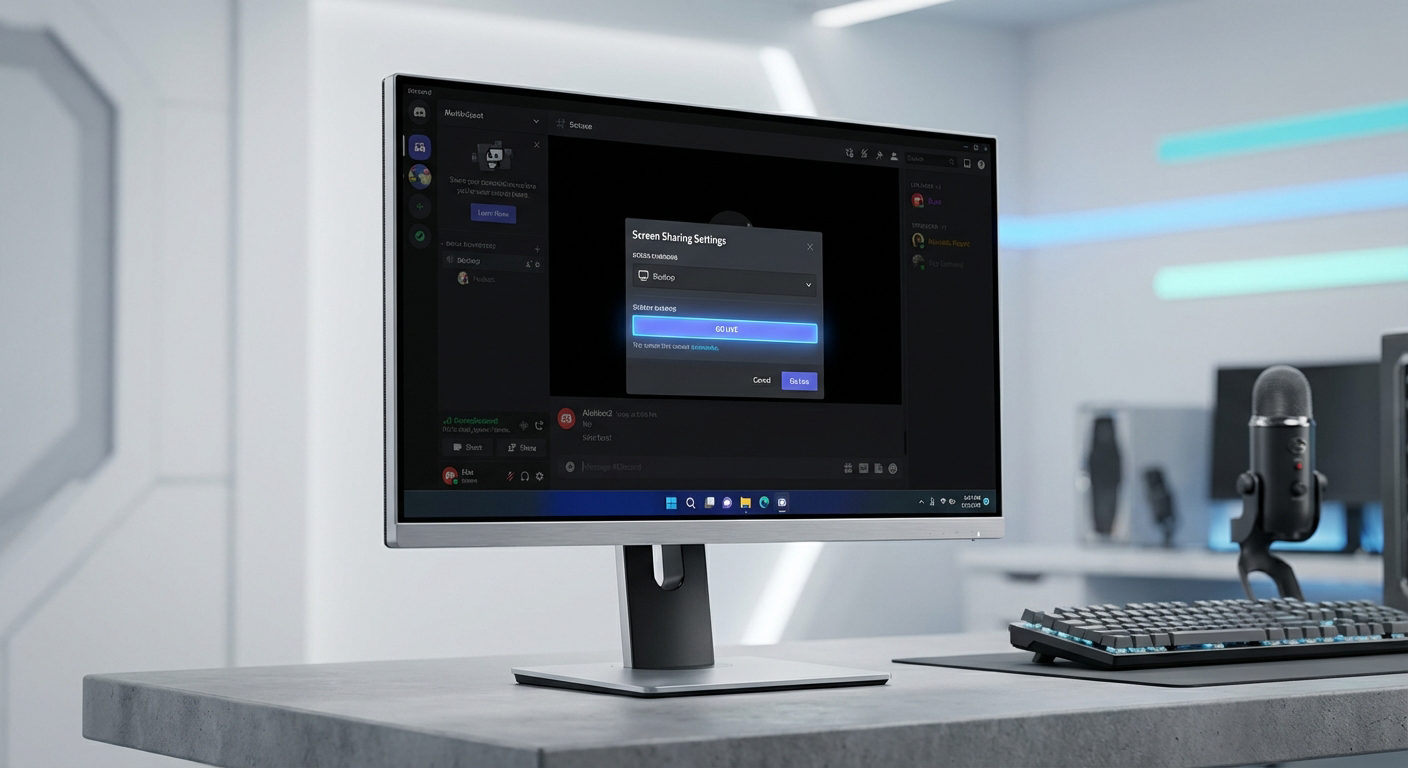
Step 6 : Go Live – Stream Nintendo Switch on Discord
Two clicks and you’re live to your squad. Keep it smooth with the same quality settings.
Join a call or voice channel in Discord and select OBS Virtual Camera (or share the OBS window)
Hop into a voice channel in Discord and under Video, choose OBS Virtual Camera.
If you prefer Screen Share, select the OBS window, but Virtual Camera is usually cleaner and less error‑prone.

Practical quality settings to balance smoothness and stability
Start at 720p/60 for silky motion. If your plan/hardware allows, step up to 1080p/60.
Close heavy apps (video editors, cloud syncs) and use Ethernet when possible. In Discord, stability beats max resolution.
Step 7 : Audio Specifics by Operating System
Routing is the only part that changes between Windows and macOS. Follow your lane and you’ll dodge echo and delay.
Windows: capture card audio in OBS and pick your mic in Discord (or route via OBS)
- Hear the game: With the capture card set to Monitor and Output, you’ll hear gameplay through your headphones.
- Send your voice: In Discord Voice & Video, select your microphone. If you prefer one mixed input, route mic + game in OBS and select that mix as Discord’s input, but watch levels to avoid clipping.
- Avoid echo: Keep just one audio monitoring path feeding your headphones (OBS or Discord). Duplicating paths creates instant feedback.
macOS: create a virtual audio device if needed and avoid double‑monitoring
- When Discord can’t hear the game: Install a virtual audio device for macOS (e.g., BlackHole or Loopback). Route OBS (game) → virtual device → Discord input.
- Monitor locally without echo: Keep audio monitoring in OBS or monitor only through Discord, never both.
- Permissions & sanity checks: After installing virtual devices, re‑open System Settings → Privacy & Security and confirm mic/screen permissions for OBS and Discord, then restart both apps.
Conclusion
You’re set, from the Nintendo Switch to the capture card, into OBS, and finally to Discord. Keep one audio monitoring path, aim for 60 fps, and favour Ethernet for smooth sessions.
From here, joining a Discord voice channel and sharing your OBS scene is simple, stable, and ready whenever you are.
FAQs
Q. Can I stream Switch on Discord without a capture card?
A. Yes, but expect compromises. Using the Xbox bridge or phone method adds latency and tanks quality. A UVC capture card is the long‑term fix.
Q. Does OBS Virtual Camera work with Discord?
A. Yes. Start it in OBS, then select it as your video source in Discord for a clean, low‑friction pipeline. If it doesn’t show up, start OBS Virtual Camera first.
Q. Can I add my face and voice?
A. Absolutely. Add a webcam/camera as a source in OBS and use your mic in Discord. You can mix both in OBS if you prefer one input, then keep the facecam small, check Mixer levels, and use headphones to avoid echo.Q. Why doesn’t Switch USB‑C send video to PC?
A. The Switch’s USB‑C port doesn’t deliver a video signal your computer can read. To stream, connect the dock’s HDMI to a capture card, then route that feed into OBS and share it in Discord.