For any Twitch stream to be successful, audio quality is essential. Thus, it is critical to make sure your audience can hear you clearly whether you’re streaming music videos, chat shows, or gameplay. Audio bitrate is one of the crucial elements in attaining superior audio quality on Twitch.
This post will explain what audio bitrate is, why it’s important for Twitch streams, and how to optimize it to give viewers a better audio experience.
So, let’s get going!
What does Audio Bitrate mean?
Audio bitrate refers to the measure of bits (audio data) processed in a given period. It is represented in kilobits per second (kbps) and defines audio quality. If you are streaming on platforms such as Twitch, then it helps to determine the quality of the audio that viewers hear.
Why is Audio Bitrate Important on Twitch?
The Twitch platform is quite interactive, where viewers and streamers can engage in a real-time. It offers streaming content of all types of interest beyond gaming and esports. However, the quality of the audio can impact the viewer’s experience.
High audio bitrate ensures clear and crisp sound, which is essential for music streams, detailed game sounds, or simply clear voice communication. A large amount of data is used to represent the audio because of the high bitrate, resulting in more detailed audio quality where the loss of information is less.
Optimal Audio Bitrate Settings for Twitch
The best audio bitrate settings for Twitch rely on several variables, including the kind of content you’re streaming, the tastes of your audience, and the capabilities of your hardware.
For stereo audio, it is generally advised to utilize a bitrate of between 96 and 160 kbps. Here’s a breakdown of audio bitrate recommendations for different scenarios:
Recommended Settings
The recommended setting of audio bitrate is 160 kbps for standard streams on the Twitch platform. This setting provides a good balance between quality and bandwidth usage, making it quite suitable for most streams.
High-Quality Streams
Twitch supports up to 320 kbps audio bitrate for music streamers or those who prioritize supreme audio quality. This is particularly useful for genres requiring high fidelity, like classical music or high-quality game audio.
Considerations for Audio Bitrate Setup
If you want to set the audio bitrate settings for Twitch, then you must know these things to fulfil your needs.
- Internet Bandwidth: Ensure that your internet upload speed can handle your total bitrate, which is both audio and video. To measure your bandwidth, you can use online speed tests.
- Audience: High-bitrate streams may buffer for viewers with slower connections. So considering the average internet speed of viewers is a must.
- Streaming Software: If you are looking for streaming software, then you should go through popular software like OBS Studio, Streamlabs OBS, and XSplit, which support adjustable audio bitrates. To get the desired output, ensure your settings.
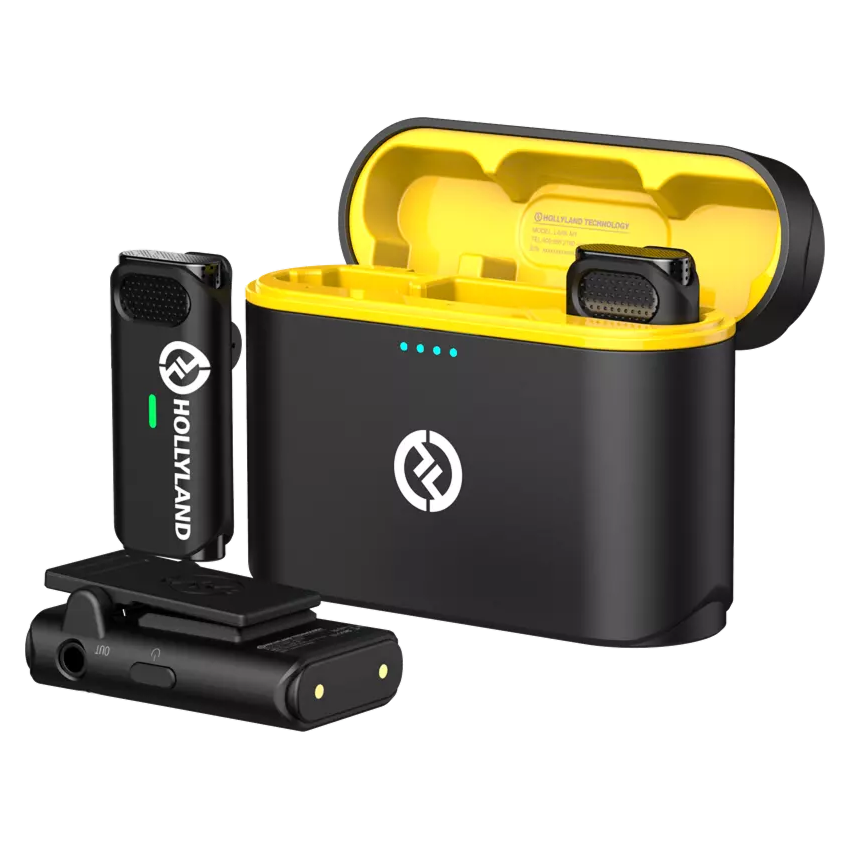
Microphone: Use the wireless microphone to enhance the audio quality of streaming. Consider the Lark M1, which quickly connects with any device.


Hollyland LARK M1 - Tiny Wireless Microphone
A lightweight and user-friendly wireless microphone with one-click noise cancellation.
Key Features: Hi-Fi Sound Quality | Tiny & Light Design | Plug and Play
How to Adjust Audio Bitrate on Twitch
Through its platform interface, Twitch does not offer direct options for changing the bitrate of audio. Rather, you will need to modify the audio bitrate settings in your encoder or broadcaster program.
The following describes how to change the audio bitrate settings in widely used broadcasting programs, such as OBS Studio, Streamlabs OBS, and XSplit.
OBS Studio
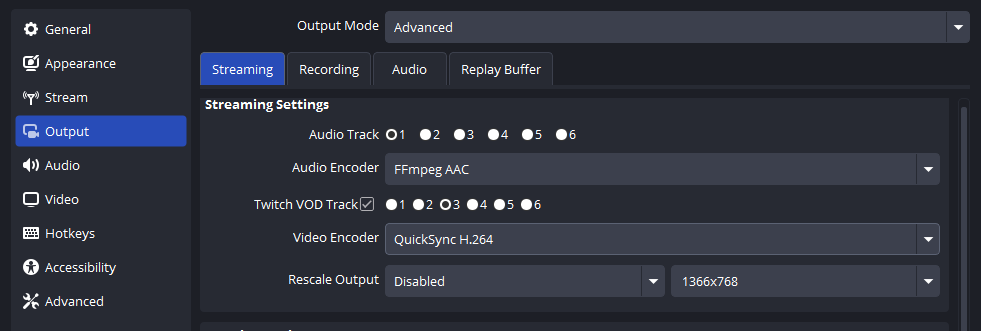
Step 1: Download and open the OBS Studio. Then, go to the “Settings” and click to open.

Step 2: Open the “Output” tab, then in the streaming section, click on the “Audio Bitrate” dropdown and select the bitrate as per your needs.

Streamlabs OBS
Step 1: Download and open the Streamlabs OBS on your device, then click on the “Settings” icon in the bottom left corner.

Step 2: Then click on the “Output” option, and under the “Output” option, go to the streaming section. Here, choose the bitrate as per your needs in the “Audio Bitrate” dropdown.

XSplit
Step 1: Download and launch Xsplit, and sign up if you are using it for the first time; otherwise, click on the Sign-in button.

Step 2: Then, click on “Broadcast” and choose the “Set up a new output” option. Here, select the “Twitch” option.

Step 3: Click on “Twitch Properties” and navigate to Channel Setup, where you can easily change the audio bitrate in the “Audio Encoding “section.

Tips for Optimizing Twitch Audio Quality
Ensuring that your audience has a captivating viewing experience on Twitch requires optimizing the quality of your audio. The following tips will assist you in getting the greatest audio quality:
Use a Quality Microphone: If your microphone quality is poor, then your audio bitrate won’t matter. You must invest in a good microphone like Lark M1 for the best audio experience.
Acoustic Treatment: You must reduce echo and background noise with acoustic panels or by optimizing your streaming space to enhance your Twitch Audio Quality.
Audio Mixers: Using audio mixers or software solutions can be a good option to balance game, music, and microphone levels.
Regular Testing: Test your stream on different devices and networks to ensure audio quality is consistently good.
Conclusion
Let’s wind it up! We hope our post on understanding Twitch Audio Bitrate has helped you learn its importance and the different settings and software for audio Bitrate so that you can get the best audio experience.
So, what are you waiting for? Use these audio bitrate settings to get a better viewer experience.
Achieving optimal audio quality is essential for maintaining audience engagement on your Twitch streams. Using a reliable wireless lavalier microphone can significantly enhance clarity and allow greater flexibility for streamers looking to upgrade their sound.
FAQ’s
1. What is the best audio bitrate for Twitch streaming?
Audio bitrate between 160 kbps and 320 kbps is best for Twitch streaming.
2. How do I change my audio bitrate in OBS Studio?
Go to the settings of OBS Studio and click on the “Output” option. Then click on the “Audio Bitrate” dropdown to select the desired audio bitrate, which appears in the “Streaming” section.
3. Can high audio bitrates cause streaming issues?
Yes, because using a high bitrate requires more bandwidth. If you have limited bandwidth, then there may be buffering issues while streaming.
4. Does Twitch automatically adjust my stream’s audio bitrate?
No, Twitch doesn’t automatically adjust stream audio bitrate, but you can change it as per your needs.
5. What is the difference between audio bitrate and video bitrate?
Audio bitrate refers to the amount of data processed per second for sound, while video bitrate refers to the amount of data processed per second for visual information.
6. How can I improve my stream’s audio quality besides adjusting the bitrate?
You can adjust the resolution and frame rate and ensure that your microphone is configured properly in OBS Studio.
7. Is there a significant difference between 160 kbps and 320 kbps audio bitrate?
320 kbps provides high-quality audio with more clarity and detail; on the other side, 160 kbps provides low-quality audio.
8. Will viewers with slower internet speeds have issues with high audio bitrate streams?
Yes, if the viewer’s internet connection is low and unstable, then high audio bitrate may result in buffering while streaming. To resolve this issue, ensure that there is a balance between the viewer’s internet speed and audio bitrate
9. Does all streaming software support changing audio bitrate?
Yes, streaming software supports changing the audio bitrate based on the quality of the stream and internet connection speed.
10. How does the audio bitrate affect my stream’s total bandwidth usage?
For high-bitrate audio quality, you may need more bandwidth for an internet connection, while for low-bitrate audio quality, you might require less bandwidth.


.png)


