.png)
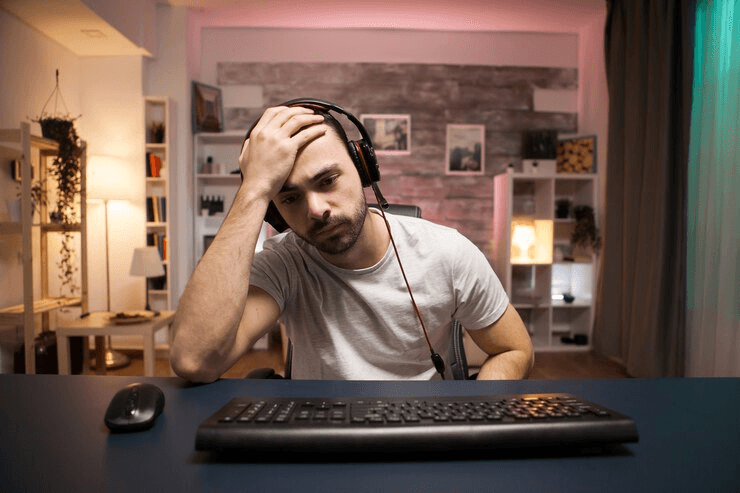
Streaming on Twitch can be an exciting way to connect with an audience, but encountering unexpected stream interruptions can be frustrating. If you’re facing the issue of your Twitch stream ending abruptly, it’s essential to identify and address potential causes to ensure a smooth broadcasting experience. Through this blog, we aim to guide you through troubleshooting steps and find solutions for why your Twitch stream may be ending unexpectedly.
Potential Causes
If you’re wondering, “Why does my Twitch stream keep ending?” let’s dive into some common reasons. When streaming on platforms like Twitch, multiple factors can impact your experience.
A. Internet Connectivity Issues:
The strength of your internet connection plays a pivotal role in your Twitch streaming experience. With a shaky or weak connection, you’re more likely to face buffering issues that can lead to abrupt stream endings.
Slow internet speed
Streaming services, particularly Twitch, which features high-quality video content, rely heavily on substantial bandwidth to ensure a seamless viewing experience. If your internet connection is slow, you may encounter frequent disconnections and interruptions during your Twitch streaming sessions.
Indicators:
1. Frequent Stream Drops: The connection may get severed, causing interruptions in the streaming service.
2. Buffering: Slow loading times, causing pauses in video playback.
3. Low Video Quality: Reduced resolution due to insufficient bandwidth.
Solutions:
1. Test Internet Speed and Upgrade if Necessary: Conduct an internet speed test to evaluate the current performance. If the results indicate inadequate speeds for Twitch streaming, consider upgrading to a higher-bandwidth internet plan for a smoother experience.
Step 1: Visit a reliable speed test website, such as Ookla’s Speedtest or Fast.com.

Step 2: Click the “Go” or “Start” button on the website to initiate the test.
Step 3: Wait for the test to complete, and note the results for both download and upload speeds.

Step 4: Compare the obtained upload speed with Twitch’s recommended minimum of 3–5 Mbps for streaming.
Step 5: If the upload speed falls below the recommended range, consider upgrading your internet plan for a better Twitch streaming experience.
Moreover, analyze whether there are line problems with your ISP (internet service provider). Line disturbances affect the overall network status, causing inconsistencies during livestreams. Consider geographical location since distance from the server affects latency rates, which in turn impact the viewing experience.
2. Close Unnecessary Bandwidth-Intensive Applications: Manage bandwidth usage by shutting down or limiting unnecessary applications that consume significant internet resources. This ensures more bandwidth is available for the Twitch stream, reducing interruptions, stream drops, and buffering.
Step 1: Use Task Manager (Windows) or Activity Monitor (Mac) to find apps consuming network resources.

Step 2: Shut down unnecessary applications to free up bandwidth.
Step 3: In app settings, limit background processes to reduce internet usage.

Step 4: Turn off automatic updates for software during streaming hours.
Step 5: Access router settings, enable Quality of Service (QoS), and prioritize your streaming device for more bandwidth.
Step 6: Use system tools to monitor bandwidth usage.
Step 7: Address any unexpected spikes or heavy usage promptly.
By taking these quick steps, you can efficiently manage bandwidth, minimizing interruptions, stream drops, and buffering during your Twitch broadcasts.
3. Use a Wired Connection Instead of Wi-Fi: opt for a wired connection by connecting your device directly to the router using an Ethernet cable. This choice enhances stability and speed, minimizing potential Wi-Fi interference and providing a seamless Twitch streaming experience.
Unstable internet connection
When facing an unstable internet connection on Twitch, the culprit is often packet loss and network fluctuations, wreaking havoc on the seamless flow of the streaming service. These issues directly affect you, the viewer, and can introduce a variety of complications that significantly impact your overall viewing experience.
Indicators:
- Stream Freezes: You may experience sudden halts in the streaming video, disrupting the continuity of the content.
- Audio/Video Glitches: Distortions in audio or visual elements can create a jarring experience during your Twitch session.
- Sudden Disconnects: Abrupt interruptions in the connection can lead to the stream’s unexpected end, causing you frustration and inconvenience.
Solutions:
- Restart Your Internet Router and Modem: Take control of the situation by restarting your internet router and modem. You can refresh the connection and fix momentary problems that cause instability by taking this simple action.

- Contact Your Internet Service Provider (ISP) for Troubleshooting: If the problem persists, contact your Internet Service Provider (ISP). They can conduct diagnostics and provide tailored solutions to address any underlying issues affecting your internet connection, ensuring a smoother Twitch experience for you.
- Check for Network Congestion During Peak Hours: Be proactive in managing your Twitch viewing by assessing whether network congestion during peak hours impacts your connection. Adjusting your streaming schedule to off-peak hours or exploring options to alleviate congestion empowers you to enhance the stability of your Twitch stream.
B. Software Issues
The software interfering with your network might also lead to abrupt stream endings.
Streaming Software
Stream Abruptly Ends: When encountering software issues, your Twitch stream may end abruptly due to bugs, incompatibility with Twitch servers, or incorrect settings. These glitches disrupt the broadcast’s continuity, affecting your experience as a streamer and causing frustration for your audience. Identifying and addressing these software-related culprits promptly is vital for sustaining an uninterrupted streaming experience.
Visual or Audio Distortions: Software-related glitches manifest as visual or audio distortions, diminishing the quality of your content on Twitch. This can result from encoding problems, incorrect configurations, or resource limitations like high CPU or memory usage. Pixelation, stuttering, artifacts, crackling, delays, or irregularities compromise the viewer experience, creating a suboptimal environment for your audience.
Performance Degradation: Software issues contribute to performance degradation within your streaming software. Outdated software, compatibility issues, or conflicts with other applications may lead to lag, delays, or freezing during the stream. This decline in overall responsiveness negatively impacts your content’s quality and engagement level. Swiftly addressing these software-related performance challenges is essential to ensure a seamless and enjoyable viewing experience for your Twitch audience.
Solutions:
- Update the Streaming Software to the Latest Version: Ensure a smoother Twitch experience by proactively updating your streaming software to its latest version. Keep Twitch streaming software up-to-date by regularly checking for updates in the software’s settings and installing the latest version to benefit from bug fixes and optimizations. Initiating this simple step helps incorporate bug fixes, enhancements, and optimizations that can rectify software-related issues causing disruptions.

- Check for Compatibility Updates and Drivers: Take control of your streaming setup by regularly checking for compatibility updates and drivers associated with your streaming software. Keeping these components up-to-date within your domain of influence minimizes the chances of compatibility issues, contributing to a more stable Twitch streaming environment.
- Lower the Encoder Settings (Bitrate, Resolution, FPS): Optimize your streaming parameters, such as bitrate, resolution, and frames per second (FPS), to better align with your system’s capabilities. Under your command, lowering these settings reduces resource demands, addressing high CPU or memory usage and mitigating potential disruptions during your Twitch broadcasts.
- Close Unnecessary Background Programs: Enhance your streaming setup by actively closing unnecessary background programs while broadcasting. This ensures that your streaming software has the resources it needs under your control to operate smoothly, minimizing conflicts that may lead to interruptions.
- Try a Different Streaming Software: If persistent issues persist, consider exploring alternative streaming software. This decisive action, within your realm of choice, can provide a fresh perspective and potentially mitigate software compatibility problems, offering a more stable and enjoyable Twitch streaming experience for you and your audience.
Operating system
An outdated operating system or drivers can significantly disrupt your Twitch stream. Without the necessary updates, your system may struggle to support the streaming demands, leading to compatibility issues and potential interruptions. These issues, rooted in the status of your operating system and drivers, can directly impact the performance of your Twitch broadcast.
Solutions:
- Update Operating System and Drivers: By diligently updating your operating system and drivers, you exert control over critical components of your streaming environment. This self-initiated action ensures that your system is equipped with the latest features, optimizations, and bug fixes, reducing the likelihood of compatibility issues and stream disruptions on Twitch.
Step 1: Go to “Settings,” select “Update & Security,” and click on “Windows Update.” On macOS: Click on the Apple logo, go to “System Preferences,” and select “Software Update.”

Step 2: Follow on-screen instructions to check for and install any available updates for your operating system.
Step 3: Identify your device’s manufacturer (e.g., NVIDIA, AMD for graphics cards). Visit the official website and locate the latest drivers for your specific model.
Step 4: Download the latest drivers and follow the on-screen instructions for installation.
Step 5: Reboot your system if prompted after installing the updates.
By following these steps, you ensure that both your operating system and drivers are up-to-date, contributing to a smoother Twitch streaming experience with enhanced features and reduced compatibility issues.
- Check for System Errors and Troubleshoot: Actively address system errors and conflicts by regularly checking for issues within your operating system. You can identify and fix potential conflicts or errors that might interfere with the smooth operation of your Twitch stream by engaging in system troubleshooting.
- Close Unnecessary Background Programs: Enhance your streaming environment by closing unnecessary background programs that may contribute to resource conflicts. This proactive measure, under your control, ensures that your system allocates ample resources to support your Twitch broadcast, minimizing the risk of interruptions.
- Restart the Computer: A simple yet effective solution is restarting your computer. By resetting the system, you ensure that your Twitch stream will start off with a clean slate and help resolve any current problems. Regular restarts can contribute to a more stable and reliable streaming experience.
C. Other Potential Causes
Overheating
Excessive heat poses a genuine threat to your Twitch stream as it can induce hardware malfunctions, ultimately leading to crashes. The impact is twofold: overheating not only hampers the performance of your streaming equipment but can also result in abrupt shutdowns, abruptly terminating your Twitch broadcast. Heat-related issues can compromise the stability and reliability of your streaming setup, creating a risk of interruptions and an unexpected end to your Twitch stream.
Indicators of Overheating:
- Fan Noise: Heightened fan noise becomes a clear indicator of your system working in overdrive to dissipate heat. As a streamer, noticing this increased fan activity signals potential overheating issues within your setup, requiring immediate attention to maintain optimal performance during Twitch broadcasts.
- Performance Issues: Overheating directly impacts the performance of your Twitch stream. As the temperature rises, performance degradation becomes noticeable, affecting the smooth operation of your broadcast. Recognizing and addressing these performance issues is vital for sustaining a high-quality streaming experience for both you and your audience.
- Sudden Shutdowns: Extreme overheating introduces the risk of sudden and involuntary shutdowns, abruptly halting your Twitch broadcast. These unexpected interruptions disrupt the flow of content and create a challenging experience for both you and your viewers. Proactively managing temperature levels is crucial to preventing such disruptive shutdowns during your Twitch sessions.
Solutions:
- Ensure Proper Ventilation: Proper airflow is crucial to dissipating heat. Ensure that your computer and streaming equipment have adequate ventilation to prevent overheating.
- Clean Dust from Fans and Vents: Dust buildup can impede airflow, contributing to overheating. Regularly clean dust from fans and vents to maintain optimal cooling.
- Monitor Temperature and Adjust Settings: Employ tools to monitor temperature levels. Adjust streaming settings or use additional cooling solutions to prevent overheating issues proactively.
Accidental End Stream
Accidentally ending your Twitch stream can occur when specific keyboard buttons, such as the ESC key, are pressed. This unintended action is often a result of custom hotkeys or a lack of awareness regarding keyboard shortcuts during streaming. Accidental stream endings disrupt the viewer experience and can leave your audience puzzled.
Indicators of Accidental End Stream:
Abrupt Twitch Stream Conclusion: Unexpectedly, your broadcast comes to an abrupt end without warning or proper closure, leaving both you and your viewers puzzled and disrupting the overall streaming experience. Identifying and resolving the root cause is essential for a seamless Twitch streaming experience.
Solutions:
- Check for Custom Hotkeys: Review and be aware of any custom hotkeys assigned to end the stream in your streaming software.
- Be Mindful of Keyboard Shortcuts: During streaming, exercise caution with keyboard shortcuts, especially those associated with ending the stream. Familiarize yourself with these shortcuts to avoid accidental disruptions to your Twitch broadcast.
Interference from Antivirus Software

Your Twitch stream may face interference from overly strict firewall or antivirus settings, potentially blocking your streaming software or the Twitch server. To mitigate this, adjusting your security settings becomes crucial to ensuring a smooth streaming experience.
Suppose your Twitch stream encounters frequent disconnections or displays errors. In that case, it’s essential to investigate and identify whether overly strict firewall or antivirus settings obstruct the streaming software or the Twitch server.
Solution:
Check for interference by temporarily disabling your antivirus software, and observe if the issues persist. If the stream stabilizes after disabling the antivirus, it suggests that the antivirus settings might be the root cause of the problem. Adjusting these settings appropriately is necessary for uninterrupted Twitch streaming.
Step 1: Locate the antivirus icon in your system tray.
Step 2: Right-click the icon and look for an option like “Disable” or “Pause Protection.”
Step 3: Select this option to temporarily turn off the antivirus.
Step 4: Keep your Twitch stream running.
Step 5: Observe if the issues such as disconnections or buffering persist or if the stream stabilizes.
Step 6: Once observed, right-click on the antivirus icon again.
Step 7: Choose the option to “Enable” or “Resume Protection” to re-enable antivirus.
Now adjust your antivirus settings. For that, follow the below-mentioned steps:
Step 1: Open the antivirus settings or control panel.
Step 2: Look for options related to real-time protection, firewalls, or internet security.
Step 3: Adjust settings to allow Twitch streaming without interruptions.
Step 4: By following these steps, you can quickly check for antivirus interference and ensure a smoother Twitch streaming experience by adjusting settings appropriately.
Configuring Your DNS Server Settings
Customizing your DNS server settings, especially by transitioning from default ISP-provided DNS servers to public alternatives like Google’s Public DNS, can enhance Twitch streams’ performance and contribute to a smoother online gaming experience. This configuration optimizes the translation of web addresses to IP addresses, improving data flow efficiency.
Indicators:
Frequent disconnections, buffering, or freezing during your Twitch stream may indicate delays in translating web addresses to IP addresses. This lag in the translation process hinders seamless data transmission, impacting the overall streaming experience.
Solutions:
Resolve this issue by opting for public DNS servers, such as Google DNS, over the default ISP-provided ones. This adjustment influences the translation of web addresses to IP addresses, positively impacting data transmission efficiency from the source to the destination. Implementing these changes can contribute significantly to a more stable and enjoyable Twitch streaming experience.
Clear Browsing Data for Better Performance
Cached images and files could be causing that annoying twitch lag you’ve been experiencing. These cached data tend to pile up over time, hogging system resources and causing performance issues.
To clear cached images and files from your Google Chrome browser,
Step 1: Select the three-dot menu at the top right corner of your window

Step 2: Go to ‘settings’ and click ‘Privacy and security’.
Step 3: Select “Cached Images and Files” before hitting “Clear Data.”
Step 4: From there, go to ‘More Tools’ and select ‘Clear Browsing Data’.

Step 5: In the pop-up window that appears next, choose “Cached Images and Files” then hit “Clear Data”.

This action should help reduce any hiccups while watching Twitch streams by freeing up necessary system resources.
Troubleshooting Tips
- Restart the Stream Immediately After it Ends: In the event of an abrupt stream ending, swiftly restart the stream. This proactive approach minimizes downtime, allowing you to promptly resume engagement with your audience.
- Check for Twitch Server Issues: If issues persist, investigate for any ongoing Twitch server problems. Ensuring the platform is stable is the first step in resolving persistent streaming disruptions.
- Review Streaming Logs for Potential Errors: Dive into your logs to identify potential errors or issues. Analyzing these logs provides valuable insights into the root causes of disruptions, aiding in targeted troubleshooting.
- Monitor Internet Connection Stability: Consistently monitor the stability of your internet connection. Fluctuations or interruptions can directly impact your Twitch stream. Ensuring a robust connection is vital for a seamless broadcasting experience.
- Test Stream with Different Settings and Configurations: Experiment with various settings and configurations during test streams. This helps pinpoint optimal parameters for your setup, reducing the likelihood of technical issues during actual broadcasts.
- Seek Help from the Twitch Community Forums: Engage with the Twitch community forums for collective troubleshooting. Fellow streamers may offer insights, share experiences, or provide solutions to challenges you encounter, creating a supportive space for problem-solving.
Bonus Tip: Enhance your live stream stability by optimizing hardware settings and checking your internet protocol version. Free up resources by disabling unnecessary hardware, like extra monitors. Ensure smooth communication protocols by updating and configuring them correctly, reducing issues like buffering or premature stream endings.
Conclusion
In the pursuit of a seamless Twitch streaming experience, various potential causes for disruptions have been identified. Software issues, including bugs and compatibility issues, operating system challenges such as outdated drivers, overheating leading to hardware malfunctions, antivirus interference with overly strict settings, and DNS configuration inefficiencies can all contribute to interruptions during broadcasts.
To troubleshoot these issues effectively, streamers are advised to promptly restart the stream after an unexpected end, check for Twitch server issues, review streaming logs for potential errors, monitor internet connection stability, test the stream with different settings, and seek assistance from the Twitch community forums for collaborative troubleshooting insights.
Additionally, users are encouraged to report persisting issues to Twitch support, as their feedback is crucial in refining and optimizing the overall Twitch experience for the benefit of the community.
Stream interruptions can often stem from inadequate video gear affecting stream reliability. Enhancing your setup with a quality streaming camera optimized for stable live broadcasting can significantly help minimize unexpected disruptions.
Questions for Further Exploration
Q: What are the best practices for optimizing the internet connection for Twitch streaming?
A: To optimize your internet connection for Twitch streaming, ensure an upload speed above 5 Mbps, use a wired connection, and configure router settings for QoS to prioritize streaming traffic. Additionally, choose servers with low ping and consider regional differences in internet infrastructure.
Q: What are some advanced troubleshooting methods for specific software issues?
A: For advanced troubleshooting of software issues, explore streaming software settings for compatibility, optimize resource usage (CPU, memory), and utilize logging and diagnostics tools. Seeking advice from experienced streamers in online communities can also provide valuable insights.
Q: How can I prevent accidental stream endings in the future?
A: Prevent accidental stream endings by customizing hotkey configurations, developing habits to minimize unintentional key presses, and exploring additional safeguards like software alerts or notifications before ending a stream.